
Introduction of Inventory Adjustment Interface for manually updating the inventory stock count.
A- Manually update – update Inventory one by one on UI
B- Bulk update – through Import file
A- Manually update – update Inventory one by one on UI
The inventory stock counts can be altered due to stock addition, removal, transfer or replacement in the facility. This action can now be accomplished manually on an interface.
On the path Products –> Inventory

It captures the total inventory for a particular product, which is the sum of available and blocked inventory.
Let us try and understand the process with the help of an example, say for a product SKU: XXXXyyyy![]()
On adding an inventory of say 7, the updated table looks like:![]()
However, if we replace it with an inventory of 7, then the table would be updated as:![]()
This page contains the inventory of all products to be processed in the system. But it does not show the out of stock products (products with inventory=0)
-
To add inventory for such products, you can hit the button

-
or choose the dropdown to Select either add inventory Manually or Scan to add inventory in the system
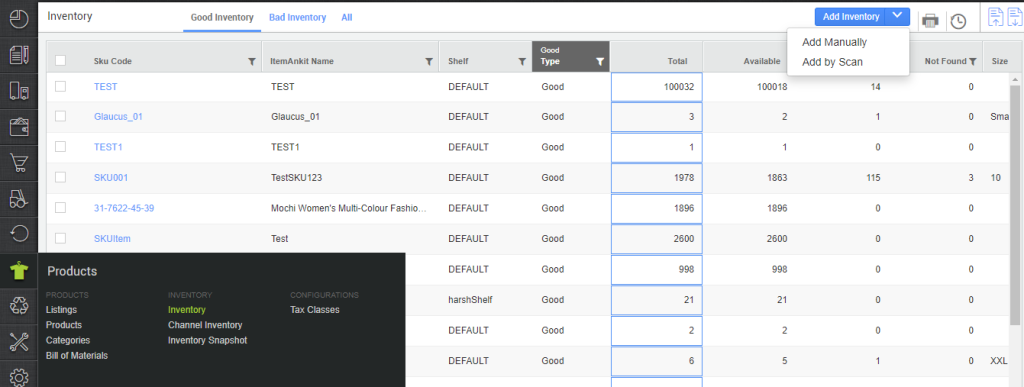
1- Add Inventory Manually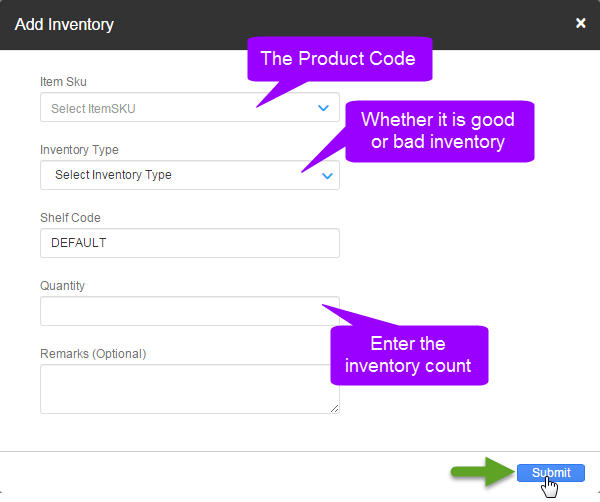
you can select the type as per your requirement to add item
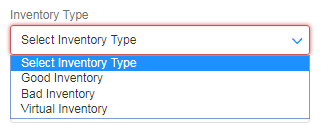
GOOD INVENTORY – For adding saleable item
BAD INVENTORY – For adding bad/broken items/non-saleable items
VIRTUAL INVENTORY – For adding virtual items for more detail Click Here
The product and its respective entry will thus be made on the Inventory page
-
To edit the total count of a particular product inventory and press enter, as soon as the changes are made, hit ‘Save Changes’.
-
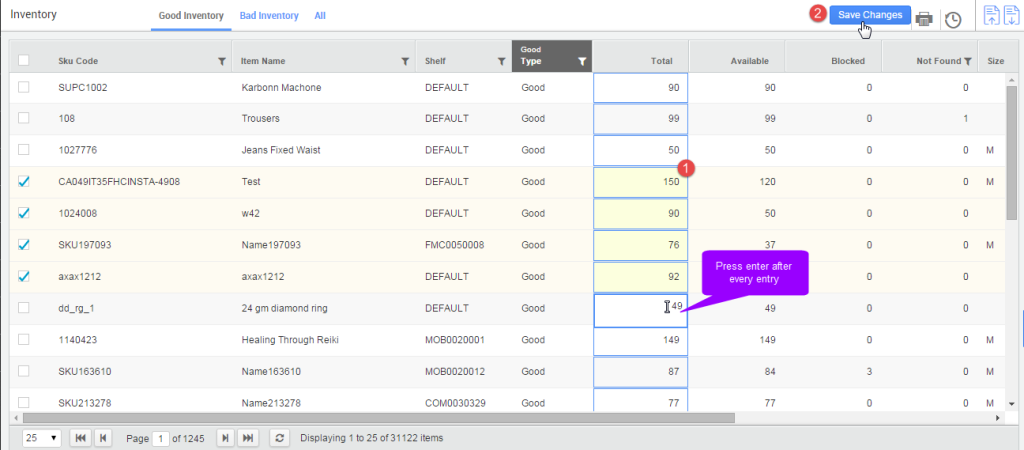
Confirm and submit the changes.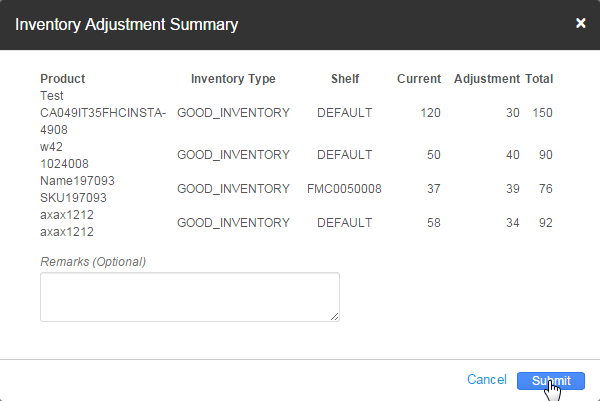
2- Scan to Add inventory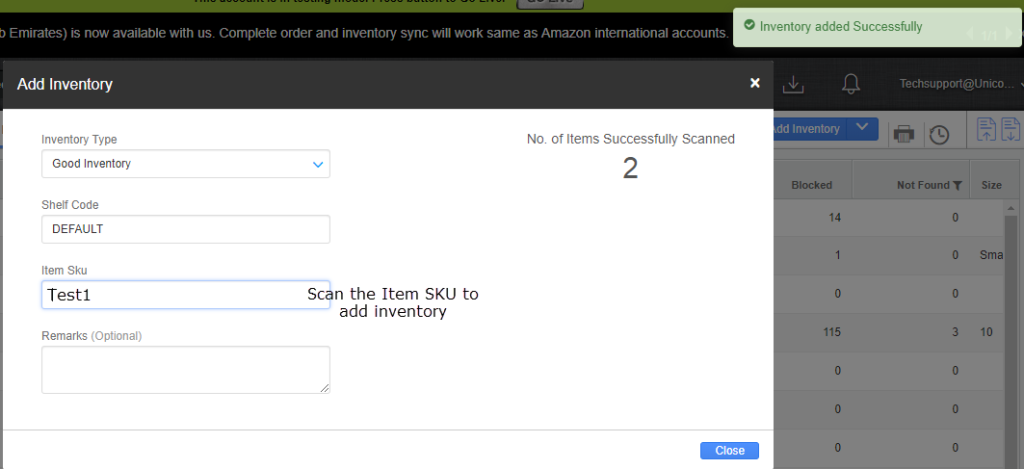
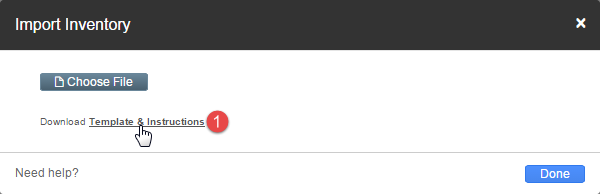
3- Import Inventory Adjustment to contain inventory type: good, bad or QC rejected.
B- Bulk update – through Import file
In order to have hassle-free inventory adjustments across channels, apart from internal processes, imports are also made to manage stock listings accurately. To make the process precise and correct, a new field mapping the inventory type has been added in the CSV format required in the import of Inventory adjustment in the system.
On the inventory page, click the Import icon![]()

In this file you can mention the adjustment type as:
| ADD | for addition of inventory |
| REMOVE | for removal |
| TRANSFER | for transferring inventory and |
| REPLACE | for the replacement of stocks. |
![]()
And you make the following upload:
Inventory type as GOOD_INVENTORY, BAD_INVENTORY or VIRTUAL_INVENTORY
This means on adding an inventory of say 7, the updated value looks like this:![]()
However, if we replace it with an inventory of 7,
Then the updated values would be:![]()
Note: The shelf must be active else the system give an error in uploading the inventory in UC
Upload the import file with the given template.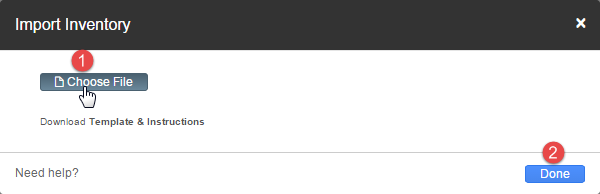
Recommended for you: