A:
A picklist is created to optimize the picking process by grouping items to be processed together. It is required to help the warehouse staff to pick correct items from the correct shelves in an efficient manner, organizing the picking instructions such that a warehouse staff doesn’t have to go to the same shelf in identical round trips to fetch the same product.
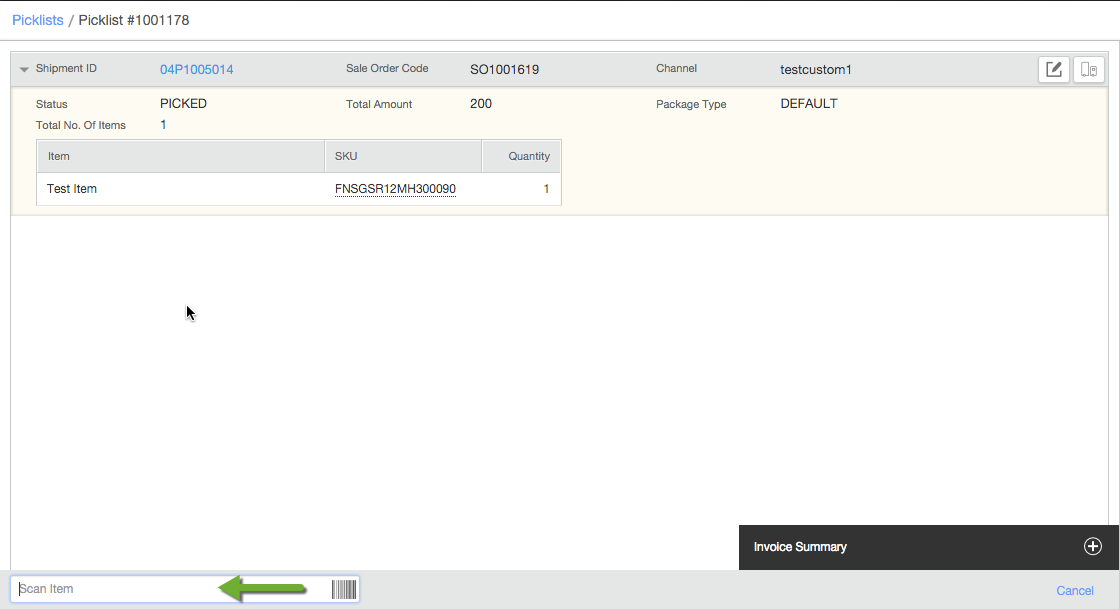
A picklist is created in the system for the selected orders; on the picklist being received, the shipment is marked as picked. And the picklist is marked as closed as soon as all the orders in it are invoiced.
From the functional point of view, when the picklists are in either of the states: CREATED or RECEIVED, they are pending picklists, since the order items are not completely received at the invoicing station.
Picklist Status
A picklist is created in the system for the selected orders and the status of the system becomes Picking; on the picklist being received, the shipment is marked as picked. And the picklist is marked as closed as soon as all the orders in it are invoiced.
Process Flow:
Follow a few simple steps to create and receive picklists:
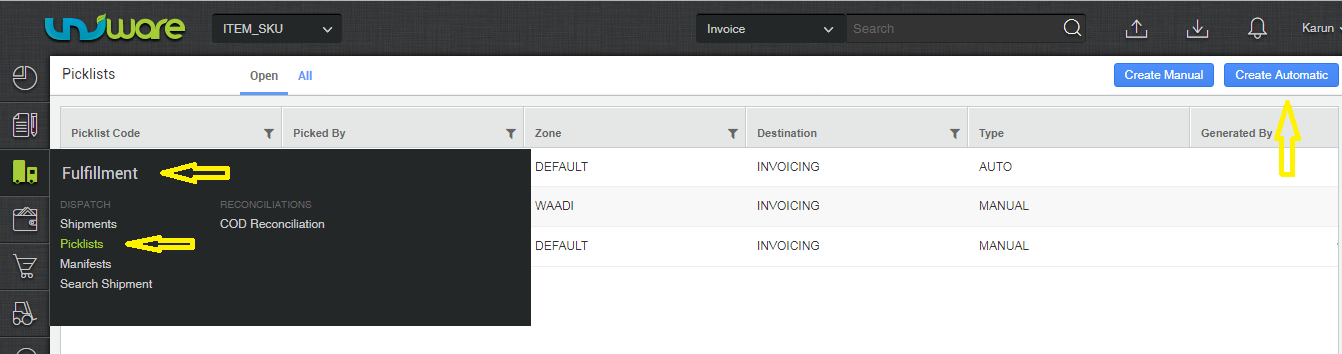
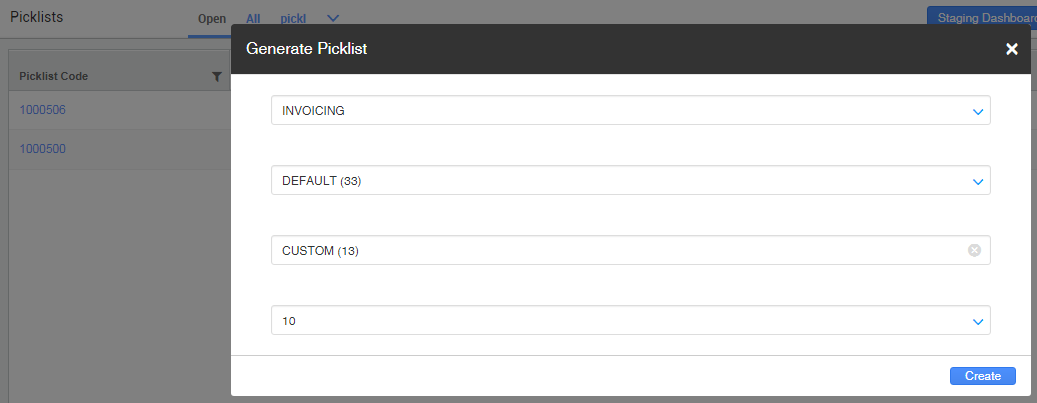
1- On the path Fulfillment > Picklists, select “Create Manual” on the top-right side of the screen.


2- Select the Orders and click on Create Picklist.

3- This creates the picklist successfully. You can generate the picklist or receive it at the invoicing station. Both the actions can be done on this page.

4- Once the picklist has been marked as received , invoices can be generated.
Please remember: For SKU level traceability (ie, SKU barcoding), you have to scan the items while receiving the picklist for conducting these actions. And it is available only in Professional & Enterprise version only.
In addition to scanning Uniware SKU code and Scan Identifier, users can now also scan Seller SKU codes during order processing.

5- After the invoices are generated, Labels can also be generated from within the picklist

6- Once invoices and labels are generated for all the orders, picklist can be marked as closed

From the functional point of view, when the picklists are in either of the states: CREATED or RECEIVED, they are pending picklists, since the order items are not completely received at the invoicing station.
Notes:
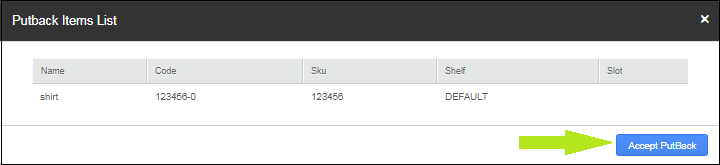
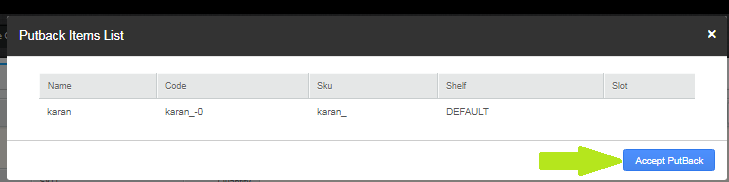
1) For Damaged/Putback item :
The user needs to create the new putaway as Putaway picklist item where he can now mark Good/Bad Inventory and assign the shelf accordingly.
2) In case of package type as fixed and having multiple order item :
If user Not Found/ Damaged any shipment item before invoicing then all other picklist items belong to that shipment will be marked as PUTBACK automatically.
3) If any order Item is cancelled under the picklist which is not Packed yet then stock will be blocked till putback is not completed in UC.
Scenarios
SCENARIO 1 -Picklist contains multiple Packages and one of the package is cancelled before receiving the picklist.
SCENARIO 2 -Picklist contains multiple Packages and one of the package is cancelled after receiving the picklist and generating the invoice.
SCENARIO 3 -Picklist has 1 order with multiple items and one of the item is cancelled before generating the invoice.
SCENARIO 4 -Picklist has 1 order with multiple items and one of the item is cancelled after generating the invoice.
There are multiple scenarios that can come across while working with Picklist. These scenarios are discussed below
SCENARIO 1-Picklist contains multiple Packages and one of the package is cancelled before receiving the picklist.

Step A- Picklist can be received and invoices can be generated as usual for all the processing orders as mentioned in Step 4 Above
Step B- Do Putback for the cancelled package

STEP C- Close the Picklist

STEP D- Create Putaway PICKLIST ITEM for the cancelled Item for putting the item back into the desired shelf

SCENARIO 2-Picklist contains multiple Packages and one of the package is cancelled after receiving the picklist and generating the invoice.
STEP A – Invoices can be generated as usual for all the processing orders as mentioned in Step 4 Above
STEP B- Picklist can be closed

STEP C- Go to Putaway Pending tab and complete the Putaway to add the inventory back

SCENARIO 3-Picklist has 1 order with multiple items and one of the item is cancelled before generating the invoice.
STEP A Invoices can be generated as usual for all the processing orders as mentioned in Step 4 but before the invoice gets generated, it will give a popup to putback the cancelled item

STEP B – Once the putback is done for the cancelled item, generate the invoice for the remaining items and close the picklist

STEP C – Create Putaway PICKLIST ITEM for the cancelled Item for putting the item back into the desired shelf

SCENARIO 4-Picklist has 1 order with multiple items and one of the item is cancelled after generating the invoice.
STEP A – If the invoice is already generated and one item is cancelled after wards then the picklist can still be closed
STEP B – Putaway can be completed for the cancelled item from Putaway Pending Tab

Also note that invoice and label can be generated right there.

6- Once the Picklist is RECEIVED, you can generate the invoice for the shipment and the shipping label for further processing the shipment and getting it ready to ship.

Note: In Enterprise version, you can also create Channel wise auto picklist.
Rest process is similar as per default functions
What is a picklist? Click here
Note:
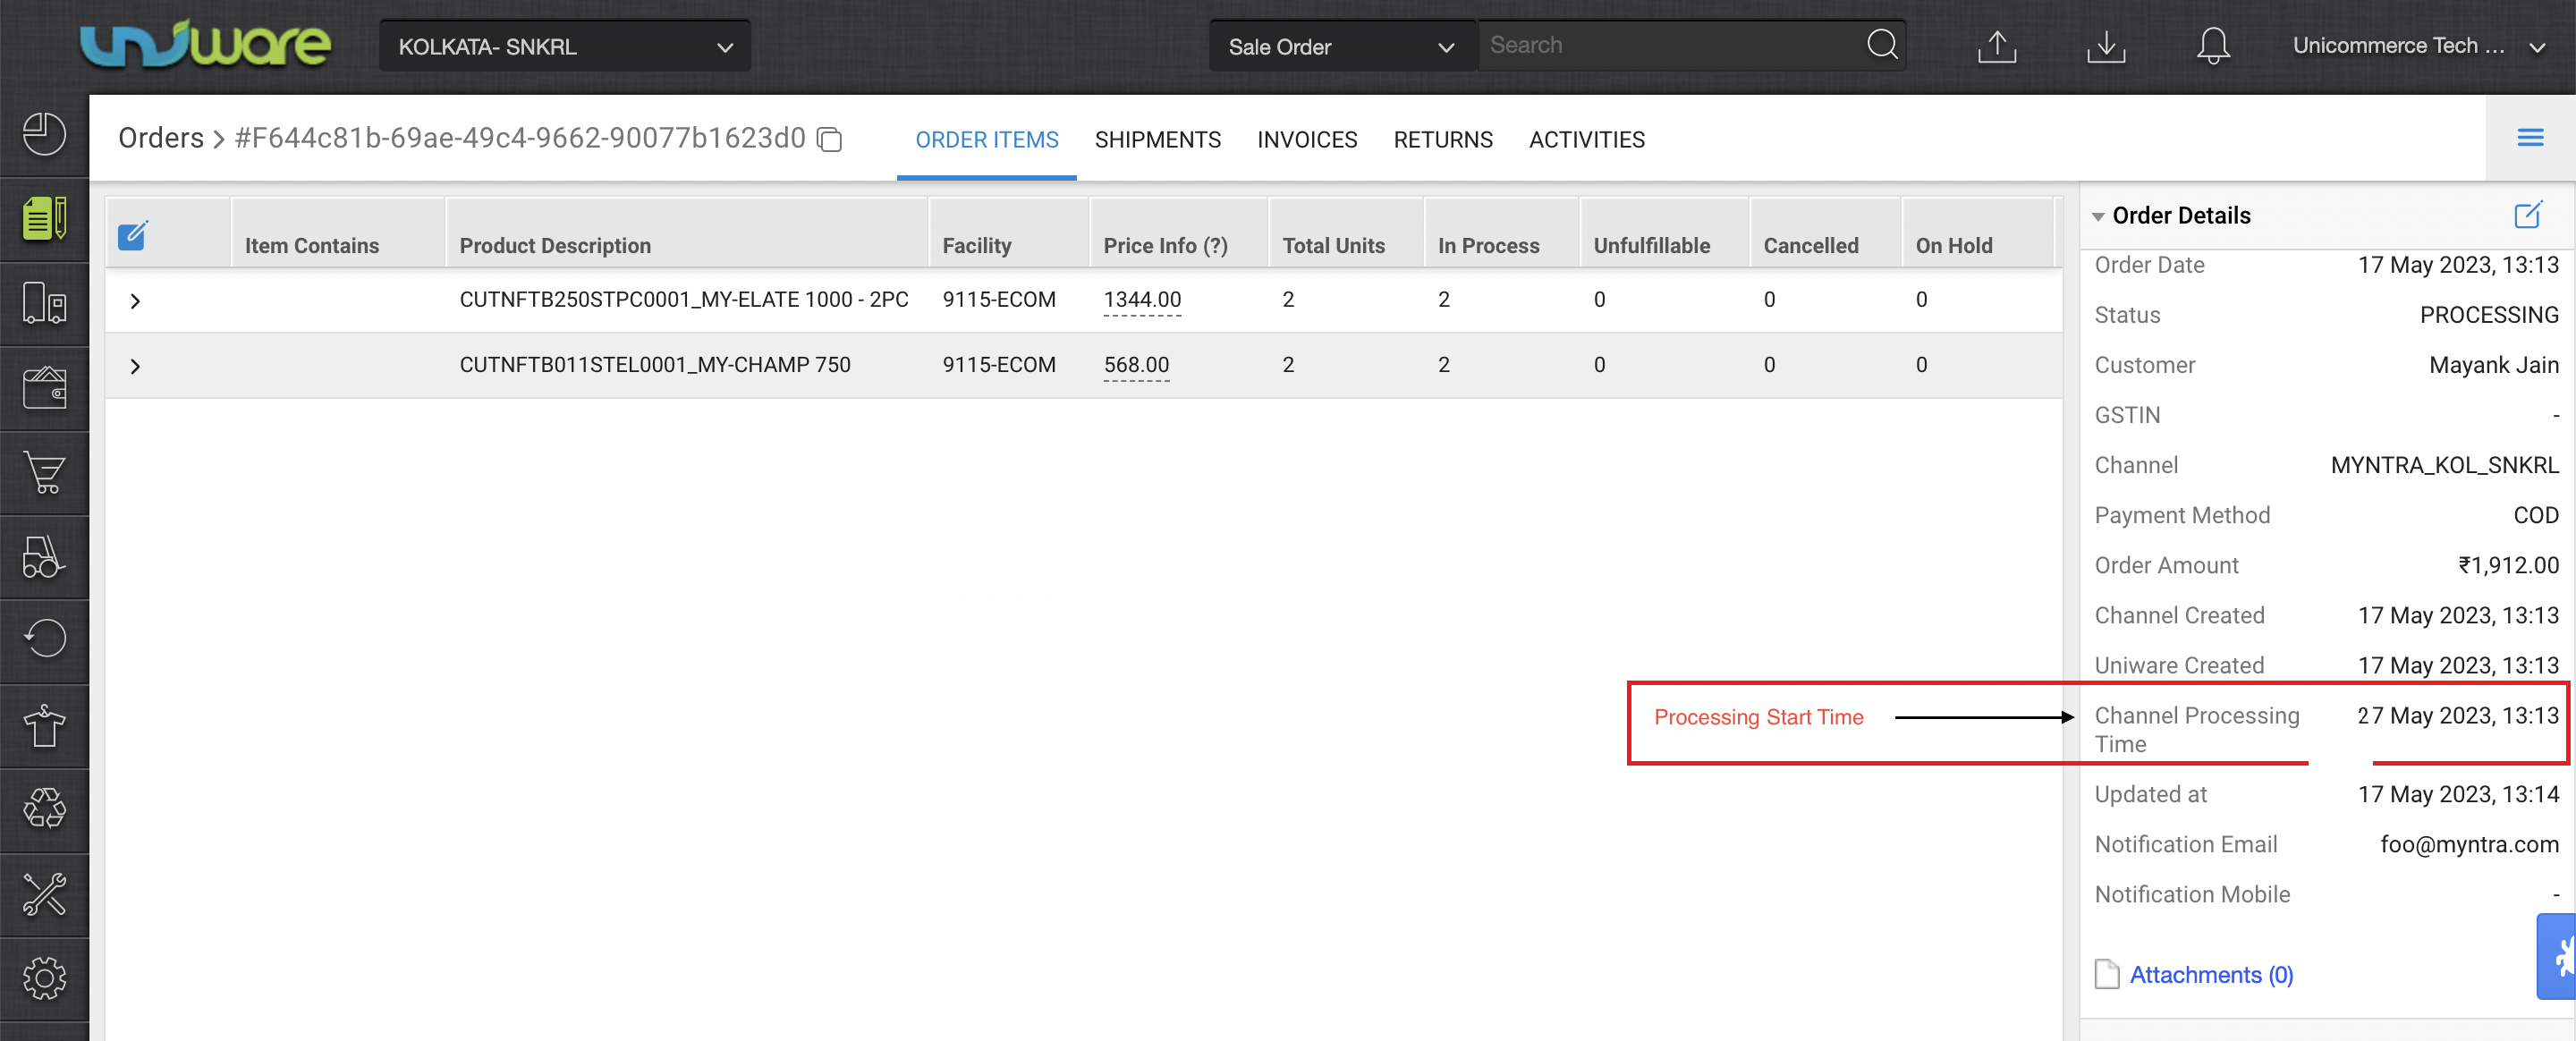
Channel Processing Time:- For selective channels ‘ orders there can be “Channel Processing Time” will be there with a future date and until this time is achieved or lesser then current time no picklist can be created.
For such orders check box option to select for picking will not visible.