
We’ve introduced a new B2B order processing flow to simplify and streamline how sellers handle B2B orders. No more switching between multiple tabs or clicking around the dashboard repeatedly. Now, you can manage the entire B2B order process from start to finish directly from the B2B Orders tab — all in one place.
Use Case Scenario
Imagine a warehouse executive handling a stack of B2B orders. Earlier, processing each order meant opening multiple tabs—one for order details, another for invoice generation, another for manifest, and yet another for updating dispatch. This repetitive navigation not only slowed down the workflow but also increased the chances of missing steps.
Now, with the new B2B order processing flow, the executive simply opens the B2B Orders tab and completes the entire process—viewing, invoicing, and dispatching—on a single page. It saves time, reduces manual effort, and keeps the workflow smooth and error-free.
Applicability
Version: Standard, Professional and Enterprise clients
Traceability: None, SKU, and Batching Trace
Procedure
Order Creation
- Login in your uniware account.
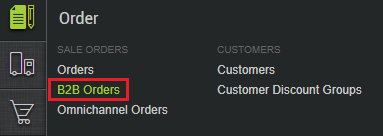
- Navigate to the Order > B2B Orders.
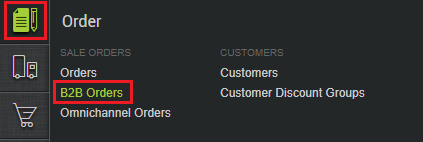
- You will be directed to the Orders page.
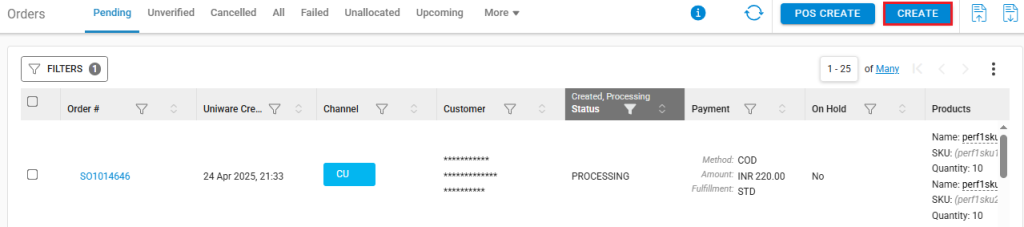
- From the top right corner, click on the CREATE button.
- Enter all the fields as required. For the Channel config, select the CUSTOM_B2B option from the dropdown.
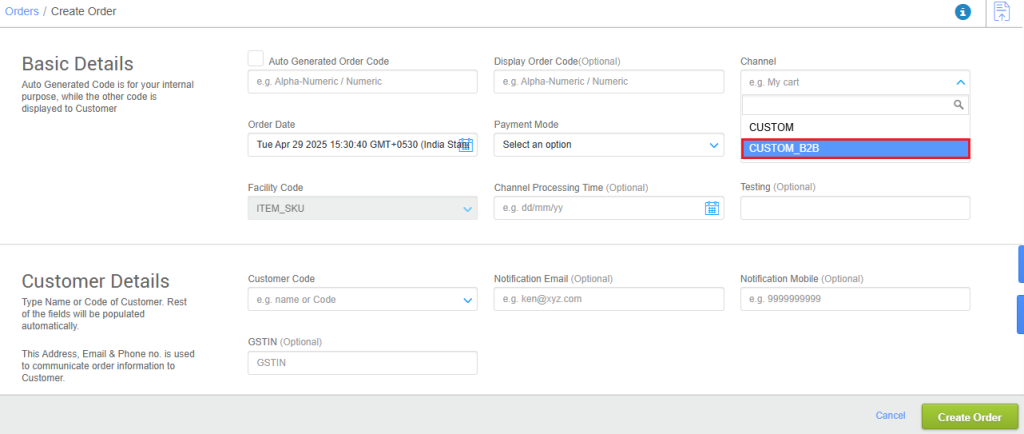
- Note: New B2B order will only be created only against existing Uniware customers. The billing address and shipping address of any B2B order cannot be changed. In case of any change, you will have to make a new customer in Uniware.
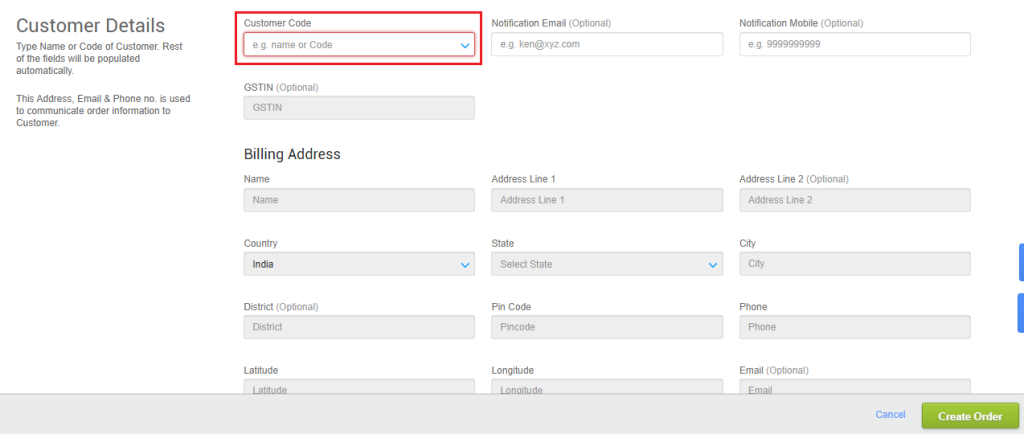
- Enter all the other details as per the existing flow.
Order Processing
- Login in your uniware account.
- Navigate to the Order > B2B Orders.
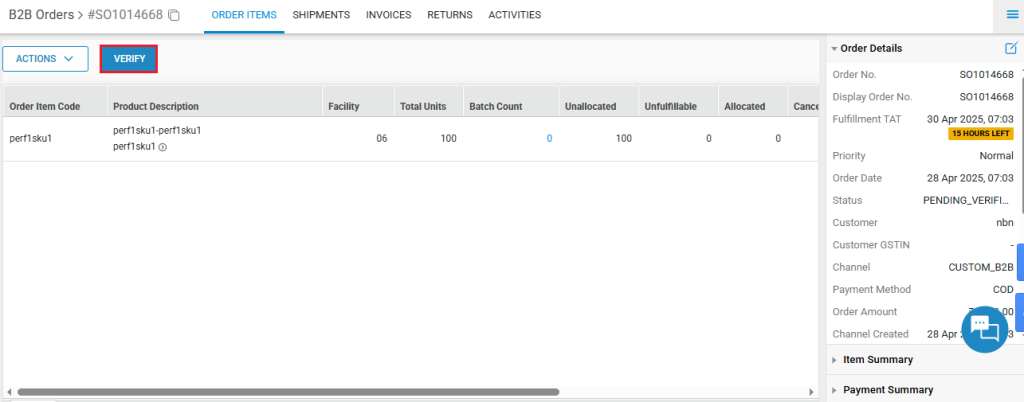
- First, go to the Unverified tab. You can verify the order by clicking on the VERIFY button here.

- You can also verify your order by clicking on the order id from the Order ID column and then clicking the VERIFY button here.

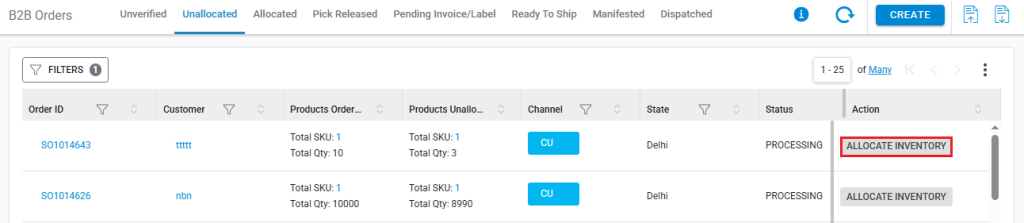
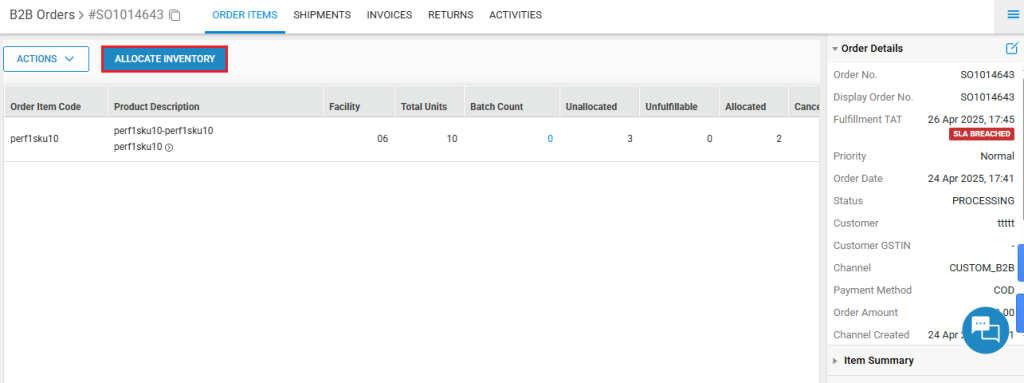
- Now, go to the Unallocated tab. You can alloacte inventory for the order by clicking on the ALLOCATE INVENTORY button here.
- On clicking on this button, you will see the following screen. Enter the quantity that you want to allocate in the Alloacated Qty column.
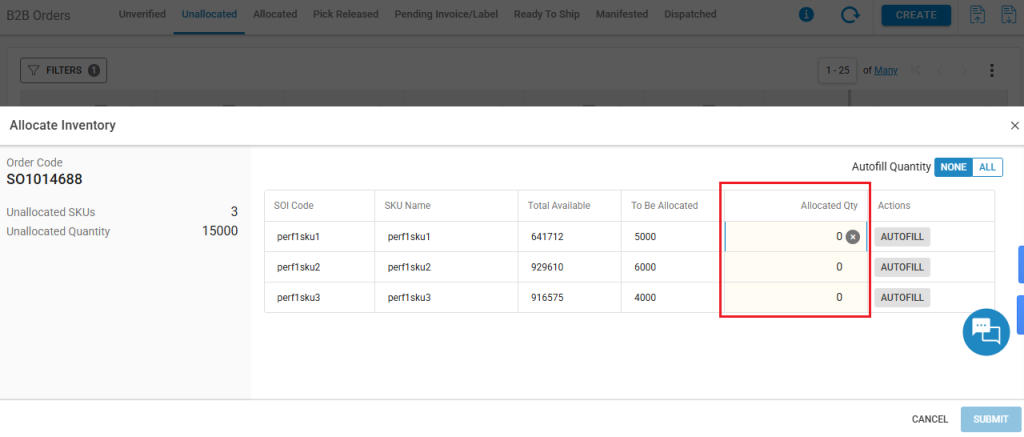
- You can also allocate the entire available inventory by clicking on the AUTOFILL button. After entering the quantity of the inventory to be allocated, click on the SUBMIT button.
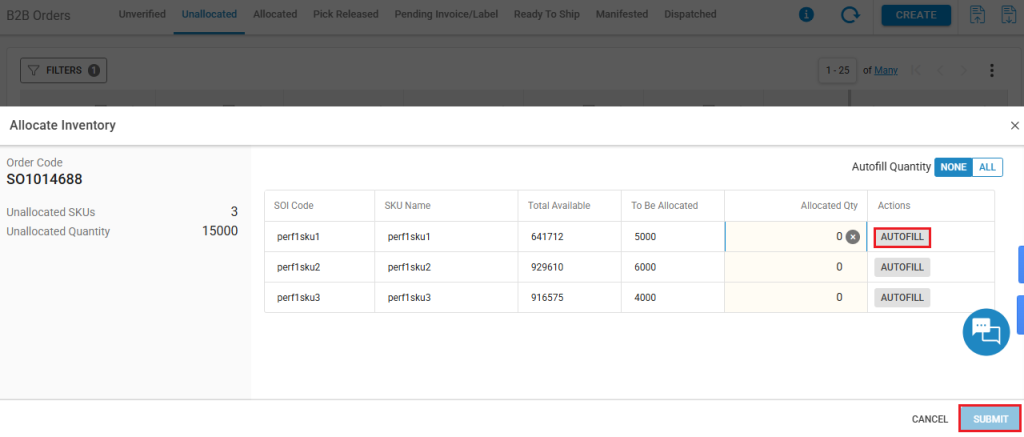
- You can also allocate inventory by clicking on the order id from the Order ID column and then clicking on the ALLOCATE INVENTORY button, and following the same steps as mentioned above.
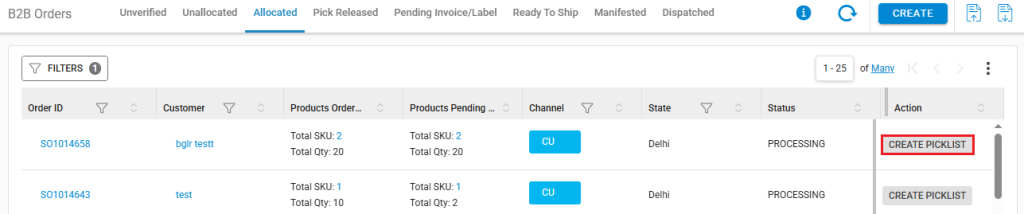
- Now, go to the Allocated tab. You can create a picklist for the order by clicking on the CREATE PICKLIST button here.
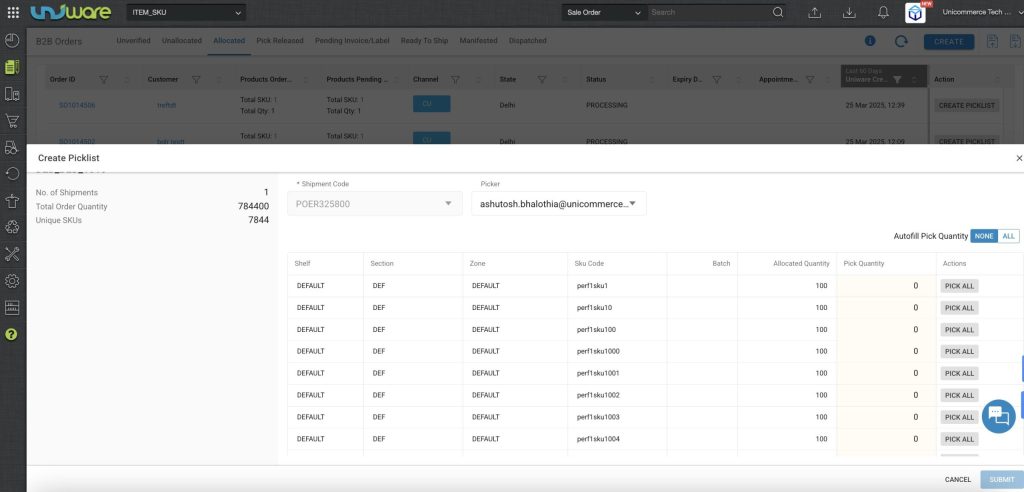
- On doing do, you will see the following screen. Select the Shipment Code and the Picker, and click on the Submit button.
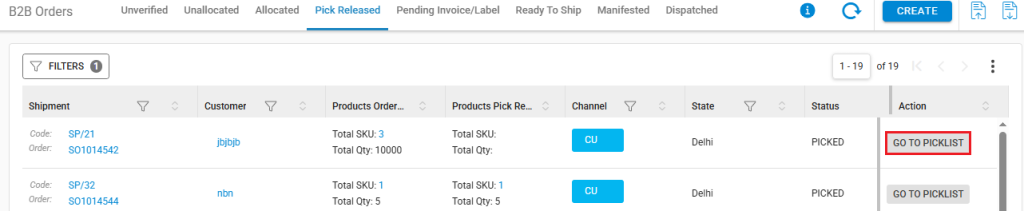
- Now go to the Pick Released tab. Here, you can view your picklist by clicking on the GO TO PICKLIST button.
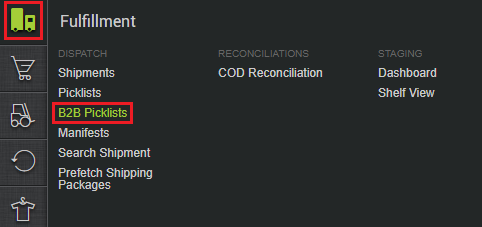
- You can also access the picklist from the Uniware dashboard by clicking Fulfillment > B2B Picklists.
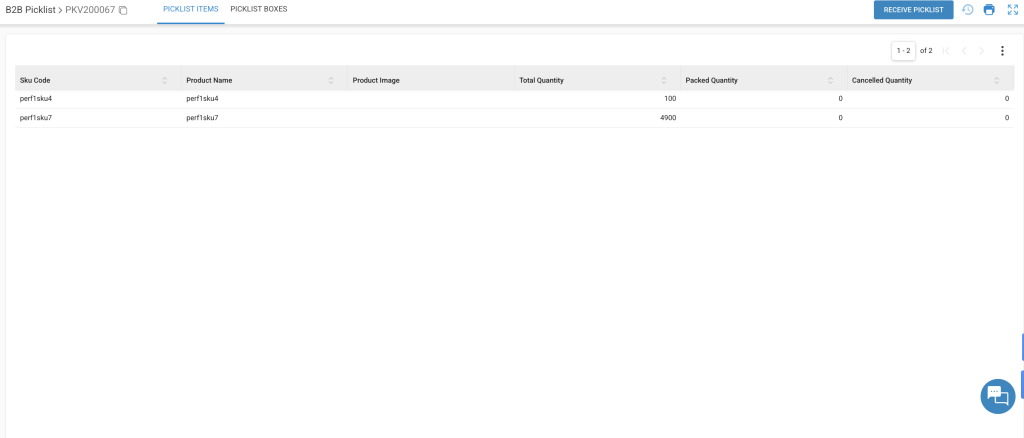
- You will see the following screen. From the top right corner, click on the RECEIVE PICKLIST button.
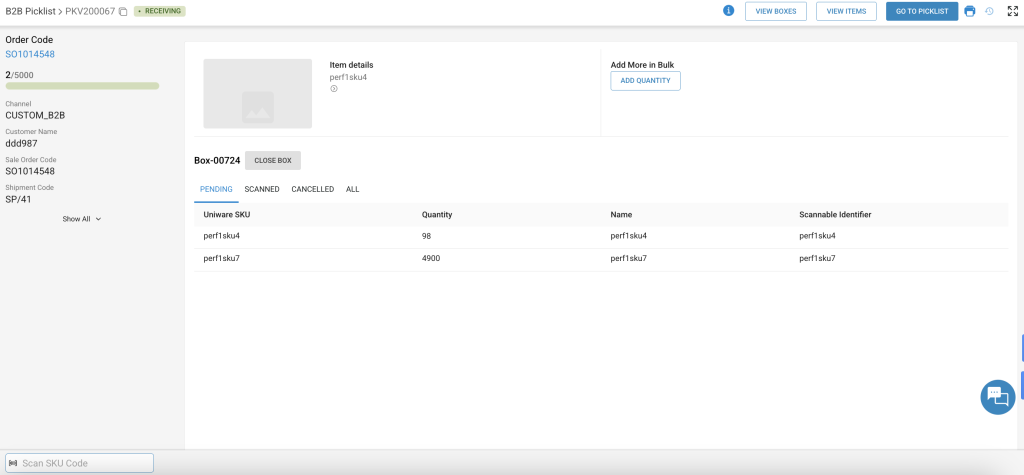
- Scan the SKU codes to add, or add the quantity in bulk by clicking on the ADD QUANTITY button. You can also create multiple boxes by adding some quantity of the item, and then clicking on the CLOSE BOX button. After closing the box, when you start adding the items, it will be put in a new box.
- Next, go to the Pending Invoice/Label tab. Here, click on the GO TO SHIPMENT button. You will be redirected to the B2B shipments page for that order. Here, you can print the invoice and label for the order.

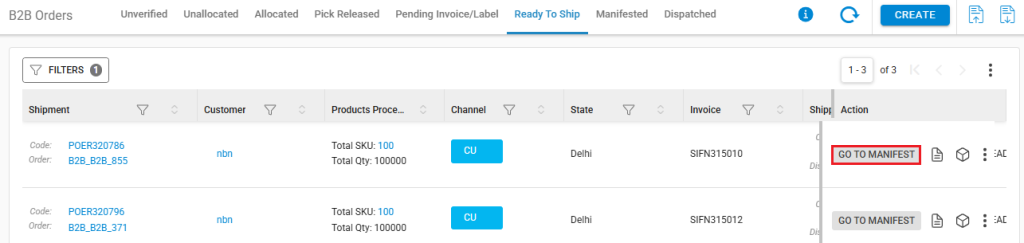
- To create a manifest for the order, go to the Ready To Ship tab. Here, click on the GO TO MANIFEST button. You will be directed to the Manifests page.
- Instead of directly adding a B2B shipment in manifest, users will have to scan all the boxes.
- This will ensure that all the boxes belonging to the shipment are dispatched and no box is left behind.

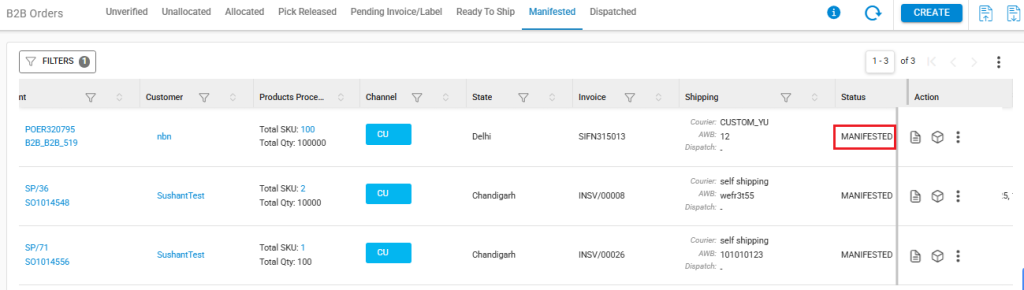
- To check the status of the Order after creating a manifest, go to the Manifested tab. Here you can see the status of the order as MANIFESTED after a manifest is successfully created for the same.
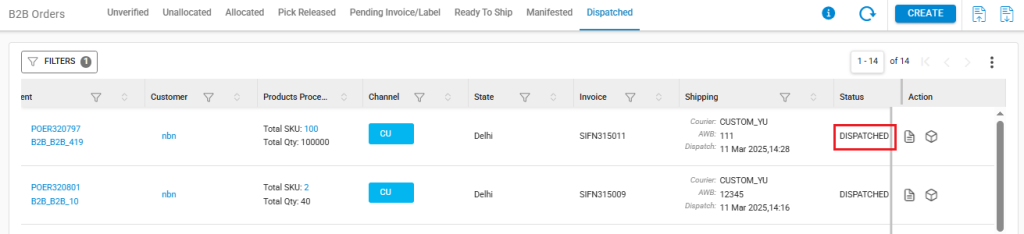
- After dispatching the shipment, you can check the status from the Dispatched tab. Here you can see the status of the order as DISPATCHED after a the shipment is sucessfully dispatched.
Important Points
- Click here to know more about AI Based PO Parsing for B2B orders.
- You can now create orders having upto 1000 SKUs and 50 Lakh overall qty. This can be done for CUSTOM_B2B channel only. Other integrated channels are not supported as of now.
- For the B2B workflow, you need to create a new channel having source code CUSTOM_B2B.
- Inventory Against B2B Orders can be manually allocated. This will ensure that warehouse can assign inventory against the orders only when adequate inventory is available. Therefore, B2C inventory will not be consumed up by the B2B orders.
- You can now create multiple picklists against a single B2B shipment.
- During the creation of picklists, you can manually select the shelf, section, SKU against which you want to create the picklist. Currently, only paper based picking is supported.
- Even if the picking of one picklist is completed and the rest are going on, the packer can start packing the completed picklist. This will ensure that the packer does not have to wait until the complete picklist is received.
- Please note that QC is still not available in the packing workflow. We currently expect the user to mark any damaged/not found items manually.
- Users can create boxes/box pack slips while packing. In case of cancellation, users can dismantle the box, remove the cancelled pieces and create a new updated box.
- In B2C, the invoice/label get generated automatically after all the items are packed. However, this will not be the case in B2B.
- Only SELF couriers are supported as of now.
- Instead of directly adding a B2B shipment in manifest, users will have to scan all the boxes. This will ensure that all the boxes belonging to the shipment are dispatched and no box is left behind.