
Now, a picklist-related information will be displayed to the sellers by Unicommerce. It will help them out to plan picking processes appropriately.
Applicability
Version: Enterprise
Traceability: None, SKU, ITEM
Configuration:
- Facility Level Config: “Track Picking Productivity”
- By default, the value of this would be ‘Disable’.
- To enable this config, kindly connect with UC Support Team/KAM.
- While assigning a picker this config will be used.
Note:-
- In Handled case, The Complete Picking button will be visible after the tote is scanned after packing the items, this will helps in maintaining the consistency and address all the challenges when the packing is delayed after picking whether the configuration is ON or OFF.
Overview
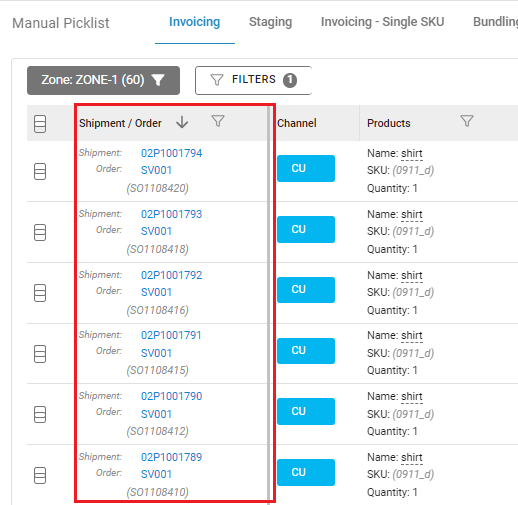
In the Uniware UI menu, go to the Fulfilment > Picklist > Create Manual.
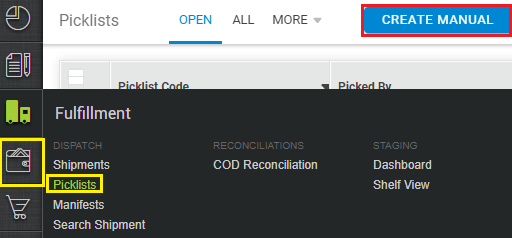
When the seller click on the Create Manual button and select the shipments, the following pointers will be displayed:-
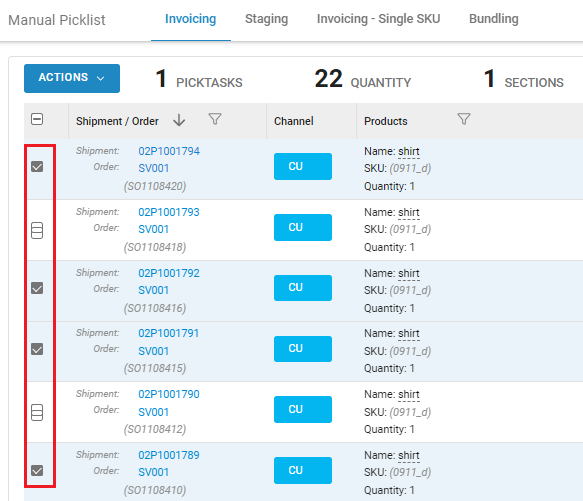
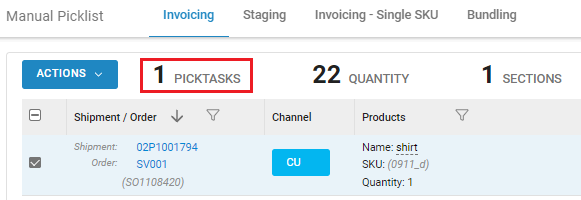
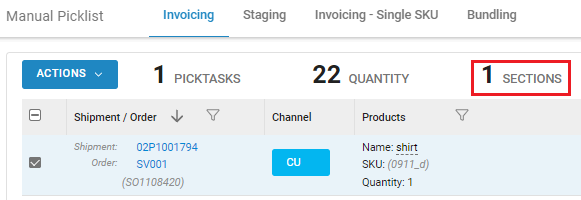
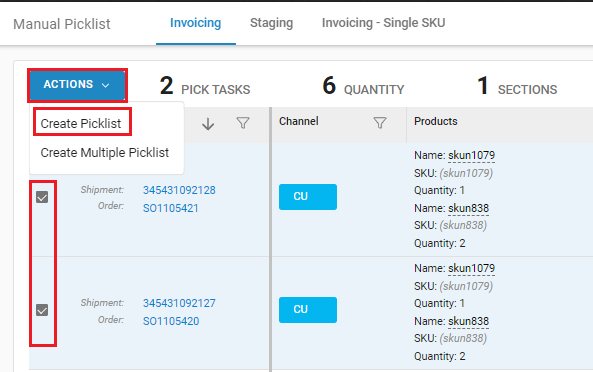
1- PickTasks:
This denotes the total activity involved while picking. With this information, the warehouse manager will be able to estimate the amount of time required to pick unique SKUs based on the number of shelves the picker needs to cover. To generate the picklist, the metric should display the overall SKU x Shelf.
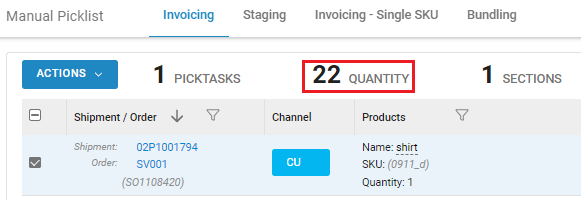
2- Quantity:
This denotes the total quantity of SKUs to be picked as per the picklist to be generated. This will provide the information as such how many aggregate quantities will be picked. The metric should display the total SKU combined with the counts for it.
3- Sections:
This denotes the total no. of section from which the shipment items are to be picked. This metric displays the total section which has to be covered while picking the items.
Tabs:
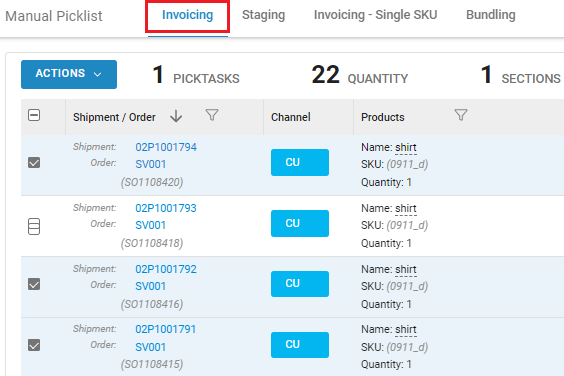
1- Invoicing:
In this view all the shipments with destination as invoicing should be contained.
2- Staging:
In this view all the shipments with destination as staging should be contained.
The staging tab will be displayed on the basis of the configuration. The configuration pertaining to staging is enabled then only the ‘Staging’ tab will be displayed and if the configuration is not enabled, then the staging tab will not be displayed.
The validation should check if the following configurations are enabled while displaying the ‘Staging’ tab:-
- Cross-shipments are allowed and picked via staging area
- Multiple items of same zone are picked via staging area
Note:- To enable these config, seller needs to get in touch with our Support Team
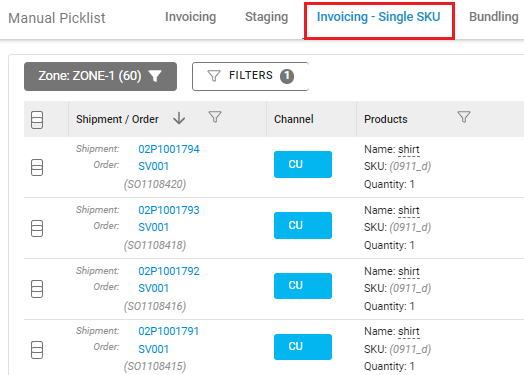
3- Invoicing – Single SKU:
Under this tab, all the shipments with single SKU will be displayed.
Note:-
- The view will be sorted as per the destination i.e. Invoicing-Single SKU, Staging-Single SKU and Bundling-Single SKU
- To create any custom view, it is necessary to have the destination name in it. Ex- Invoicing Single SKU.
4- Bundling:
Under this tab, all the bundle shipments will be displayed.
Filters :
1- Select any column on which you want to apply filter.
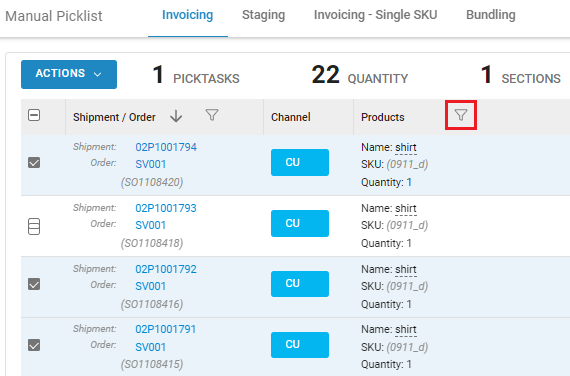
2- From the right side of the screen, the filter flyout will appear.
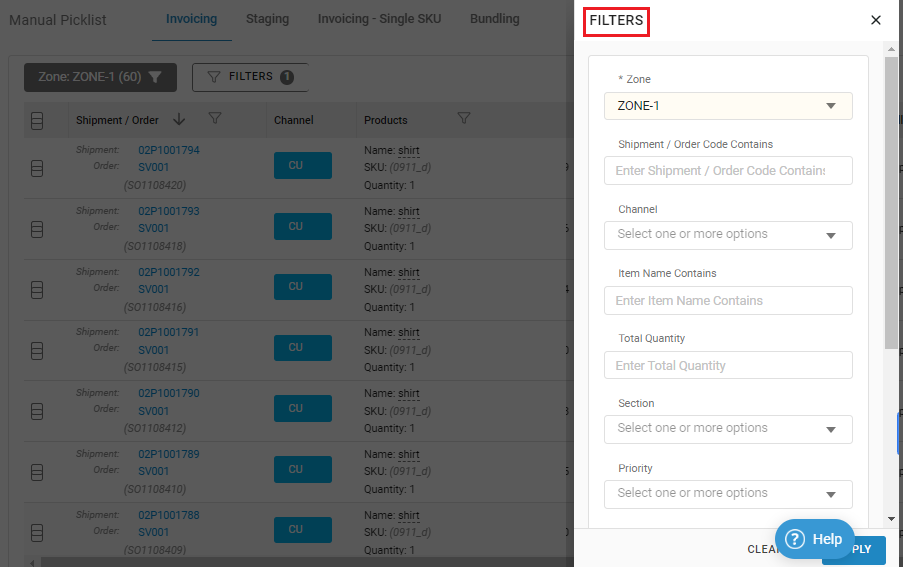
3- User can select the zone, section channel, quantity etc.
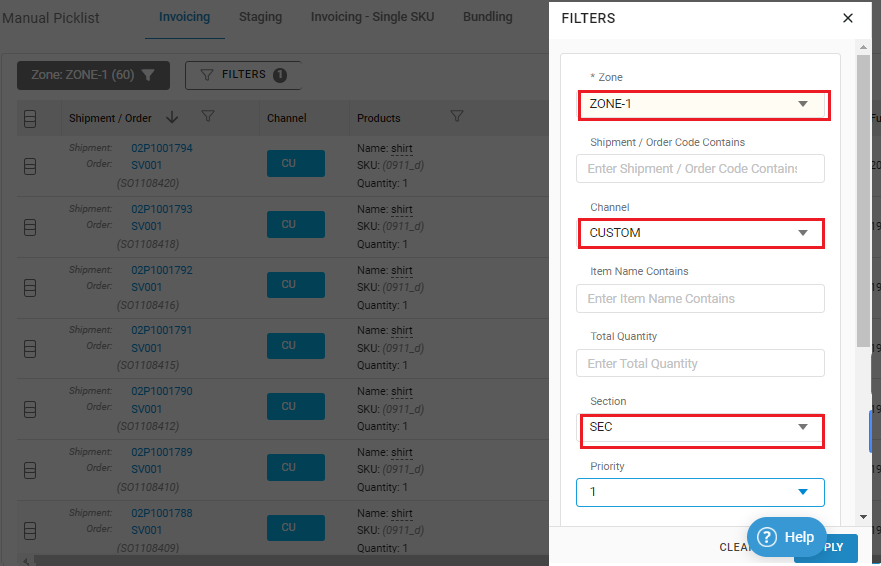
Note:- If seller apply multiple filter at a time, then he/she needs to load the table only one time.
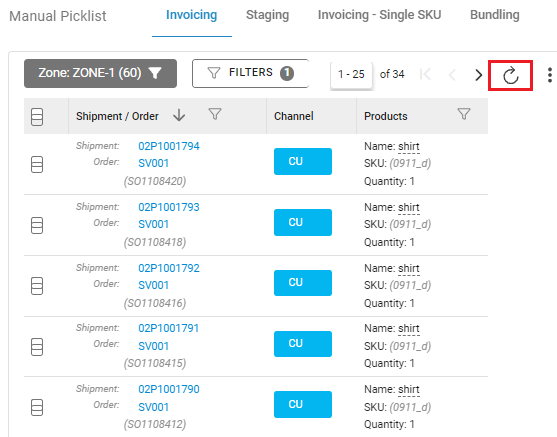
Data Table Reloading:
The reloading icon will help seller to reload the data table instead of browser reloading.
Column Freezing:
Column freezing will help our sellers to keep Shipment Orders related information in view when they have a lot of columns, so that so that seller can easily identify which column of information they are looking at.
1- Click to the three dots, select the Column (First or Last) which you want to Freeze. e.g. Here are selecting First Column.
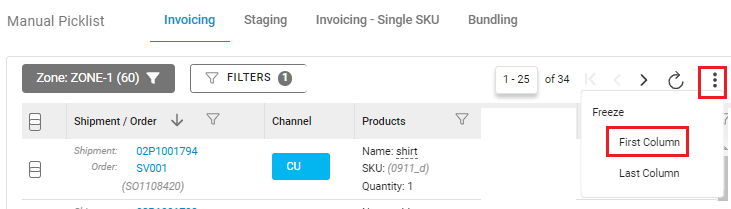
2- Once you select the column the select column will look like this e.g. Here are selecting First Column.
Assign a Picker
In the Uniware UI menu, go to the Fulfilment > Picklist > Create Manual.

Select the shipments for which you want to assign a picker and go to the Action button on the left top side of the window and select the Create Picklist option.
Once you select the Create Picklist option, the ASSIGN PICKLISTS pop-up window will appear.
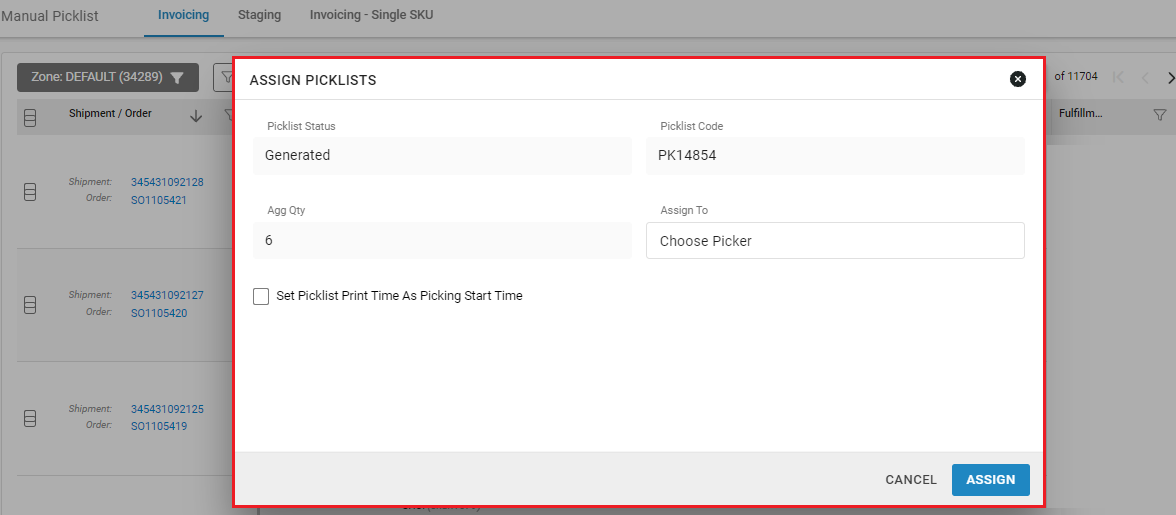
Choose a picker whosoever is present at that time. Also you can set the Pickling Start Time as same as the Picklist Print Time (doing this will help you to reduce the paper work).
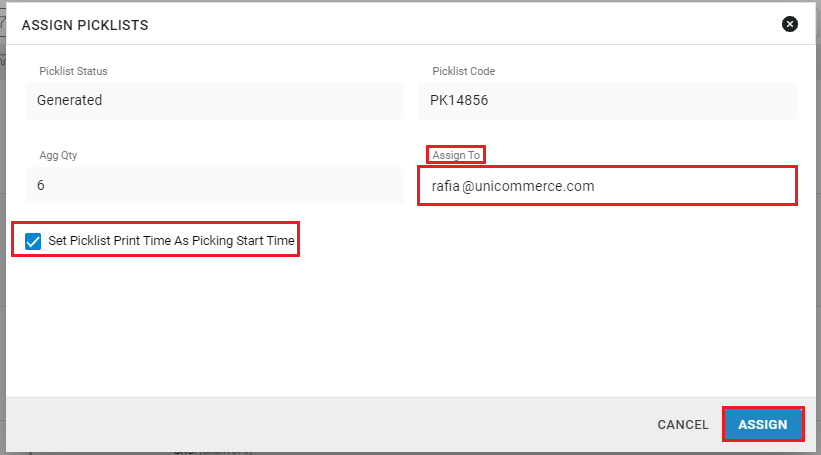
Note:-
- There is no need to set picking start time as picklist print time, you can set it by yourself as well.
- You can assign the picker later on as well, you can click on the Assign button without choosing picker.
- The Invoicing- Single SKU will be sorted as per the destination i.e. Invoicing-Single SKU, Staging-Single SKU and Bundling-Single SKU.
- To create any custom view, it is necessary to have the destination name in it. Ex- Invoicing Single SKU.
- If sellers apply multiple filter at a time, then they needs to load the table only one time.
- To enable the configs, seller needs to get in touch with our Support Team.