Inventory Sync refers to the control of all the stock levels of your products in one place. The inventory is updated real time on channels.
Click here for Tutorial Video – English
Click here for Tutorial Video – Hindi
Common Reasons If the channel connector is broken, you may access your uniware account in “Incognito Browser”. Note: It is recommended for the sellers to do these steps in the incognito mode to avoid incorrect API connectors configuration. Follow the below simple steps to check Inventory Sync Status in Uniware: In case the inventory sync is off you are required to turn on the sync by going to the Settings tab and choosing Channels. Follow the below simple steps to check the Disable Inventory reason on Amazon Seller Panel: Scenario 1- Automatic Sync Disabled After five consecutive attempts, if the inventory sync continues to fail, the inventory for a listing gets automatically disabled and moves to the "Sync Disabled" tab (This case is only applicable wherein it shows “Yes” in disabled due to an error section). In this case, sellers need to activate their listings in Uniware. you`ll be able to see the products in the Sync Enable tab. If the seller has manually disabled the listing on uniware, they can reactivate them in Uniware In the Uniware Menu, go to the Products, select Listings, and check the Linked tab. Check for the Manually Disabled field, If it`s True for a specific SKU, it means that it is disabled from the seller`s end. Now go to Tools, select Import, and search for the file named Channel Item Type. Download the csv template and fill out these fields. You can now upload the file and check the linked tab again, you will see the sync enabled for the SKU. Now. click on the “Edit” section of the SKU in which you wish to add the dimensions. Go to “More Details” and fill out the following sections- Item Dimensions, Package Dimensions, Package Weight. Once mentioned, click on save and finish to save the changes.

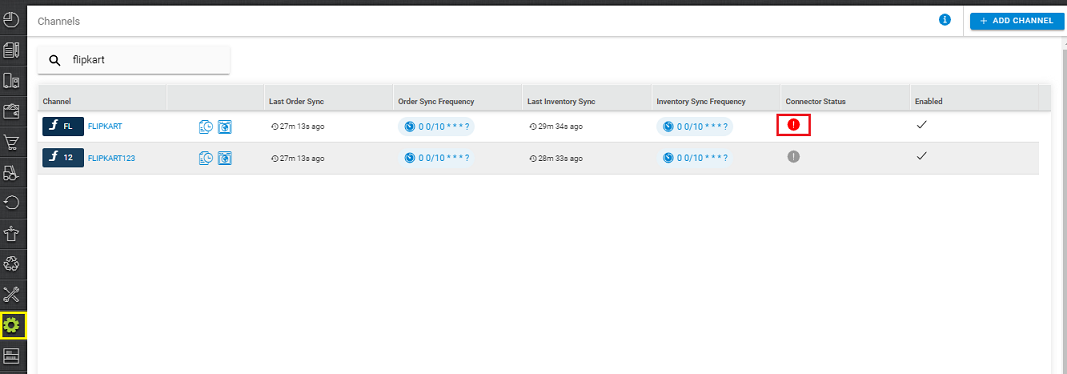
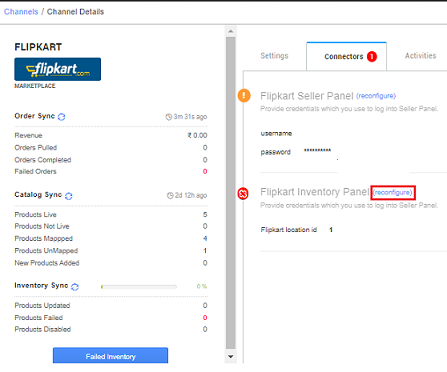
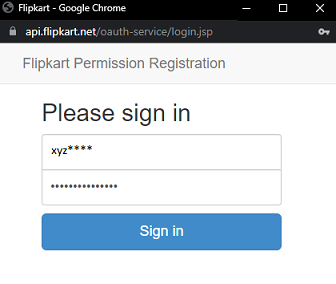
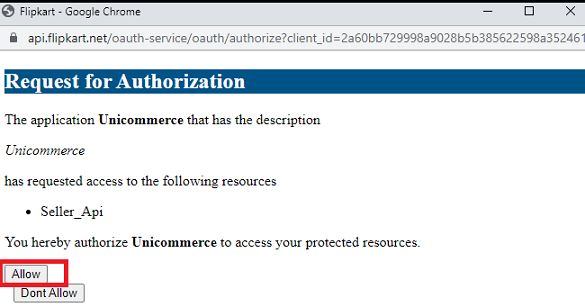
Note:- The Red i button indicates that Connector of the particular channel is broken. It means you need to reconfigure the Channel connector.

Note:- The Red i button indicates that Connector of the particular channel is broken. It means you need to reconfigure the Channel connector.


Scenario 2- Manually Sync Disabled
Note: While filling out details in Channel Item Type, keep in mind that “0” denotes “False” and “1” denotes “True”.
Self-Checks
Below are the important points that need to be kept in mind:
- Check if Inventory Sync is “ON” on Uniware.
- Download the “Inventory Sync Failure Report” and identify the errors.
- Check if the sync has been Disabled for any listing Manually in Uniware.
- Check the Channel Connectors in Uniware.
Inventory Sync Failure Report:
If any of the above common reason is not there, kindly download the Inventory Sync Failure Report once.
Follow the below simple steps to download “Inventory Sync Failure Report” in Uniware:
-
In the Uniware Menu, go to the Dashboard > Other Reports > {Select the report named: “Inventory Sync Failure Report”}.
-
Select the column headers as per your need. We suggest you select “ALL” ( so that it gives full reports). You can also choose selected columns one by one.
-
Select and control the date in the report file as per selected report.
-
Click on “Create Export” to generate the selected report.
-
After exporting the Inventory Sync Failure Report, identify the errors and then please reach out to the Unicommerce Support Team.
Further, if the issue does not get resolved, please reach out to the Unicommerce support team from Here
