
Omni Order/Hopping is a functionality that empowers store staff to accept or reject individual items within an order. Upon rejection, the item seamlessly transitions to another store. As a component of our omnichannel solutions, Uniware facilitates manual or automatic hopping of orders between stores.
In order to enhance store efficiency and streamline operations, Uniware has introduced the “No Frills Order Processing” a simplified and straightforward method of handling store orders focusing on essential tasks, such as order acceptance, rejection, and fulfillment.
This feature enables store staff to view all actionable order items on a single page, facilitating seamless processing of store orders from one centralized location to serves multiple purposes:
1- Improve visibility of all the pending actions in the store.
2- Reducing operating costs to enhance the bottom line.
3- Elevating the customer experience through improved fulfillment rates and Service Level Agreements (SLA).
4- Ensuring packages are handed over to respective shippers, regardless of the initial channels.
Applicability
Version: Enterprise clients with Store Orders or Omni Channel hopping feature.
Traceability: None and SKU
Configuration
- Facility Level Config: “Simplified Omni Order Processing”
- Enabled with scan based acceptance
- Enabled without scan based acceptance
- Disabled
- Old Omni Workflow
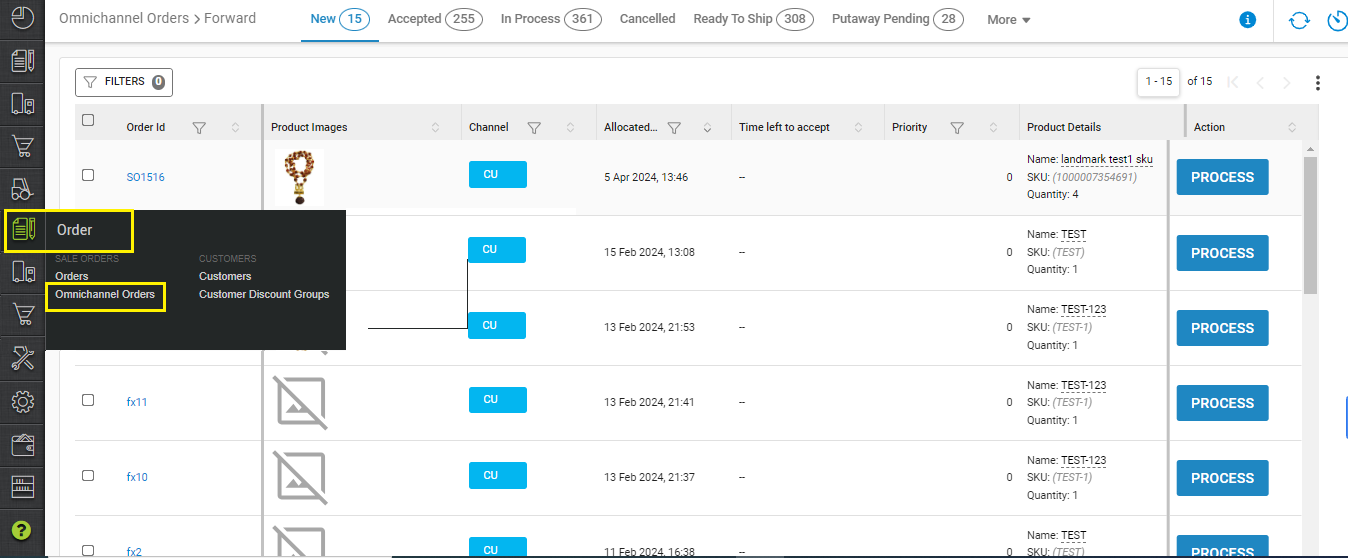
- Channel Setting Configuration: “Omni Channel Orders”
All orders(Omni/Storeorders) will be visible in “Omnichannel Orders“, where you can take action as per bulk or single order processing.
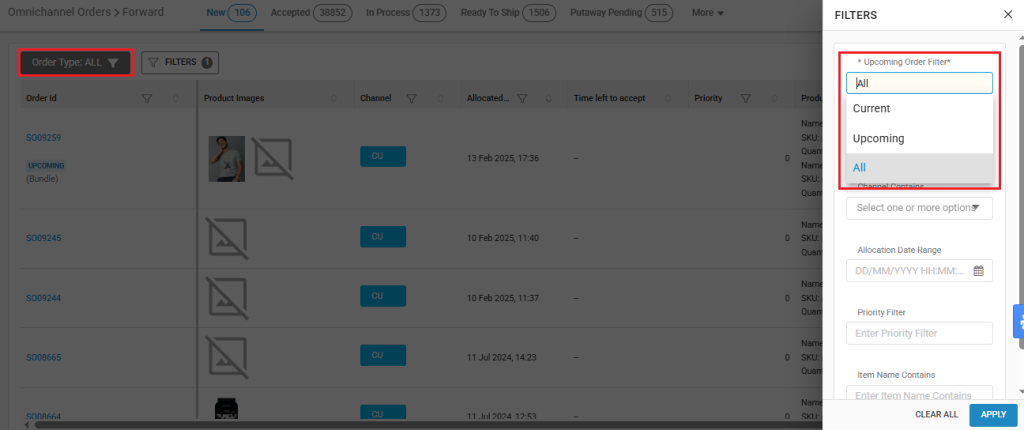
This page contains the Order Type filter which has 3 values:
-
- Current : Shows all the current orders.
- Upcoming : Shows all the orders which are upcoming.
- All: This shows both, current and upcoming orders.
This page contains the following majors tabs
-
- New: displays all fresh orders awaiting acceptance or rejection. Here you can take action as per bulk or single order processing.
- Accepted: displays all orders that have been accepted and waiting for processing next.
- In Process: displays all orders that are currently in progress, invoiced(packed).
- Ready to Ship : displays all orders that are labeled and ready for shipping.
- Cancelled: displays all cancelled orders.
- Putaway Pending: shows all Orders for which putback or putaway is required.
- More
- Rejected: displays all orders which are rejected at the store.
- Completed: displays all orders which are completed at the store.
Workflow:
- Single order processing (Without scan based acceptance) – in ‘NONE or SKU’ trace facility
- Bulk order processing (Without scan based acceptance) – in ‘NONE or SKU’ trace facility
- Scan based order processing (with scan based acceptance) – only in the SKU trace facility
Procedure
Without scan based acceptance
Order Acceptance/Rejection
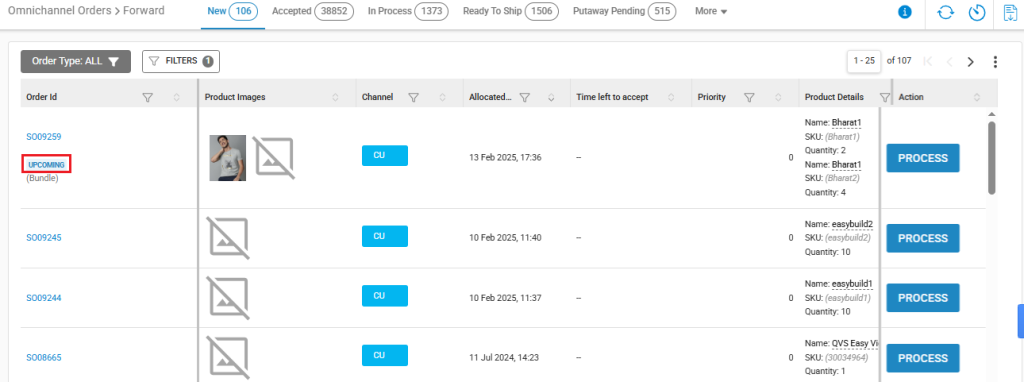
1- New Tab: Users have the flexibility to either select multiple orders for acceptance or review individual order details one by one. They can accept or reject items using the “PROCESS” action button accordingly.

Also, all the upcoming orders have a tag attached to them, which is visible just below the respective Order Id.
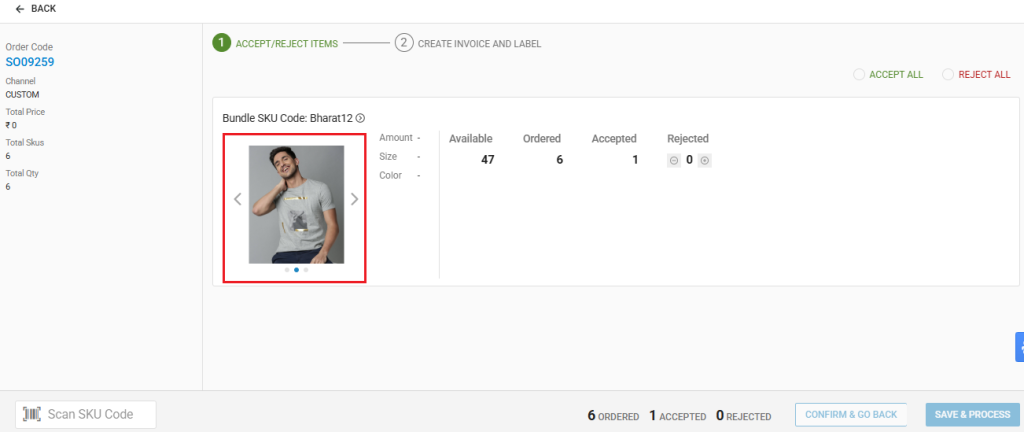
2- View Order Screen: here user can review the item’s summary, along with it’s SKU details like amount, size, colour, etc. You can take detailed actions such as accepting or rejecting orders. When rejecting an item, users are prompted to provide a reason for rejection.

You can also view the complete summary of the SKU details by clicking on the following arrow, as shown below.
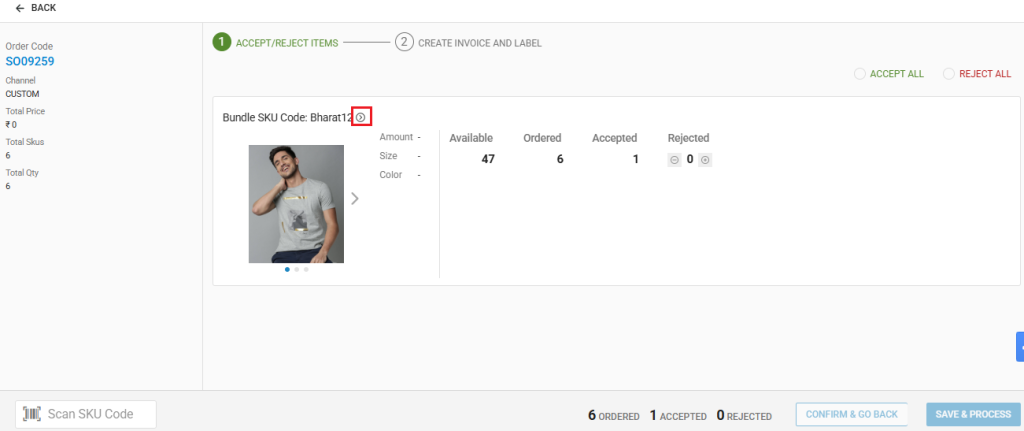
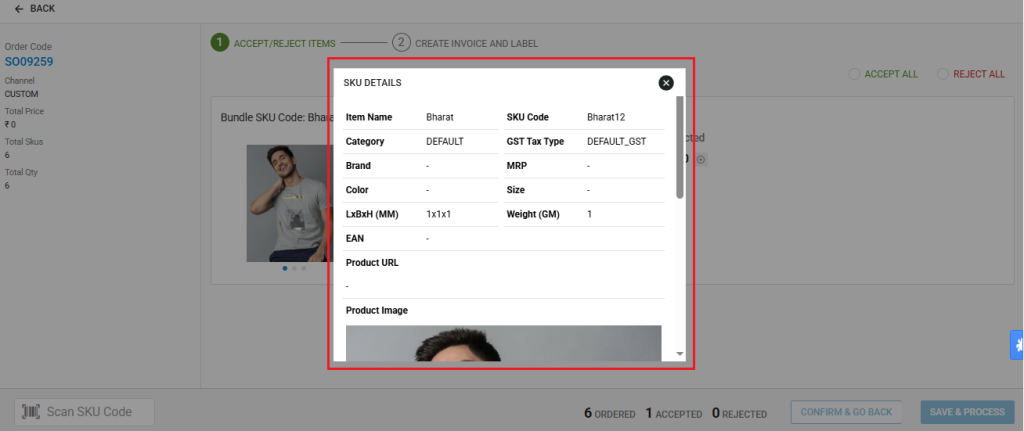
For items having bundle SKU code, you can view the images using the carousel.
Order Processing
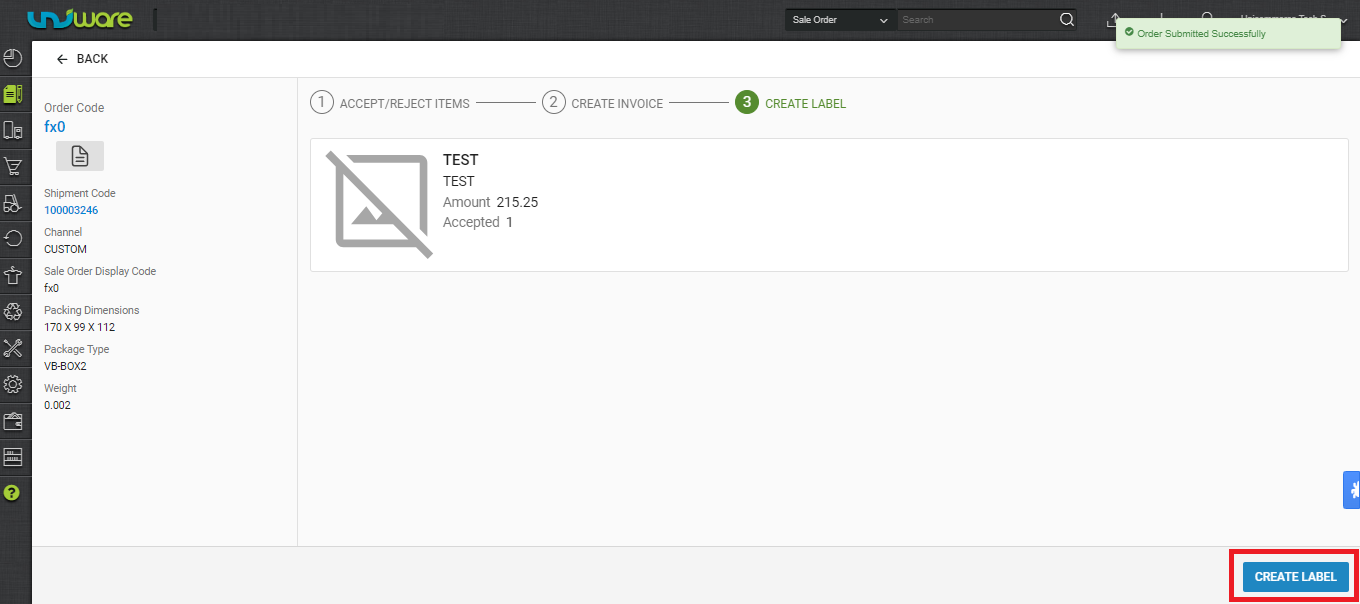
3- After completing all tasks and clicking the “Save & Process” button, the system will display the opportunity to generate the invoice and label according to the channel setting configuration.
Channel Setting: Single Action Invoice Label New
- Case1: If the setting is toggled to “OFF,” the system will initially present the “Create Invoice” button upon successful completion of the task, followed by the option to “Create Label.
- Case2: If the setting is toggled to “Merge Invoice label URL” it shows the action button “Create Invoice and Label” at one go.
Case1:

Case2:

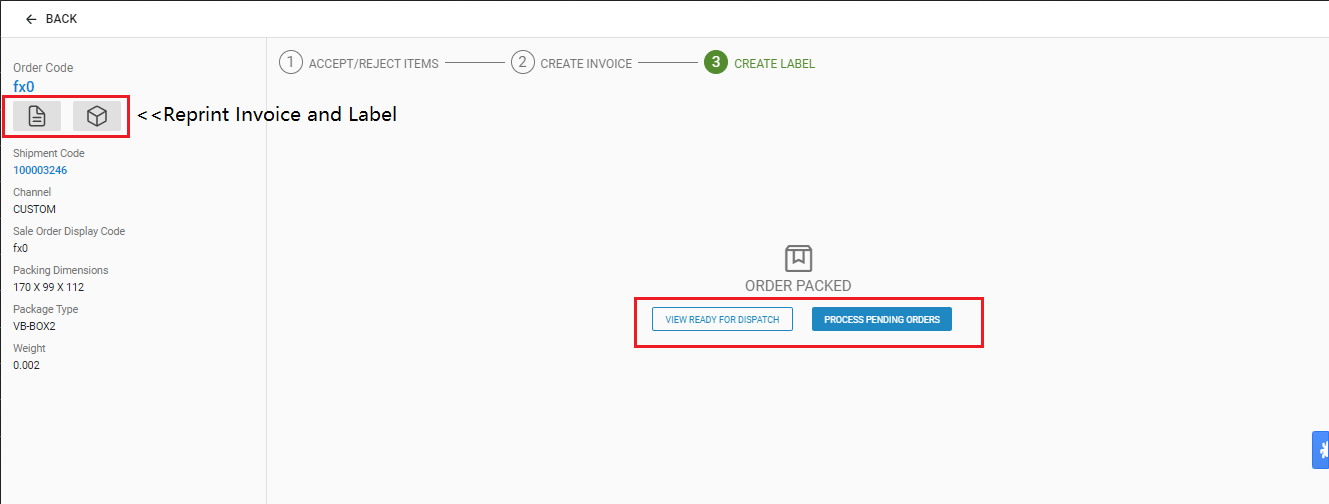
4- Now you can go next for ready for dispatch or go back to process pending orders in a similar way.
Manifestation:
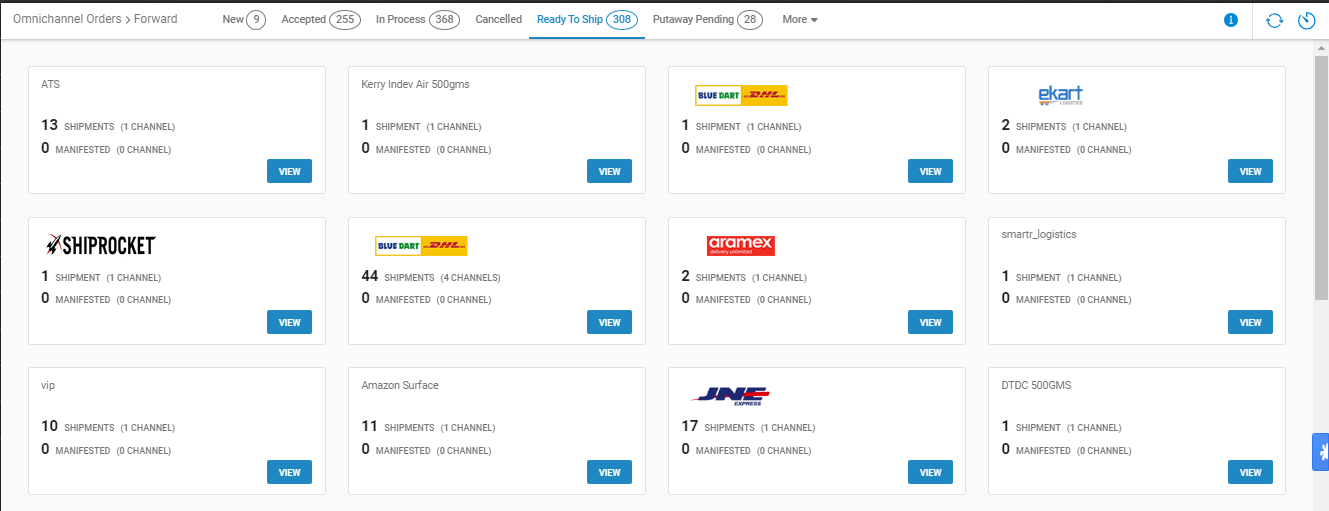
5- This section provides an extensive list of shipping partners for which packages are ready for handover.
For further details, click on the “View” button.
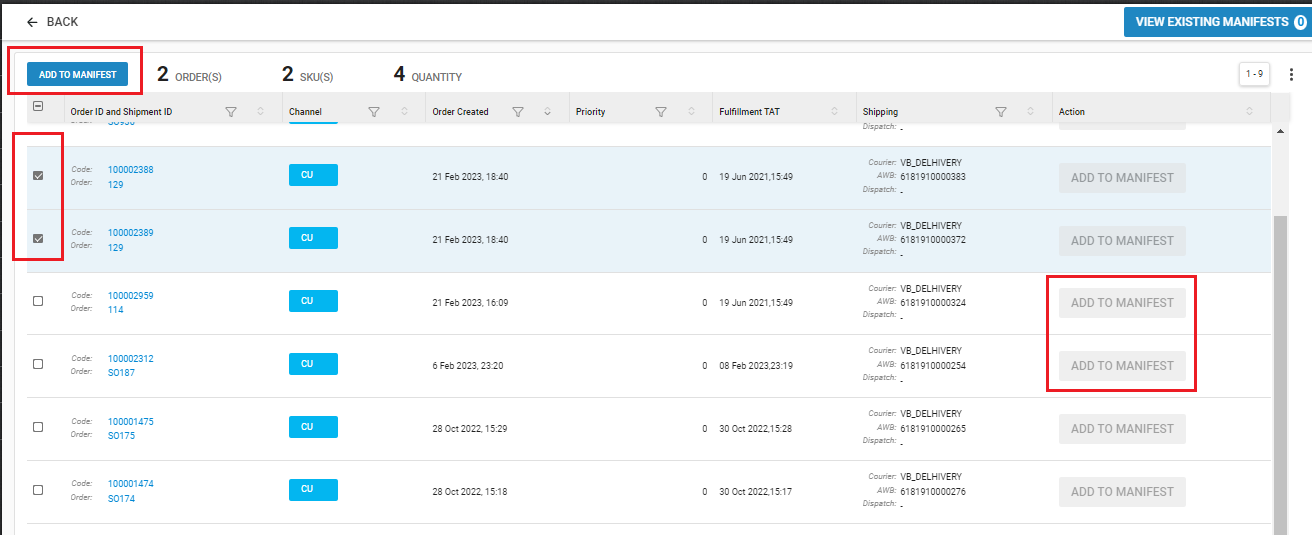
6- Upon clicking the “View” button next to a specific shipping provider, you will gain access to detailed package information. From here, you have the option to add packages to the manifest either through bulk actions or individually, as per your preference.
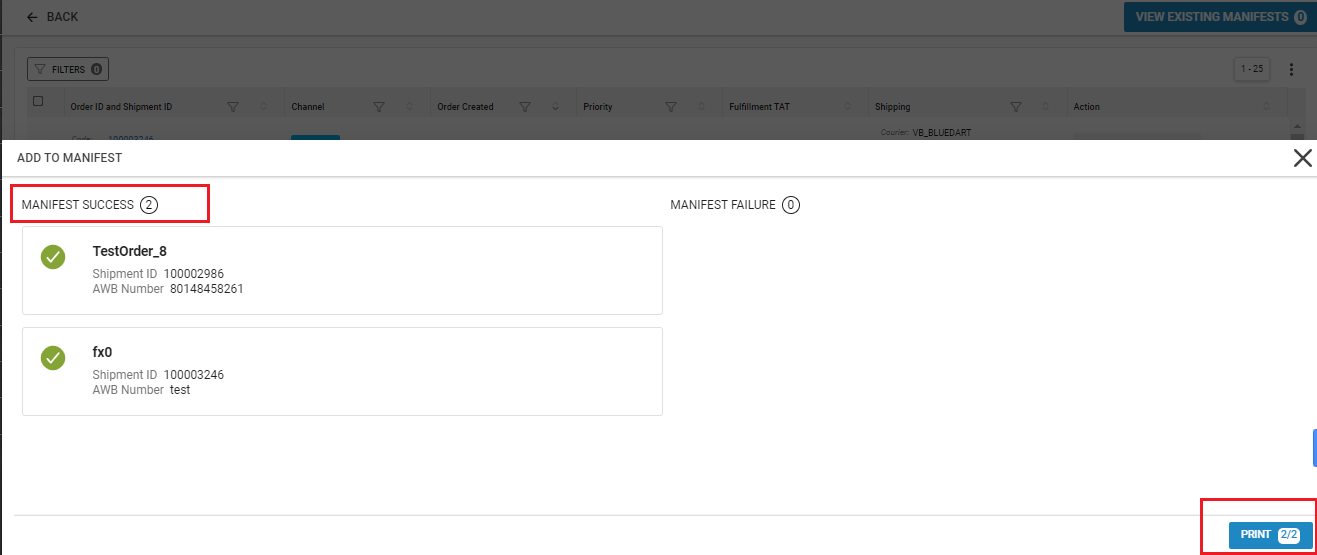
7- Now you can check the manifest is ready to print and packages are dispatched in UC.
Keep in mind:
- If the store staff creates manifest and dispatches at different points of time then he will have to dispatch multiple manifests, each corresponding to a different channel.
- If there are no allocation rules then giving manual AWB number is not supported in the workflow, for this the seller will have to go to the shipment page of order (old flow) and edit the shipping details.
- No visibility of cancelled shipments while dispatching manifest. Cancelled shipments will automatically get removed and will appear in the cancelled tab.
P2336R