
Once an order is “created” in the system, Uniware does inventory allocation for the ordered item(s). If the inventory is available, the item is marked Fulfillable, else Unfulfillable. Once the inventory is allocated to order items, the shipment(s) is created which is identified with a shipment ID in Uniware.
Order status is set to “processing”. During this, the shipment(s) (order items get picked from shelves), packed, ready to ship, manifested and then dispatched to the user. As soon as the shipping package is dispatched successfully, the order status is set to “complete”. The order can be “cancelled” before Item (s) are being dispatched and after dispatched it can only return in system.
Applicability
Version: Enterprise
Traceability: Item Traceability
The order processing consists of the following tasks:
-
Create Picklist
-
Print Invoice
-
Print Label
-
Create and Close Manifest
Note:- Few steps need to be taken care of while order processing as per the channel SOPs.
Process Flow:
For order processing with ITEM traceability system, follow the below steps:
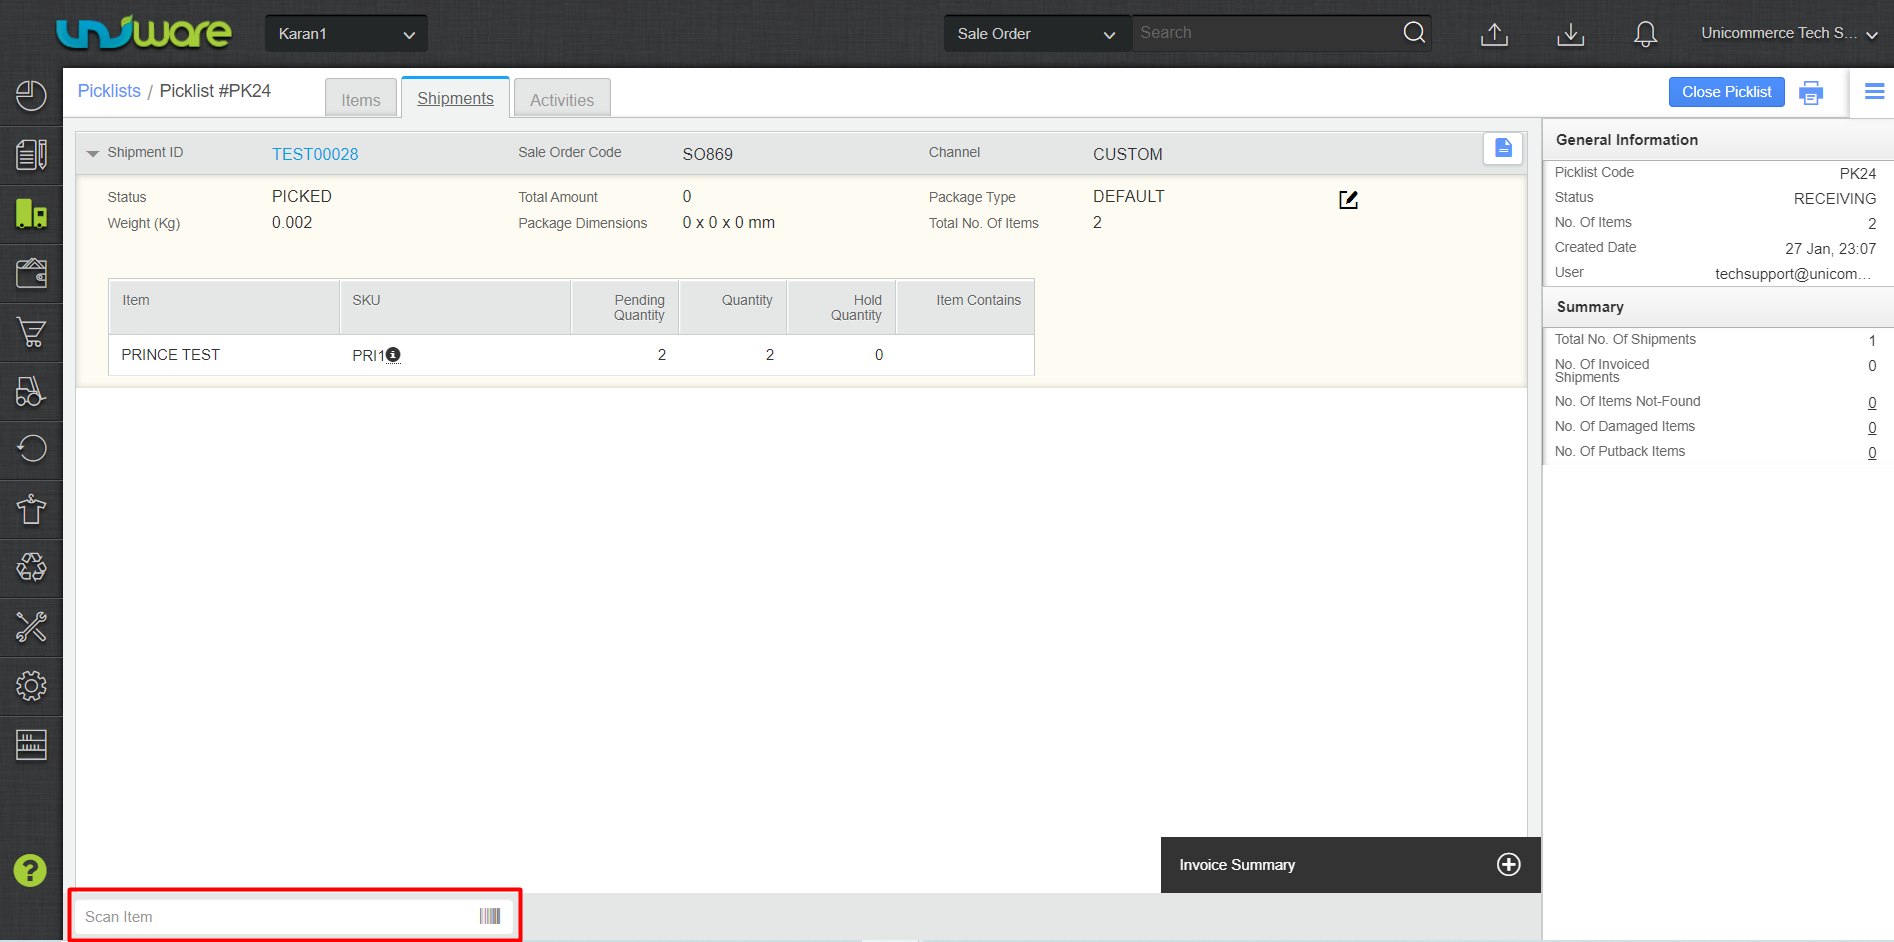
Create Picklist
Generate Picklist:
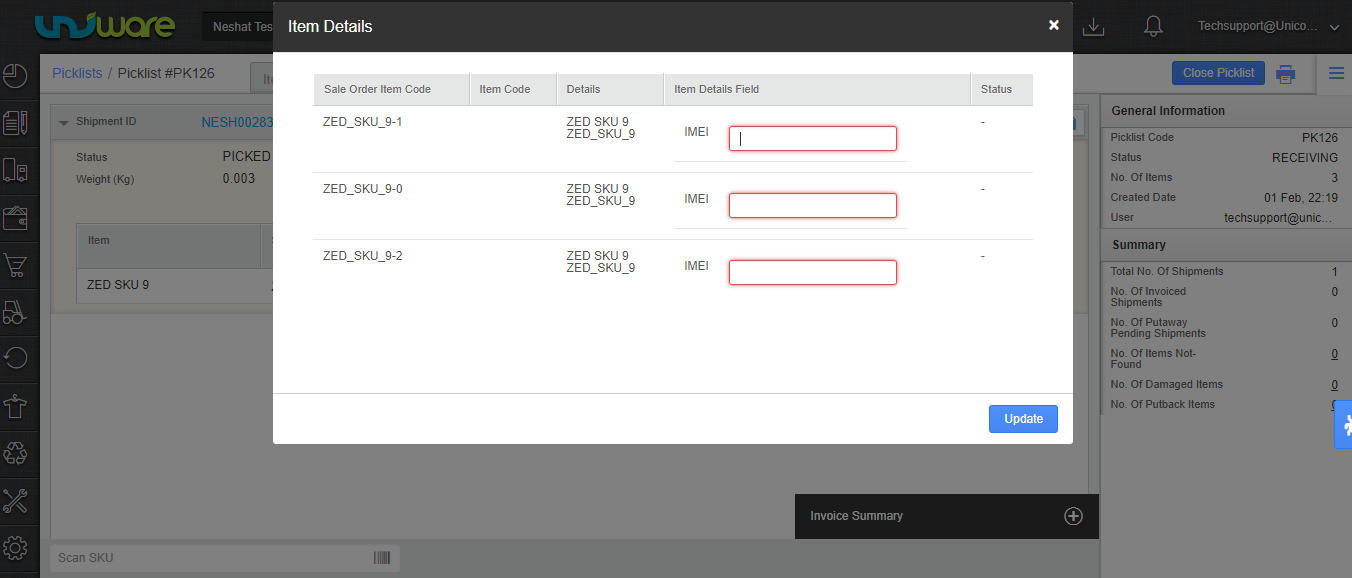
1-On the picklist page, go to the ‘Shipments’ tab and scan the item barcode.
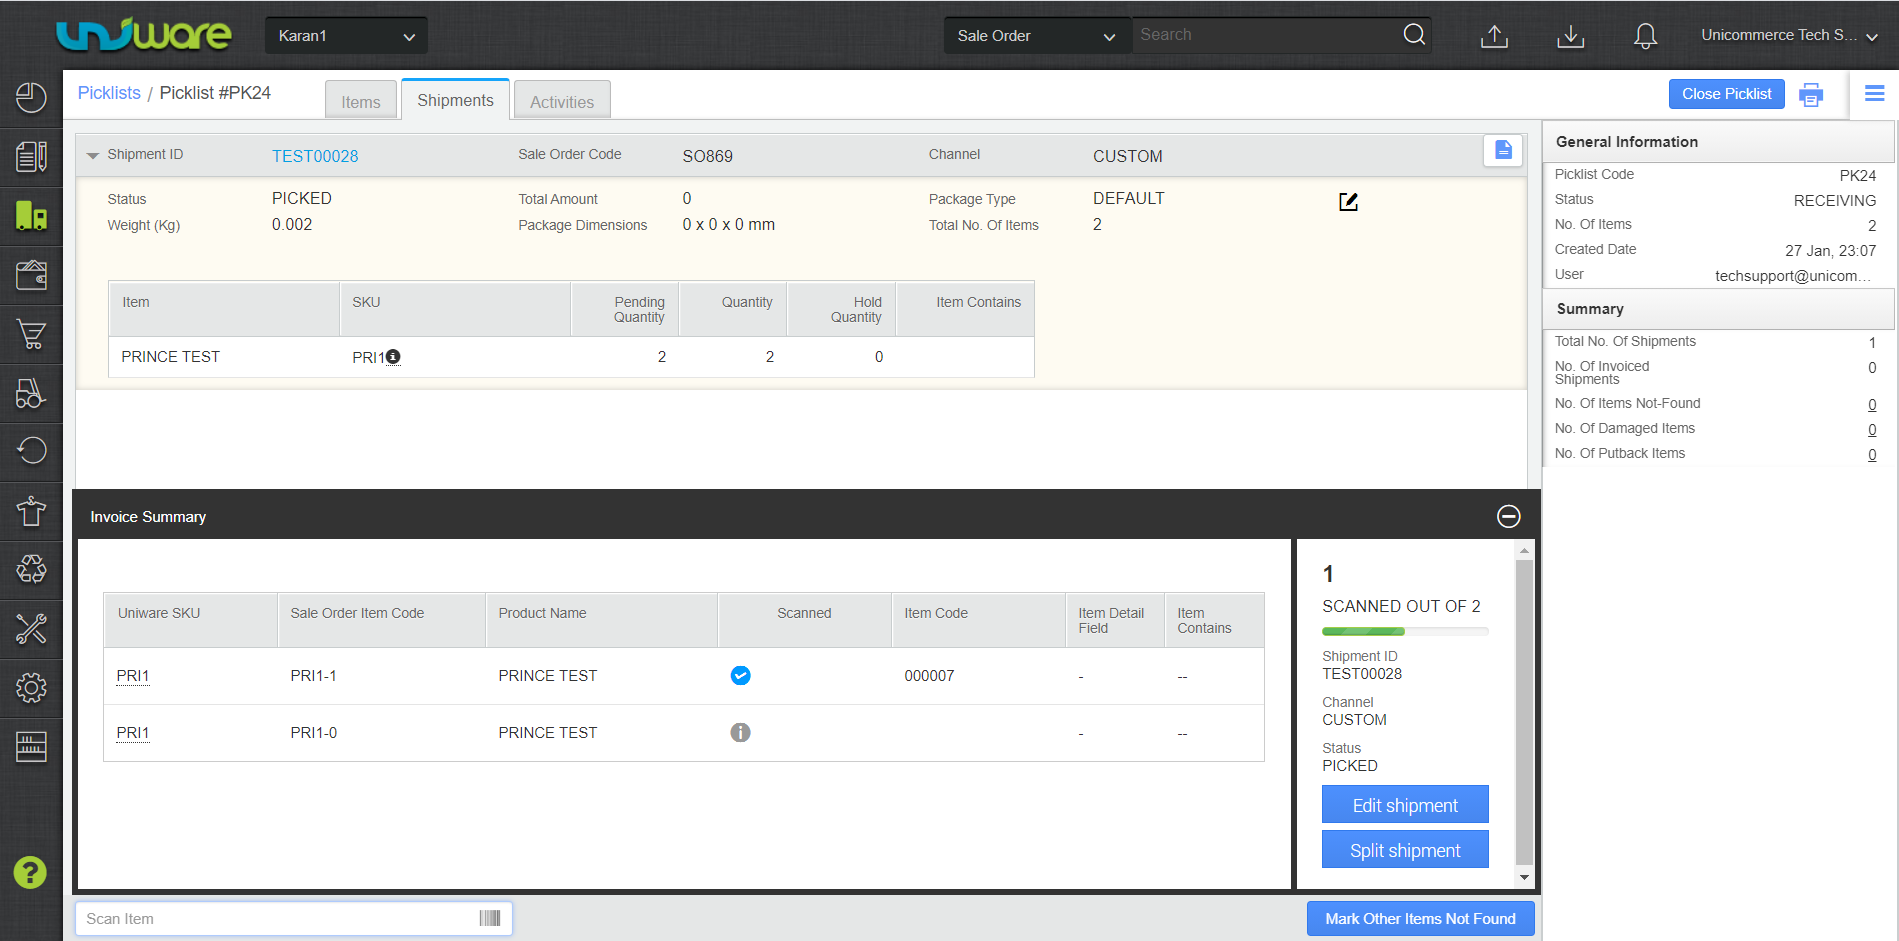
For Boxing With Packslip Enabled channel, system generates the packslip print.
Print Invoice
Follow the steps to Generate Invoice:
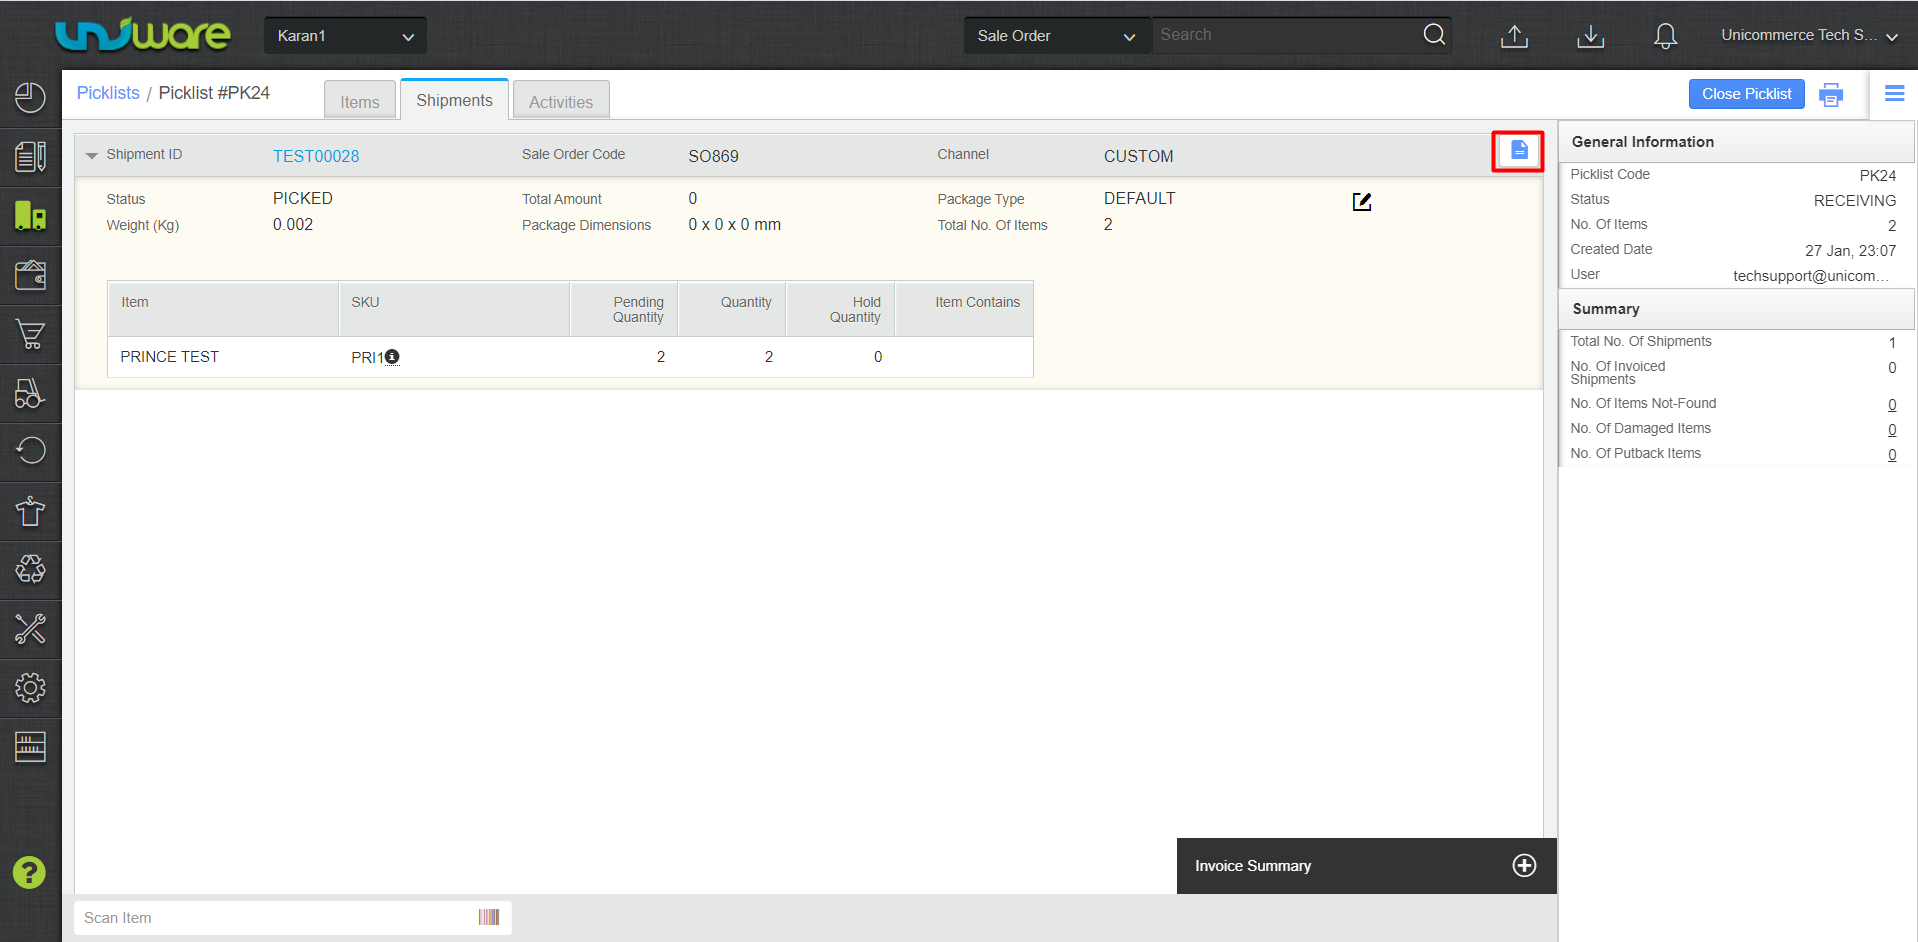
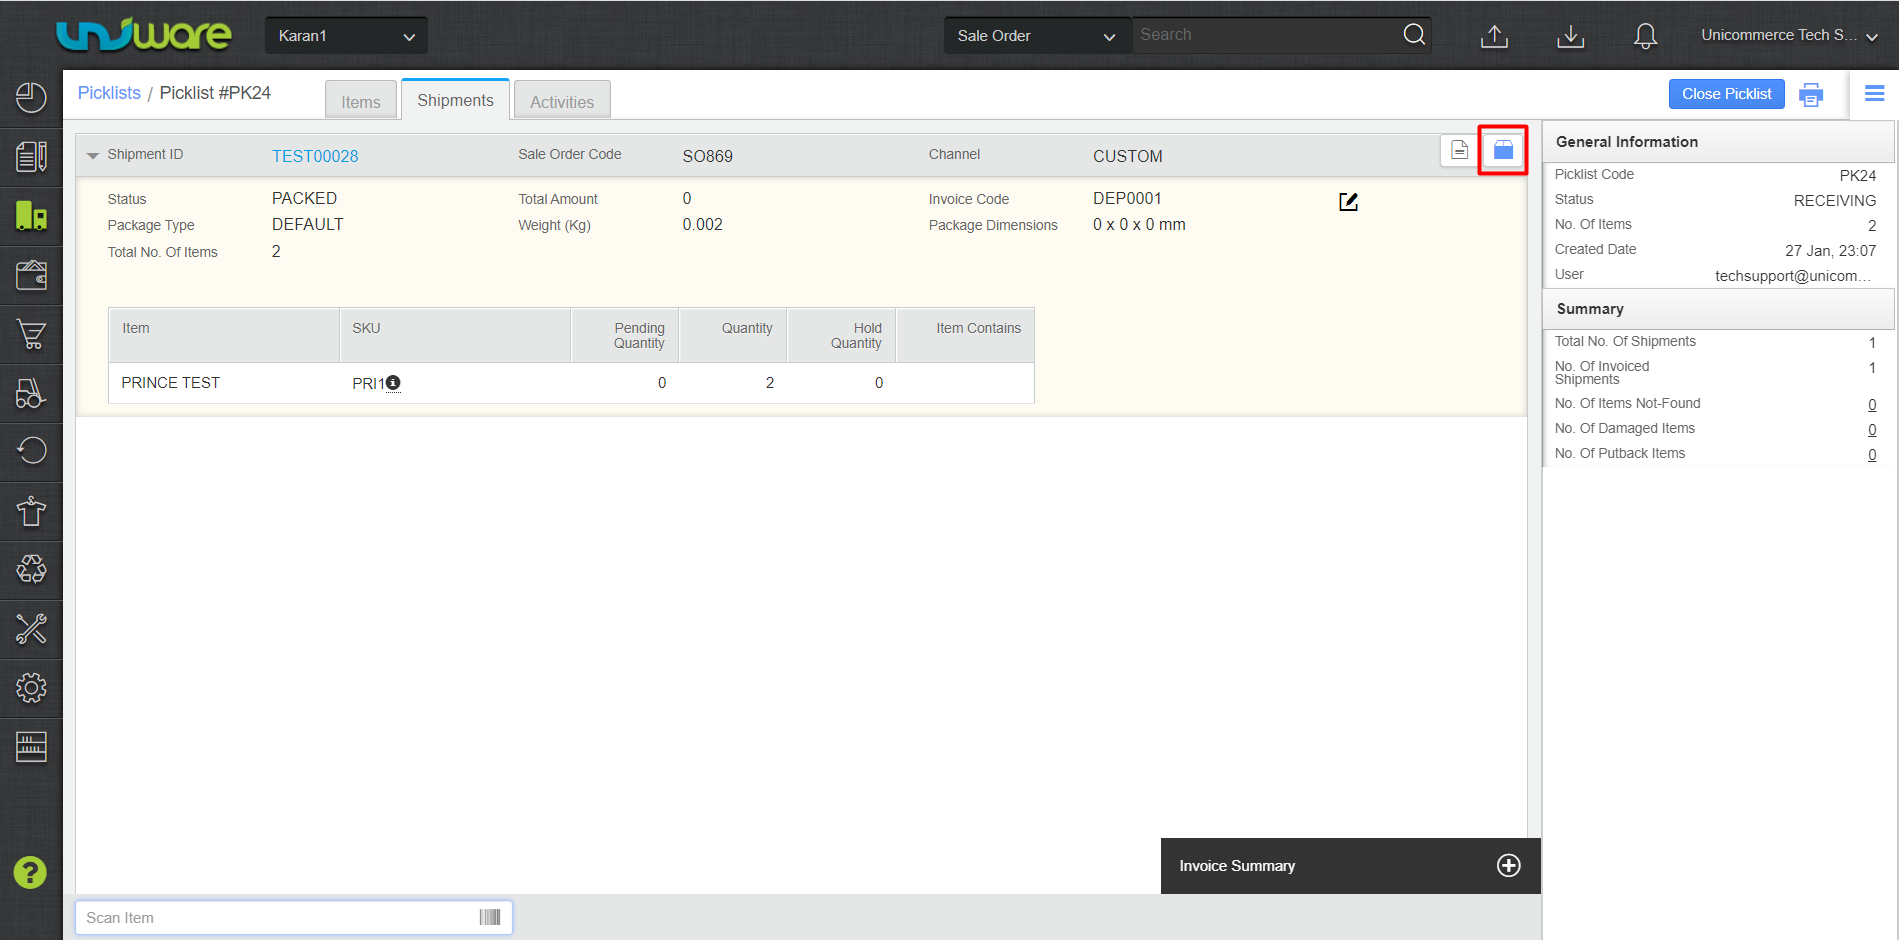
1-Click on the ‘Invoice’ Icon to generate the invoice.
Once the invoice get generated, user can generate the Label.
Print Label
Follow the steps to Generate Label:
1-Click on Label Icon to generate Label.
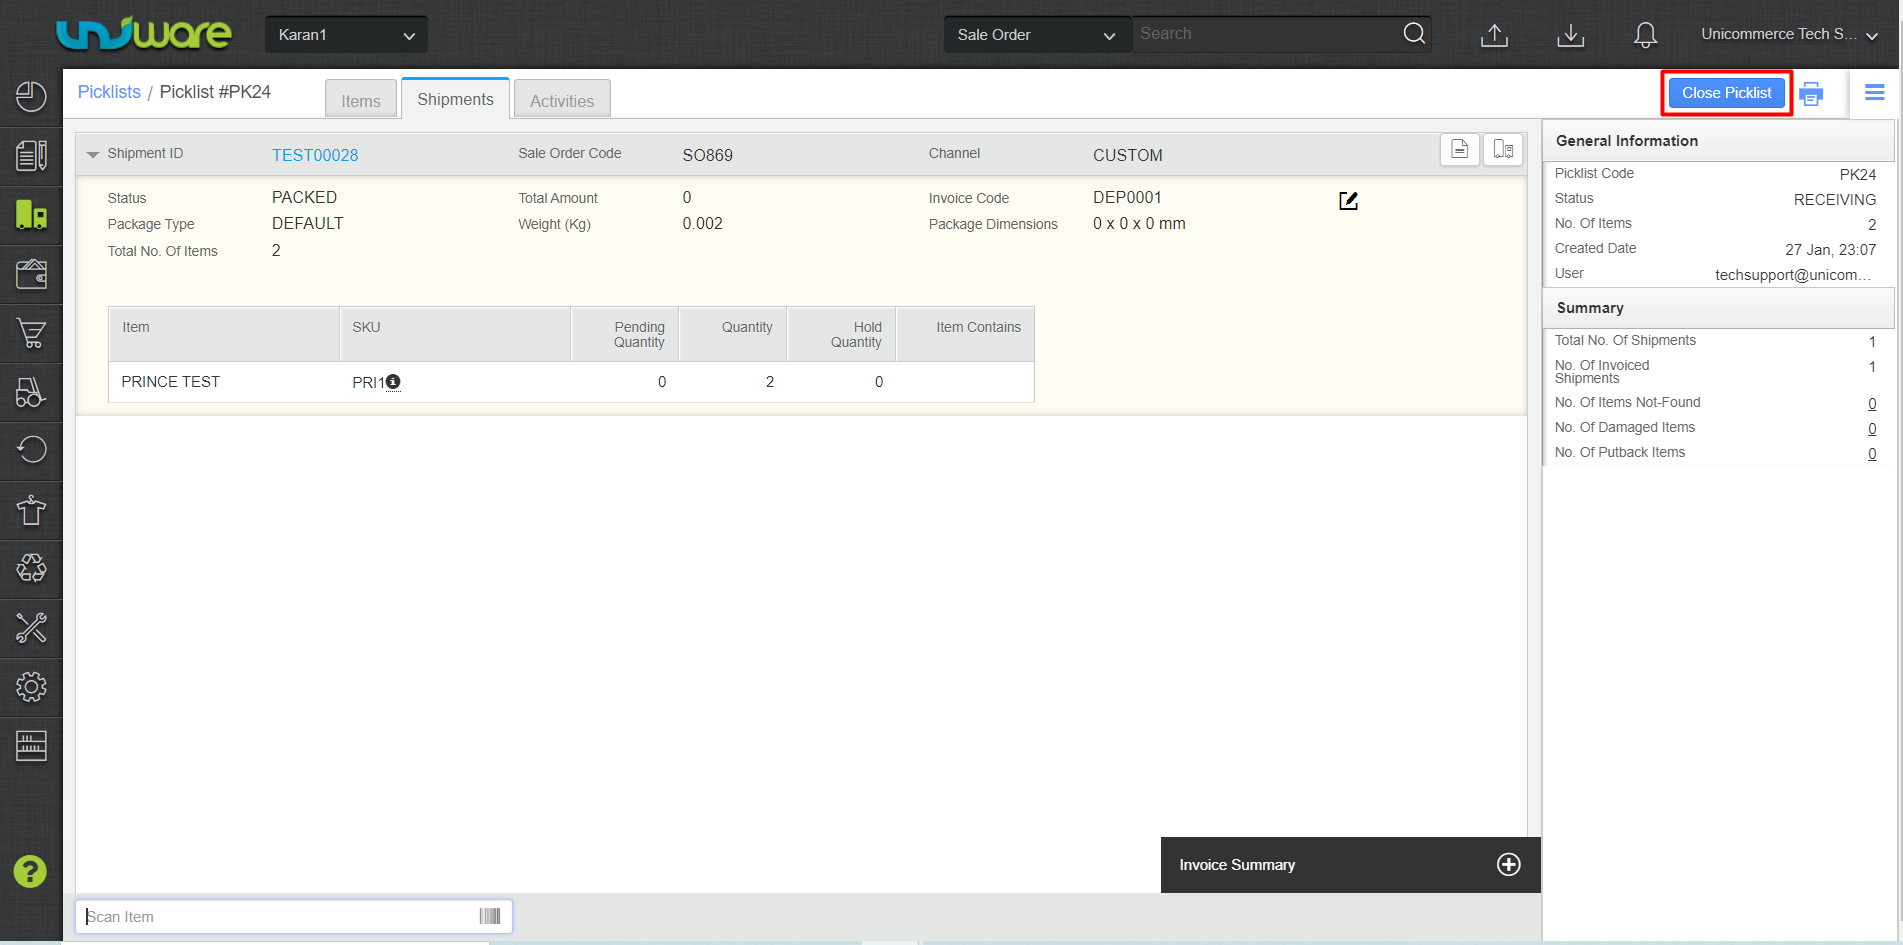
Similarly, generate invoices and labels for all other shipments in the picklist. Once all Labels will get generated then click on ‘Close Picklist‘, if not, the system will close the picklist automatically once no shipment item is present to take further action.
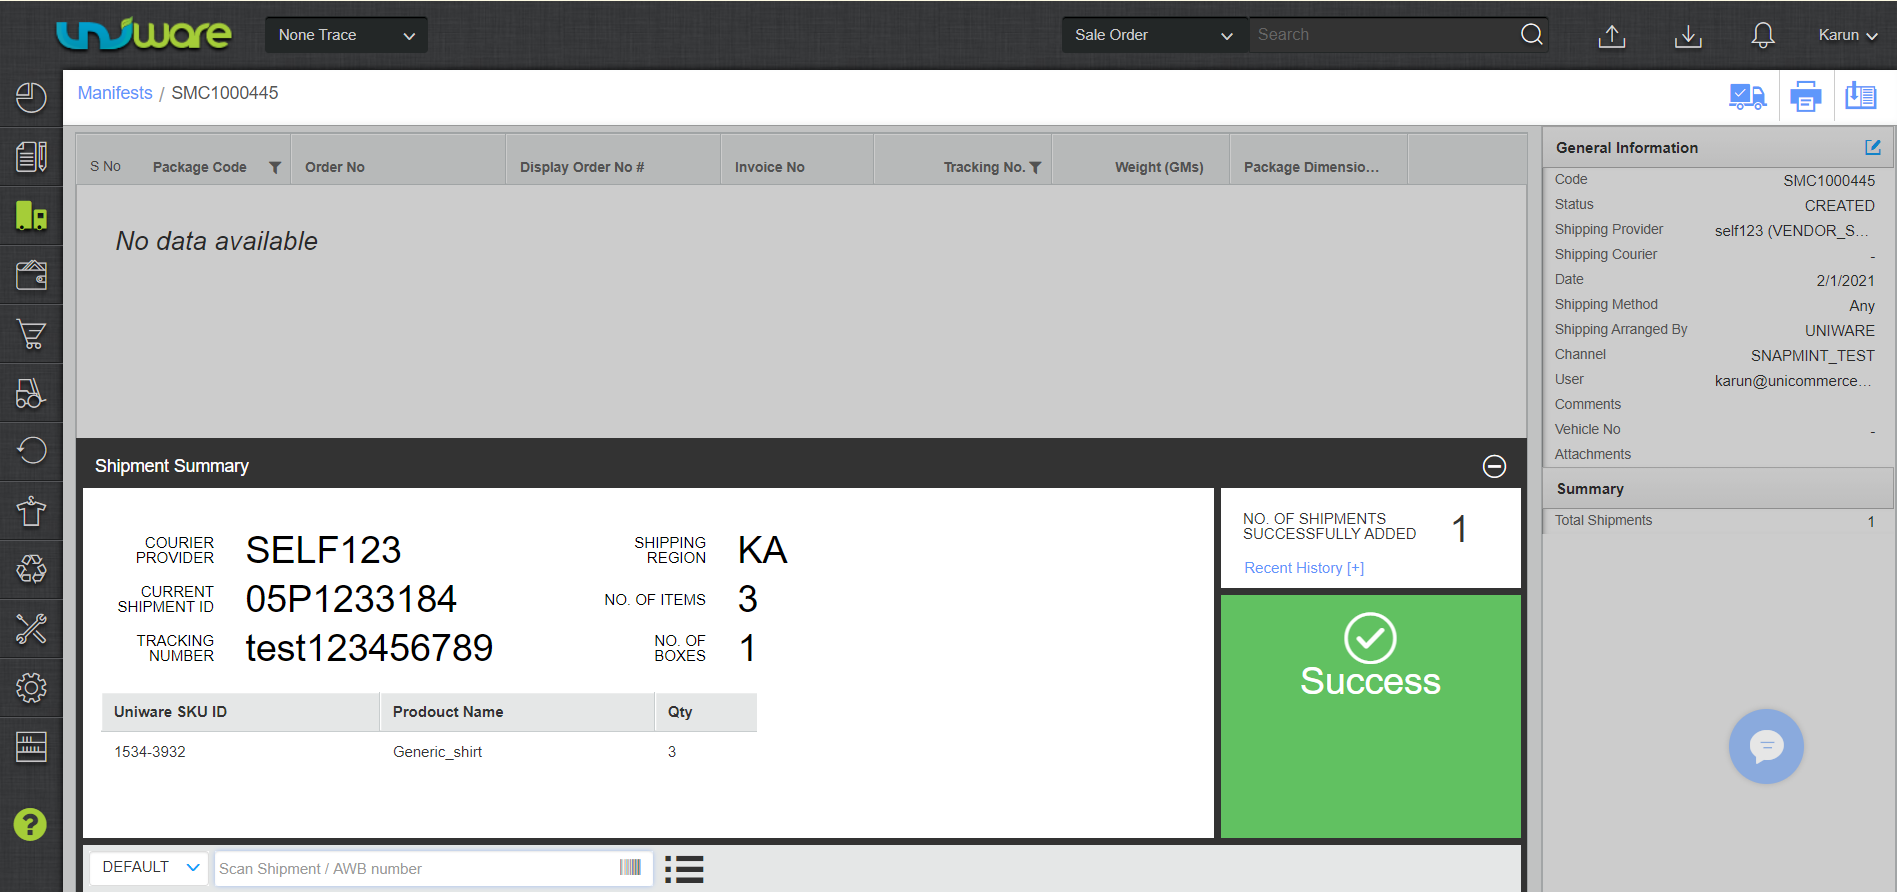
Create and Close Manifest
Follow these steps to create a Manifest:
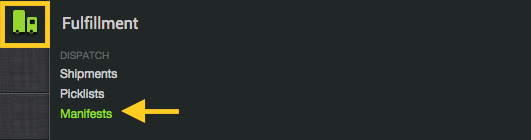
1- UI Navigation: Fulfillment > Manifests > Create Manifest
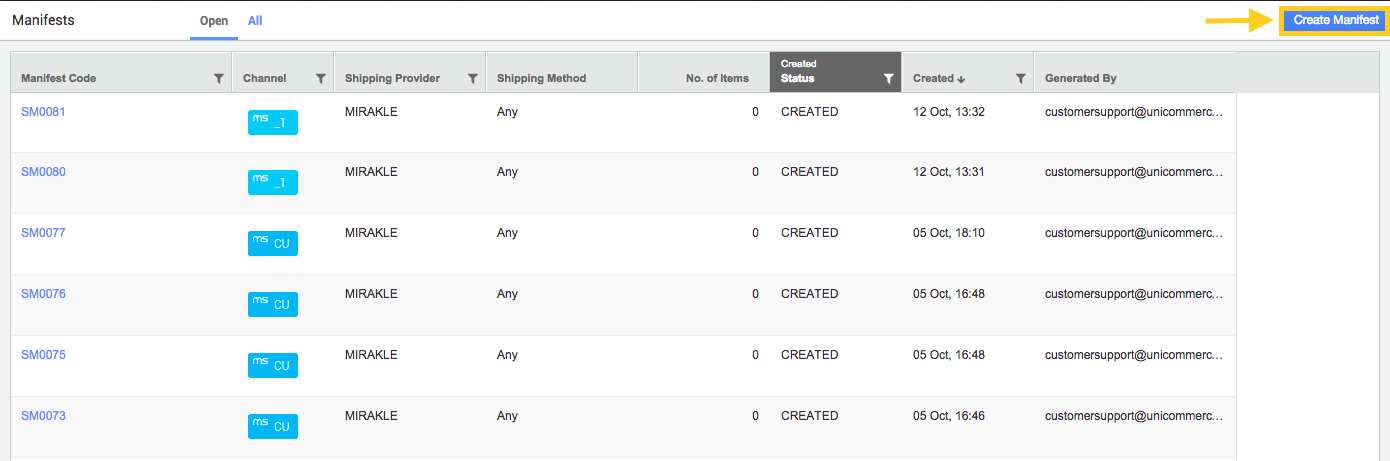
2- Enter the field details as per the description provided below:
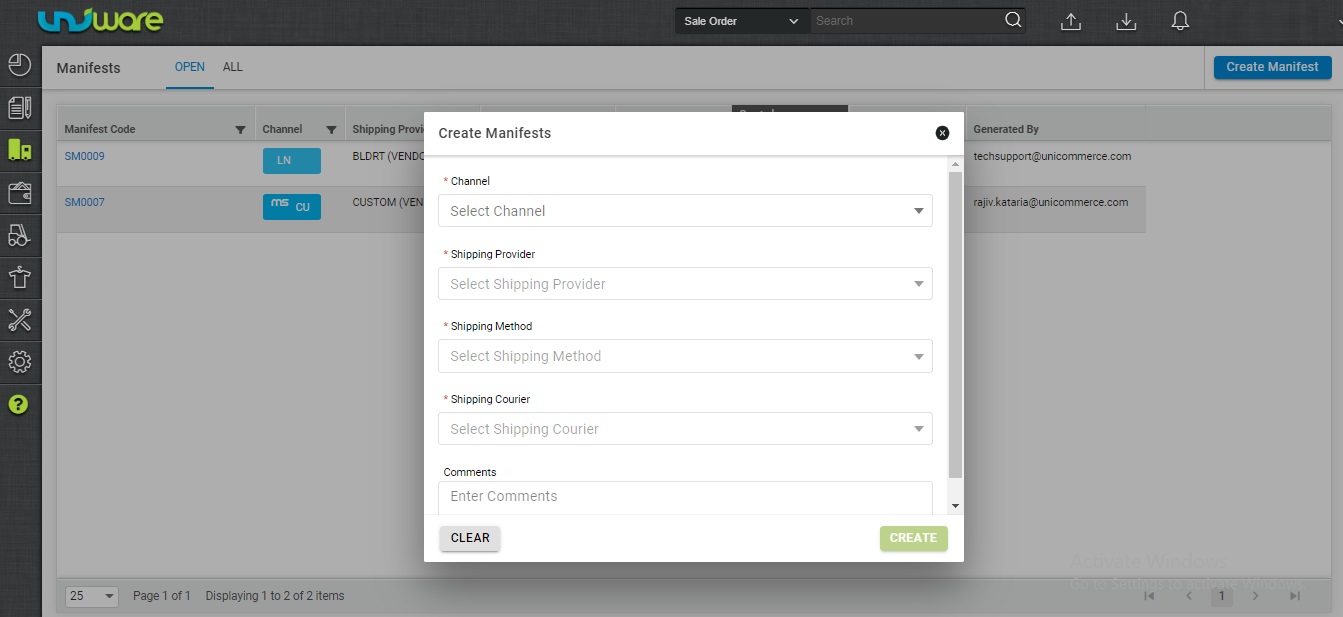
3-Click on ‘Create’ to Create Manifest
Load Manifest | Add Shipment to Manifest
After creating a manifest next step is to add shipments in that manifest that are ready to dispatch. This can be done in two ways as mentioned below:
One by One
1-In the shipment summary section, enter or scan the barcode of the shipment id or AWB No.

2-Every successful entry will add the package to the manifest. Repeated the same way to add more packages that are ready.
1-In shipment summary section, there is an option to check all existing ‘Ready to Ship’ packages for the selected courier provider and channel. Click on the ‘Three Bars List’ icon to populate it.
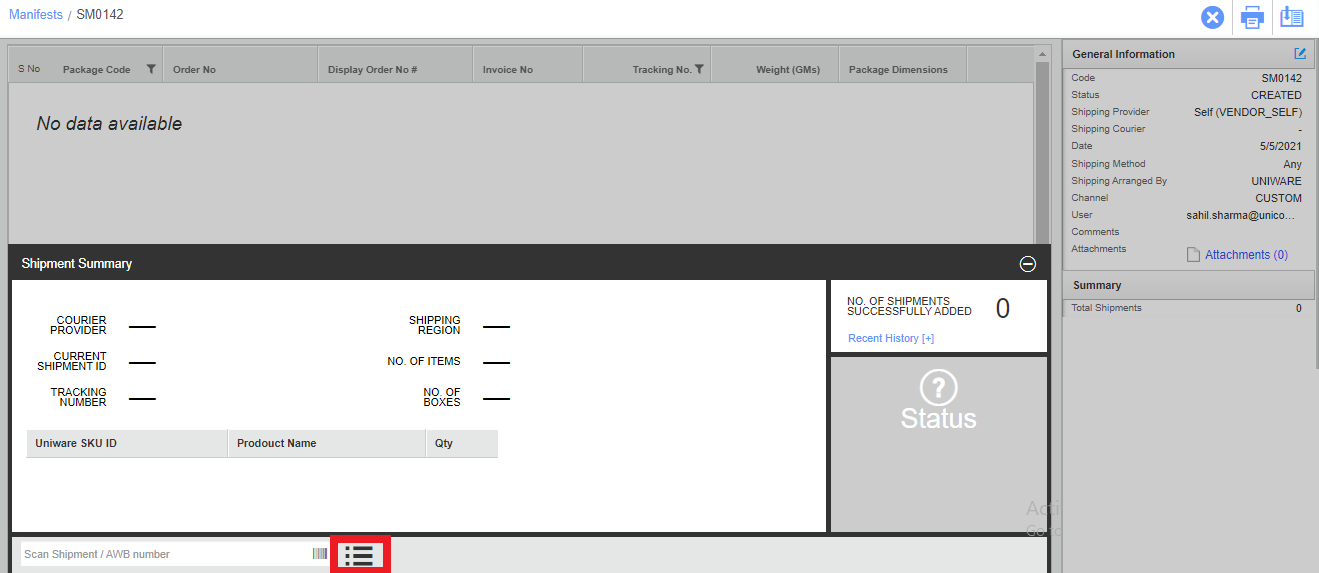
2-From here shipments can be added to the manifest.
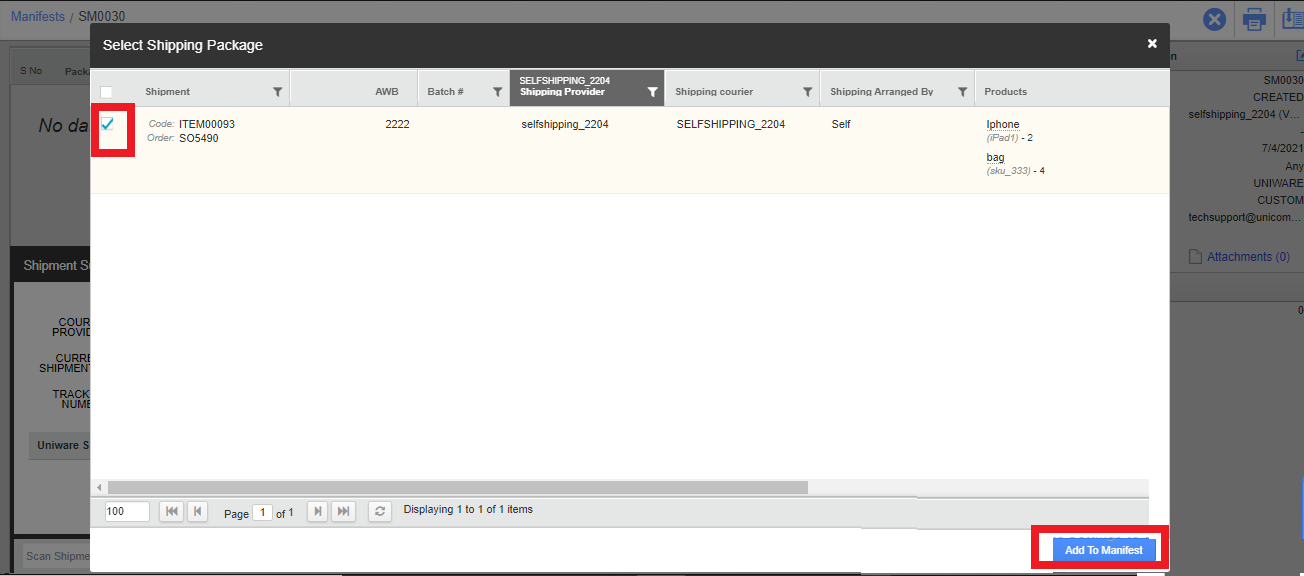
3-By the ‘Add to Manifest’ button user can add the packages to the manifest. Repeated the same way to add more packages that are ready for handover.

4-After loading the packages to the manifest user can close the manifest.
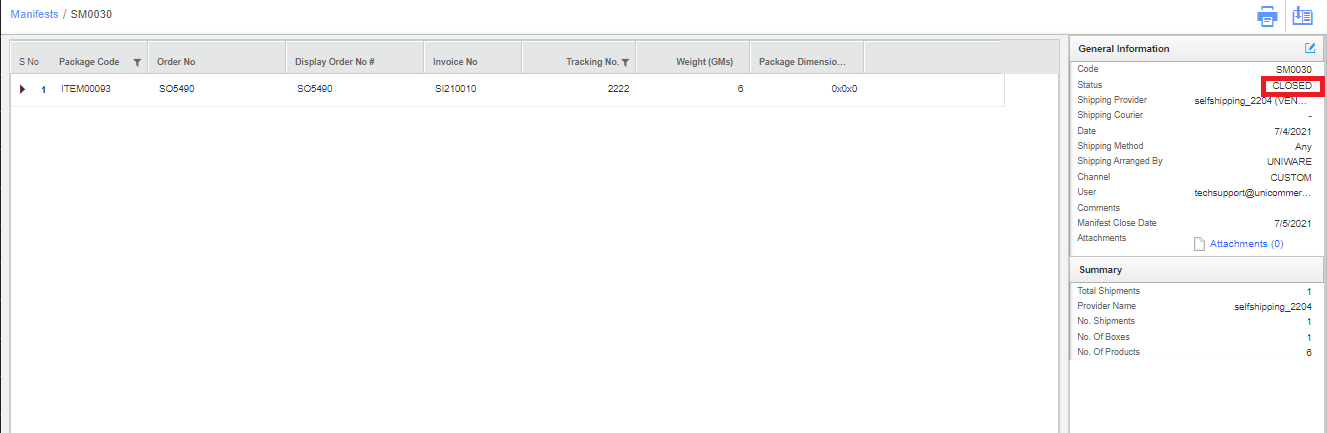
Close Manifest
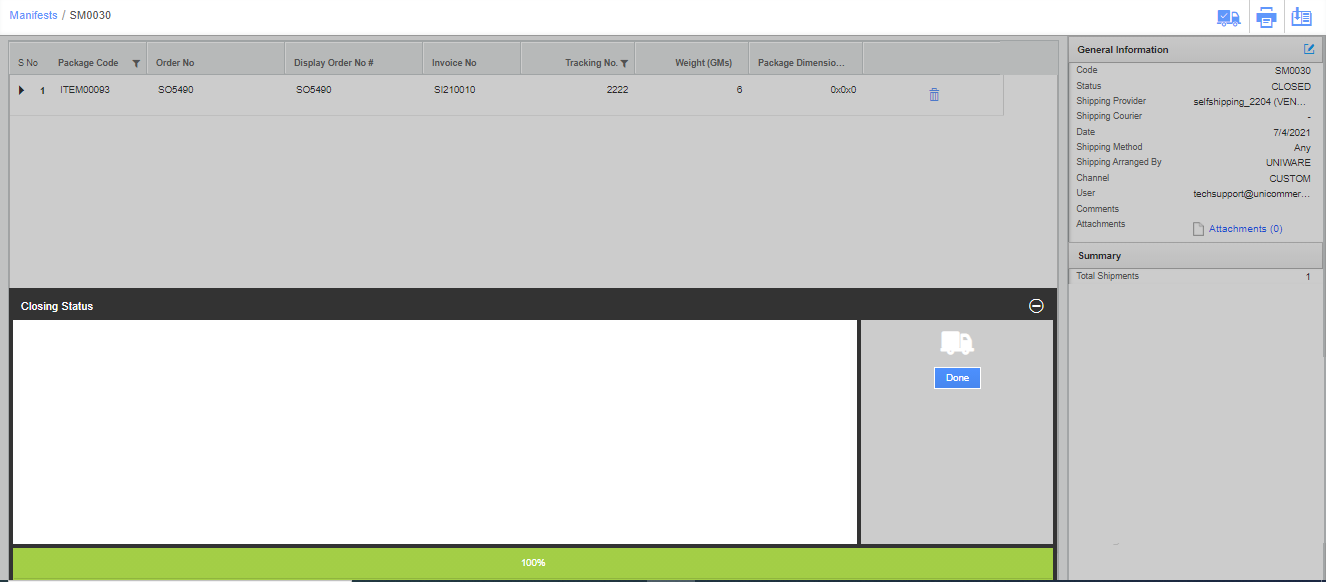
1-Click on the truck icon to close the manifest.
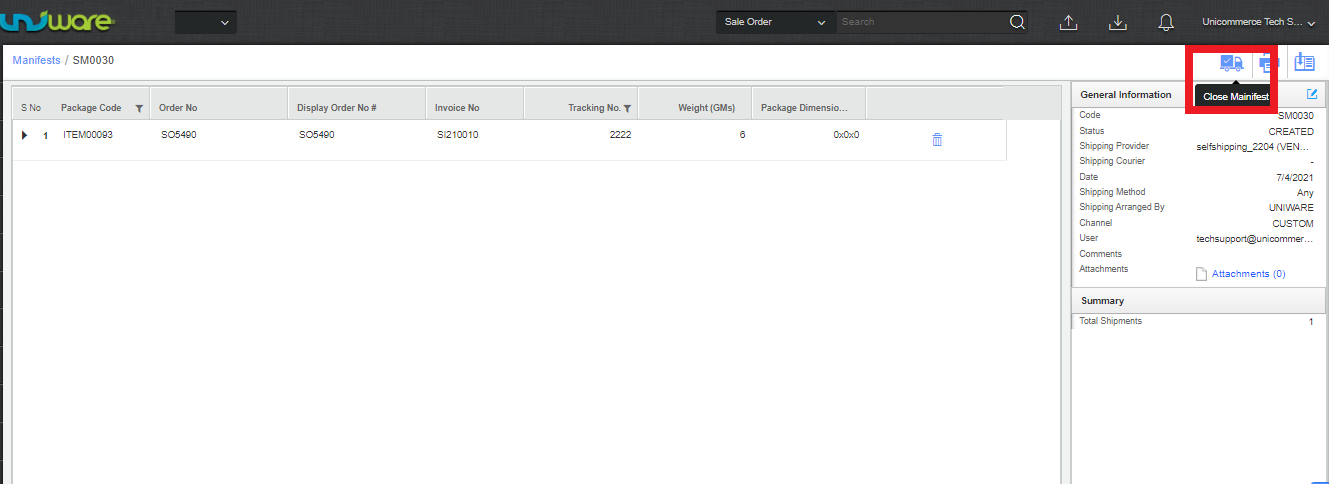
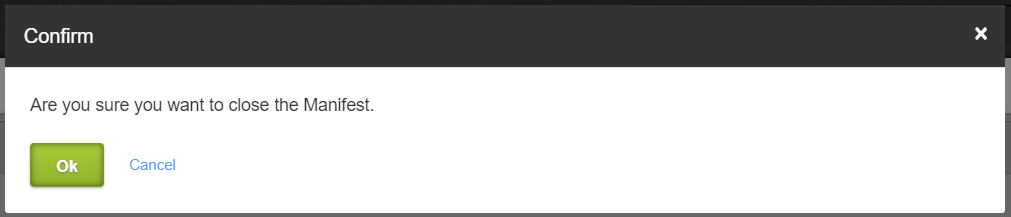
2-Click ‘Ok’ to confirm closure.
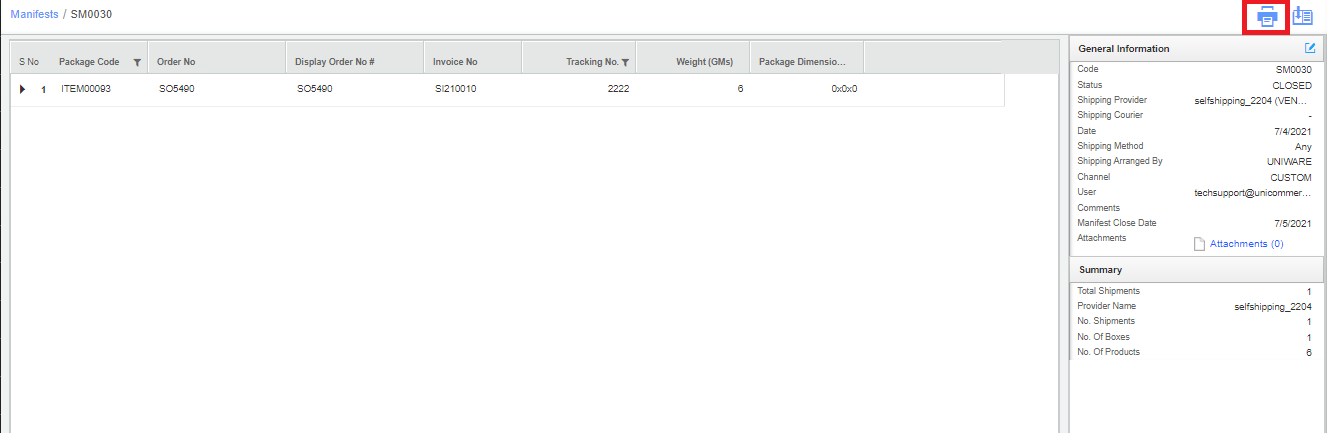
 Print Manifest
1-Click on the ‘Print’ Icon to print the manifest. This option is always present in the page manifest but we recommend to take print after a successful closing of the manifest.

Note:
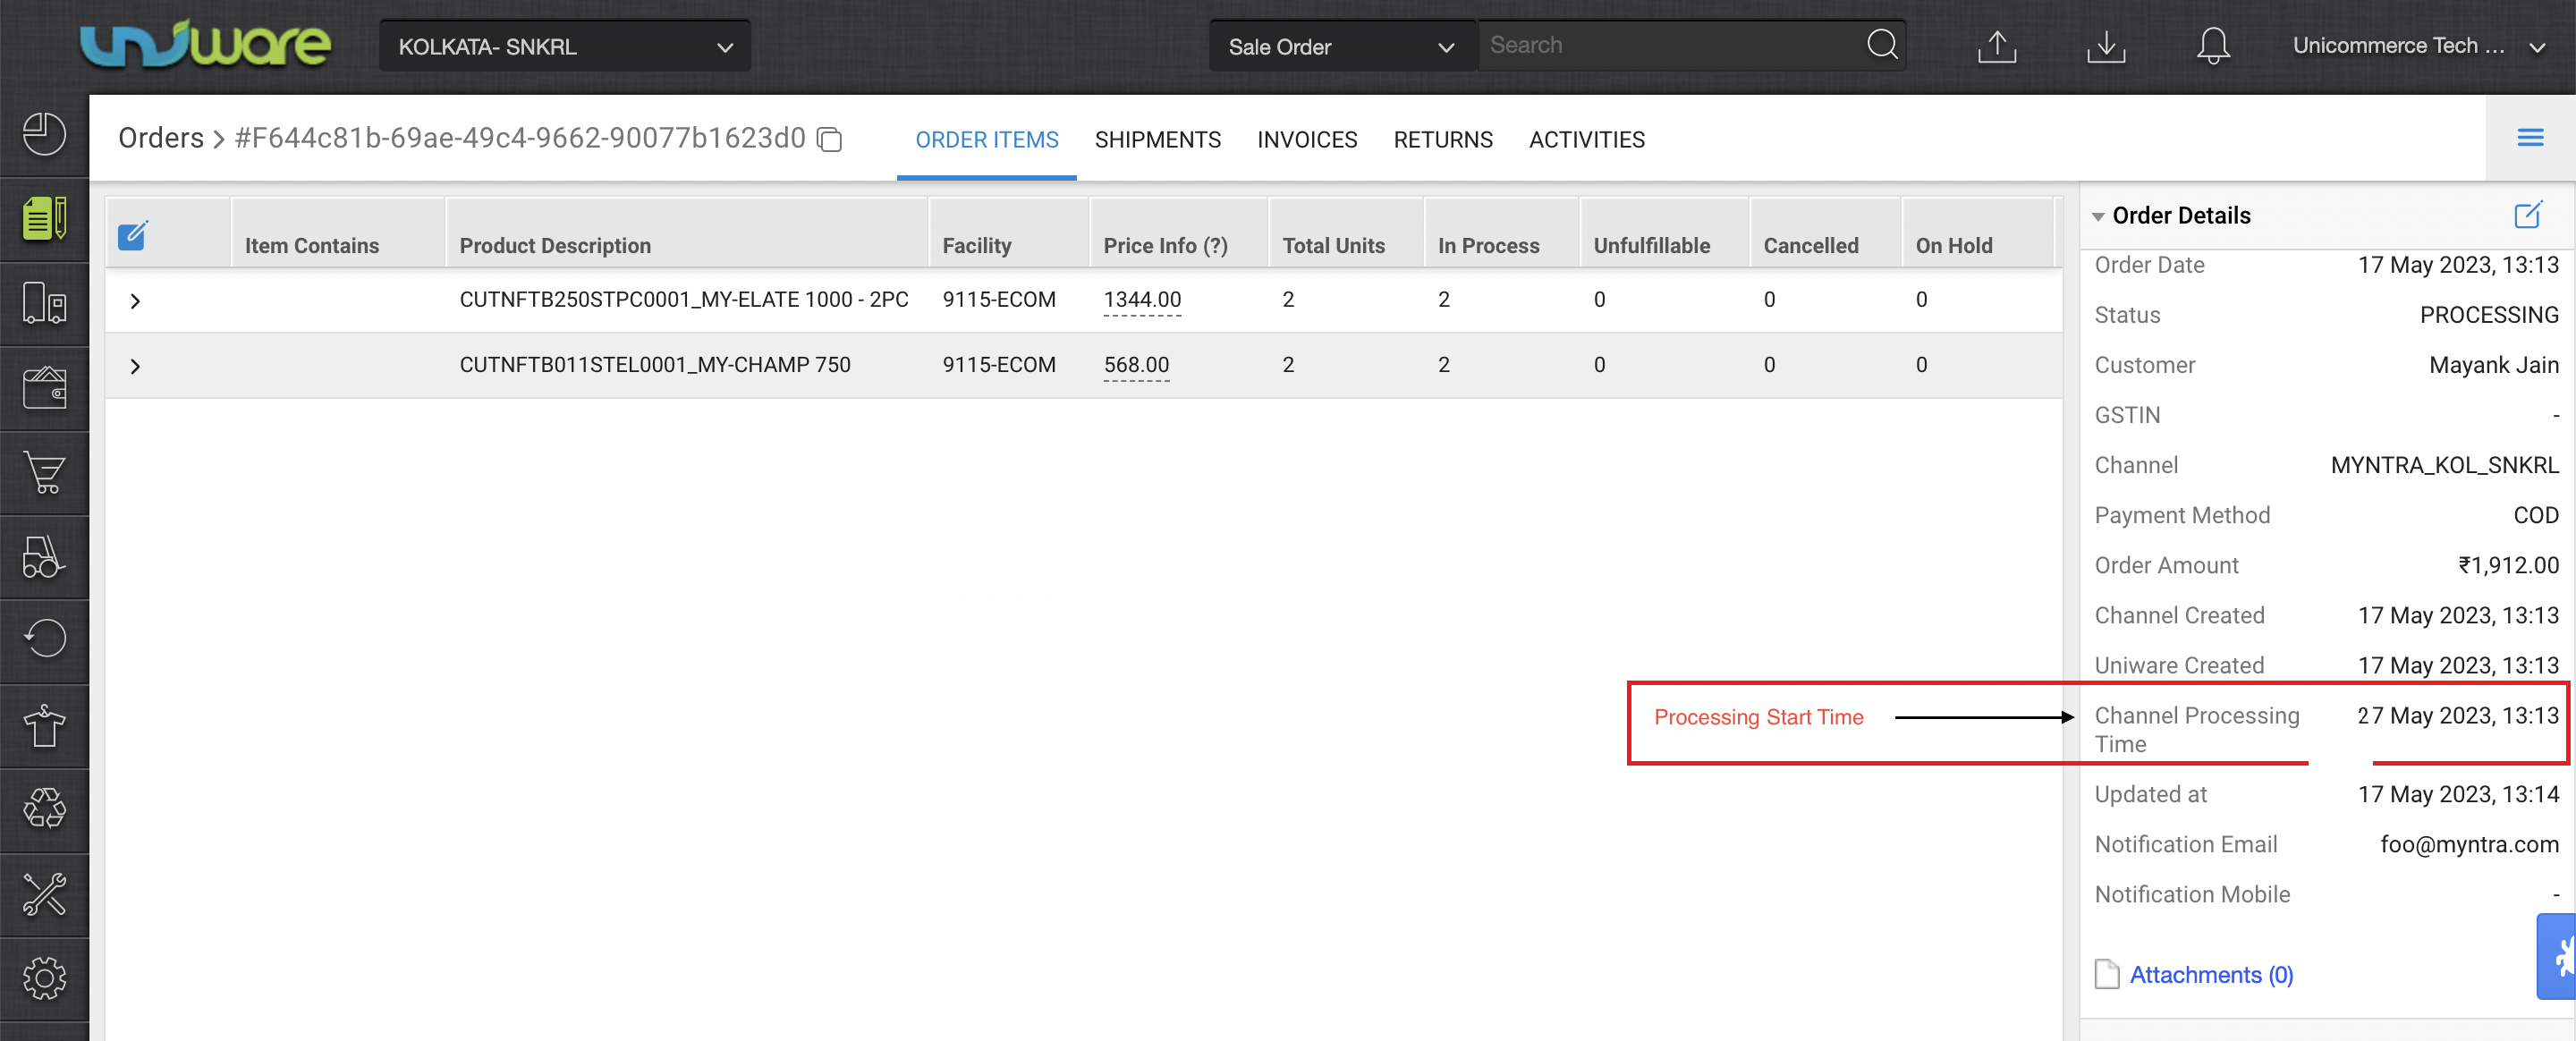
Channel Processing Time:- For selective channels ‘ orders there can be “Channel Processing Time” will be there with a future date and until this time is achieved or lesser then current time no picklist can be created.
For such orders check box option to select for picking will not visible.
.