
Once any order is “created” in the system, Uniware does inventory allocation for the ordered item(s). If the inventory is available, the item is marked Fulfillable, else Unfulfillable. Once the inventory is allocated to order items, the shipment(s) is get created and visible in “New” tab which is identified with a shipment ID in Uniware.
Order status is set to “processing”. During this, the shipment(s) (order items get picked from shelves), packed, ready to ship, manifested and then dispatched to the user. As soon as the shipping package is dispatched successfully, the order status is set to “complete”. The order can be “cancelled” before Item (s) are being dispatched and after dispatched it can only return in system.
The order processing consists of the following tasks:
-
Generate Invoice
-
Generate Label
-
Create and Close Manifest
Note:- Few steps need to be taken care of while order processing as per the channel SOPs.
Process Flow:
For order processing with None traceability system, follow the below steps:
Generate Invoice
Bulk Selection:
Follow these steps to Generate Invoice :
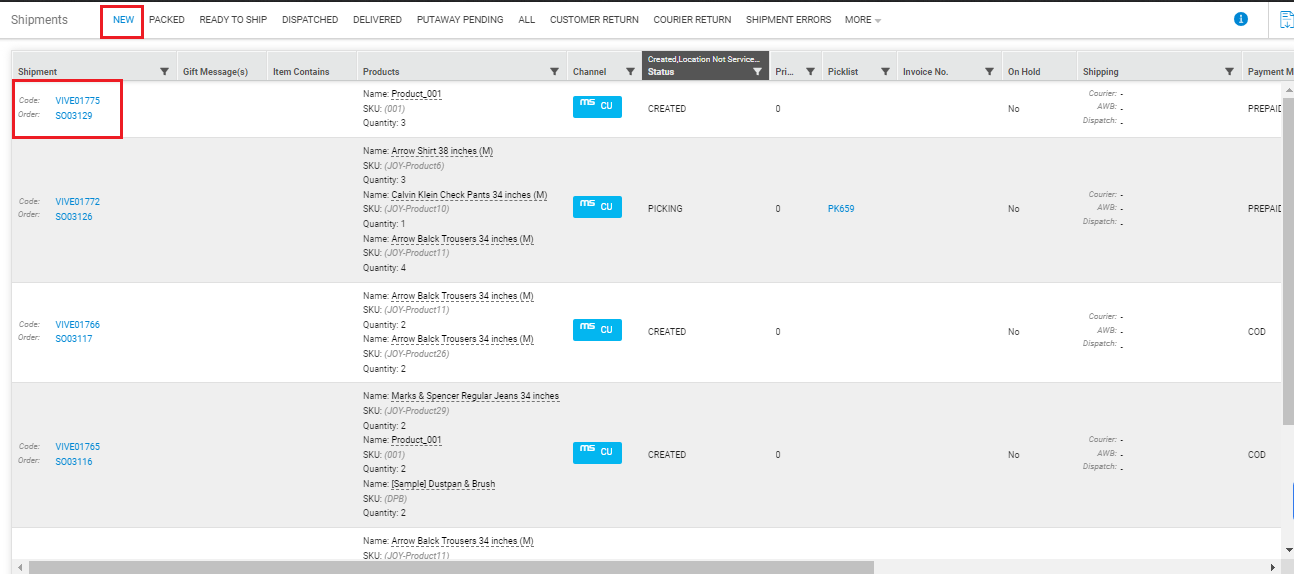
1. UI Navigation: Fulfillment > Shipments > {Orders listed under New tab}

2. Select few or all order(s), from the checkbox, against the order code.
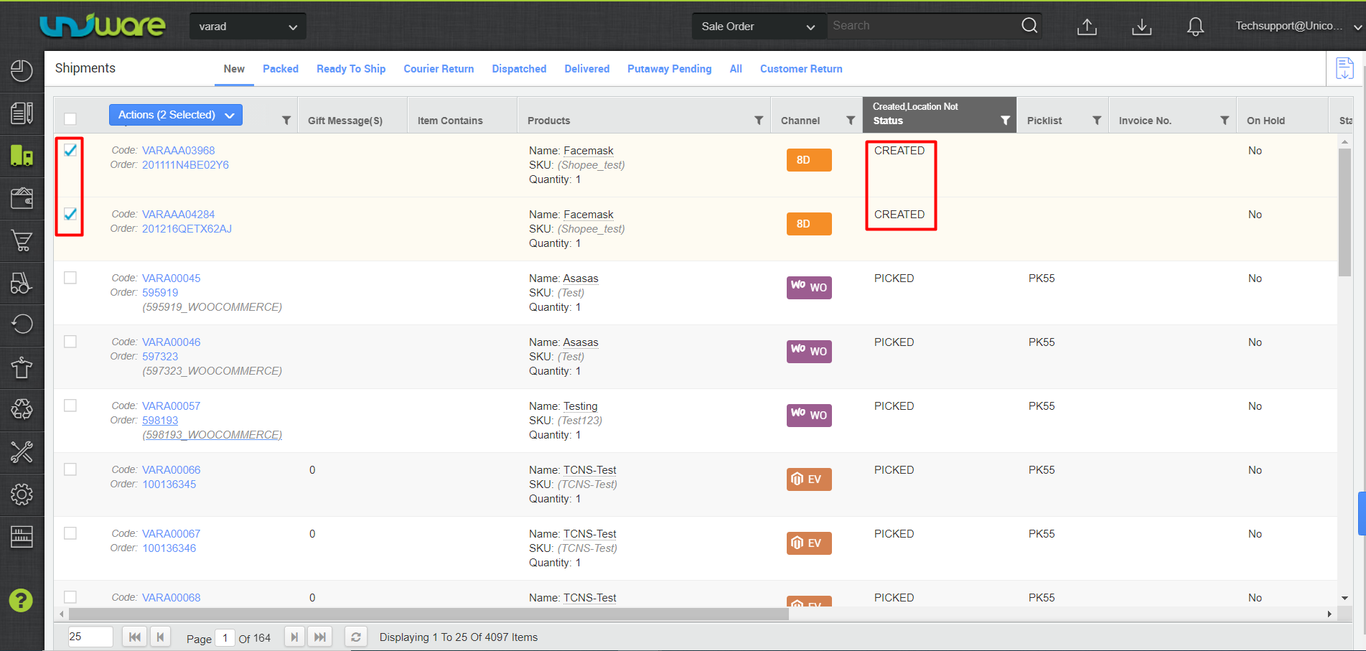
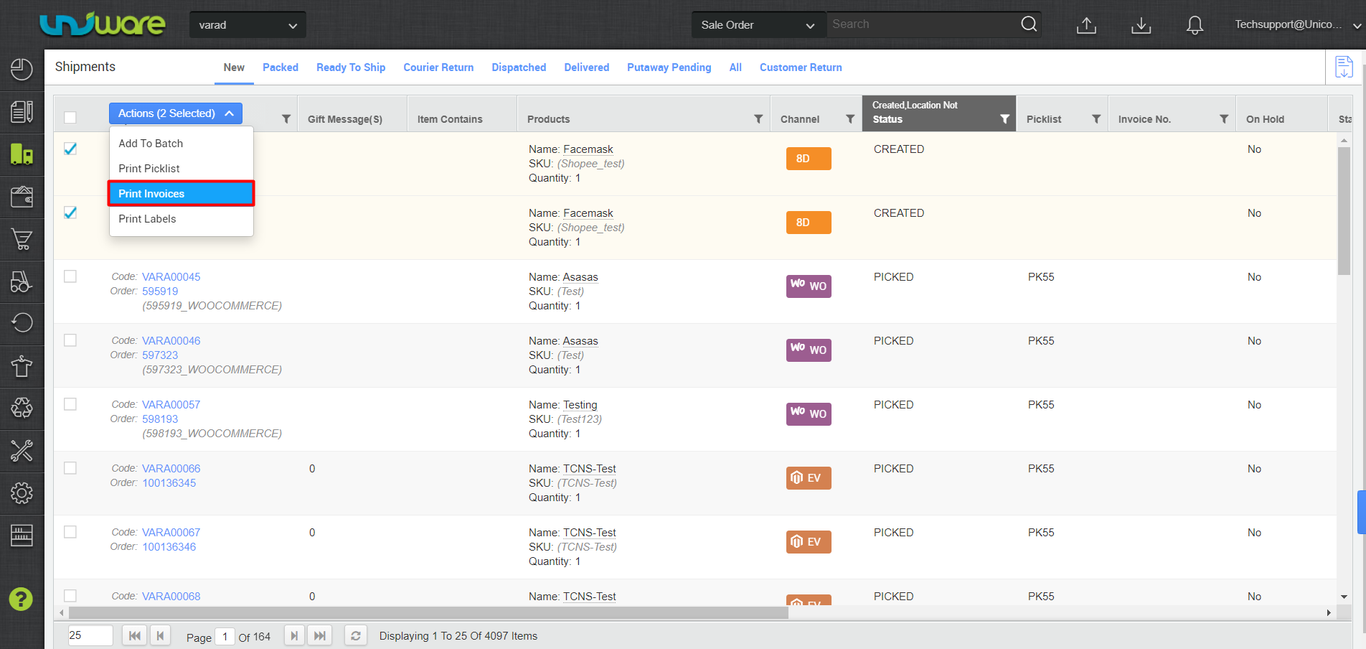
3. From Actions dropdown menu, select Print Invoices.
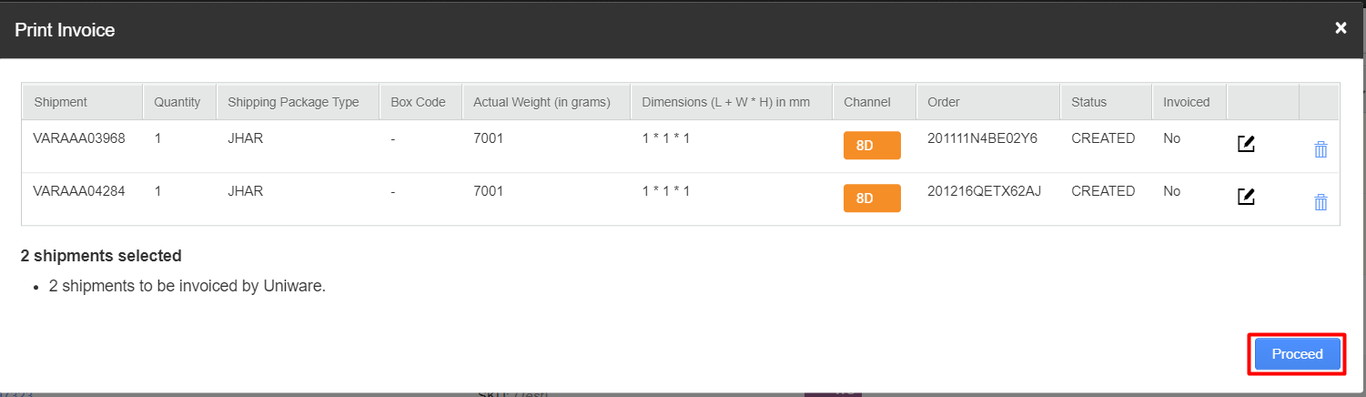
4. Click Proceed.
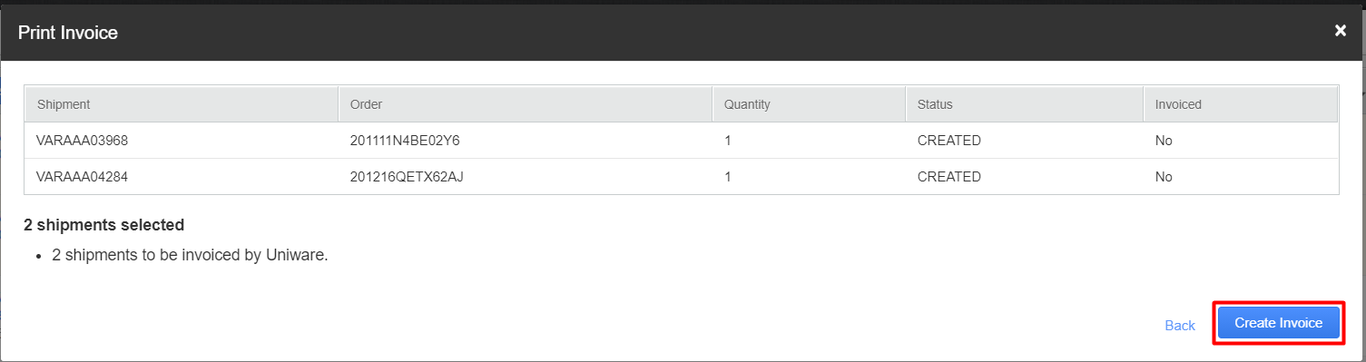
5. Click Create Invoice.
6. Click Print for Generating Invoice.
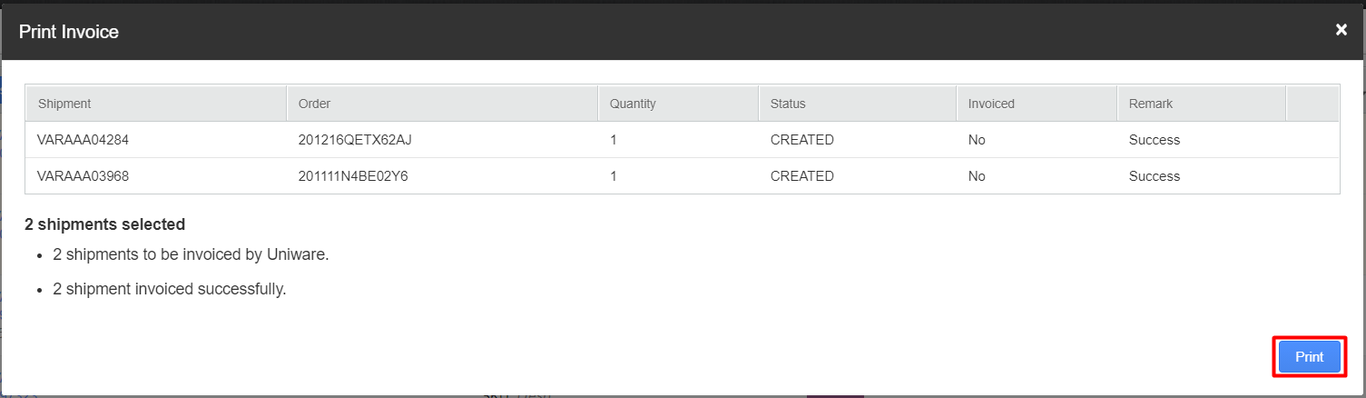
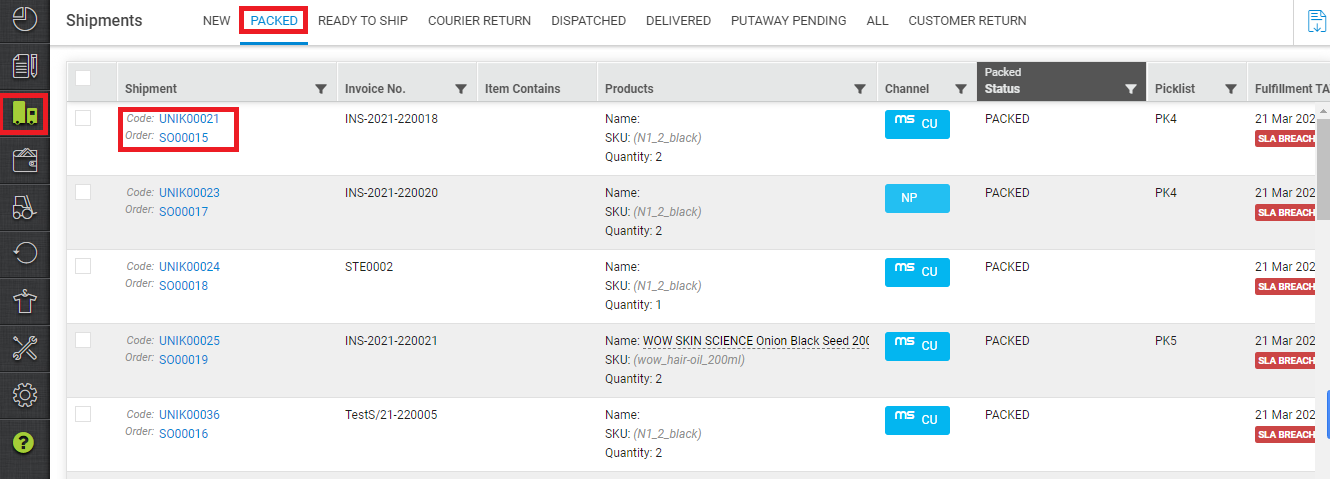
Once the invoicing is done for the shipment, its status changes to Packed and it moves under the Packed tab.
One by One
Follow these steps to Generate Invoice:
1. UI Navigation: Fulfillment > Shipments > {Orders listed under New tab}
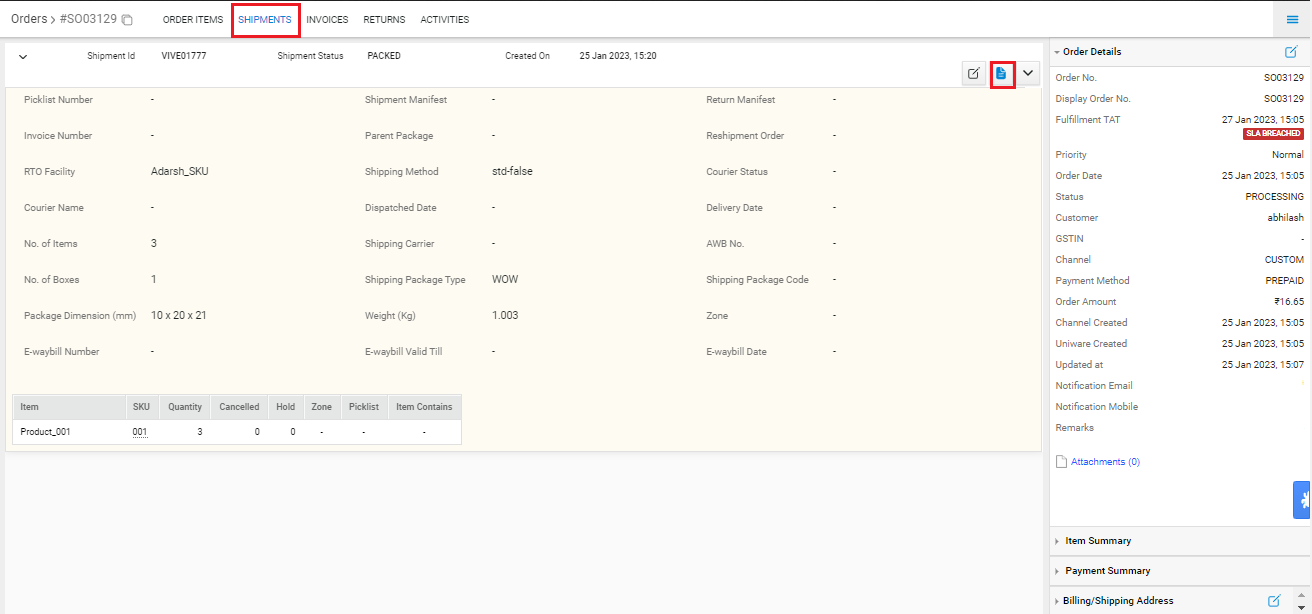
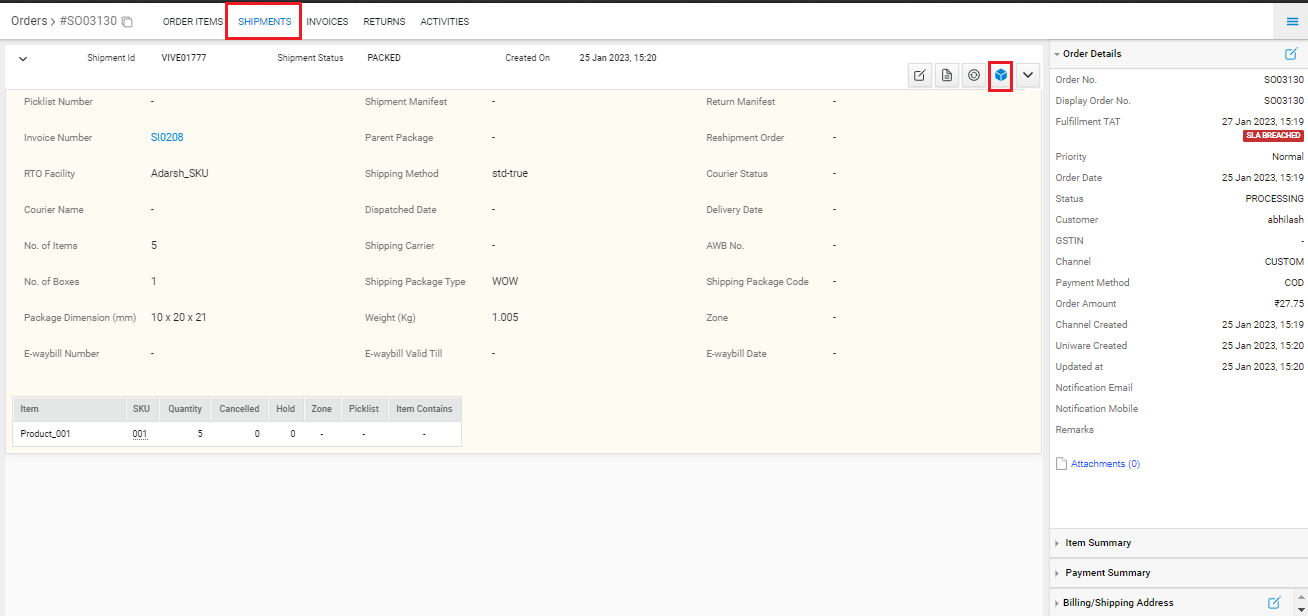
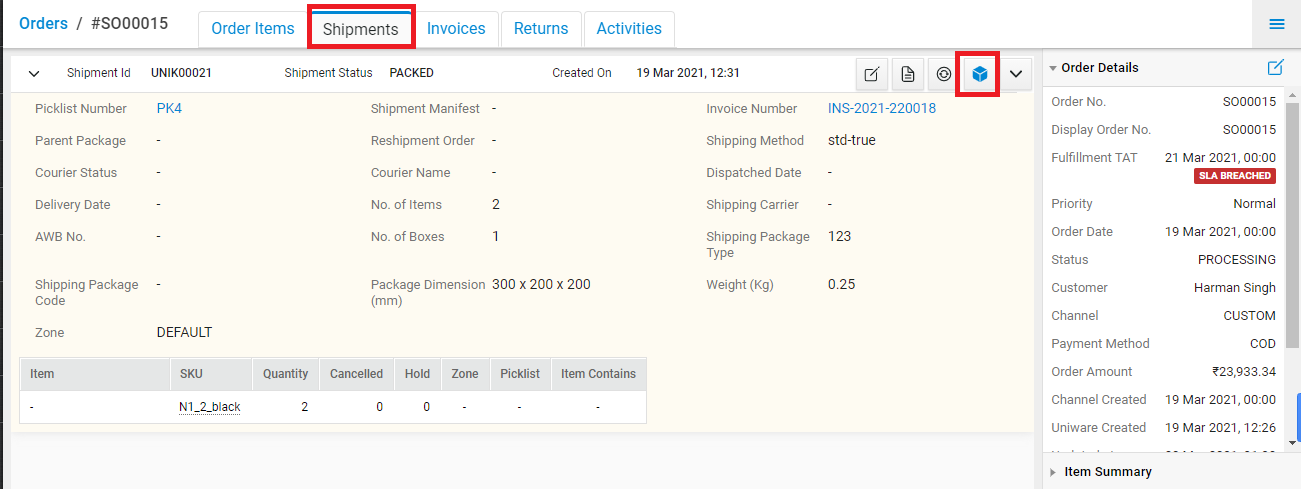
2. Click on any shipment and go in order’s shipment page and Click on the Invoice button to generate Invoice.
Generate Label
Bulk Selection
Follow these steps to Generate Label :
1.UI Navigation: Fulfillment > Shipments > {Shipments listed under Packed}
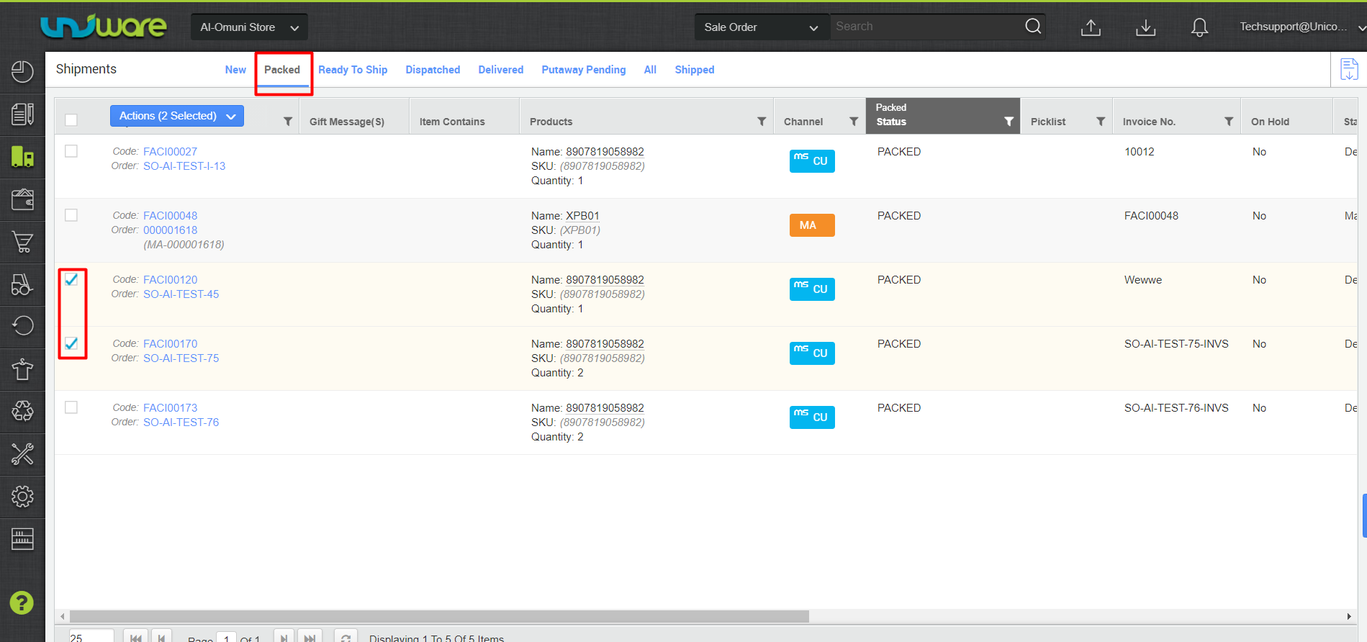
2. Select few or all shipments, from the checkbox against each shipment.
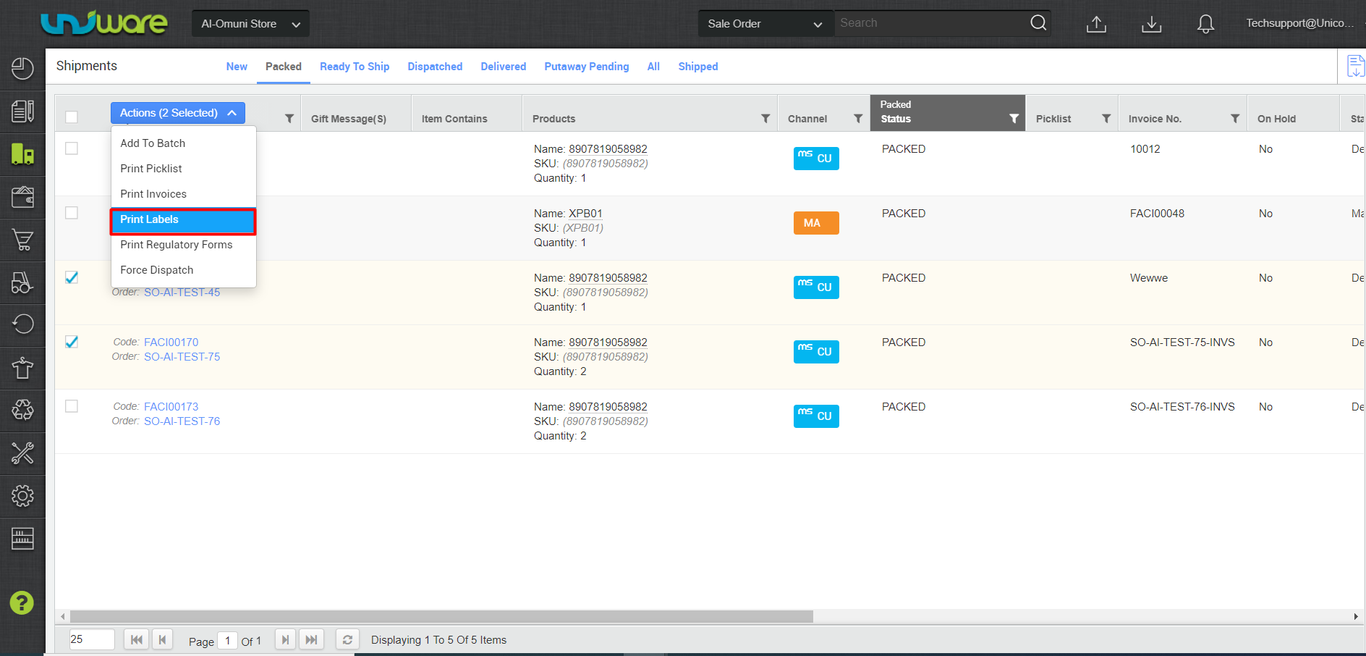
3. From Actions dropdown menu, select Print Label.

4. Click on Allocate Courier.
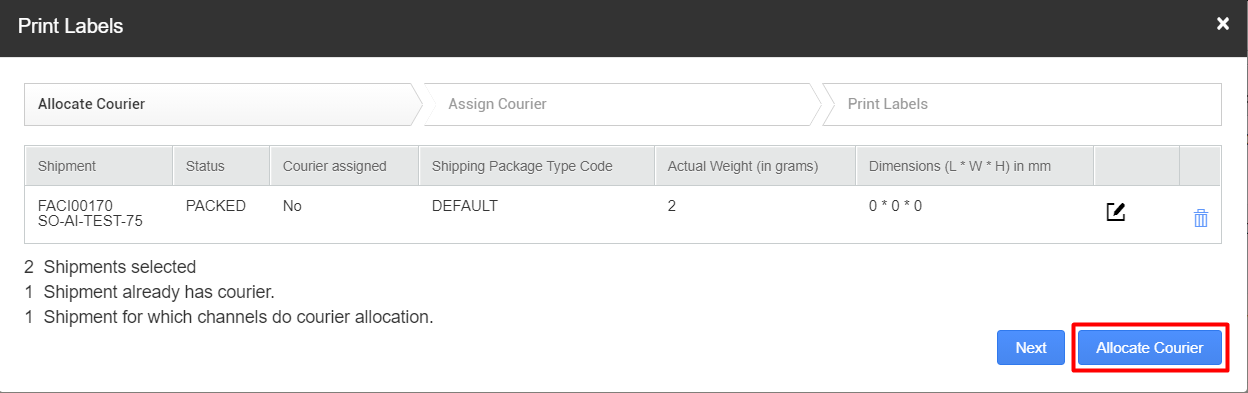
5. If the delivery pincode is serviceable and the AWB No. is available, the shipper will get auto-assigned and AWB No. will be also be assigned.
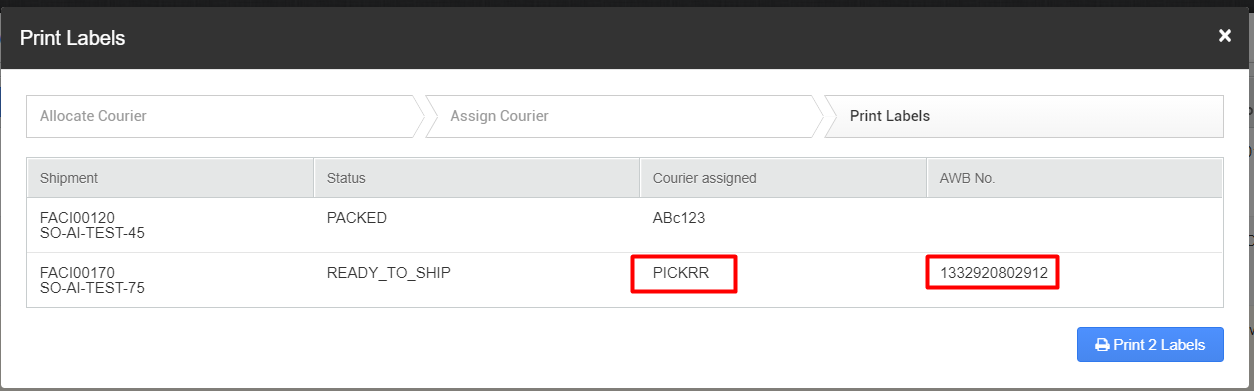
6. Click on Print Label to generate Label.
Post label printing the shipment status changes to READY_TO_SHIP, and moves under the Ready to Ship tab.
One by One
Follow these steps to Generate Label:
1. UI Navigation: Fulfillment > Shipments > {Shipments listed under Packed}
2. Click on any shipment and go in order’s shipment page and Click on Label button to generate Label.
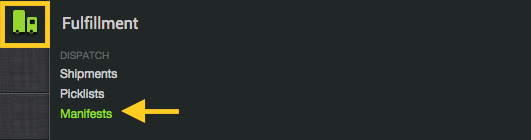
Create and Close Manifest
Follow these steps to create a Manifest:
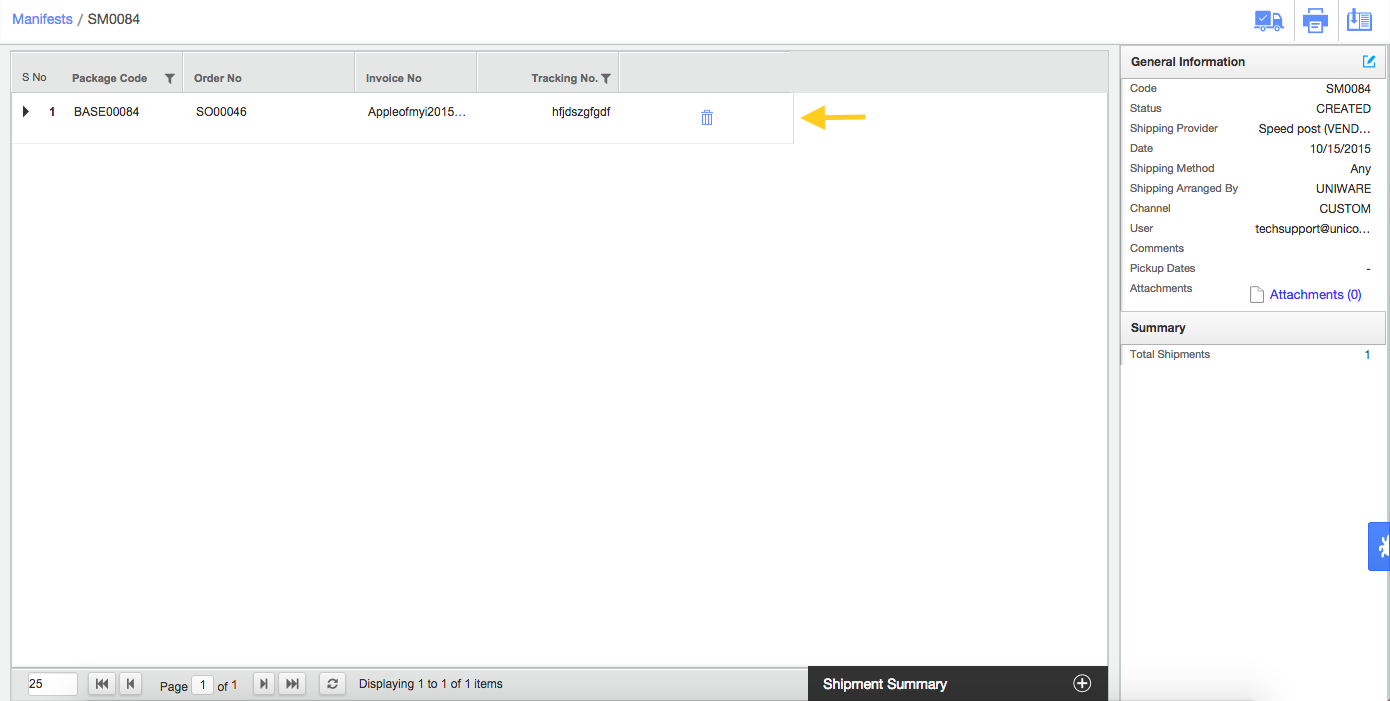
1. UI Navigation: Fulfillment > Manifests, Press the button “Create Manifest”
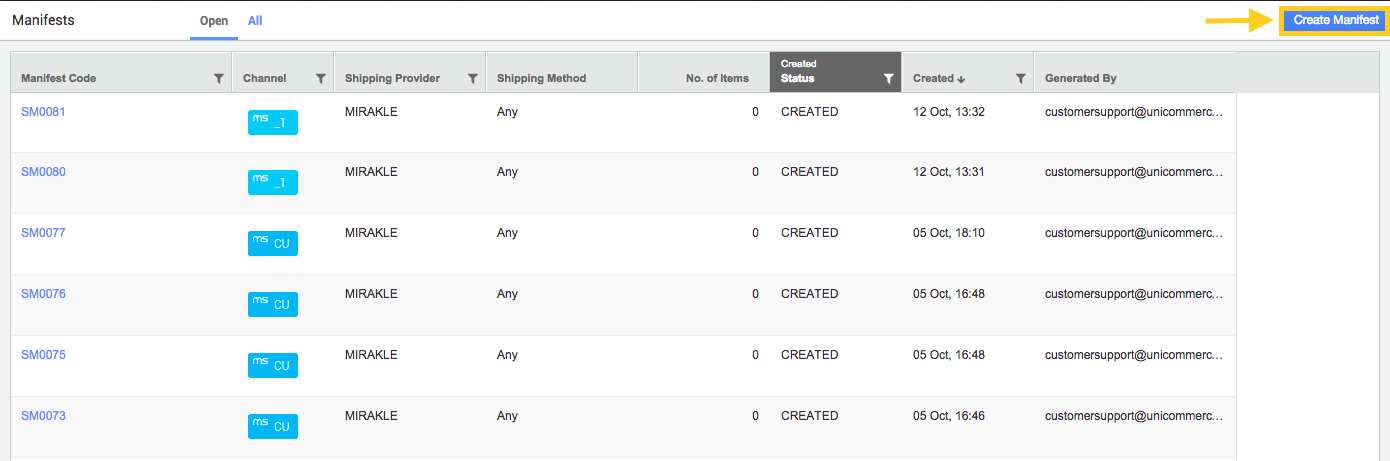
2. Select the Channel (from which the orders have originated), Shipping Provider,
Shipping Method (COD or Prepaid or Any). You can select pick up dates and add comments (which are optional) to create the manifest.
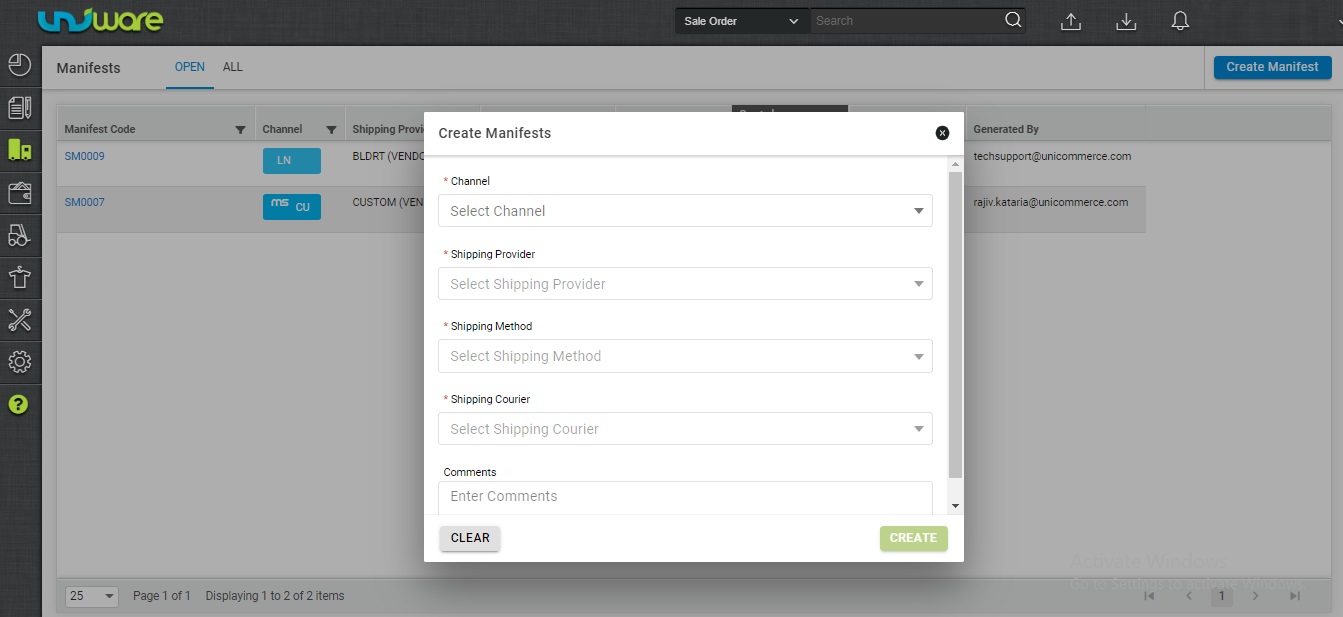
Always remember that at a manifest can be created for a single channel/market place at a time. Here, only those shipping providers will appear in the drop-down list for which packets with the status “Ready to Ship” are present in the system or package is assigned a shipping provider (in case of manual seller shipping).
Note: In case of Aggregator Shipping, Seller can use, shipping courier-wise segregation on manifest creation.
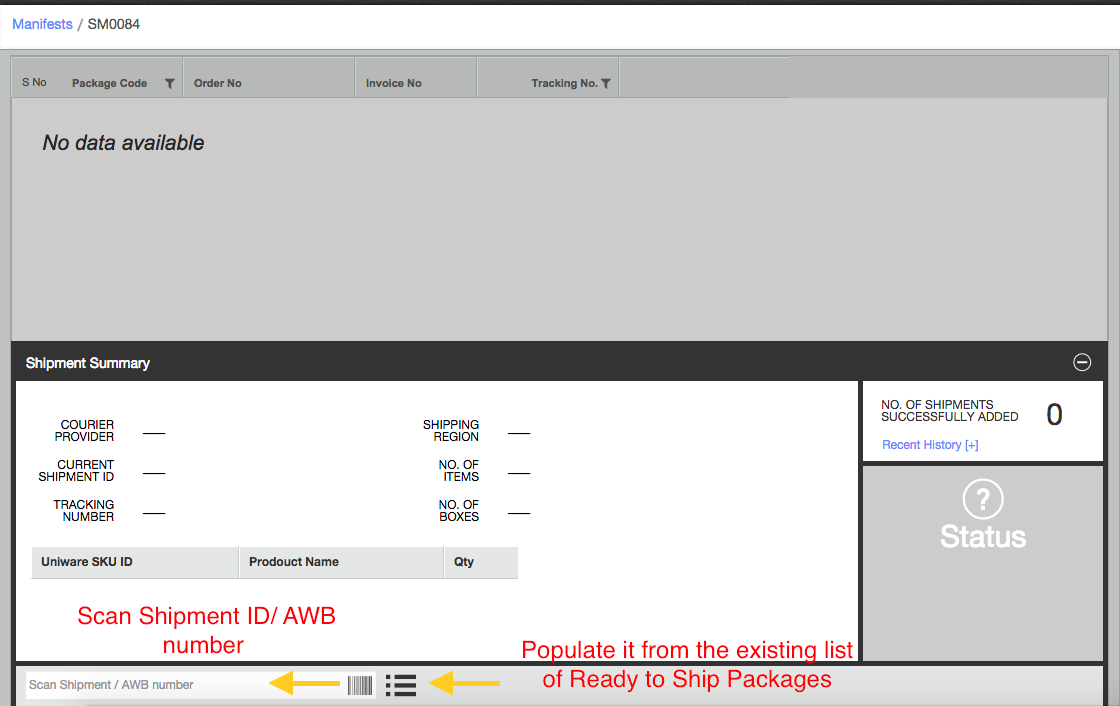
3. In the subsequent sheet add the shipments to the created manifest. This can be done in two ways, either by scanning the Shipment ID/AWB number or by populating it from the list of existing Ready to Ship packages for the selected Courier provider and Channel.
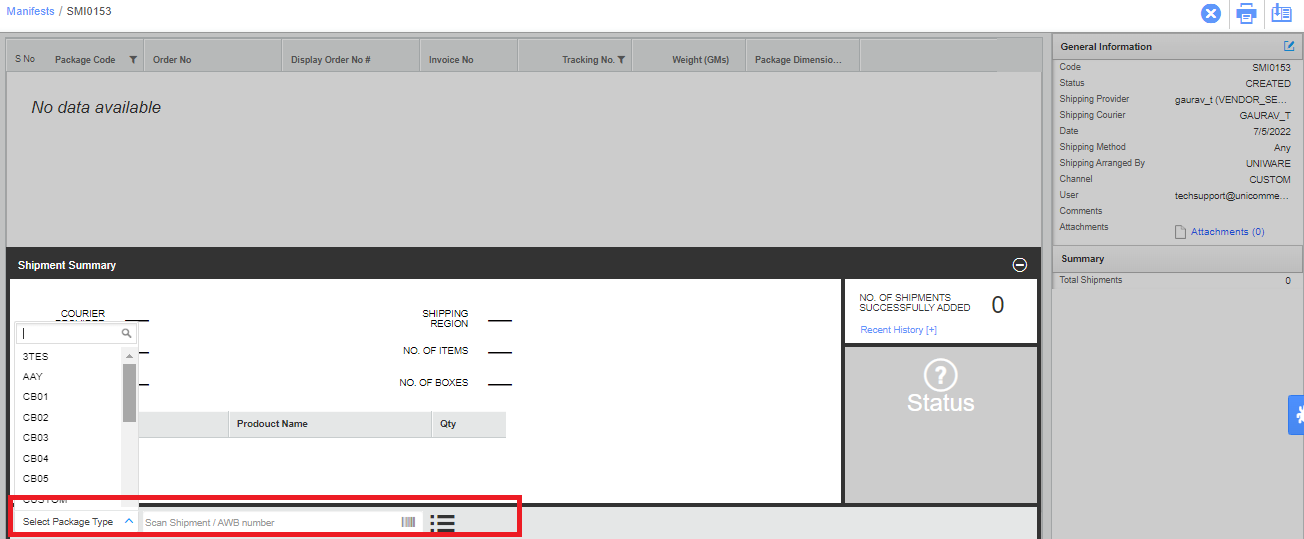
Shipping package type selection while adding shipments to manifest
The seller can now opt to choose shipping package type while adding shipments to the manifest. Shipping package type will have to be chosen for each shipment before scanning and added to the manifest.
- To enable this we have a facility-level configuration as “Select Shipping Package Type before adding each shipment to the manifest”
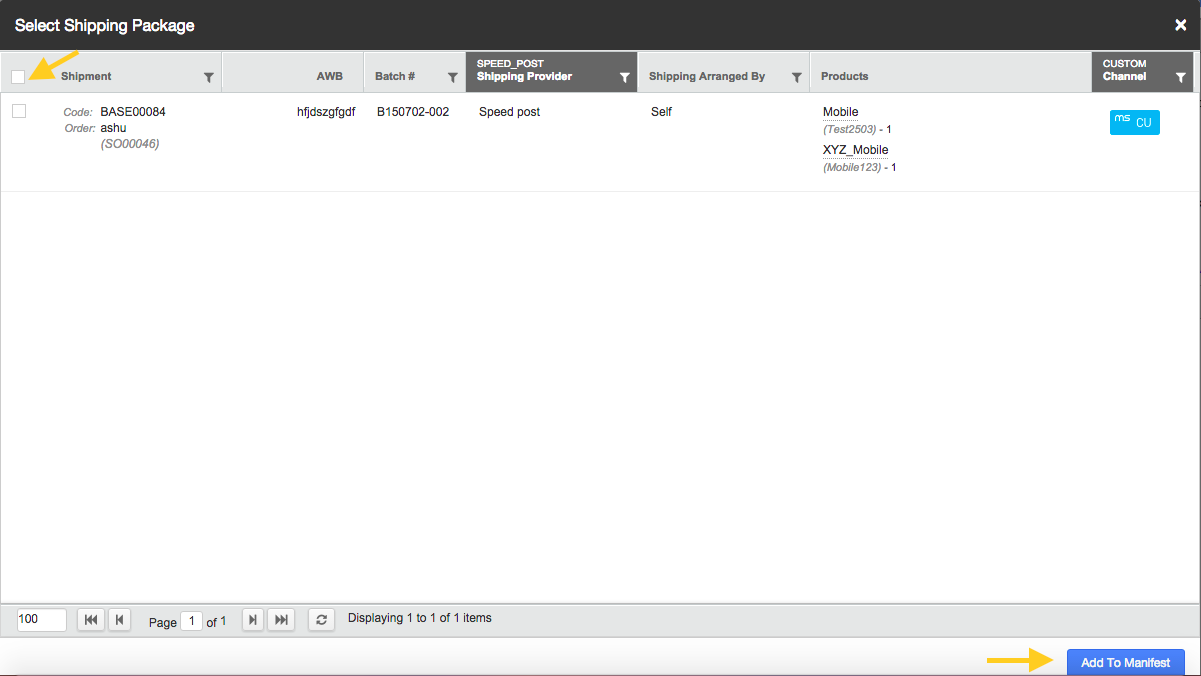
4. The shipments can be added into the manifest from existing list of “Ready to Ship” packages in these simple steps:
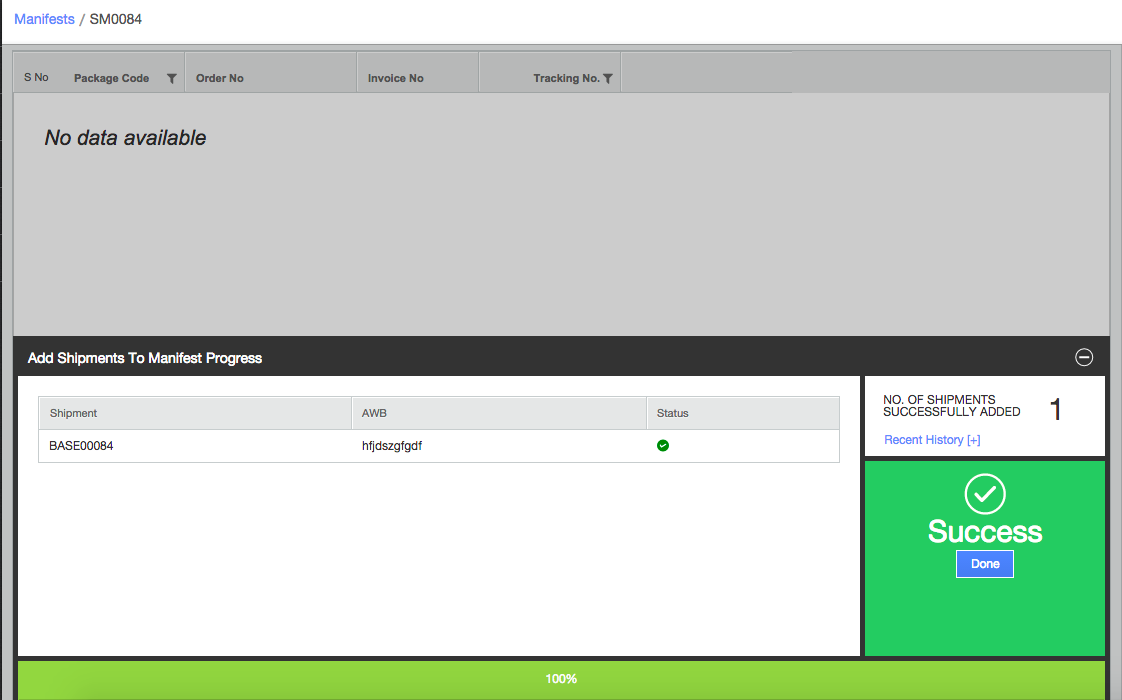
6. Now you have to print and close the manifest. This can be accomplished by clicking these icons on the top right side of the page:
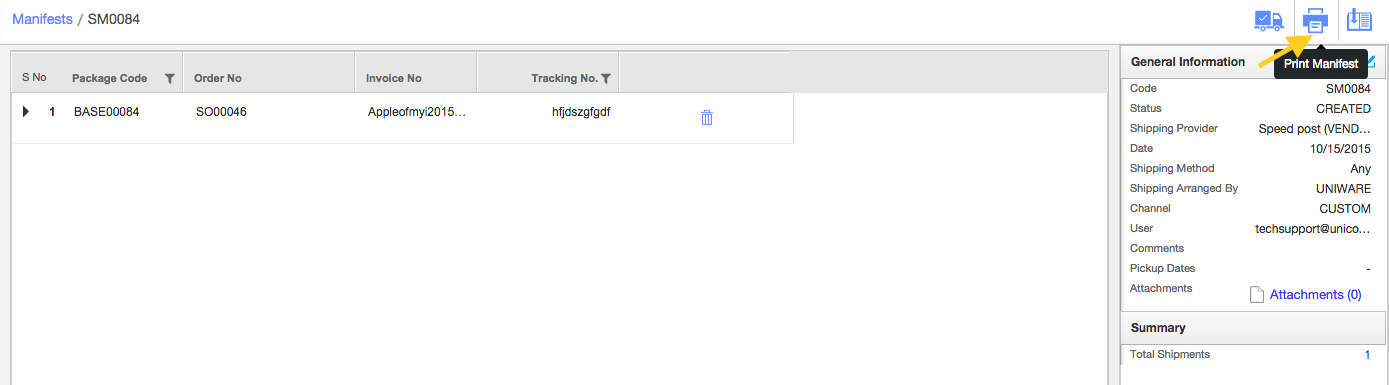
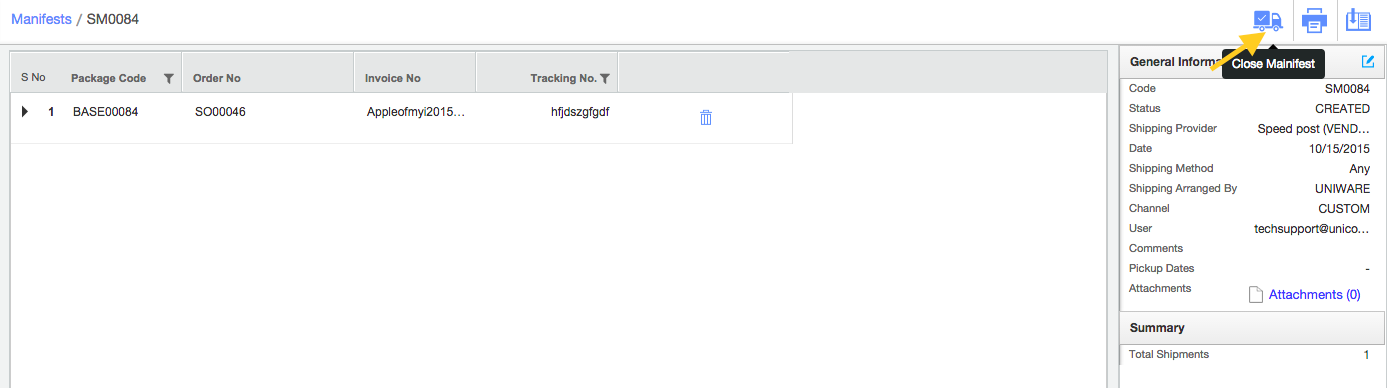
7. After closing the manifest, this shipment is marked “DISPATCHED” in the system.
Important points:
- Uniware now enables swift processing of bulk orders, handling up to 1000 shipments seamlessly.
- For this shipment count visibility can be adjusted up to 1000, in sets such as {25, 50, 100}, {50, 100, 200}, {150, 300, 600}……,{250, 500, 1000} allowing bulk actions for up to 1000 shipments.
- Note: To configure this feature, you can reach out to us via Uniware Chat Support/Support SPOC.