Manifest
When handing a bulk of shipments ov
er to a courier you generally create a list of the shipments which acts as a proof of handover. This document is called MANIFEST. It contains all the details of the number of shipping packages exchanged.
Creating a Shipping Manifest
Follow these steps to create a manifest:
1. On the path Fulfillment > Manifests, Press the button “Create Manifest”


2. Select the Channel (from which the orders have originated), Shipping Provider,
Shipping Method (COD or Prepaid or Any). You can select pick up dates and add comments (which are optional) to create the manifest.
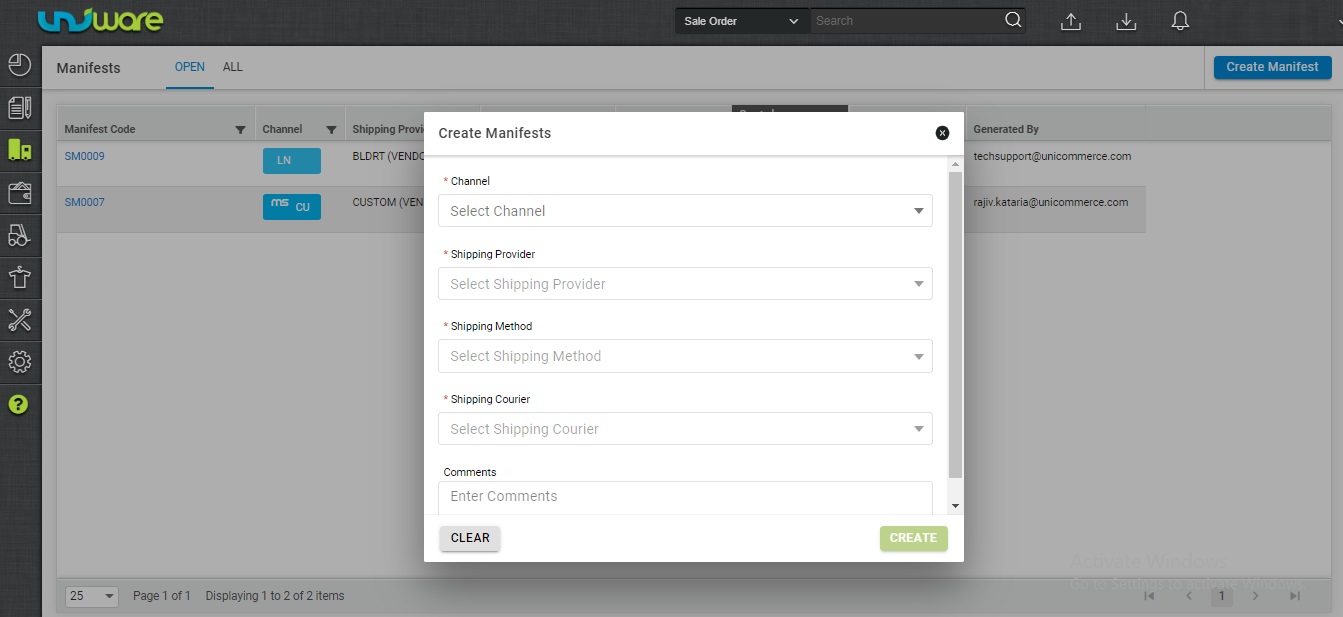
Always remember that at a manifest can be created for a single channel/market place at a time. Here, only those shipping providers will appear in the drop-down list for which packets with the status “Ready to Ship” are present in the system or package is assigned a shipping provider (in case of manual seller shipping).
Note: In case of Aggregator Shipping, Seller can use, shipping courier-wise segregation on manifest creation.
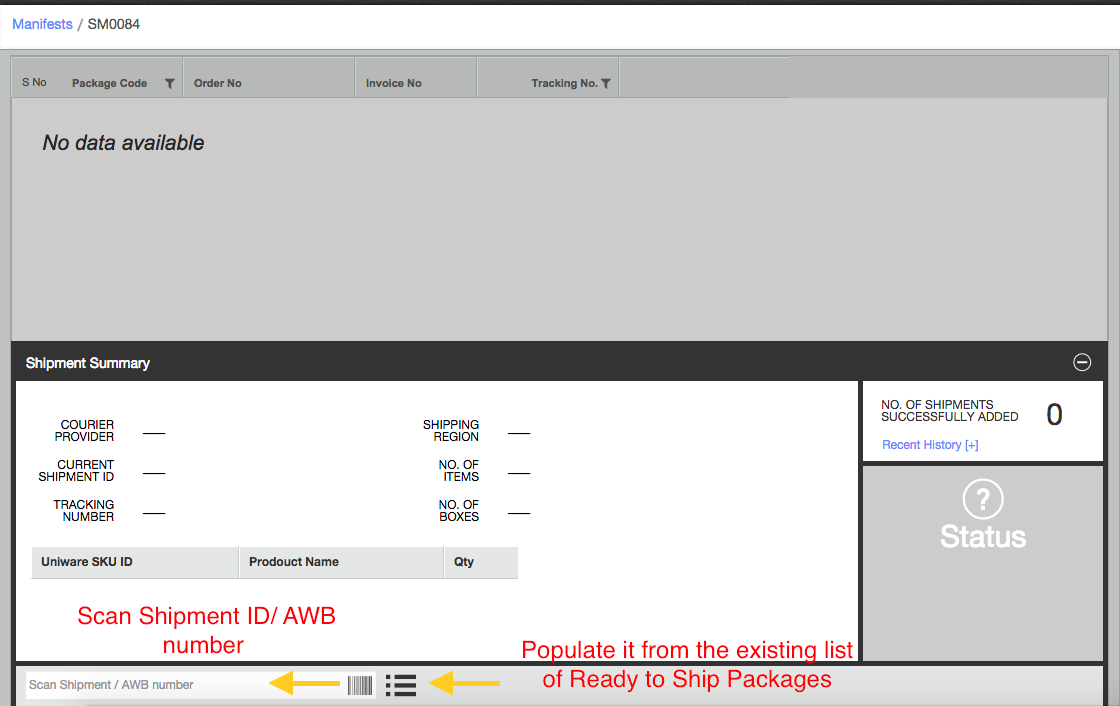
3. In the subsequent sheet add the shipments to the created manifest. This can be done in two ways, either by scanning the Shipment ID/AWB number or by populating it from the list of existing Ready to Ship packages for the selected Courier provider and Channel.
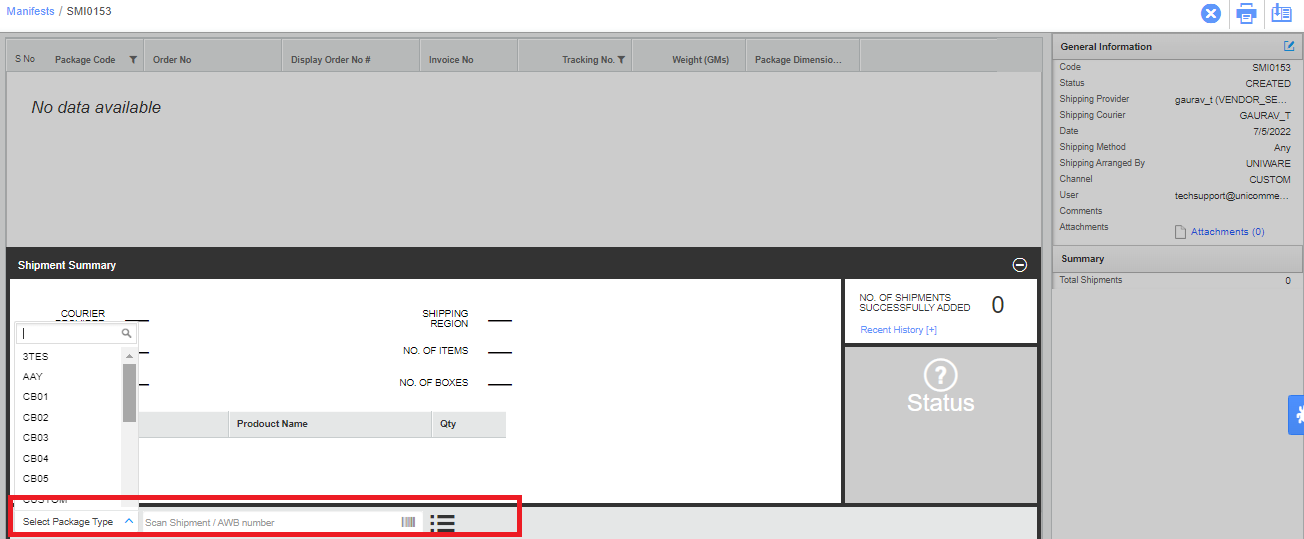
Shipping package type selection while adding shipments to manifest
The seller can now opt to choose shipping package type while adding shipments to the manifest. Shipping package type will have to be chosen for each shipment before scanning and added to the manifest.
- To enable this we have a facility-level configuration as “Select Shipping Package Type before adding each shipment to the manifest”
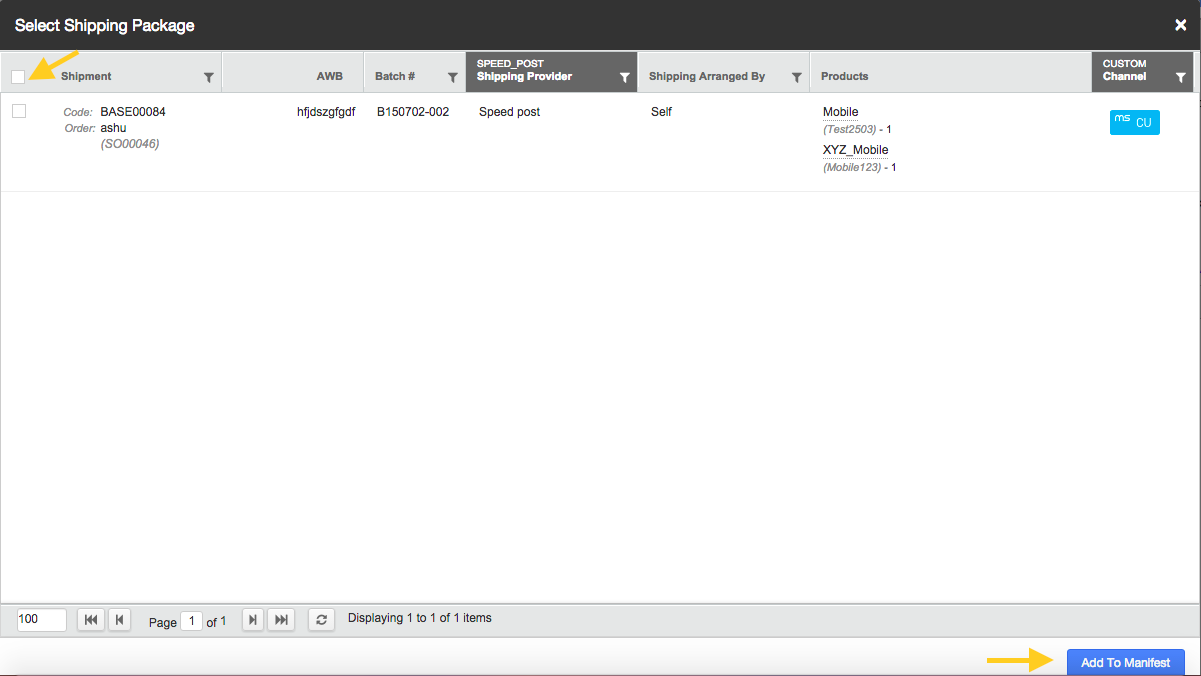
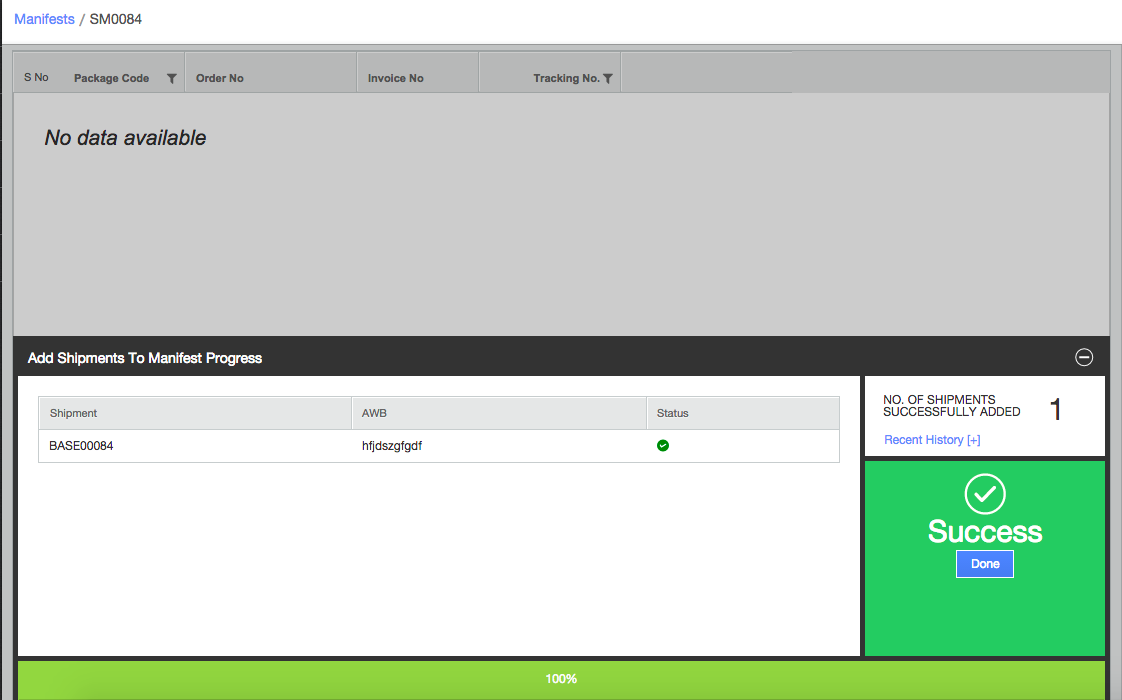
4. The shipments can be added into the manifest from existing list of “Ready to Ship” packages in these simple steps:
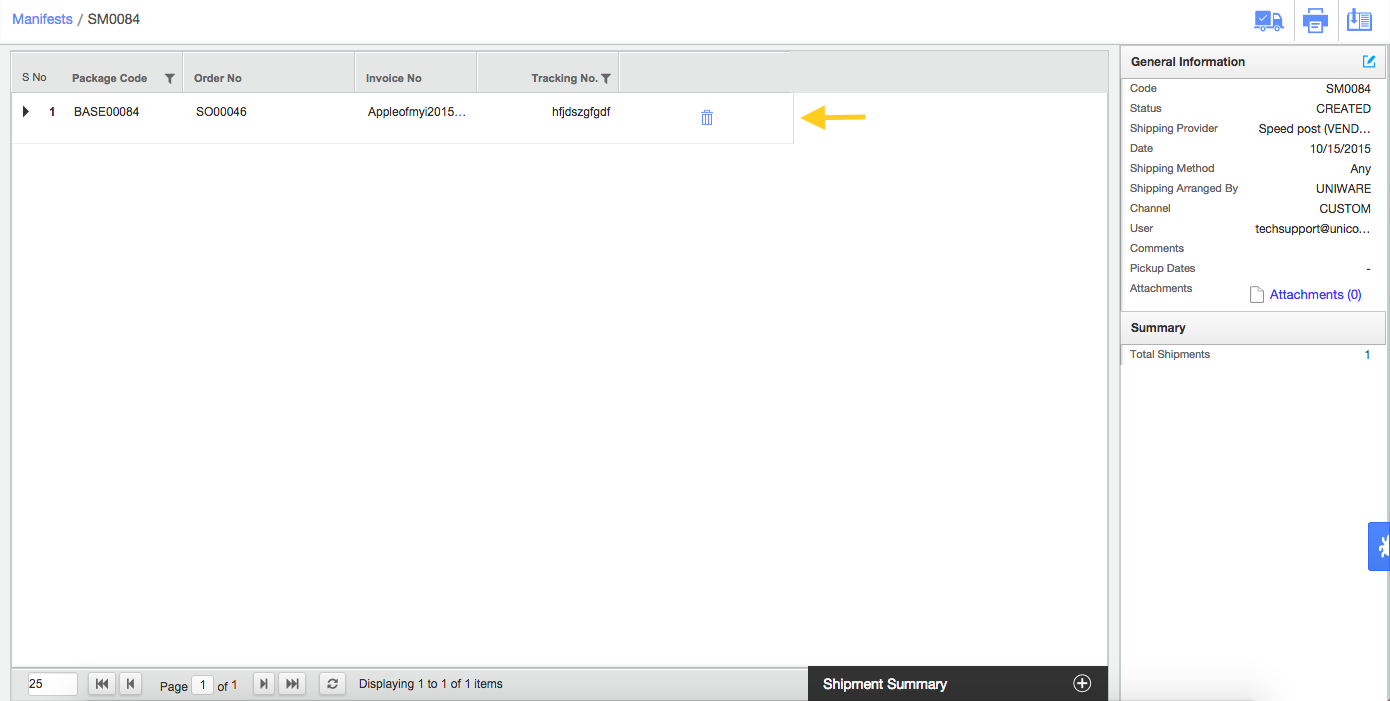
5. Now you have to print and close the manifest. This can be accomplished by clicking these icons on the top right side of the page:


6. After closing the manifest, this shipment is marked “DISPATCHED” in the system.

Please Note:
- All Uniware Print and Export templates are seller/Tenant level entities.
- UC does not allow customization in UC template i.e. Picklist,Label,Manifest and many more print for Standard or Professional plans.
- Customizations can be allowed in the Enterprise plan (if feasible) in UC template with Paid Effort estimates.
- For any change in Uniware print template’s set values will change for all channels uniware templates.
Recommended for you:
- Warehouse Returns and Cancellations Management [Reasons, Problems and Solutions]
- Manage Items and Orders with Order Management System
- Benefits of Warehouse Management System
