
Magento version 2.X is available with uniware under Carts.
Follow these simple steps to integrate Magento version 2.X in Uniware, i.e. Magento version 2.0 to 2.9.
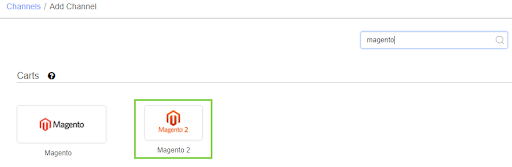
1- In the Uniware menu, select Settings > Channels, then press the button “Add Channel”.

2- Search and Select “Magento 2”.
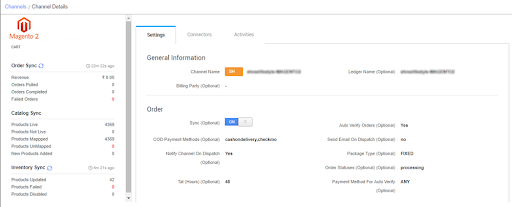
3- Fill and save the channel details.
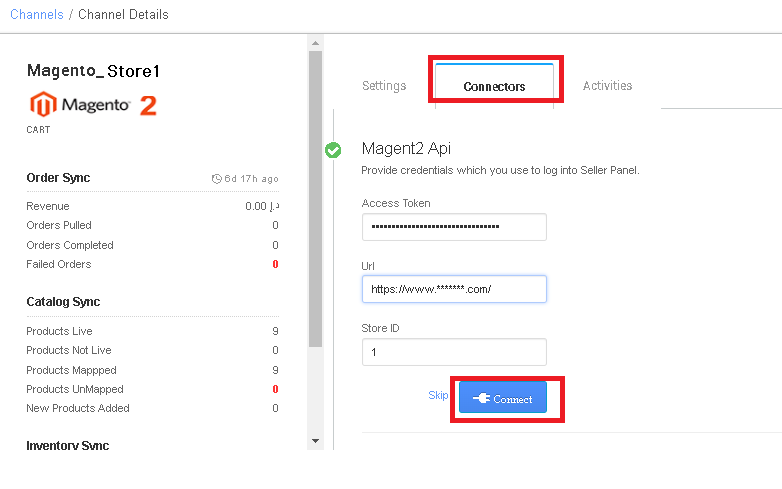
4- As soon as you save the channel details, Connectors tab will get opened where Access Token and Seller’s Magento Website URL has to be updated.
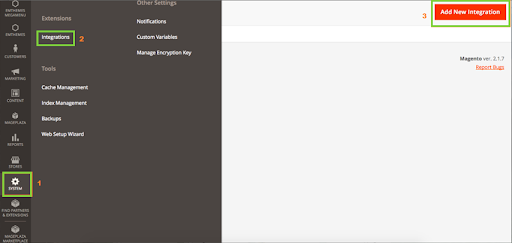
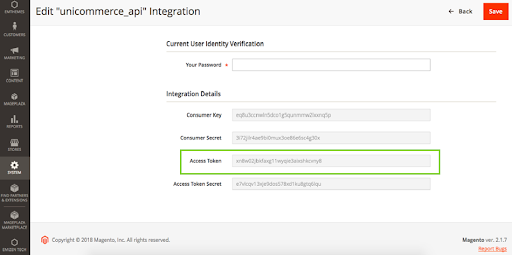
5- Steps for creating Access token on Magento admin panel-
a) Login on Magento2 Admin Panel and go to System> Integrations> Add New Integration
b) Update mandatory fields on the General Settings on System page and save.
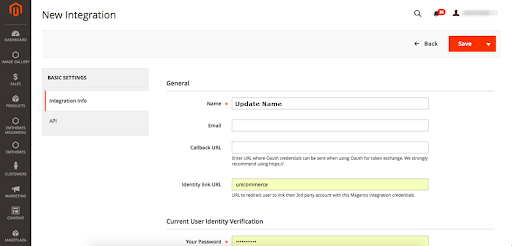
6- Once required fields are updated, it will redirect to page reflecting Access Token on Magento admin panel.
7- Now, to complete the integration update the Access Token and Seller’s Magento Website URL under Connectors tab on Unicommerce.
- Store ID: It is a field to have a differentiation link for different storefronts both being on Magento2.As this is not required for every client thus a pass value “-1” can be used for cases where the client does not wish to add it. The Store Id is a seller-created ID on Magento for as many storefronts they require.
- For multiple stores management in uniware, seller can also use channel name along with Store Name and pass the respective Store ID in this field.
8- Once connectors are configured, you can update below setup at setting page to be made automatically in Unicommerce against website orders –
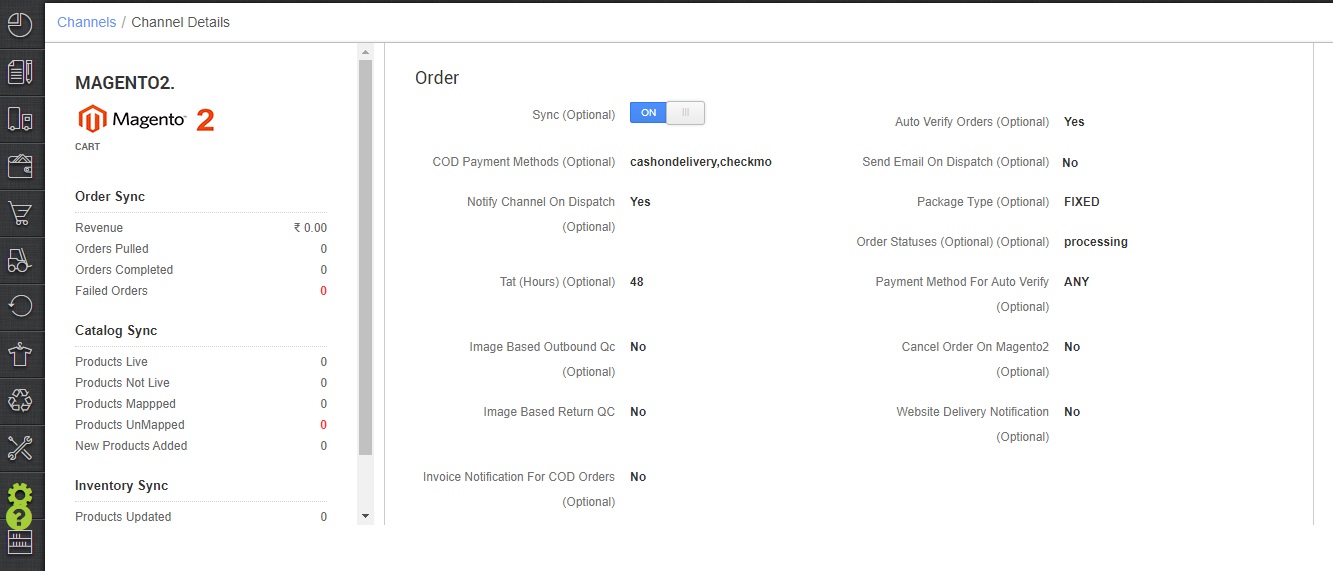
1- COD Payment Methods – Payment methods of Magento which needs to be considered as COD (Pending Payment status codes Eg – cashondelivery,checkmo)
2- Send Email On Dispatch – Set as True if you want to Flag out Magento2 to initiate a mailer to customer once orders are shipped. Else False
3- Notify Channel On Dispatch – Set as True if you want to notify Magento2 website panel once order is dispatched in Unicommerce. Else False.
4- Order Statuses – Initial Magento2 status codes of orders in which they need to be synced into Unicommerce (Eg. Processing, Pending)
5- Cancel Order On Magento2 – Set as True if you want to send updates of cancellations to Magento2 if any order marked as cancelled in Unicommerce. Else False
6- Website Delivery Notification – Set as True if you want to send Delivered tracking update of the package to Magento2 once the order is Delivered to end customer. Else False.
7- Invoice Notification For COD Orders – Set as True, if you want to send invoiced notification on Magento2 for COD orders on Magento2. Else False.
Below are the important points needs to be kept in mind while adding the channel.
- Order sync and inventory sync are available.
- Catalog sync is not there. You can make the manual mapping.
- Invoices and Label: Details to be provided by uniware.
- Shipping will be handled by the vendor(Shelfship),
- On Manifest close, the “Dispatched” status will get updated on the channel.
- Seller cancellation from Uniware is allowed, Cancelled status will get updated on the channel.
- Status sync: UC will pull status for Cancelled orders from channel to uniware.
Note: You have to manually update listings in Uniware which are live on Magento2, after which inventory sync will work automatically. Click Here
Fill below mandatory columns with details as suggested and upload the sheet in Uniware:
- Channel Name– Name of the Magento channel added in Uniware
- Channel Product Id– Listing Id generated for your products on Magento
- Seller SKU Code– Same as Channel Product Id
- Uniware SKU Code– Uniware SKU codes created in Uniware corresponding channel product ids or Seller SKU.
Recommended for you: