
Overview
The Cycle Count workflow enables warehouse teams to verify physical inventory against system records using the Unicommerce Handheld Device (HHD) Scale App.
By integrating the Uniware with mobile scanning technology, this process ensures real-time inventory accuracy, identifies discrepancies, and maintains an auditable trail of warehouse stock without requiring a total facility shutdown.
Advantages and Applications
Utilizing the HHD for cycle counting offers several operational benefits:
-
Real-Time Synchronization: Updates inventory levels instantly between the warehouse floor and the central Uniware dashboard.
-
Enhanced Accuracy: Minimizes manual entry errors by utilizing barcode scanning for shelves and SKUs.
-
Granular Control: Organizes counts into “Waves,” allowing managers to assign specific zones or shelves to different operators.
-
Dynamic Status Tracking: Identifies overdue counts and pending tasks through visual badges and color-coded “shelf chips.”
-
Quality Categorization: Allows operators to tag inventory as Good, Bad (Damaged), or Mixed during the counting process.
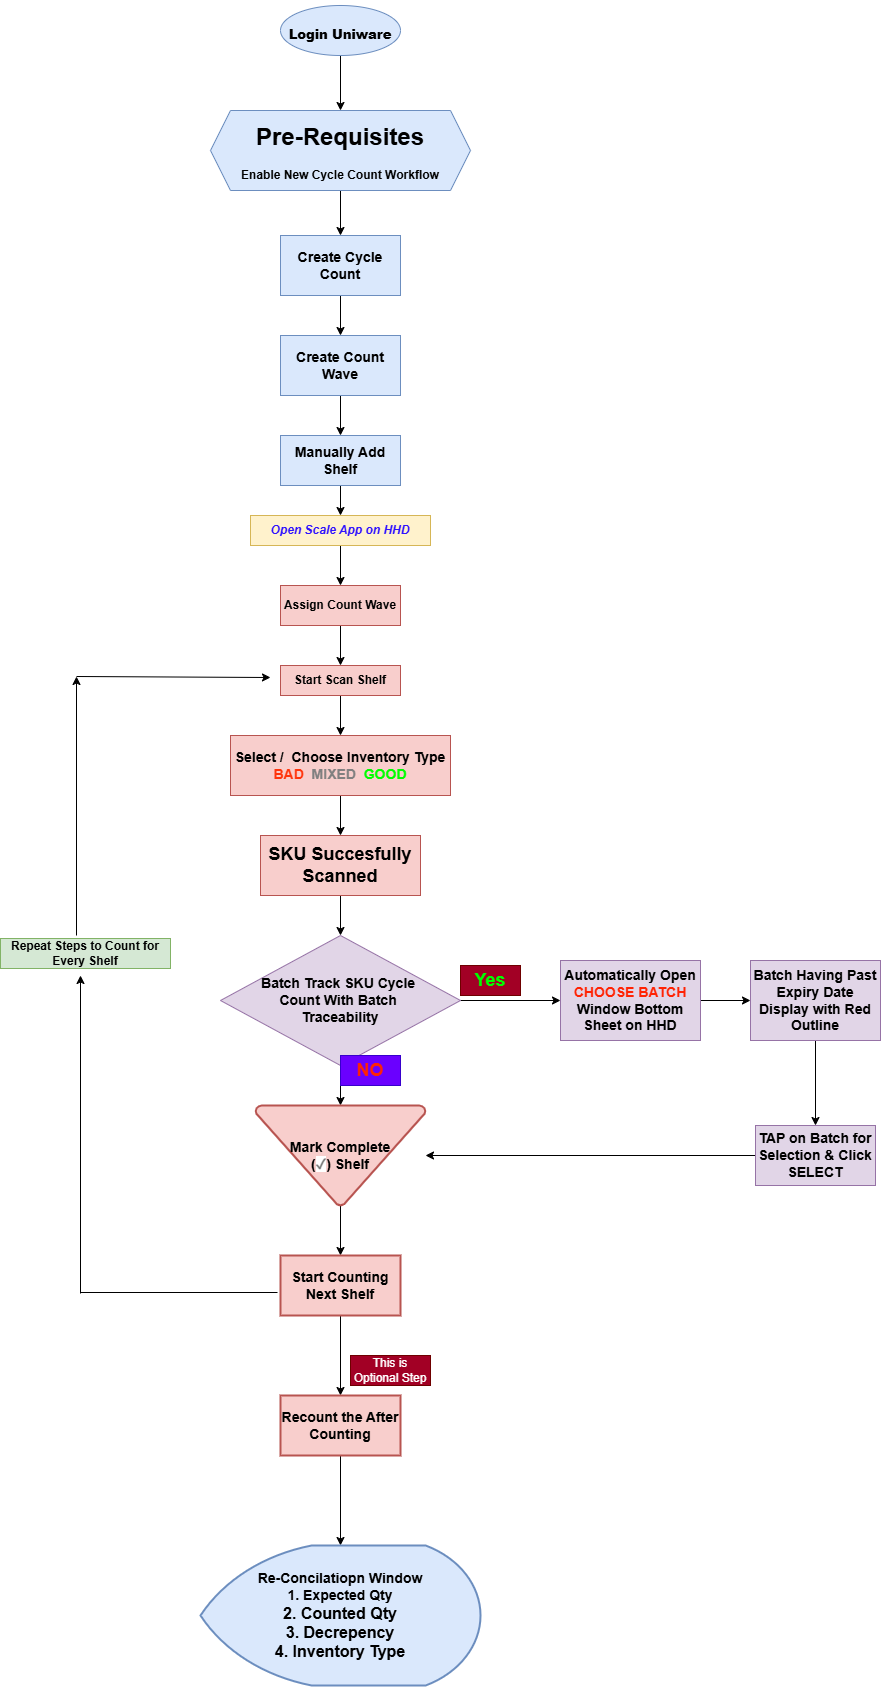
Work-Flow
Pre-Requisites
Before beginning the workflow, ensure the following requirements are need to enable.
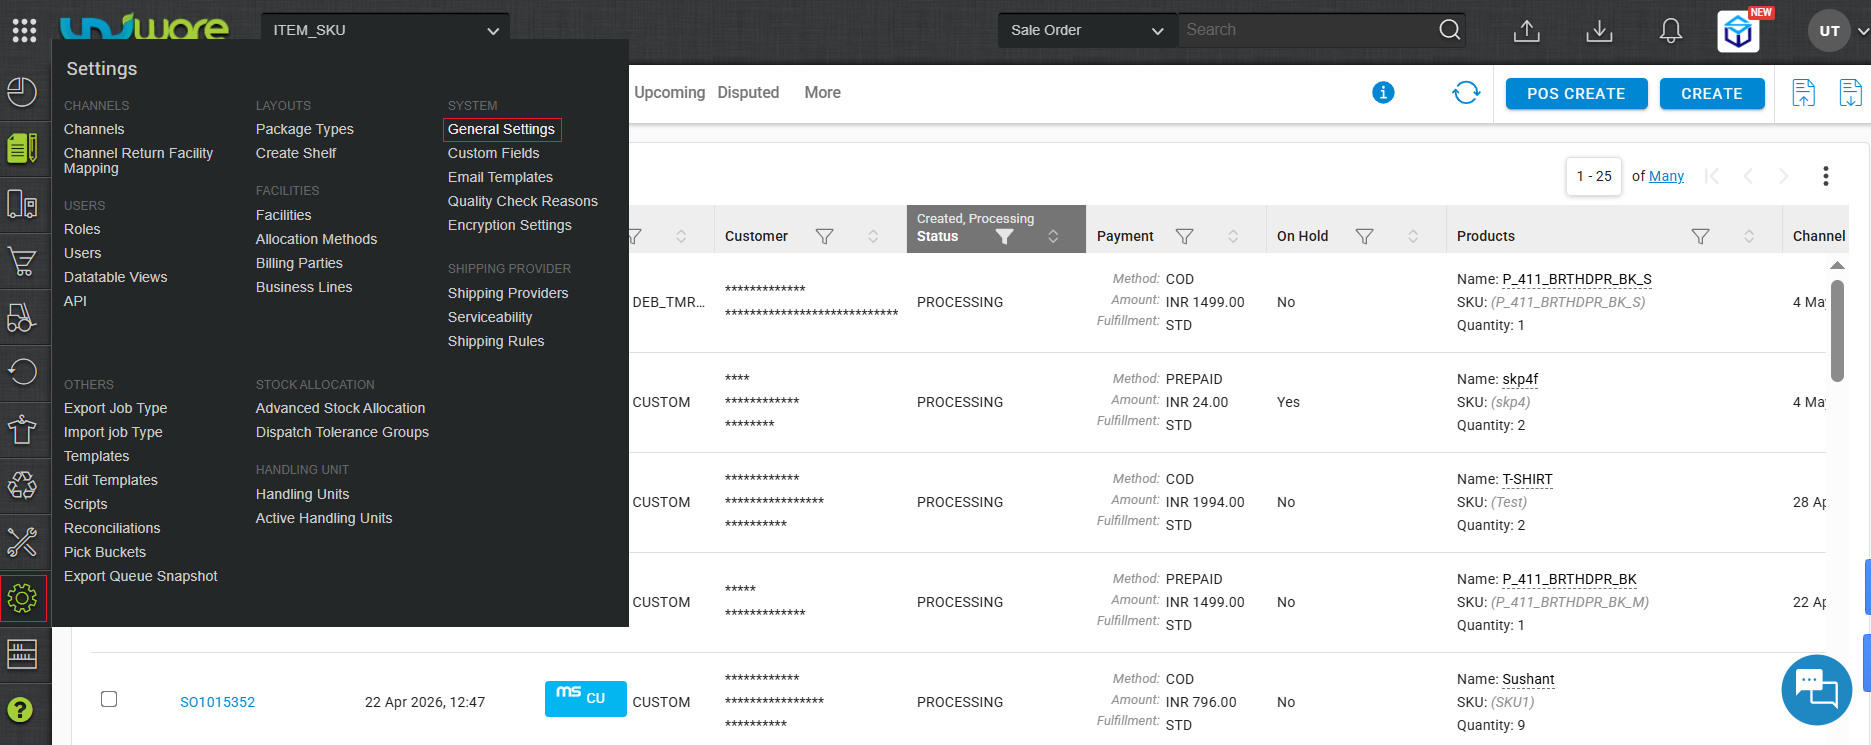
Step-1: Visit Uniware Menu, Hover Tab Settings & Click General Settings
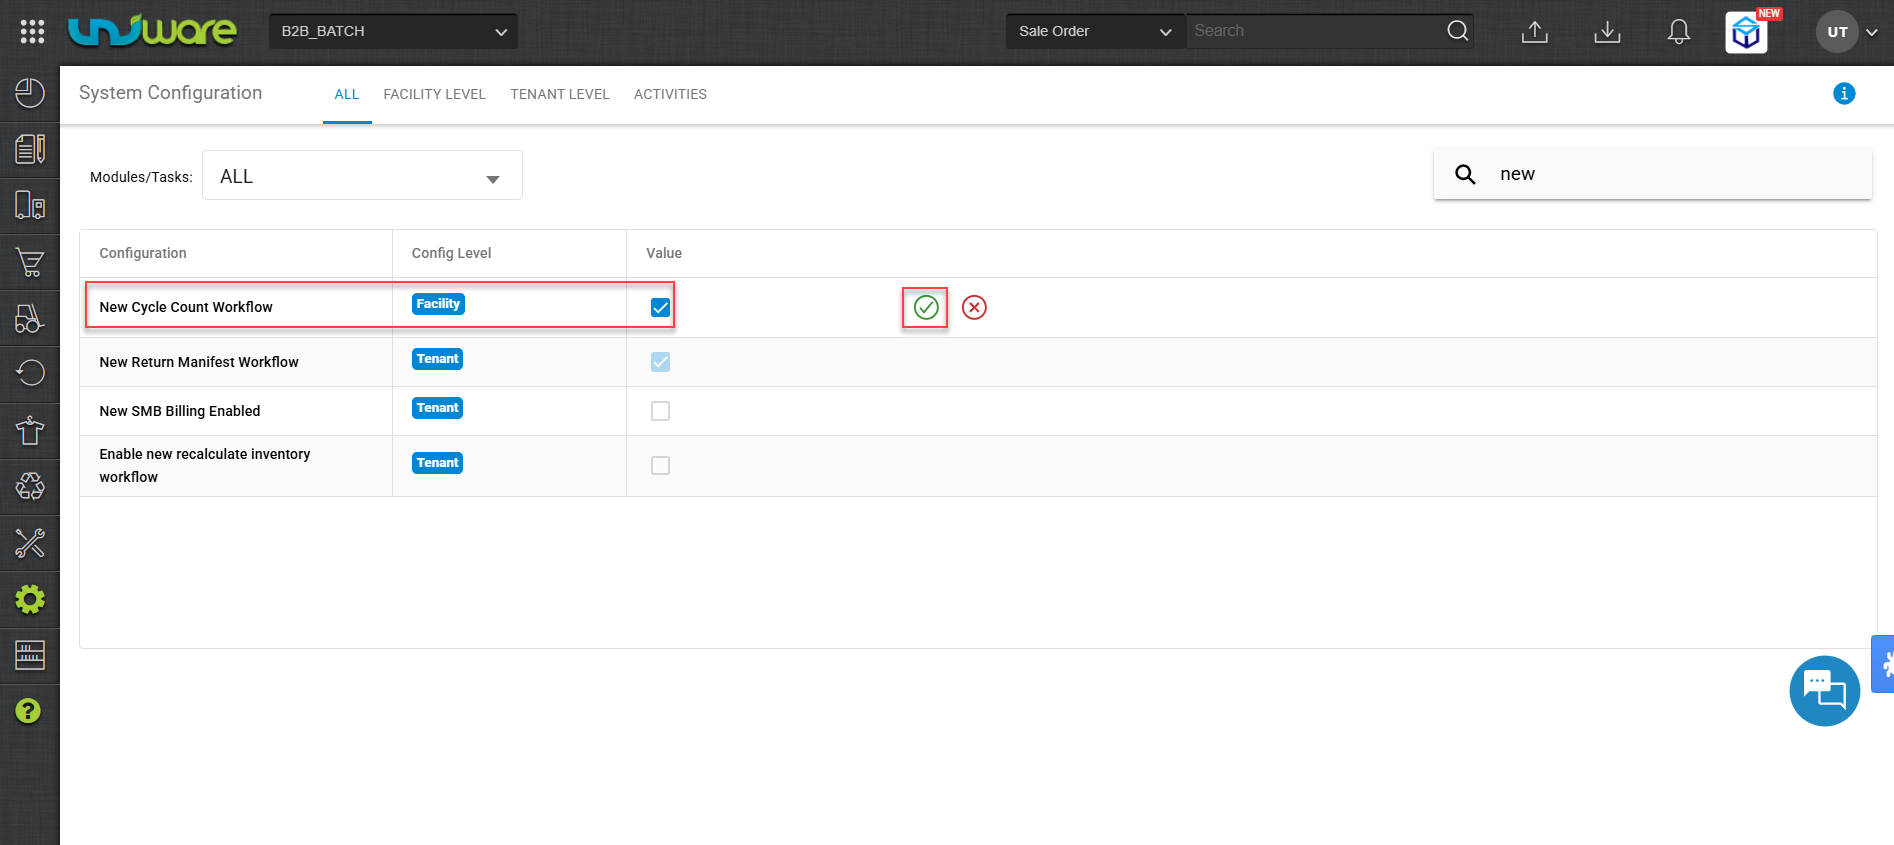
Step-2: Enable New Cycle Count Workflow
Process Workflow
Part-1: Setup in Uniware
Part-2: HHD Application
Operational Workflow
Part-I: Setup in Uniware
Step 1: Create a Cycle Count
i. Login Uniware, Hover Material & Click cycle Count.
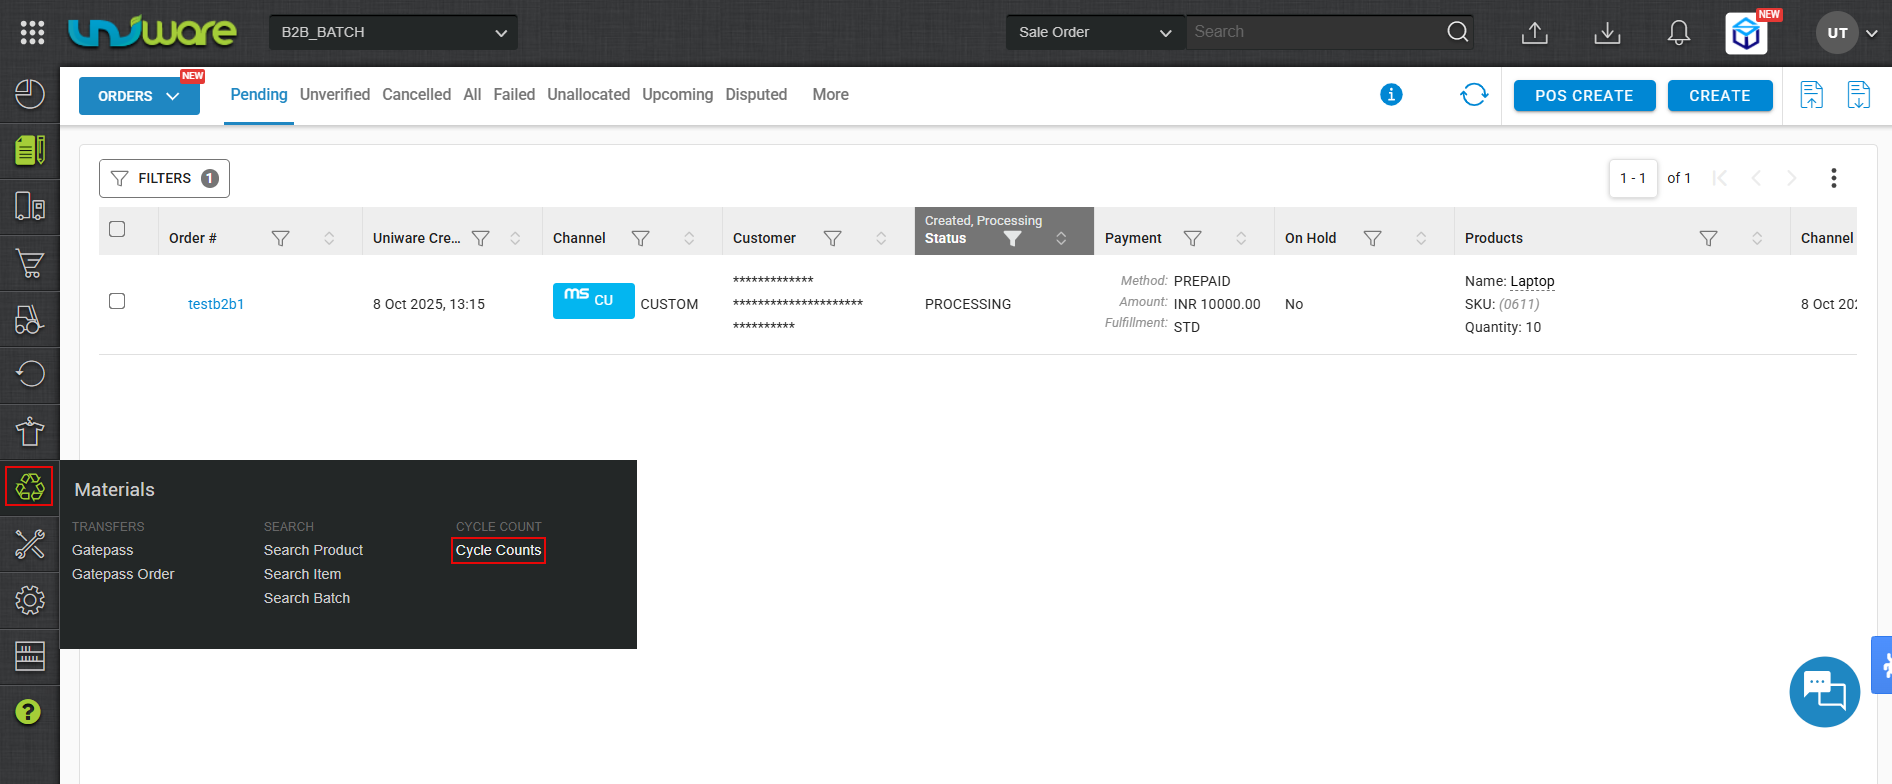
- Click Create for Create Cycle Count

Fig: Click Create - Select Target Date & Click CREATE

Fig:Select Target Date & Click CREATE - Display Overdue Cycle Count.
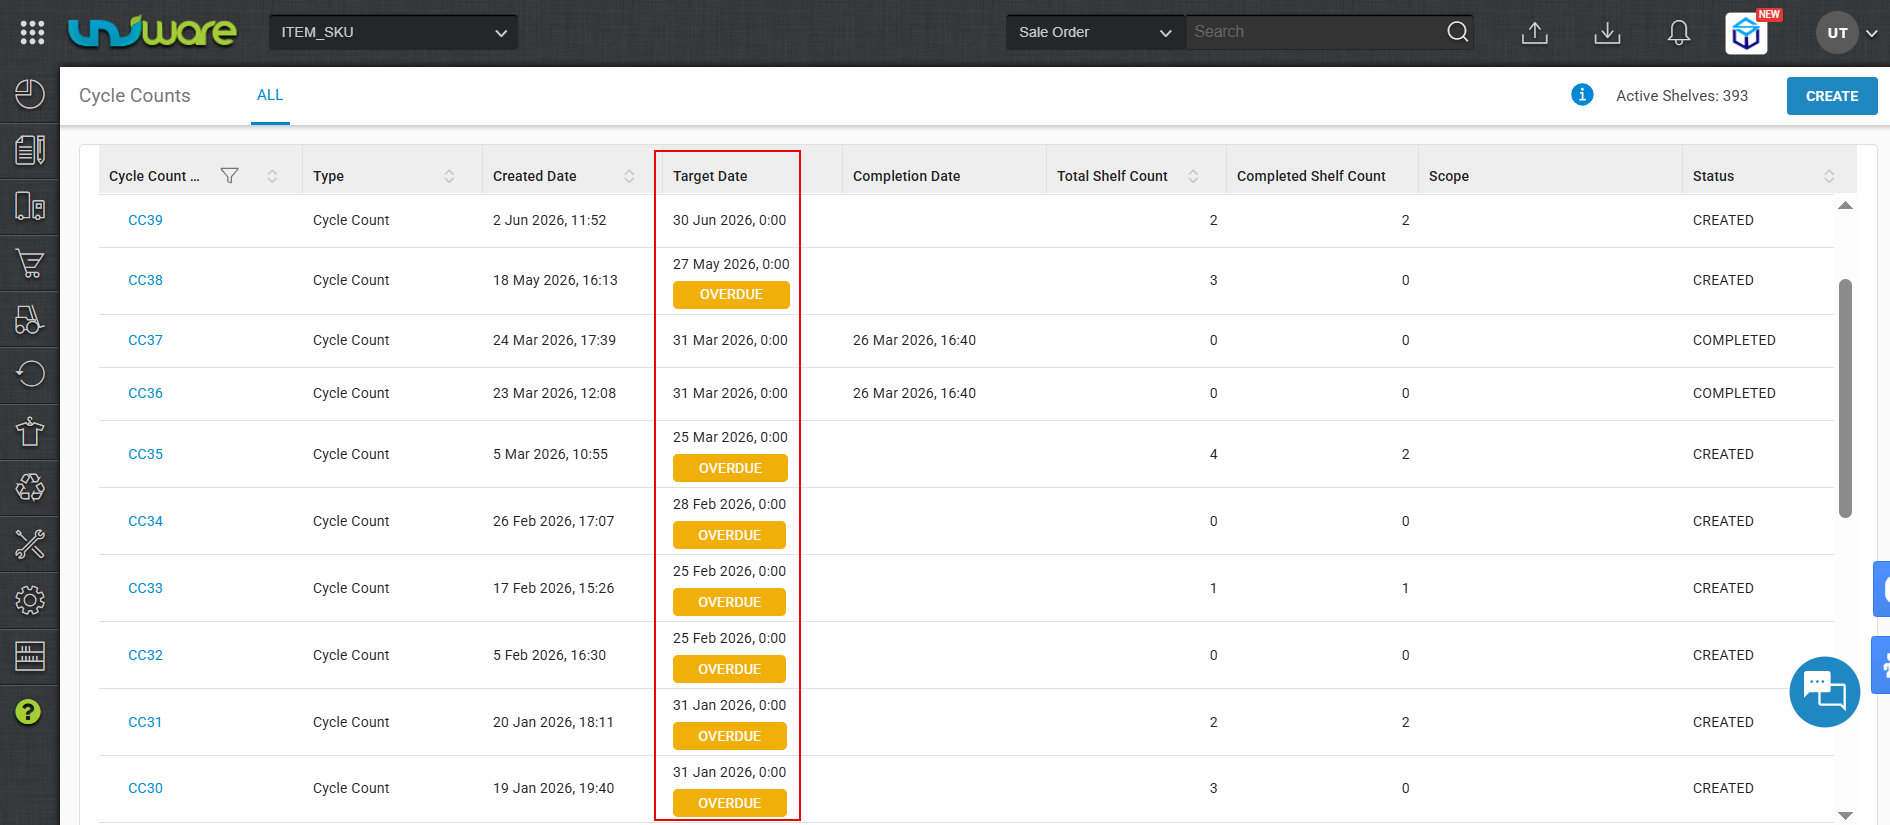
Fig: Display Overdue Cycle Count.
Step 2: Create a Count Wave & Add Shelfs to the Wave.
- Click Create Count Wave.
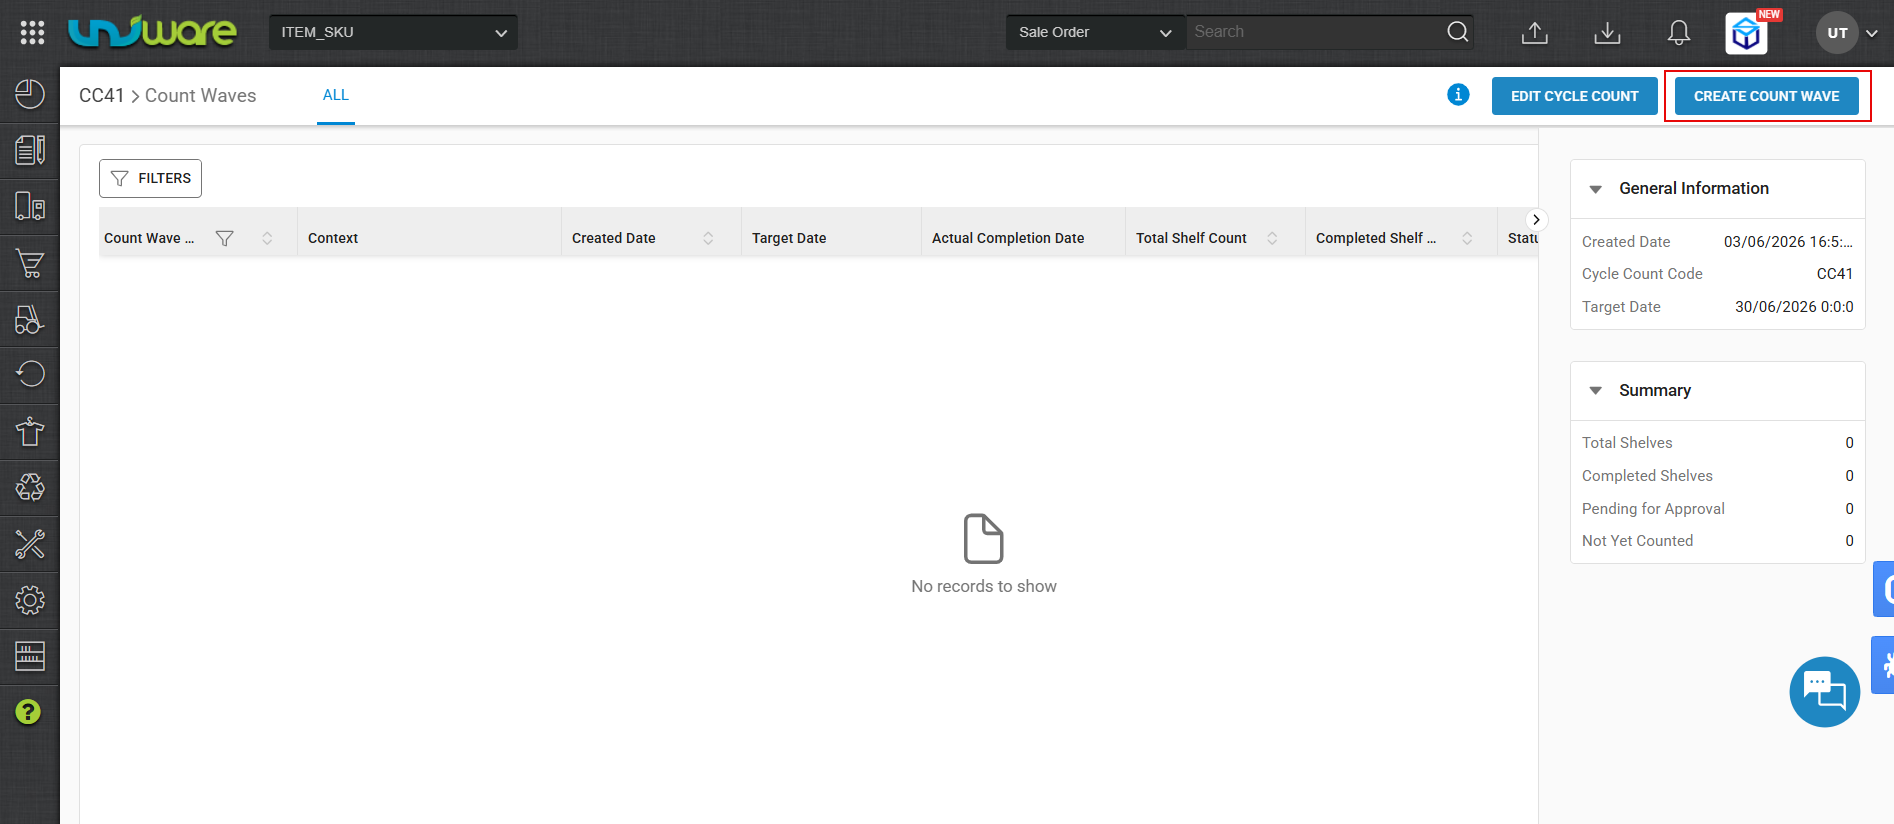
Fig: Click Create Count Wave - Manually Added Shelf Code for Scan
- Select Target Date
- Assign count wave operator name
- Add shelves by scanning barcodes into the Scan/Add Shelf field or by uploading a CSV file.
- Click GENERATE COUNT WAVE to push the task to the HHD.
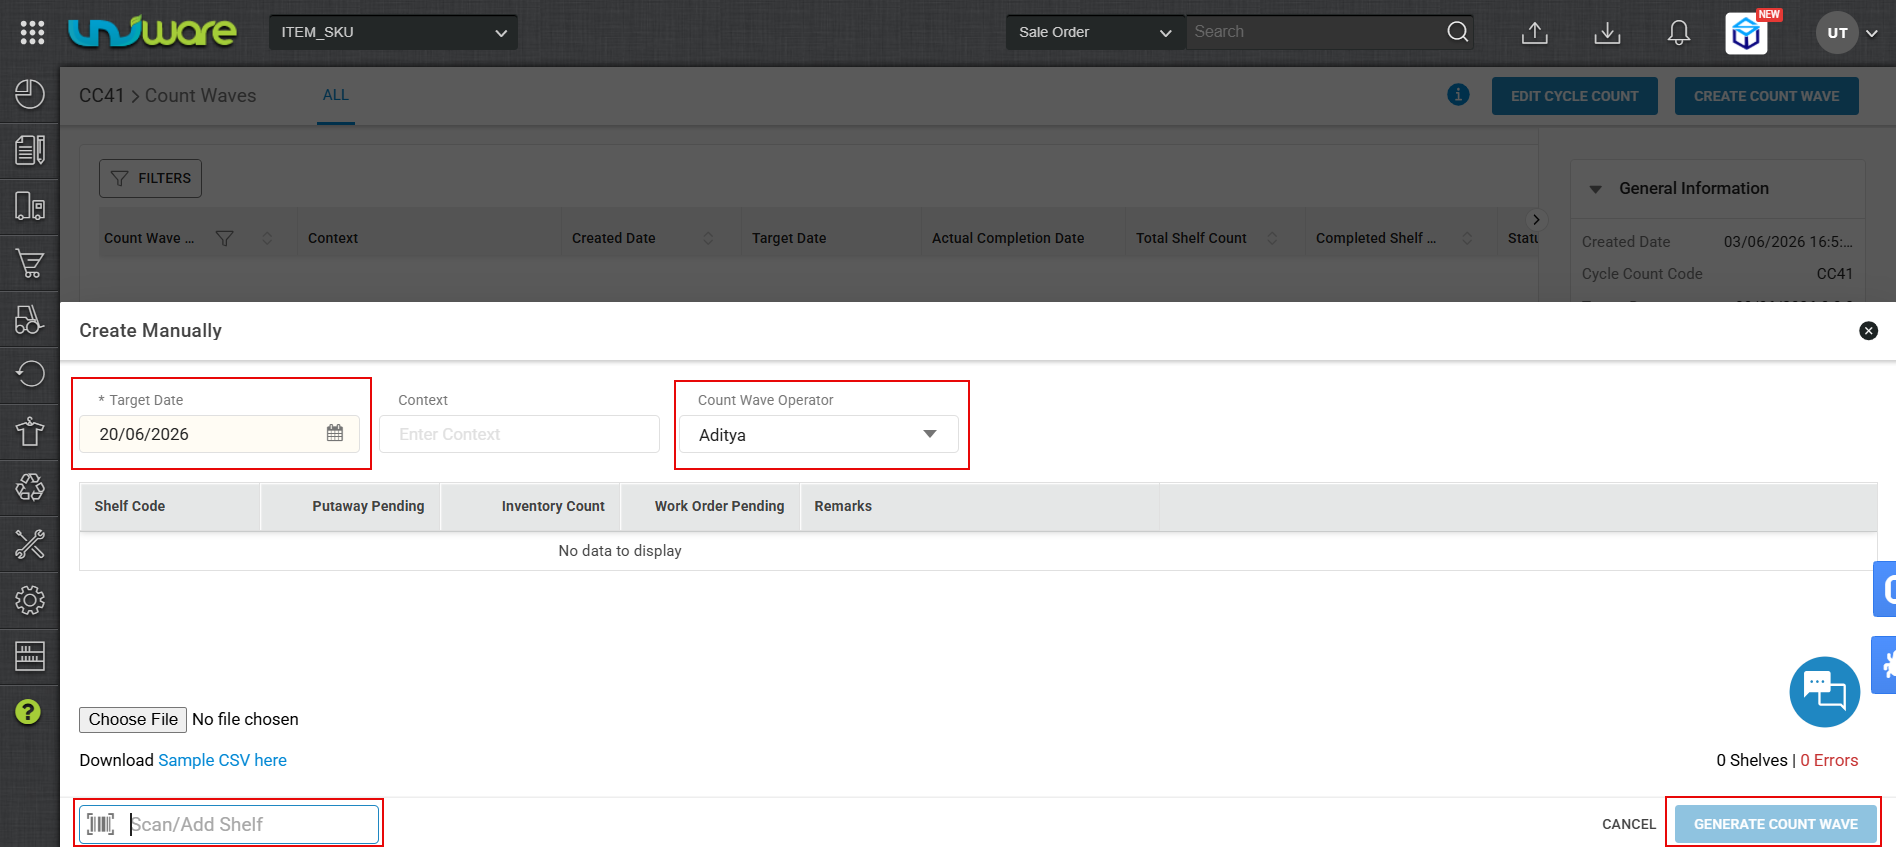
Fig: Create Count Wave Manually.
Part-II : Execution on HHD Scale App
Open the Count Waves screen on the HHD.
Step 4: Assign the Count Wave
- Display Allocated Shelf on Shelf Card Screen & Switch Toggle to Assign to me.
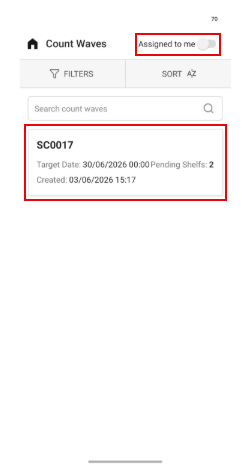
- Click Assign to me for Confirmation.
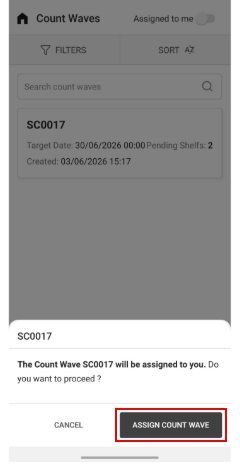
Fig: Click Assign Count Wave for Assign to Scanning.
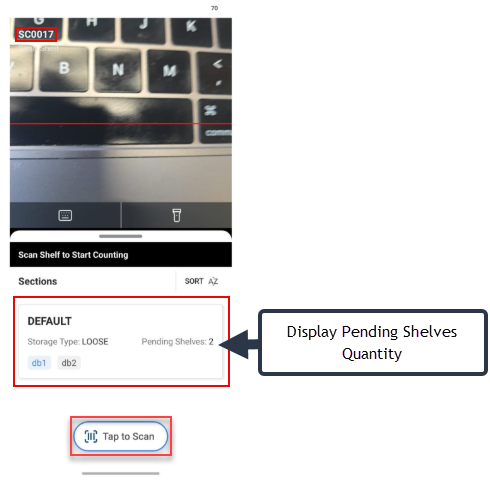
Step 5: Scan the Shelf
- Display Pending Shelves : 2 & Shelf Chips db1 and db2 (in Blue Font)
- Click Tap to Scan for Scan SKU or Enter From Keyboard
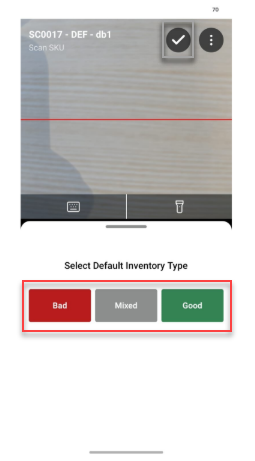
Step 6: Select Inventory Type
Choose the condition of the items on the shelf:
-
Good: Saleable inventory.
-
Bad: Damaged or unsaleable units.
-
Mixed: A combination of both.
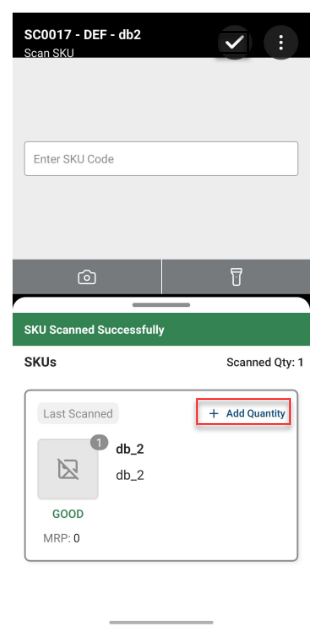
Step 7: Scan SKUs, Count & Click +Add Quantity for Bulk Scanning
Scan each SKU’s barcode.
- A green banner confirms a successful scan.
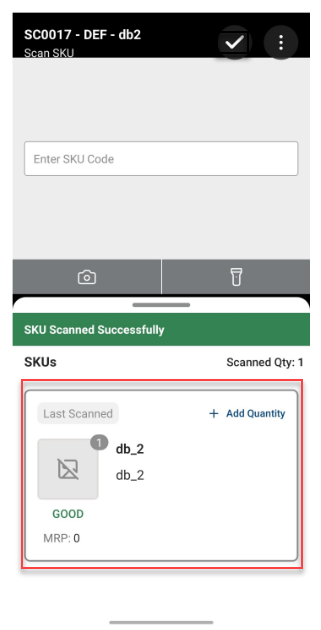
-
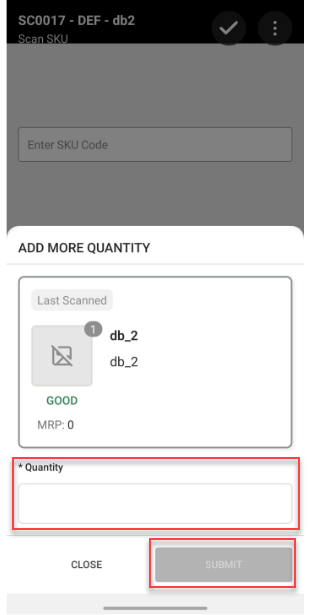
For Bulk Scanning: Tap + Add Quantity on the SKU card to manually enter a high volume of units rather than scanning each one individually.
- Enter Quantity & Click Submit for Bulk Scanning.
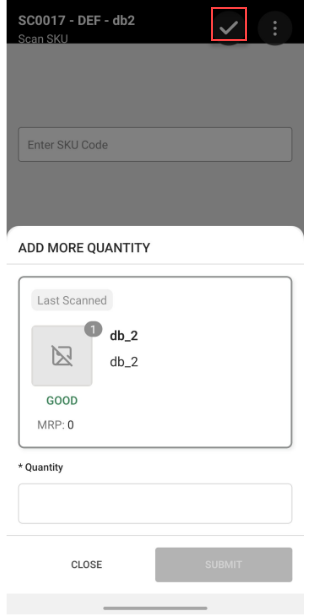
Step 8: Complete the Shelf
Once you have scanned all items on the shelf, tap the Tick (✓) button in the top-right corner. This submits the data for that shelf to Uniware. The shelf chip will turn grey (inactive), and the app will prompt you to scan the next pending shelf.
- Click Tick (✓) button to Complete Shelf.
Step-9: Redirect to Shelf Scan
After completing shelf scan db1, db1 changes color to gray and next pending shelf remains highlighted with blue color.
Pending shelves count decrements automatically.
Step-10 : Recurrently Follow Steps for Remaining Shelf.
Repeat Steps 5 to 8 for all remaining Shelf.
Correction and Reconciliation
Step 9: Perform a Recount (Optional)
If you discover an error after counting but before the wave is approved, tap the three-dot menu on the SKU scan screen and select Recount.
Enter the corrected quantity to overwrite the previous entry.
Step 10: Review Discrepancies
The Warehouse Manager reviews the final data on the Uniware web panel by comparing:
| Field | Description | Action Required |
| Expected Qty | System inventory during at Cycle count creation. | Review sales history & Putaway |
| Counted Qty | Physical Qty Counted from HHD. | Request recount if error suspected. |
| Discrepancy |
Delta (Counted – Expected). Negative = Shortage, Positive= Surplus |
Approve to adjust stock or Investigate. |
| Inventory Type | Good / Bad / Mixed tag. | Move “Bad” stock to QC/Damaged area. |
1. Expected Quantity = Available + Blocked – Picked (Picked is only available if the Unicommerce Scale app is used)
2. Inventory Adjustments post Approval:
- The counted inventory is updated in the Shelf & WH Inventory Snapshot.
- Any excess & not found quantity is stored and displayed on the UI and in reports.
- Inventory APIs also provide the inventory & the excess/not found variance separately. This must be taken care of during any custom integration.
Frequently Asked Questions (FAQ)
Q: Can I assign a wave to someone else after I have started?
A: No, once a wave is assigned and counting has begun, the operator must complete the assigned shelves or a manager must reset the wave from the web panel.
Q: What happens if I scan an SKU that isn’t supposed to be on that shelf?
A: The system will record the SKU as a “Surplus” in the discrepancy report during the reconciliation phase, allowing the manager to adjust the inventory location records.
Q: How Can proceed cycle count with batch Traceability SKU with batch.
A: Follow Steps from 1 to 7, and after that follows below mentioned steps
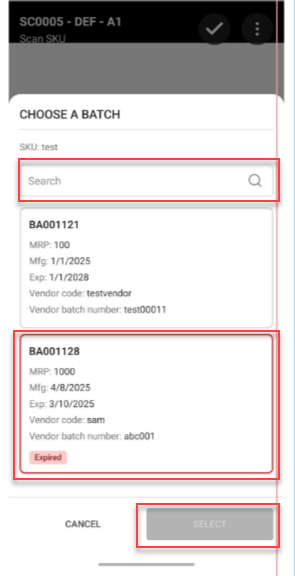
Step-1: Select CHOOSE A BATCH
After Successfully scan Batch-Tracked SKU- the HHD application automatically open CHOOSE A BATCH before recording the quantity.
Step-2: Display Batch Card
Batch card display- Batch Code, MRP, Manufacturing Date (Mfg), Expiry Date (Exp), Vendor Code and Vendor Batch Number.
Step-3: Search, Tap Batch & Click SELECT.
Use Search bar to specific batch by code or vendor info.
Tap batch card to select it and Click SELECT for confirm selection.
Step-4 : Follows Remaining Steps from Step-8 to proceed cycle count with batch traceability.