
De-Kitting
Overview
De-Kitting is the reverse of the Kitting process. It lets a seller break down an already-assembled kit SKU back into its individual component SKUs, and return those components to sellable inventory.
This is useful when a kit needs to be dismantled after assembly for example, if it was over-produced, assembled incorrectly, is no longer in demand, or its components are needed to fulfill other orders or build a different kit.
| Note: Kitting converts individual component SKUs into a single kit SKU, ready for future orders.
De-Kitting does the opposite it converts an assembled kit SKU back into its original component SKUs, which are then available for individual sale or reassembly into a different kit. |
Kitting vs De-Kitting
| Aspect | Kitting | De-Kitting |
|---|---|---|
| Direction | Components → Kit | Kit → Components |
| Inventory effect | Blocks component SKU inventory | Blocks kit SKU inventory |
| Output | One kit SKU in stock | Individual component SKUs back in stock |
| Typical trigger | Anticipated kit demand | Excess/incorrect kit stock, demand shift, or damage |
Use Case
Consider a skincare brand that created a “Daily Skincare Routine” kit containing a face wash, toner, and moisturizer.
If the kit stops selling as well as expected, or if the seller needs the toner and moisturizer to fulfill individual orders, they can de-kit the existing kit stock.
Uniware breaks the kit SKU back down into its component SKUs and updates inventory for each component automatically without the seller manually adjusting stock counts.
Prerequisites
Before starting the de-kitting process, ensure the following:
- The kit SKU you want to de-kit has assembled stock available in the warehouse.
- You know the Kit Code and the quantity of kits you intend to break down.
How to De-Kit
Part-1 : Initiate a De-Kit Work Order
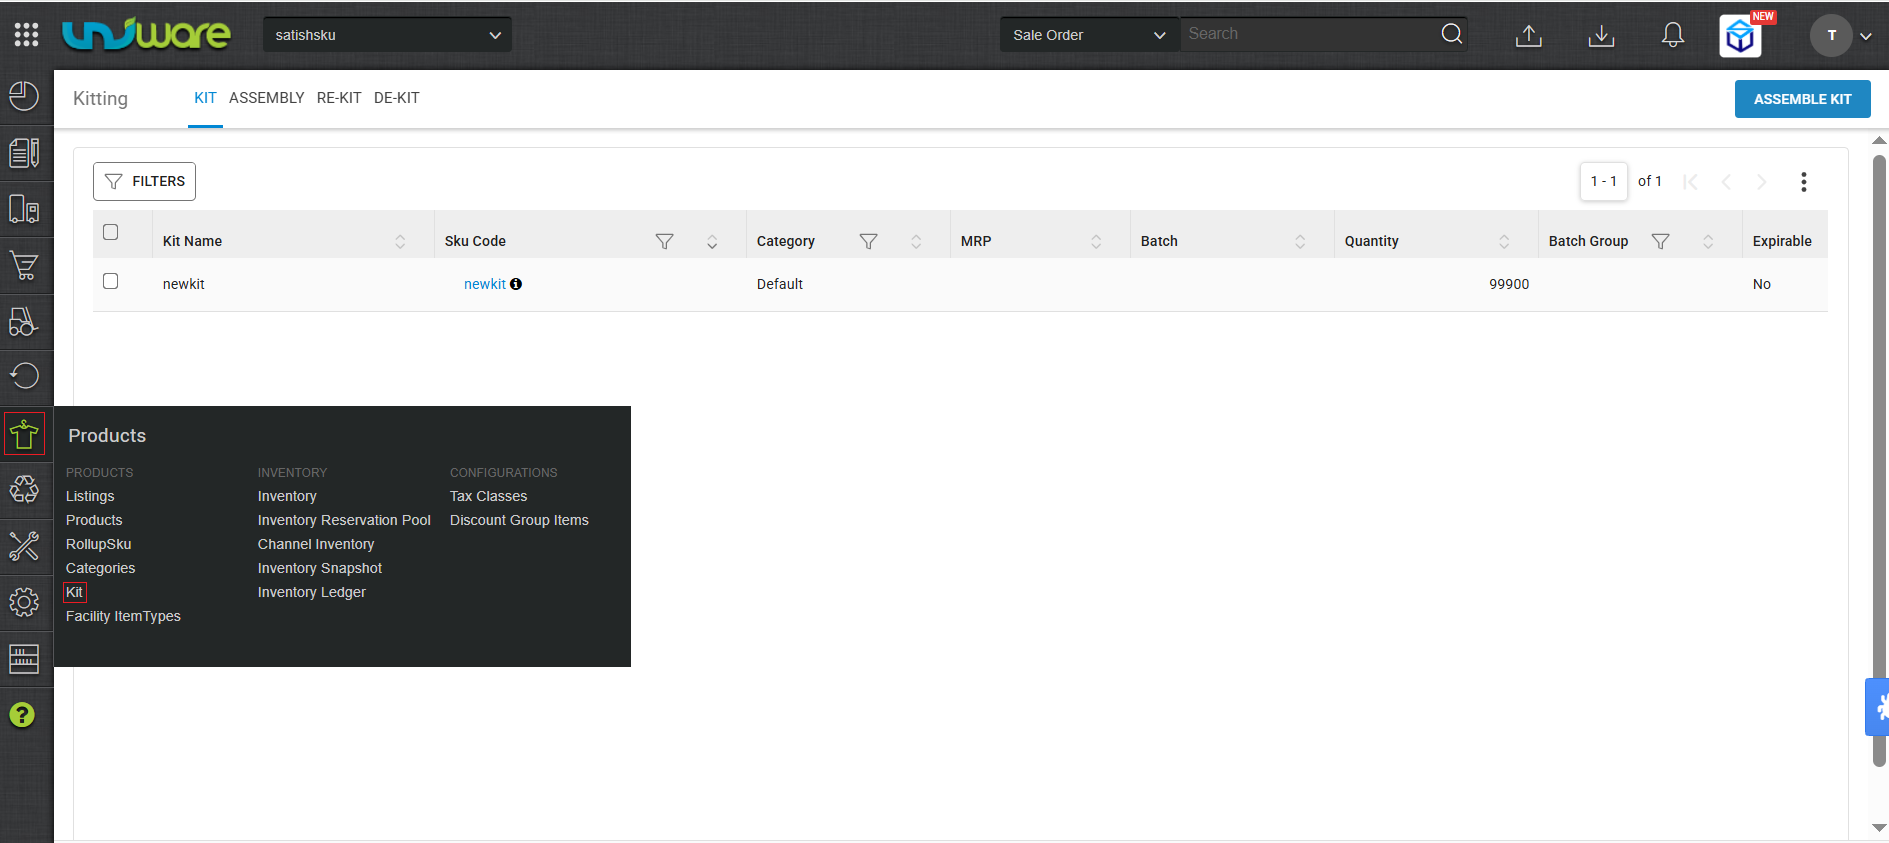
Step-1 : Login Uniware, Hover Products and Click Kit.
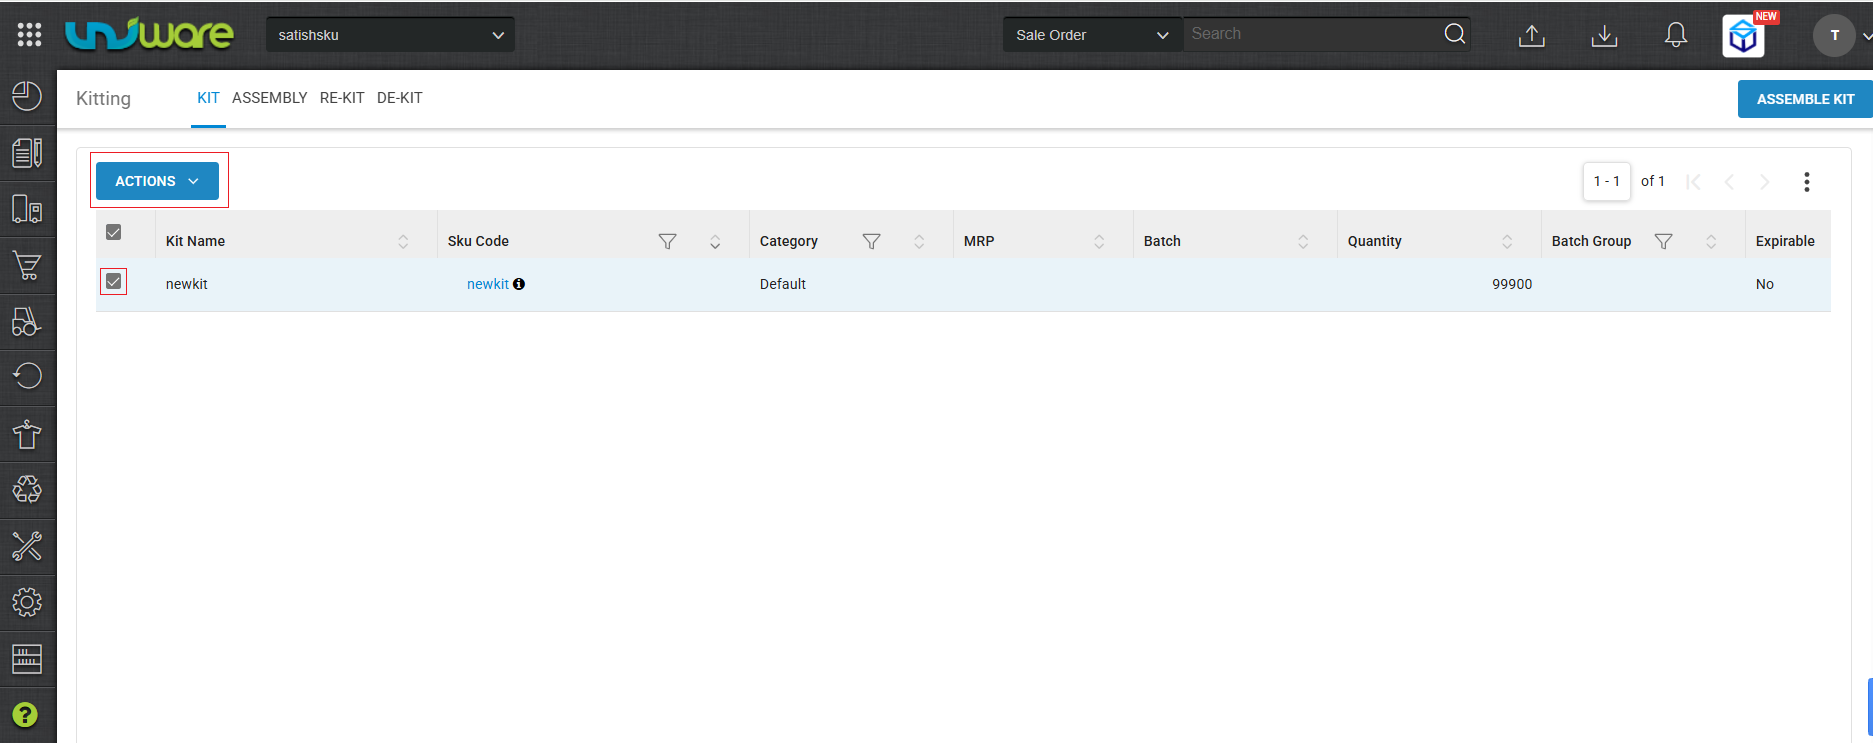
Step-2 : Select Checkbox of Kit & Click Action Dropdown.
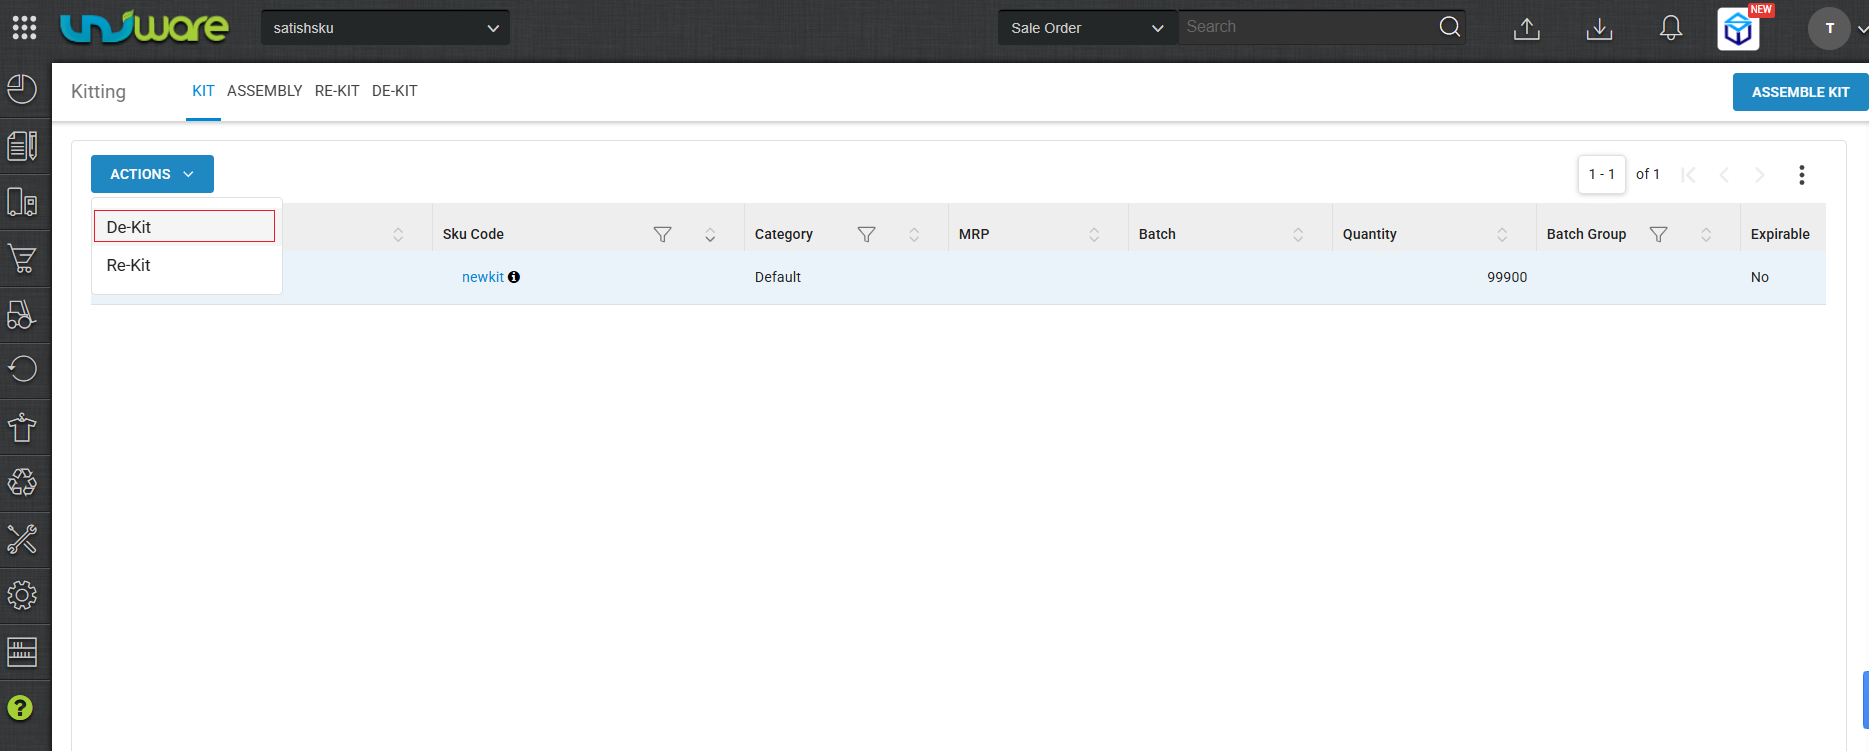
Step-3 : Select/ Click De-Kit.
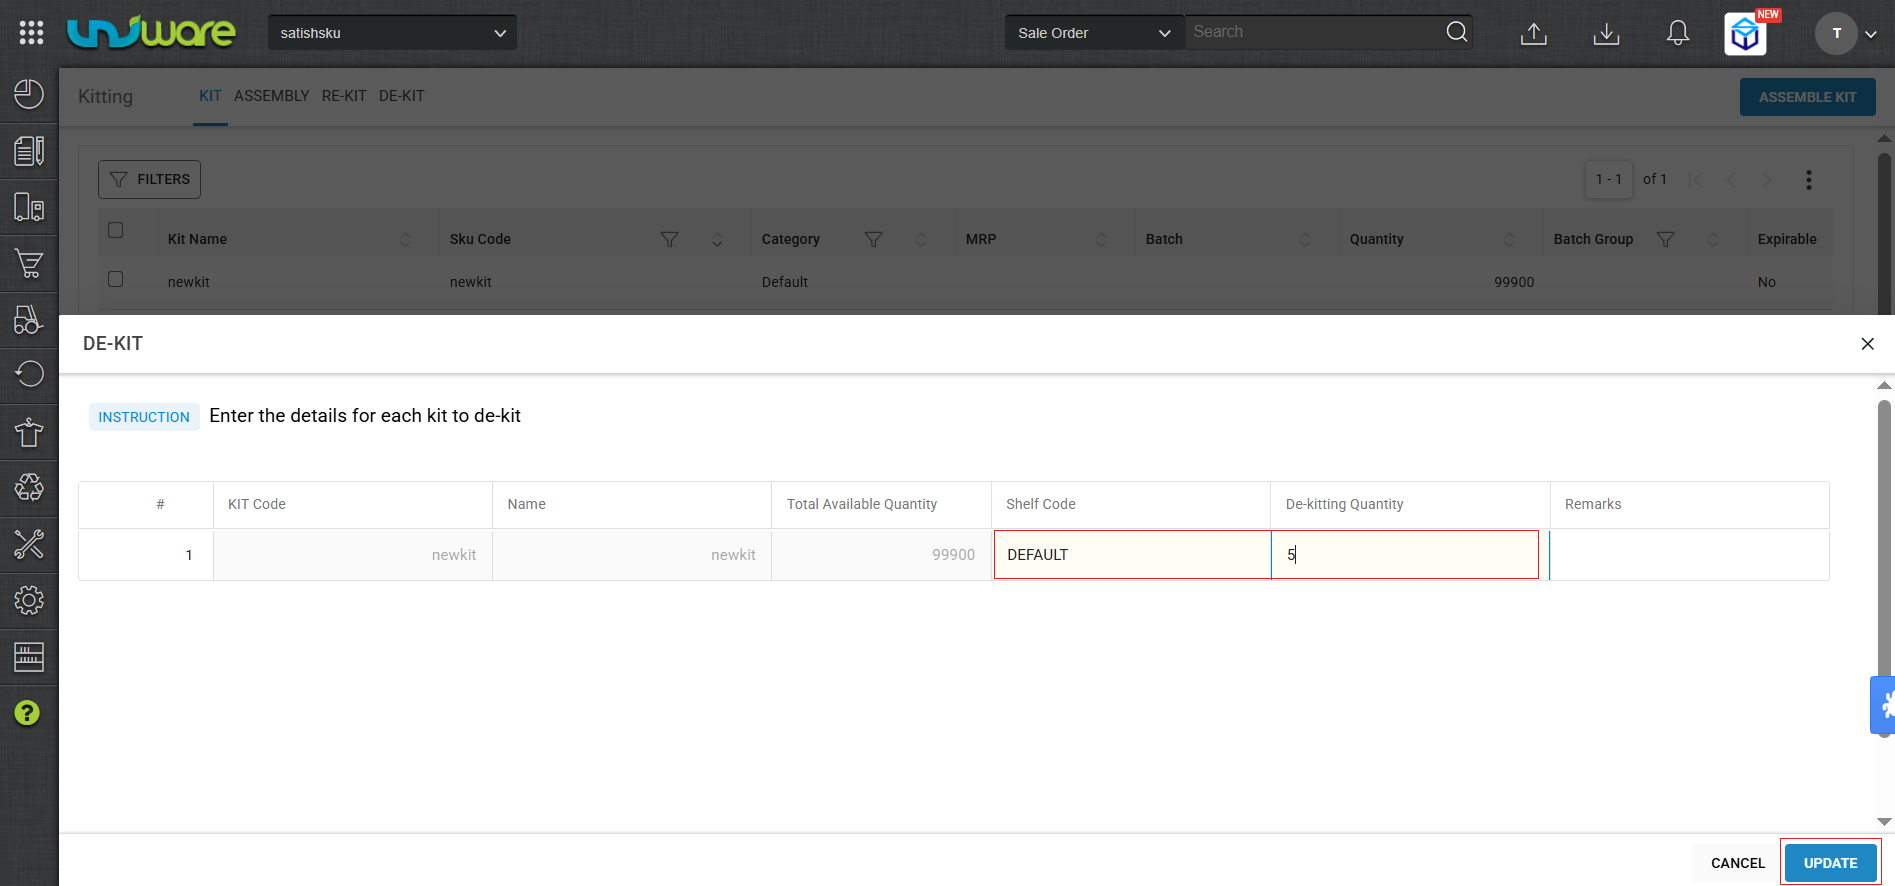
Step-4 : Enter Shelf Code, De-Kitting Quantity & Click UPDATE.
Part-2 : Create Picklist
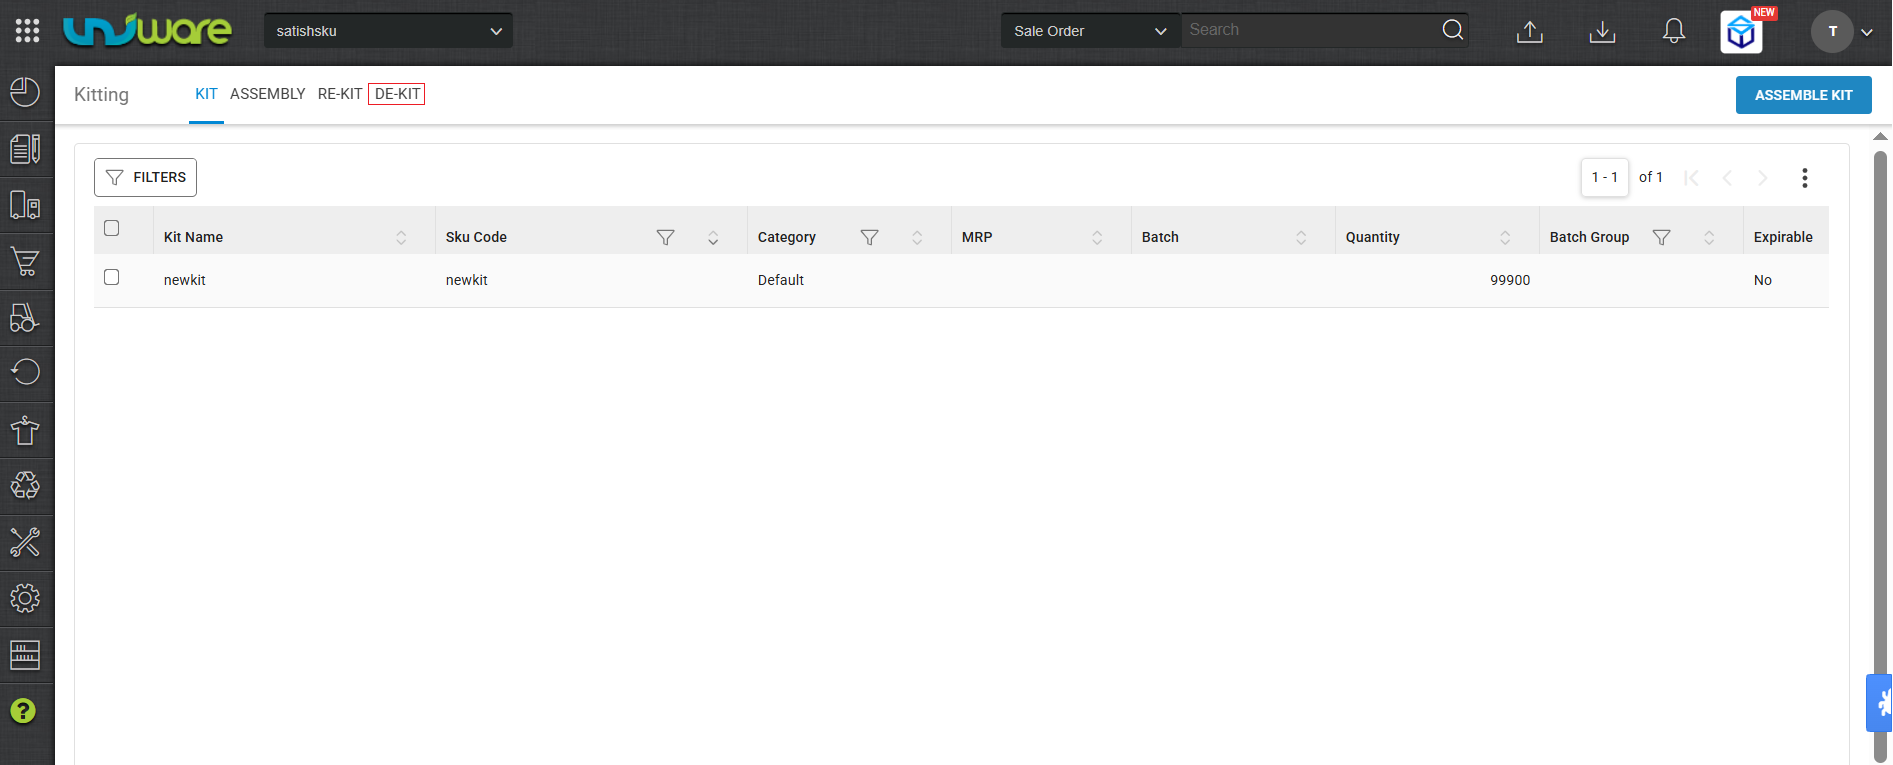
Step-5 : Navigate to De-Kit Section.
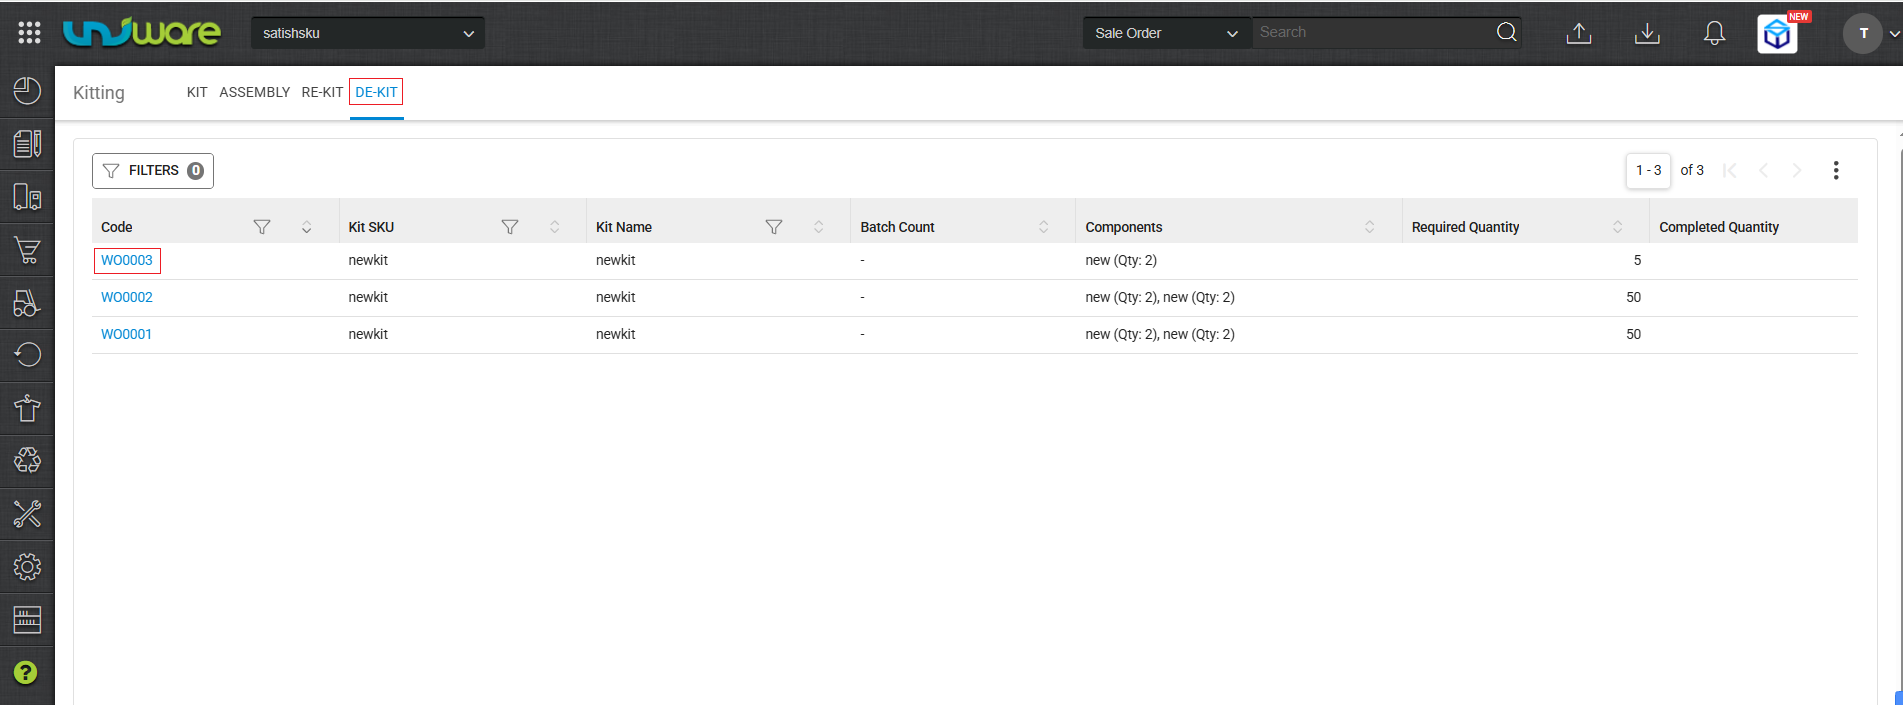
Step-6 : Select Recently Created Work Order.
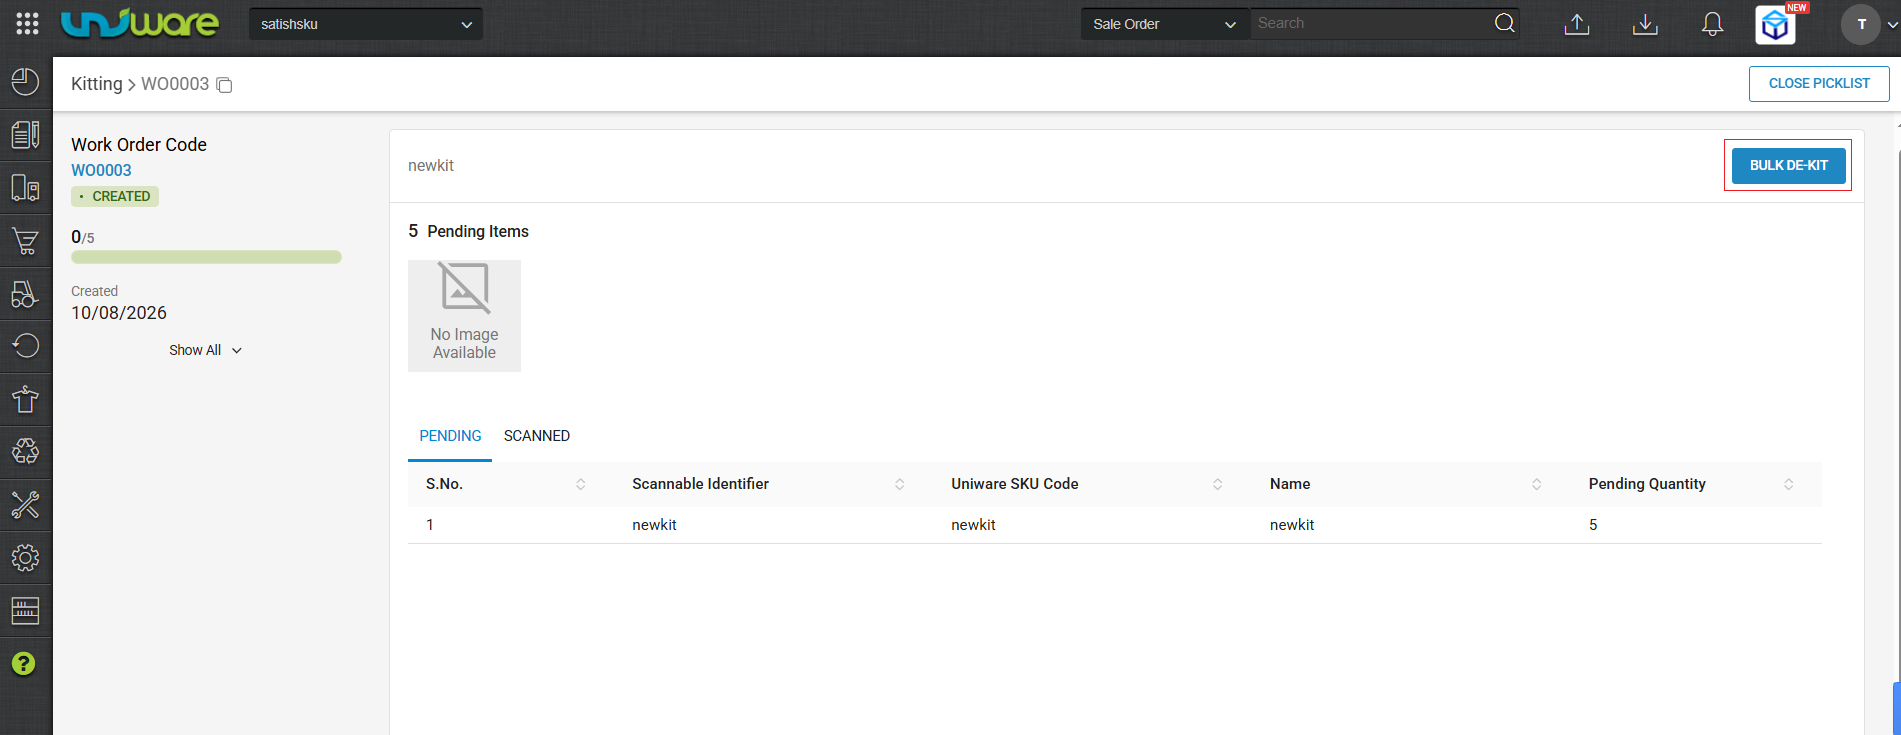
Step-7 : Click BULK DE-KIT.
Step-8 : Enter a Required Quantity and Click Add.
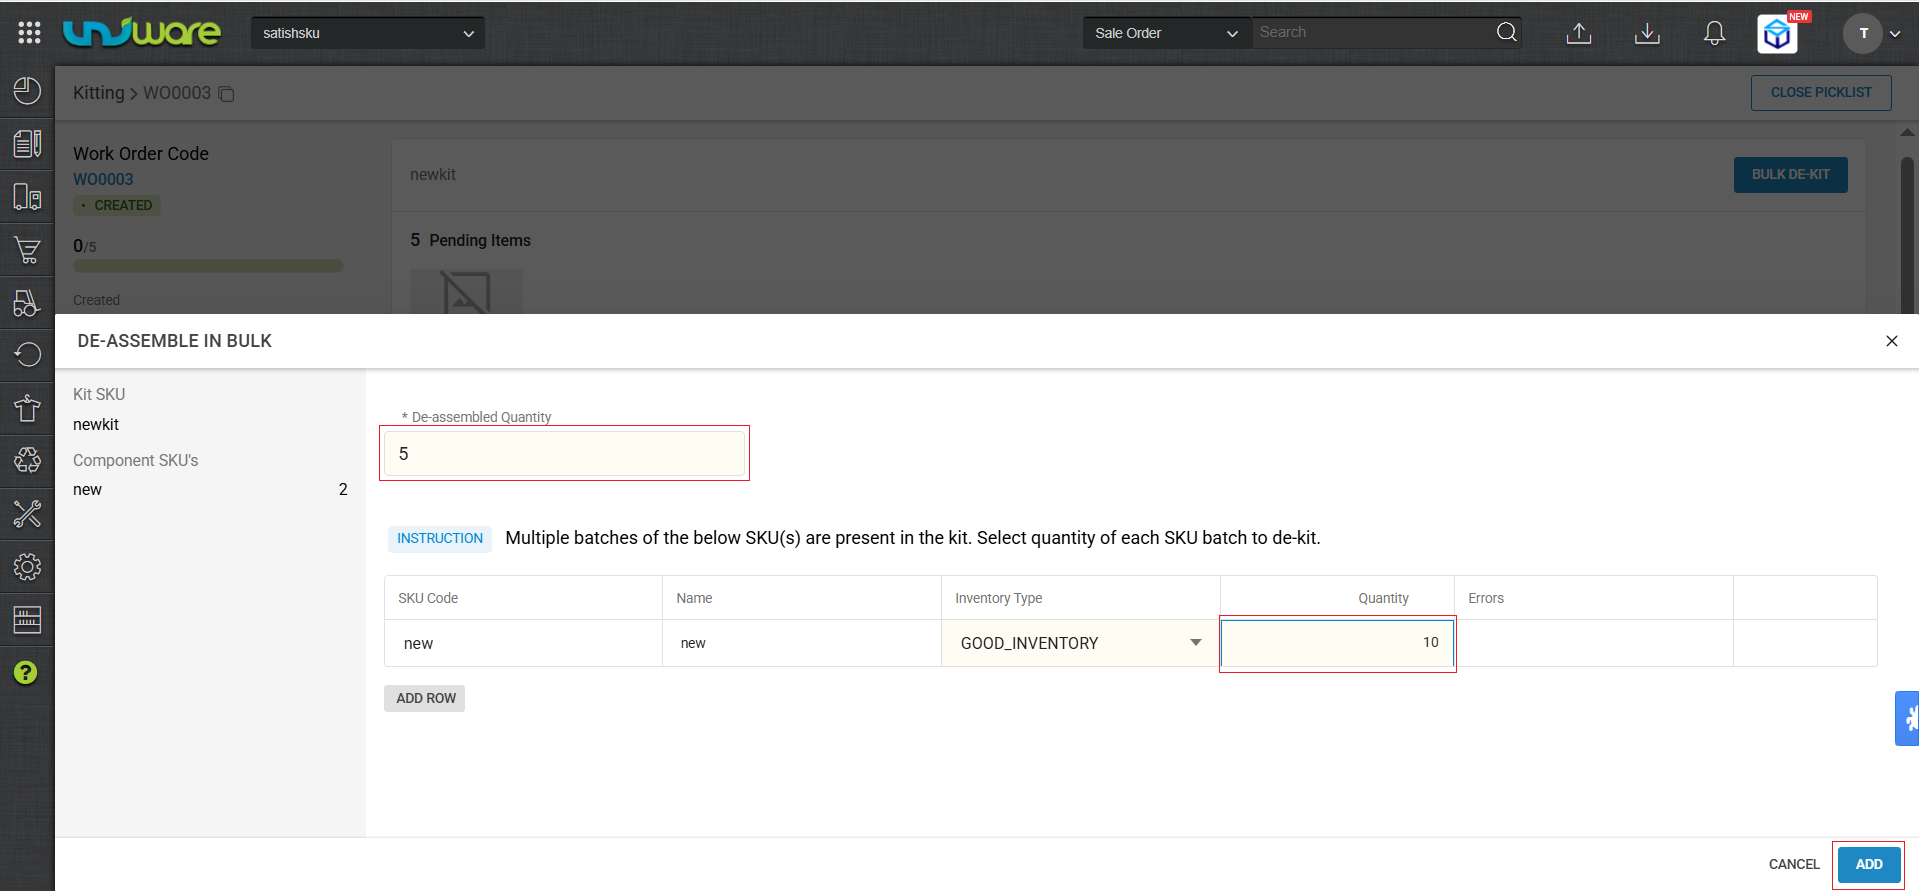
| Note: Enter the number of kits you wish to Disassemble in the De-assembled Quantity field. Ensure the Quantity field reflects the total number of individual SKUs generated from those kits. |
| Parameter | Value |
| De-assembled Quantity | Number ( Enter Quantity of De-assembled Kit ) |
| Quantity | Number ( Enter Quantity of all SKU containing in that specific Kit )
Calculation: Quantity = De-assembled Quantity × SKUs per Kit |
Step-9 : Click CLOSE PICKLIST.
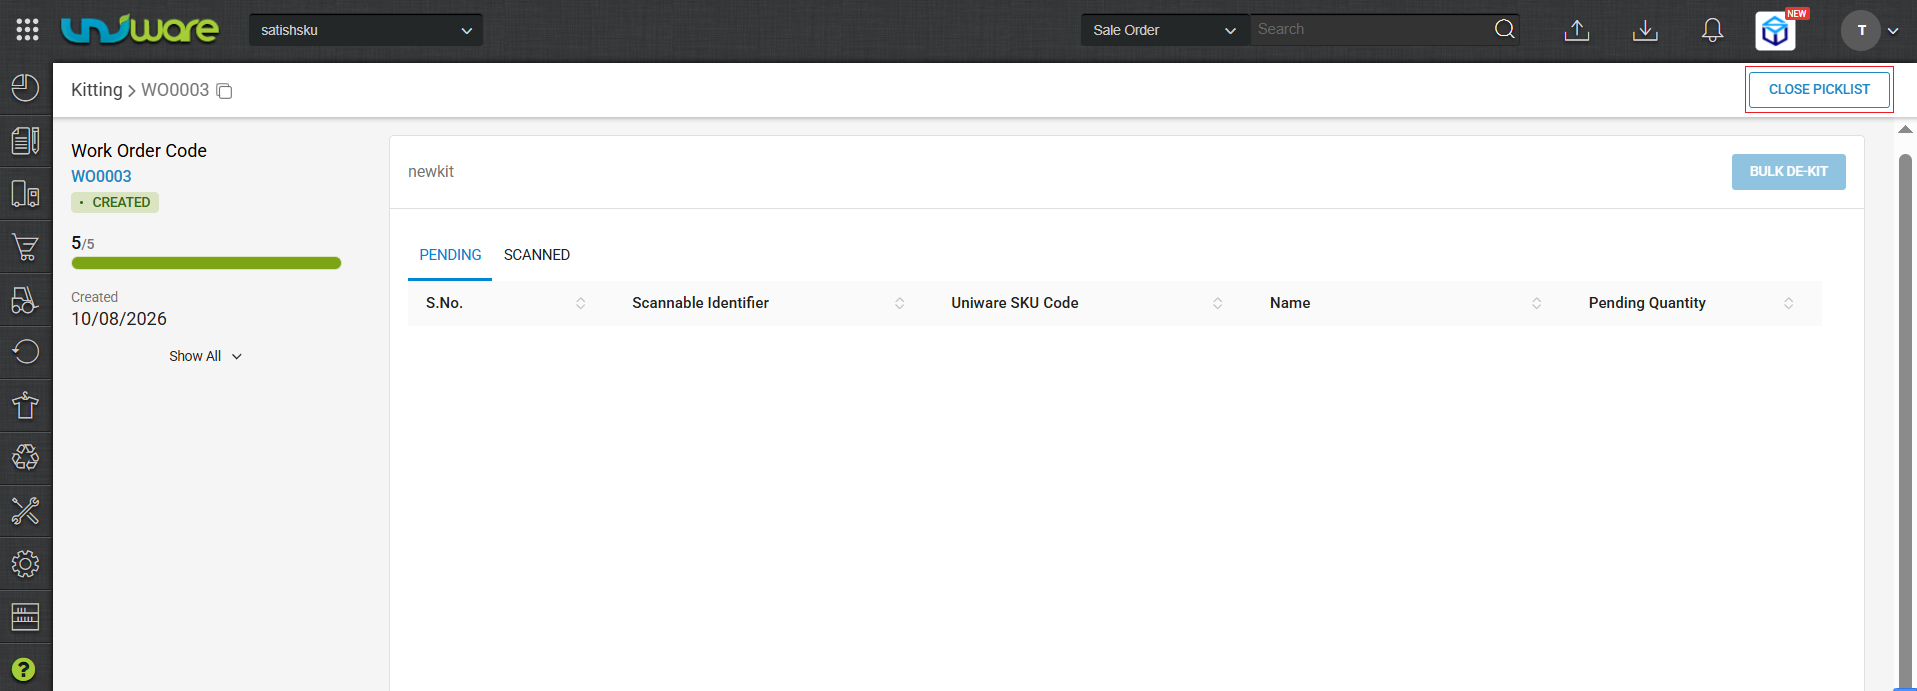
Part-3 : Create Putaway
Step-10 : Click ADD TO PUTAWAY.
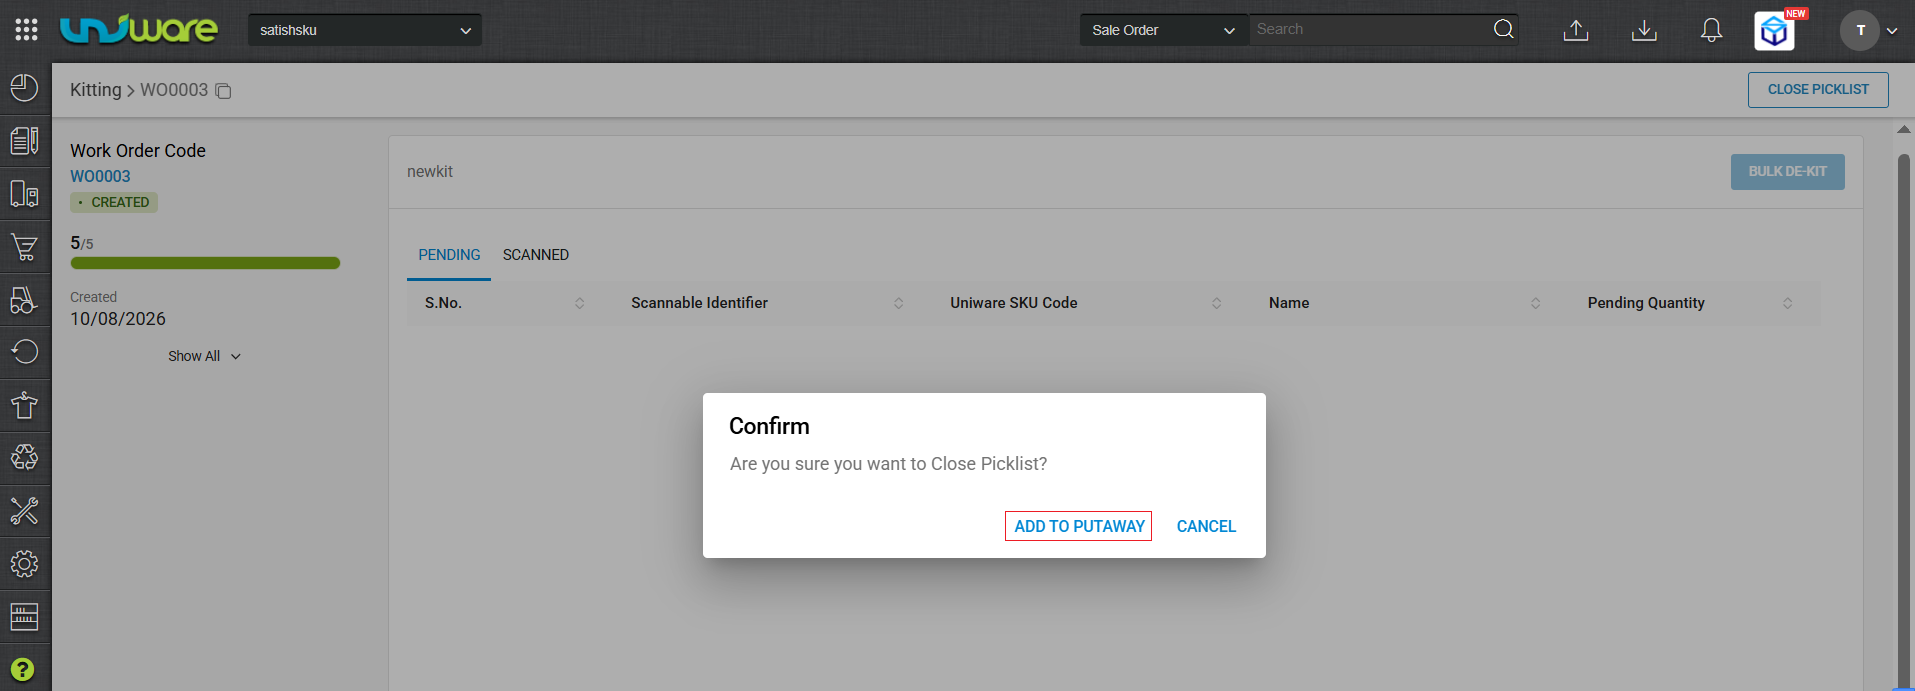
Step-11 : Hover Inbound Section and click Putaway.
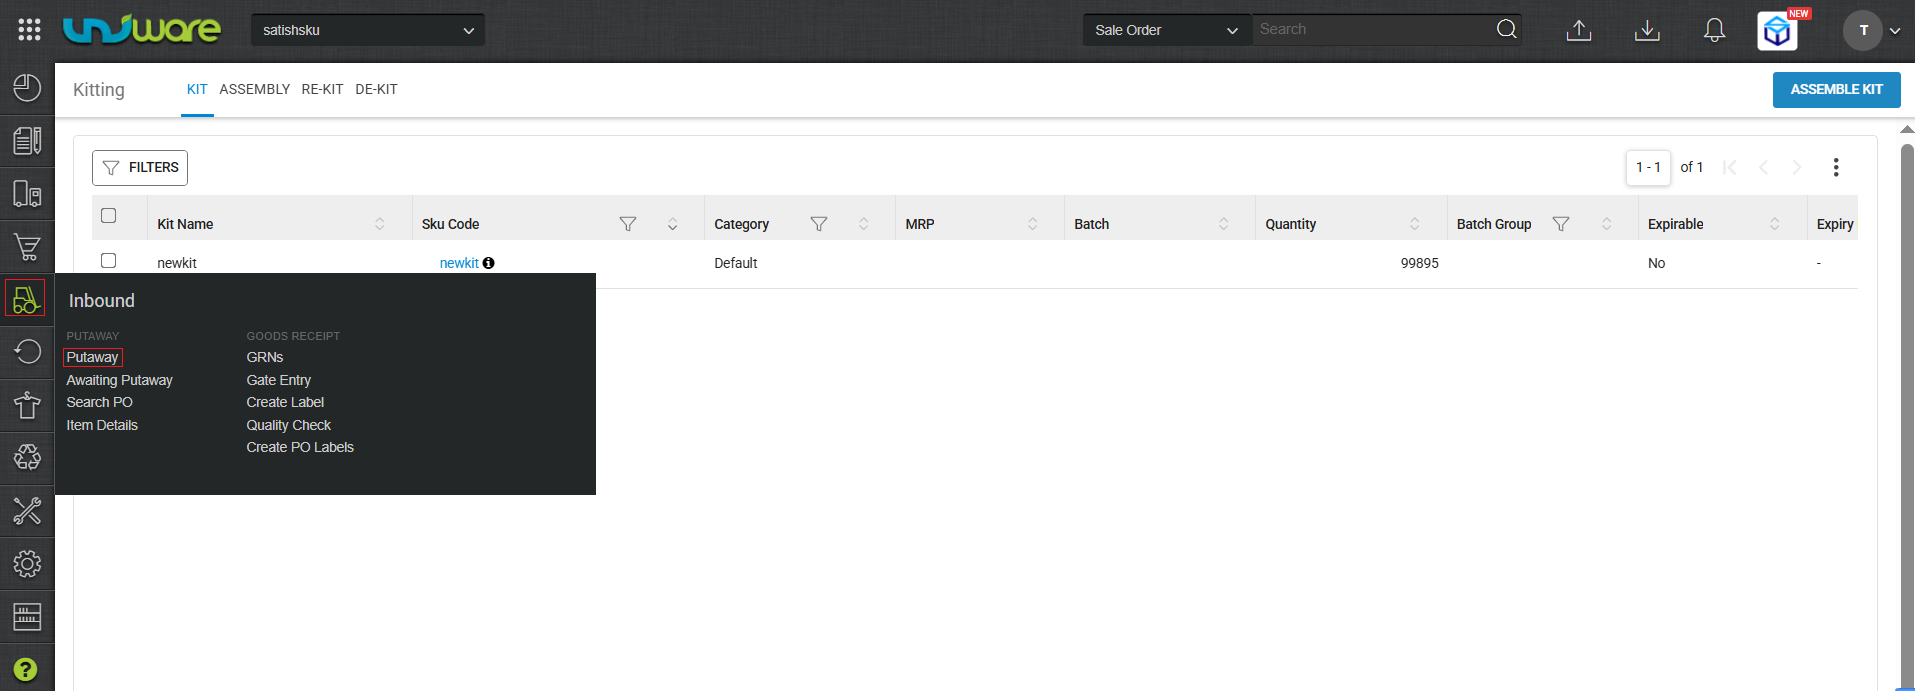
Step-12 : Click Create Putaway.
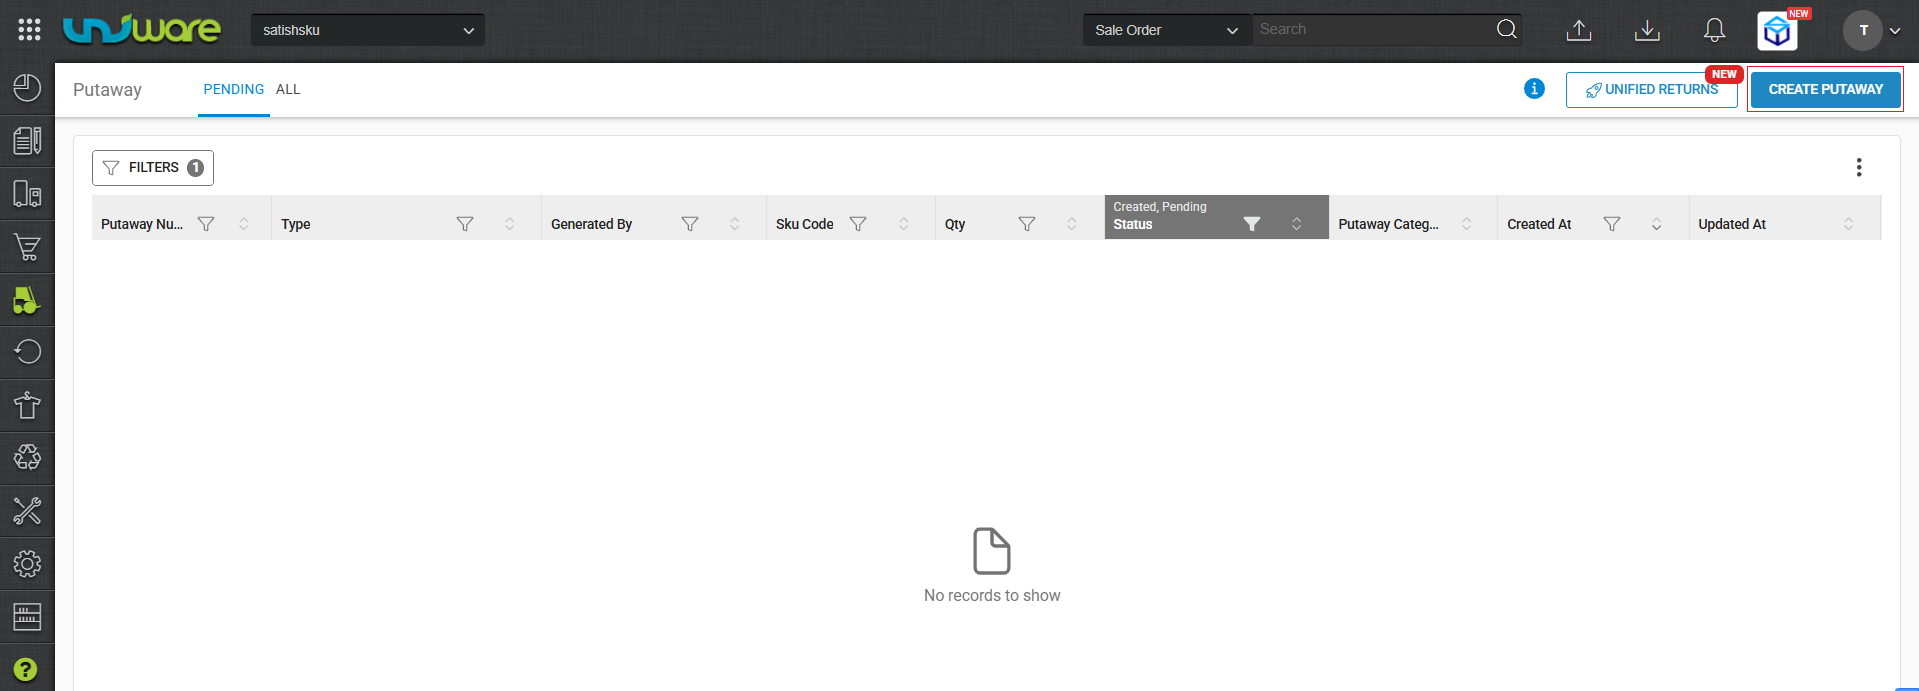
Step-13 : Select Putaway Type as a PUTAWAY_PICKLIST_ITEM.
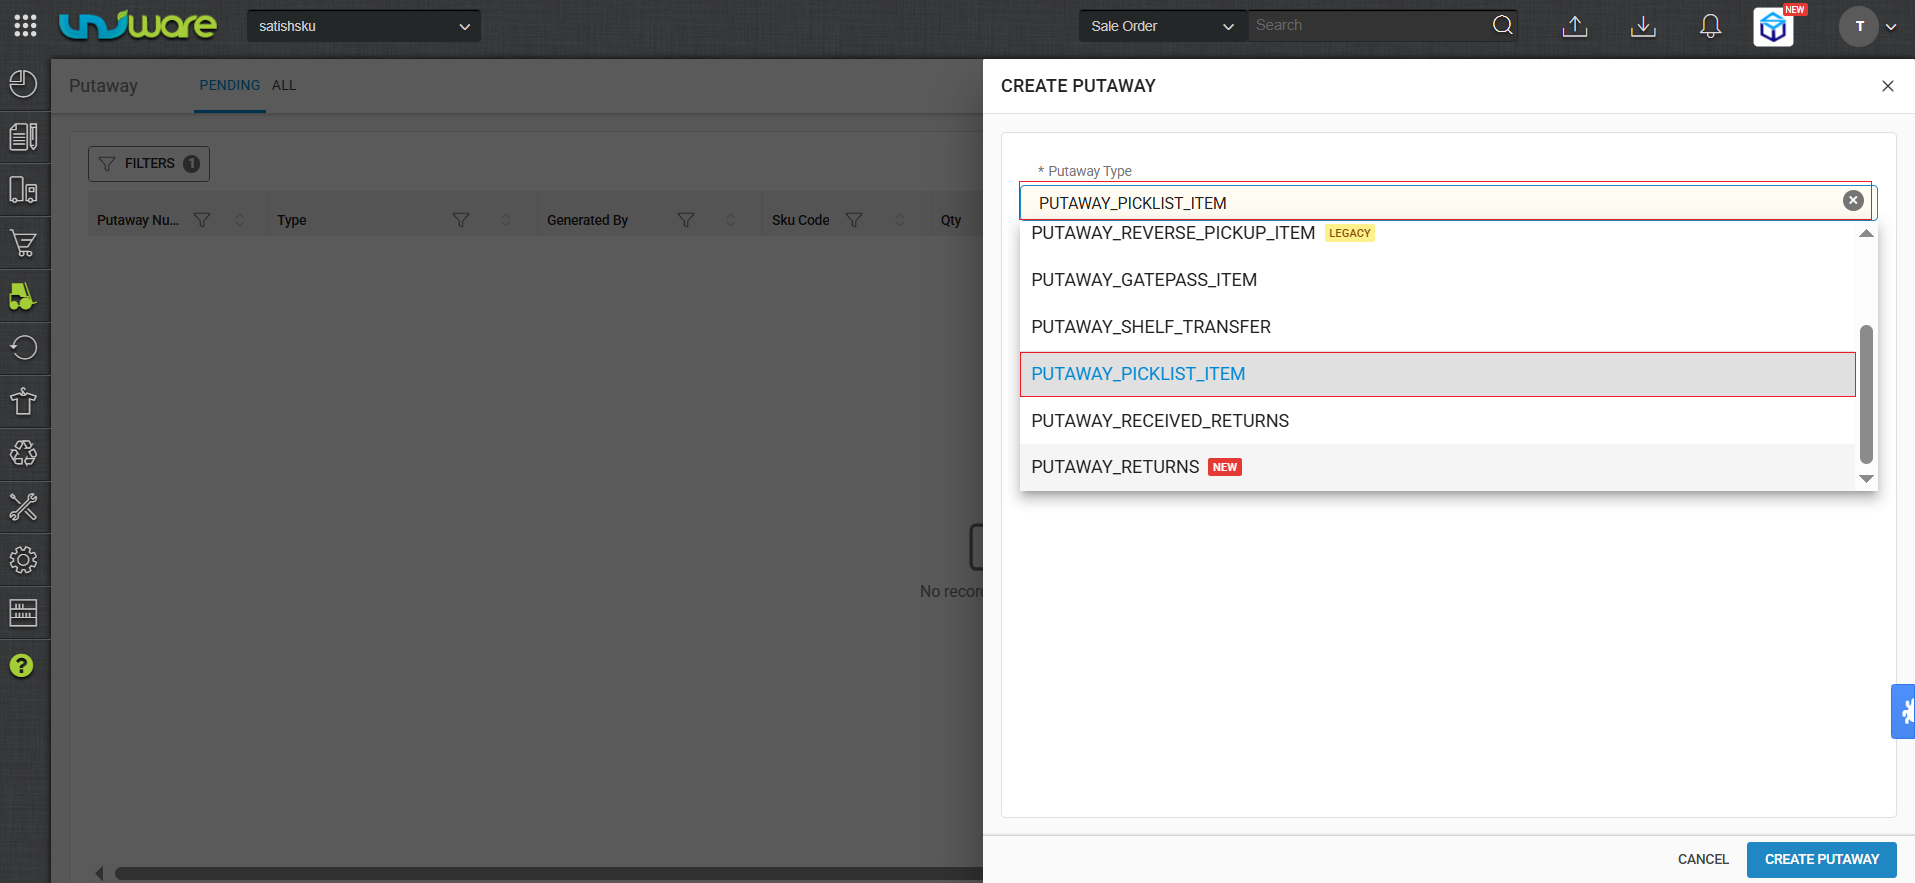
Step-14 : Select Category as KITTING.
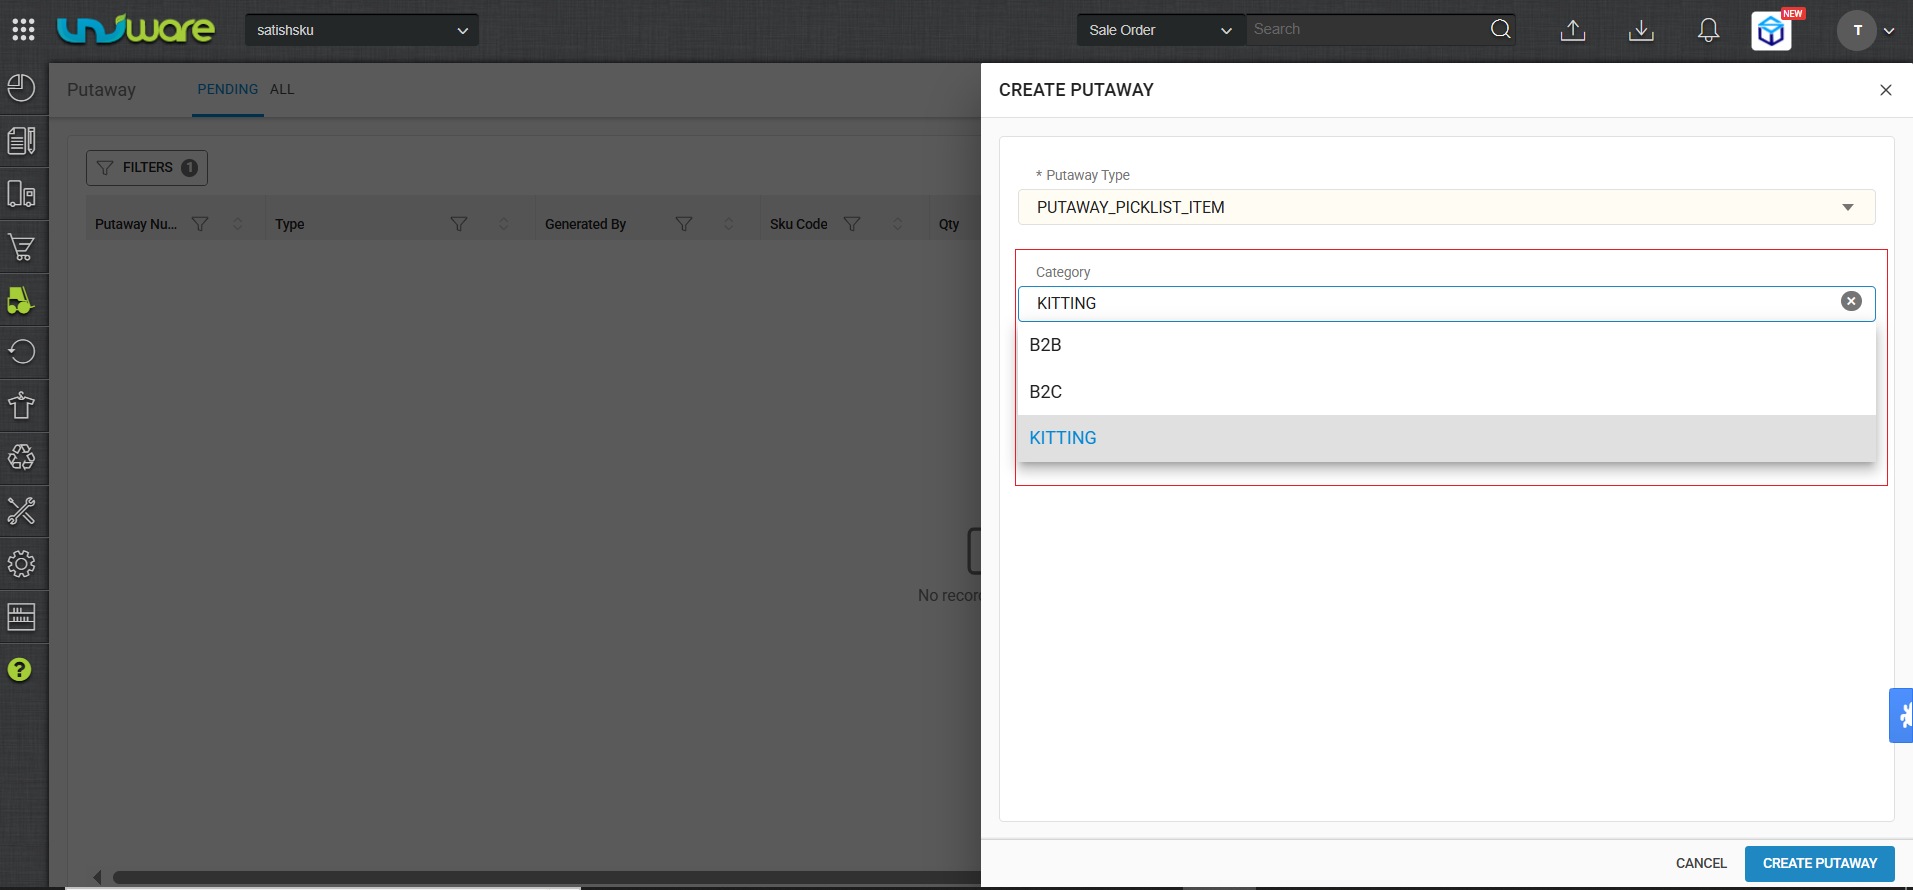
Step-15 : Click CREATE PUTAWAY.
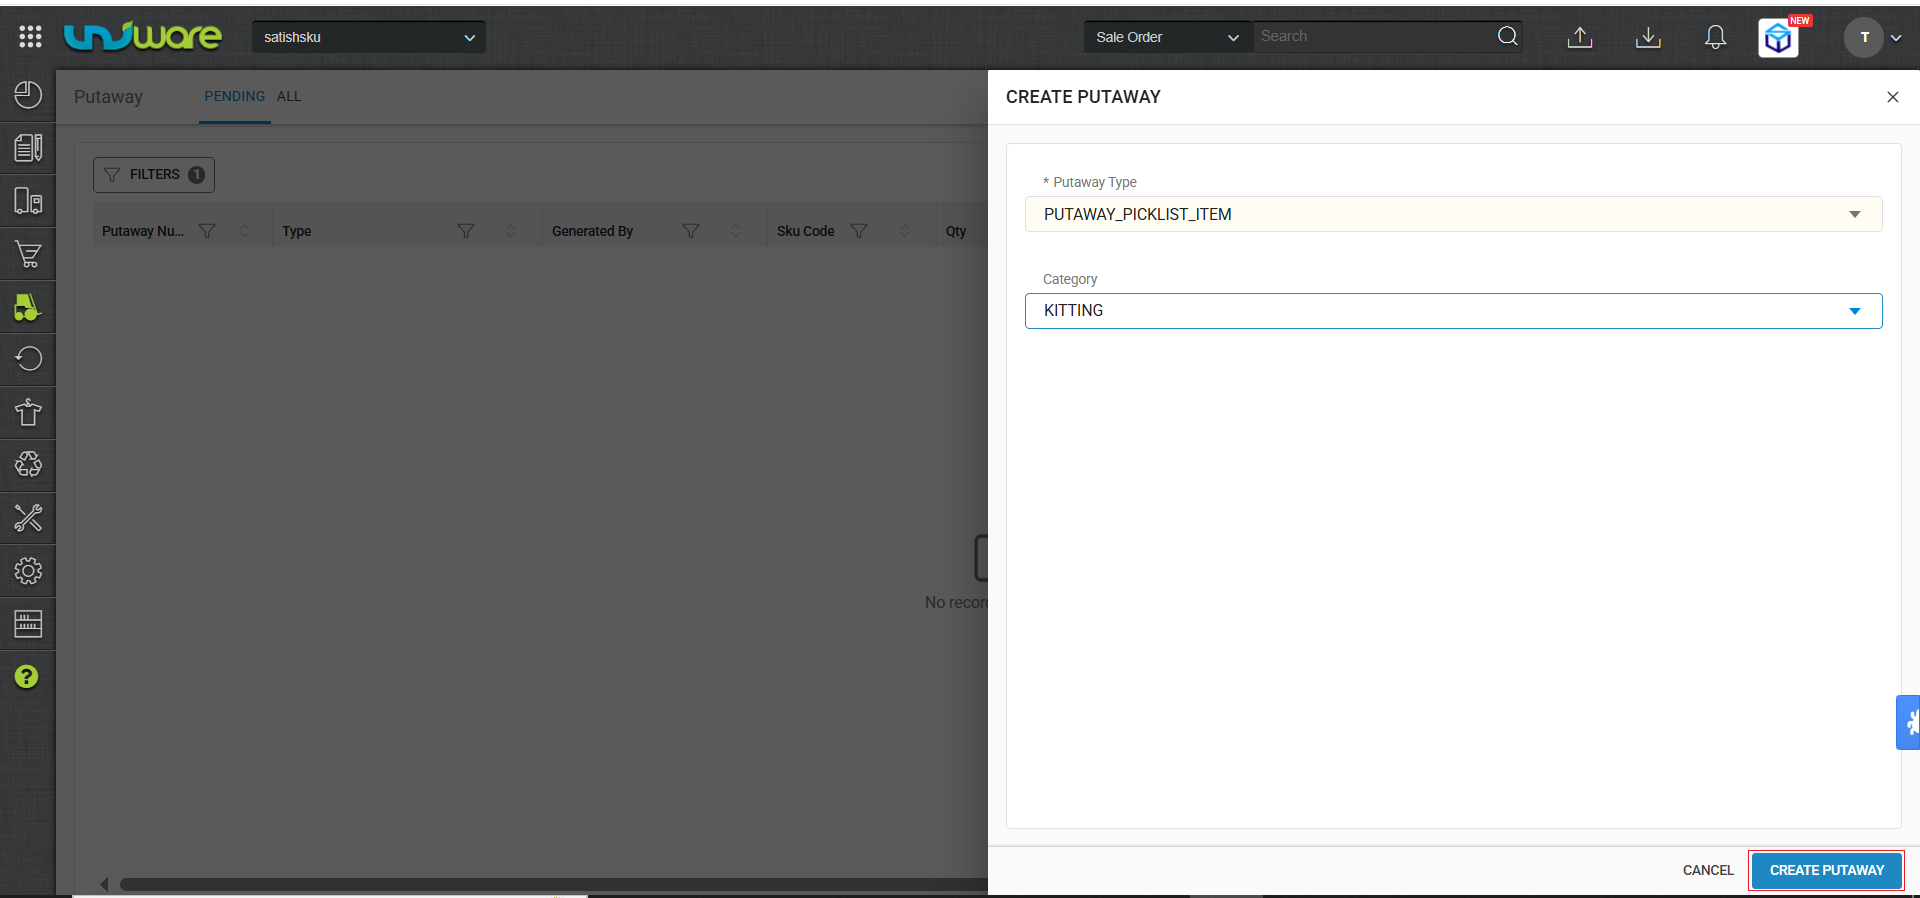
Step-16 : Select WORK ORDER CODE from the Dropdown and Enter Work Order Code to scan.
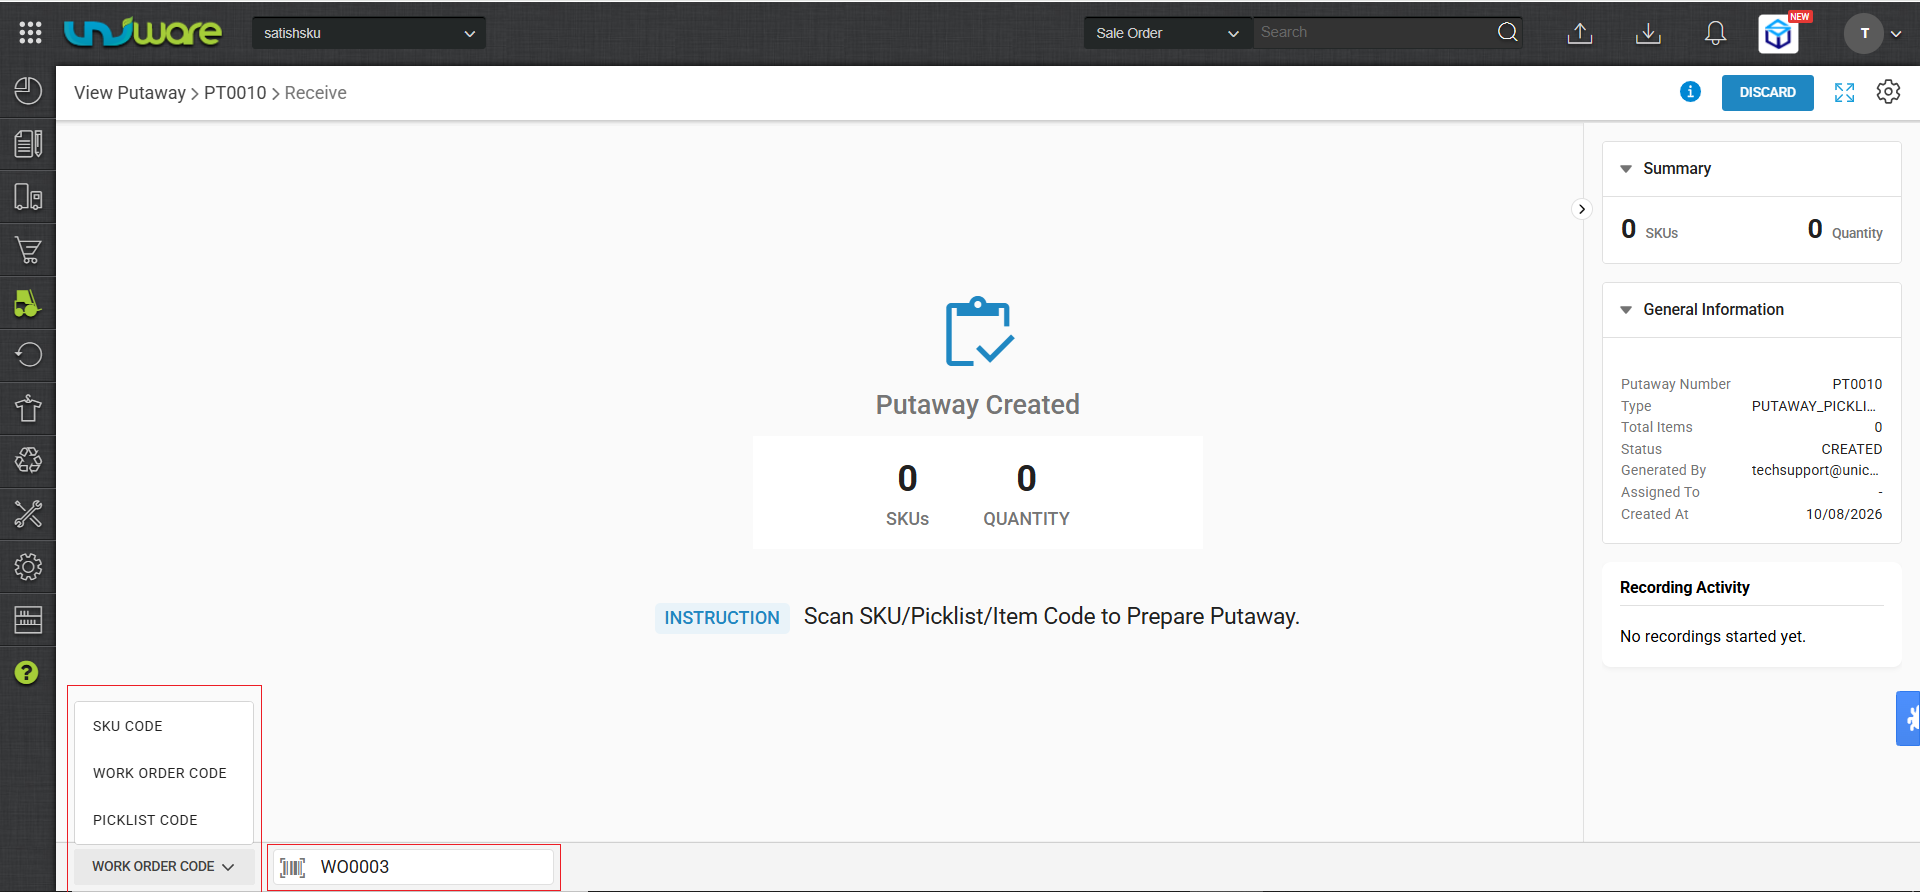
Step-17 : Enter a Quantity and Click ADD TO PUTAWAY.
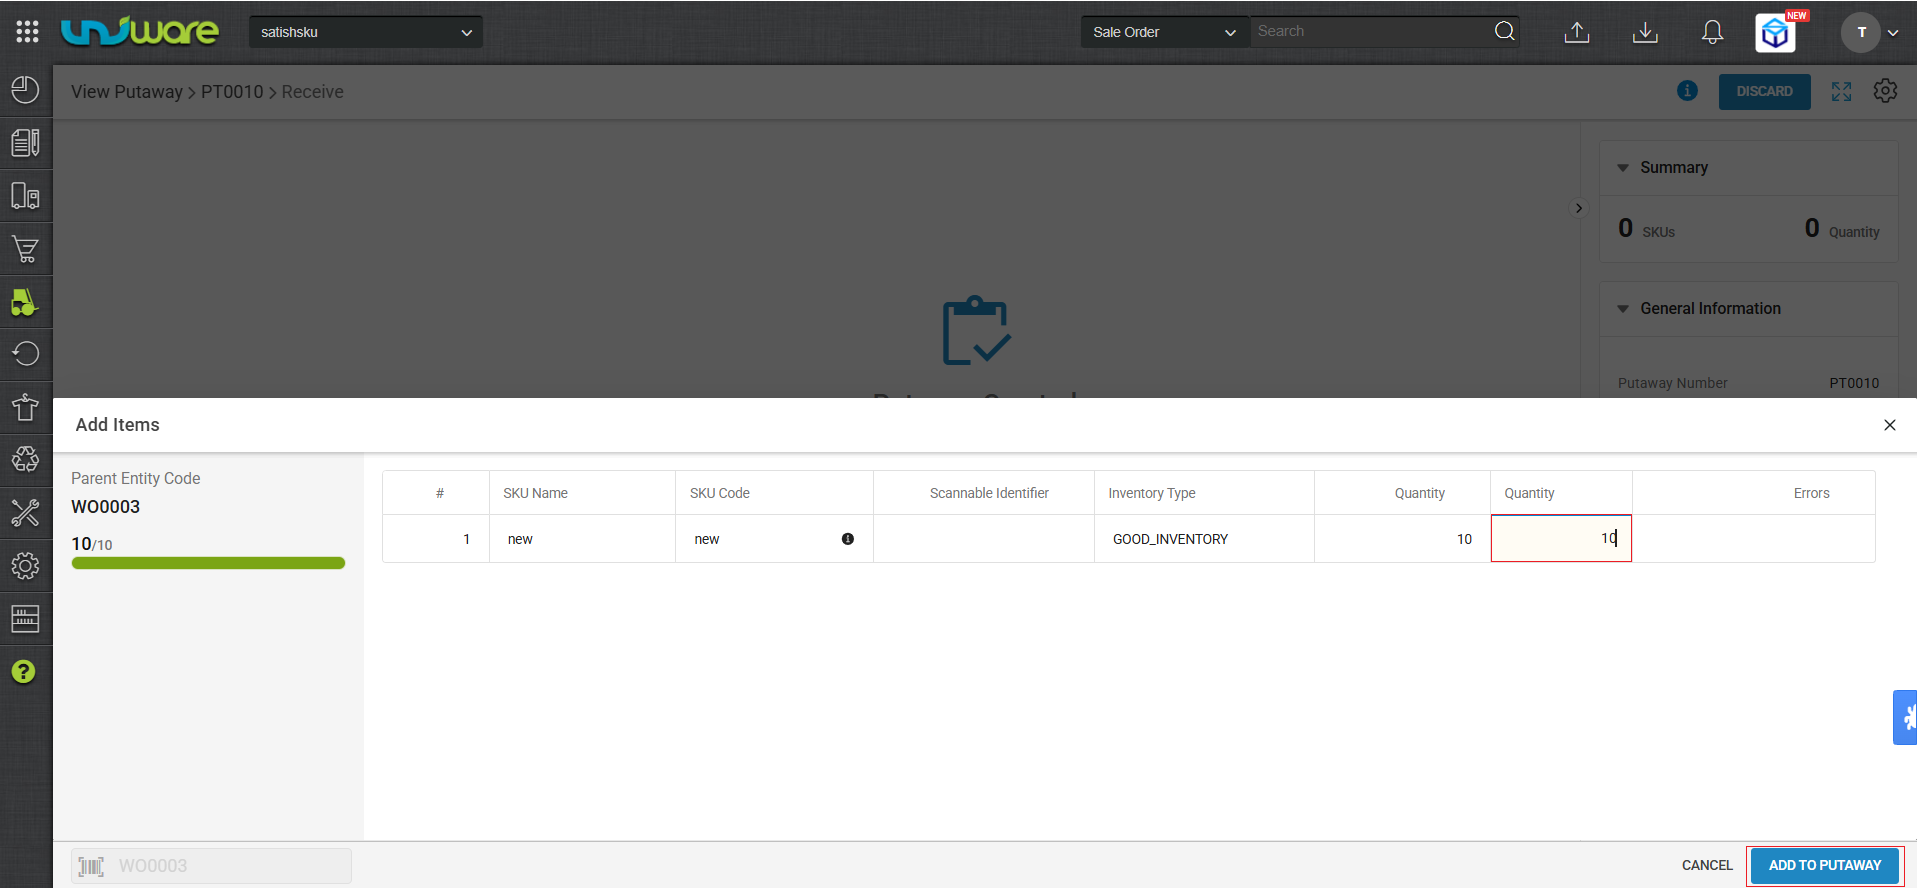
Part-4 : Complete Putaway.
Step-18 : Click CREATE PUTAWAY LIST.
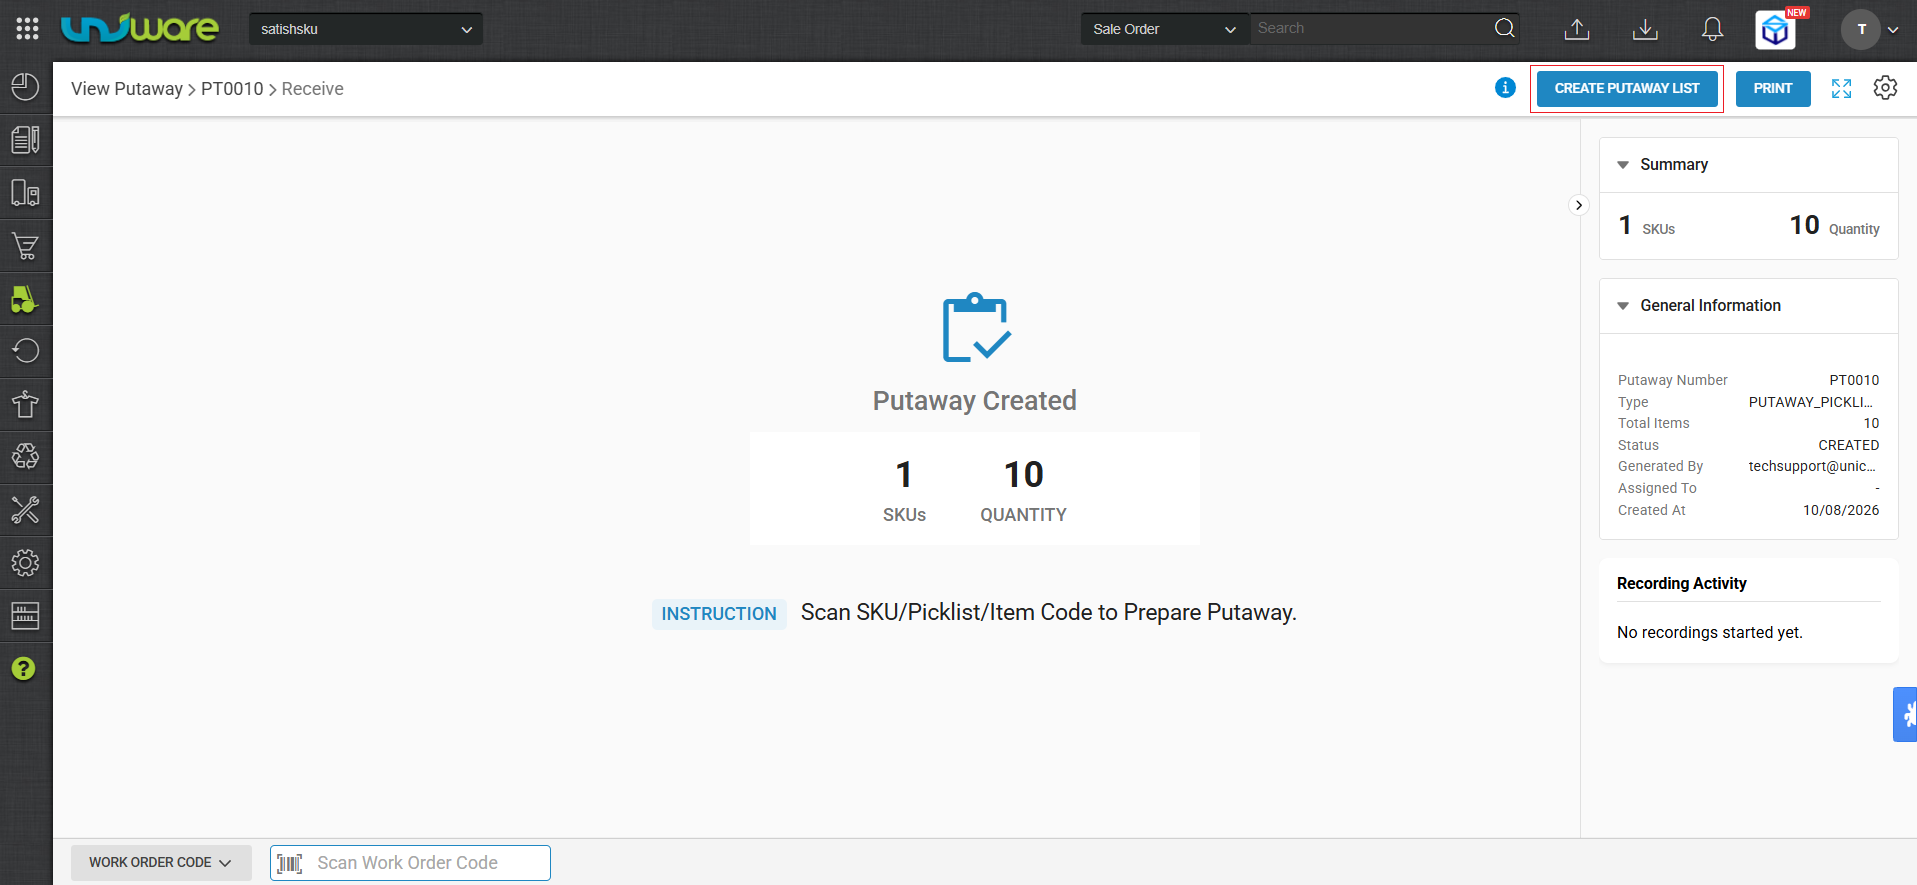
Step-19 : Click COMPLETE PUTAWAY.
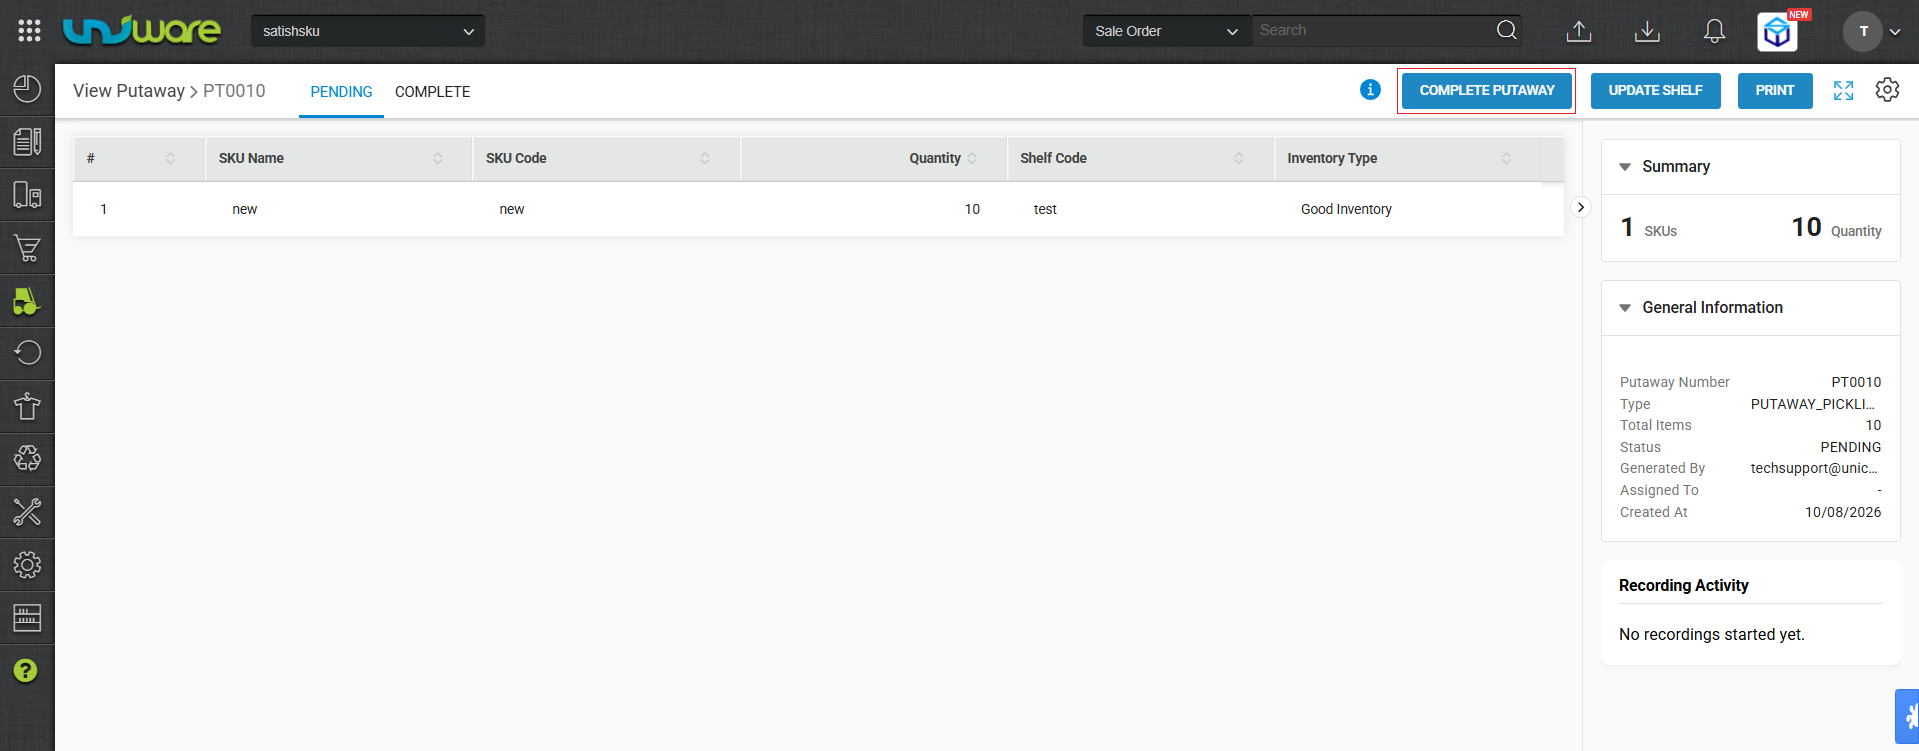
Step-20 : Click Yes on Showing Pop-Up to complete putaway.
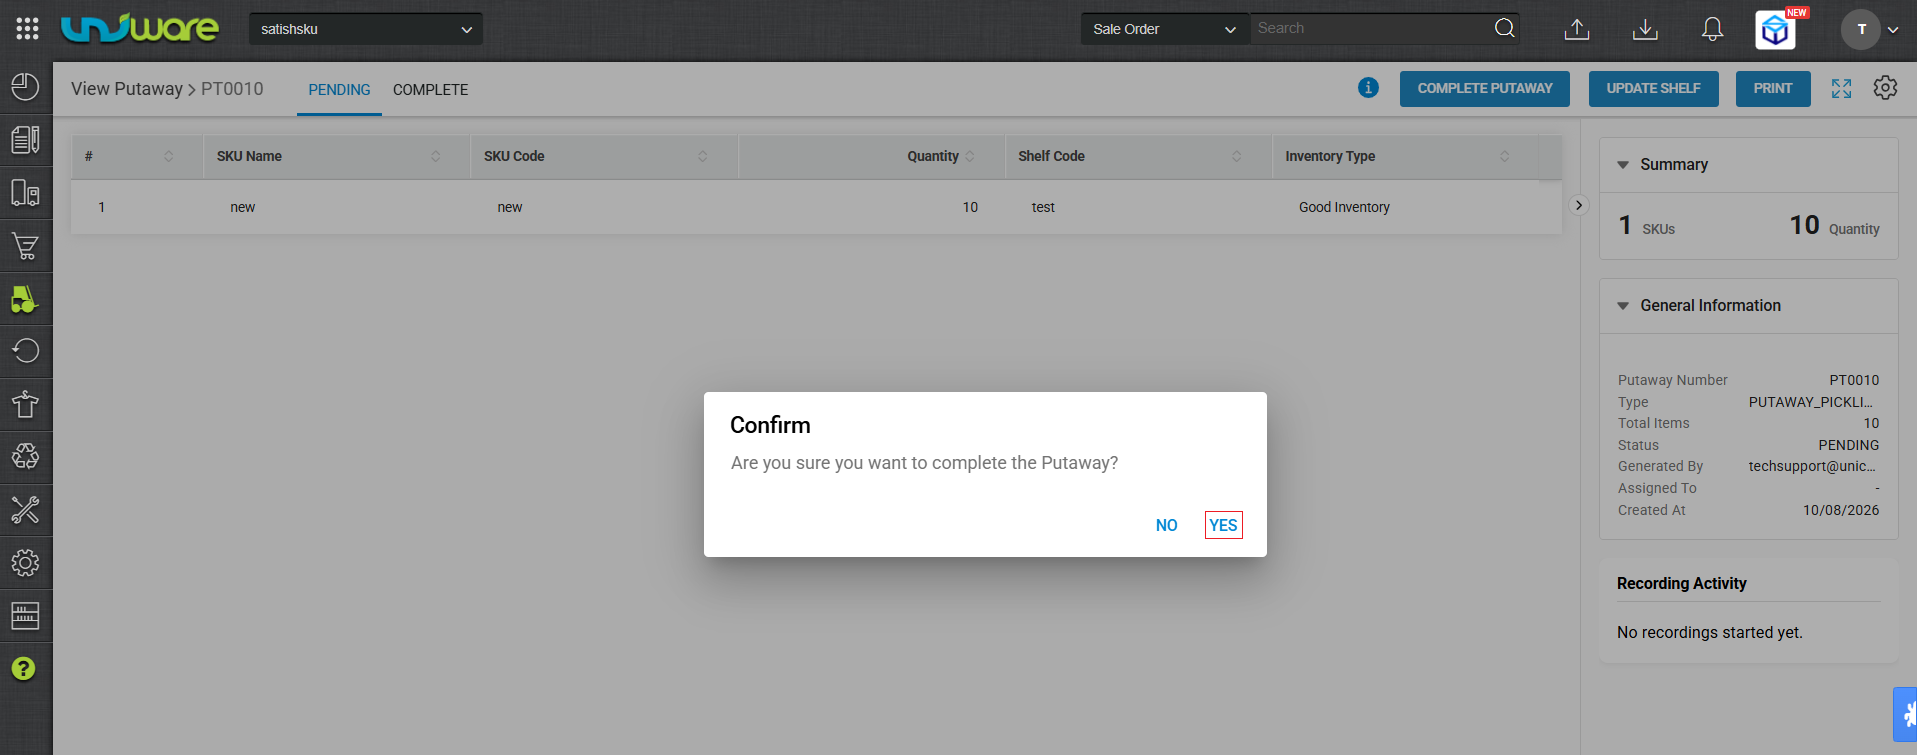
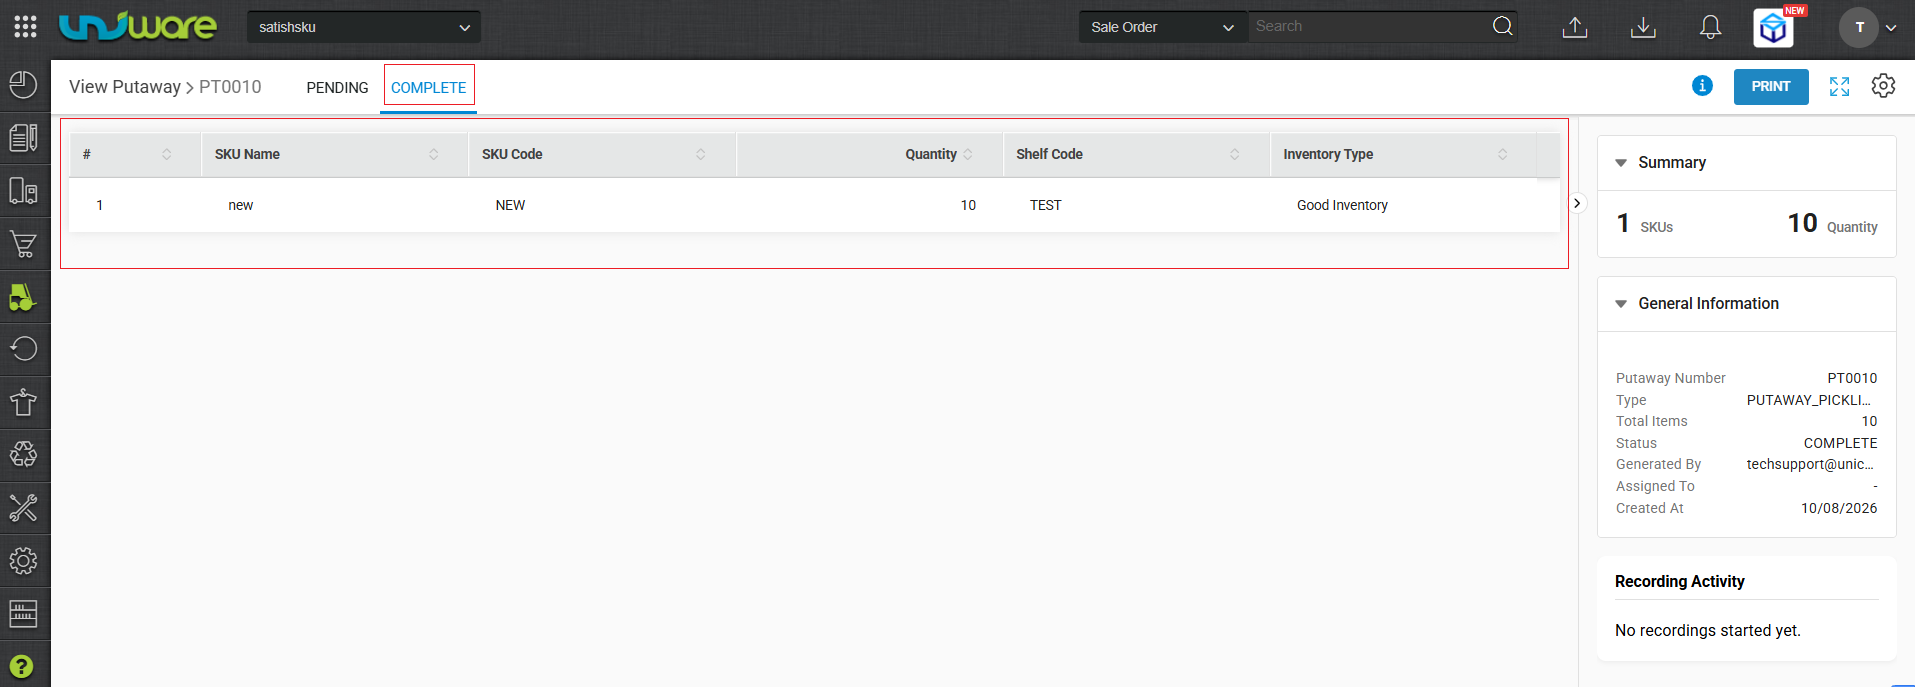
Step-21 : Navigate Complete tab to see recently completed putaway
Frequently Asked Questions
Q: Can I de-kit only part of my kit stock?
A: Yes. Enter the specific quantity of kits you want to break down in the Quantity field when creating the de-kit work order you don’t need to de-kit your entire kit inventory at once.
Q: What happens to damaged components during de-kitting?
A: Components marked as Bad during picking or putaway are recorded with a reason code and are not added back to sellable inventory.