
Overview
Introduction
This document outlines the end-to-end inbound process in Unicommerce WMS.
To enhance traceability and reduce manual data entry errors, the system now allows a mandatory link between Gate Entry, the Purchase Order (PO), and the Goods Receipt Note (GRN).
By linking these stages, warehouses can ensure that every item received is traced back to a physical vehicle arrival and a valid, approved PO.
Key Benefits
-
End-to-End Tracking: Monitor inbound processes from dock unloading to final putaway.
-
Data Integrity: Eliminate manual errors by auto-filling Vendor Invoice details from the Gate Entry to the GRN.
-
Validation: Prevent unloading of vehicles that do not have a valid, approved Purchase Order.
Process Workflow
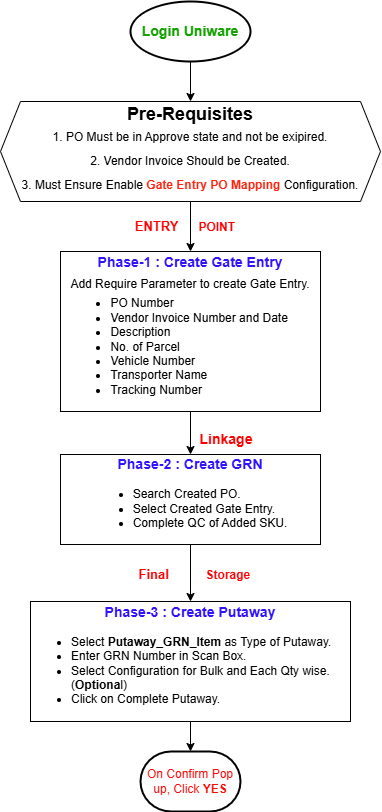
Prerequisites & Configurations
Before using Gate Entry Feature flow, ensure the following settings are configured
1. The PO must be in Approved status and not expired.
2. Vendor Invoice Should be created.
3. Enable configuration “Gate Entry PO Mapping Enabled“.
To enable “Gate Entry PO Mapping Enabled” follows below mentioned steps.
Step-1 : Login Uniware, Hover Settings and Click General Settings.
Step-2: Search ” Gate Entry PO Mapping Enabled ” and Enable it.
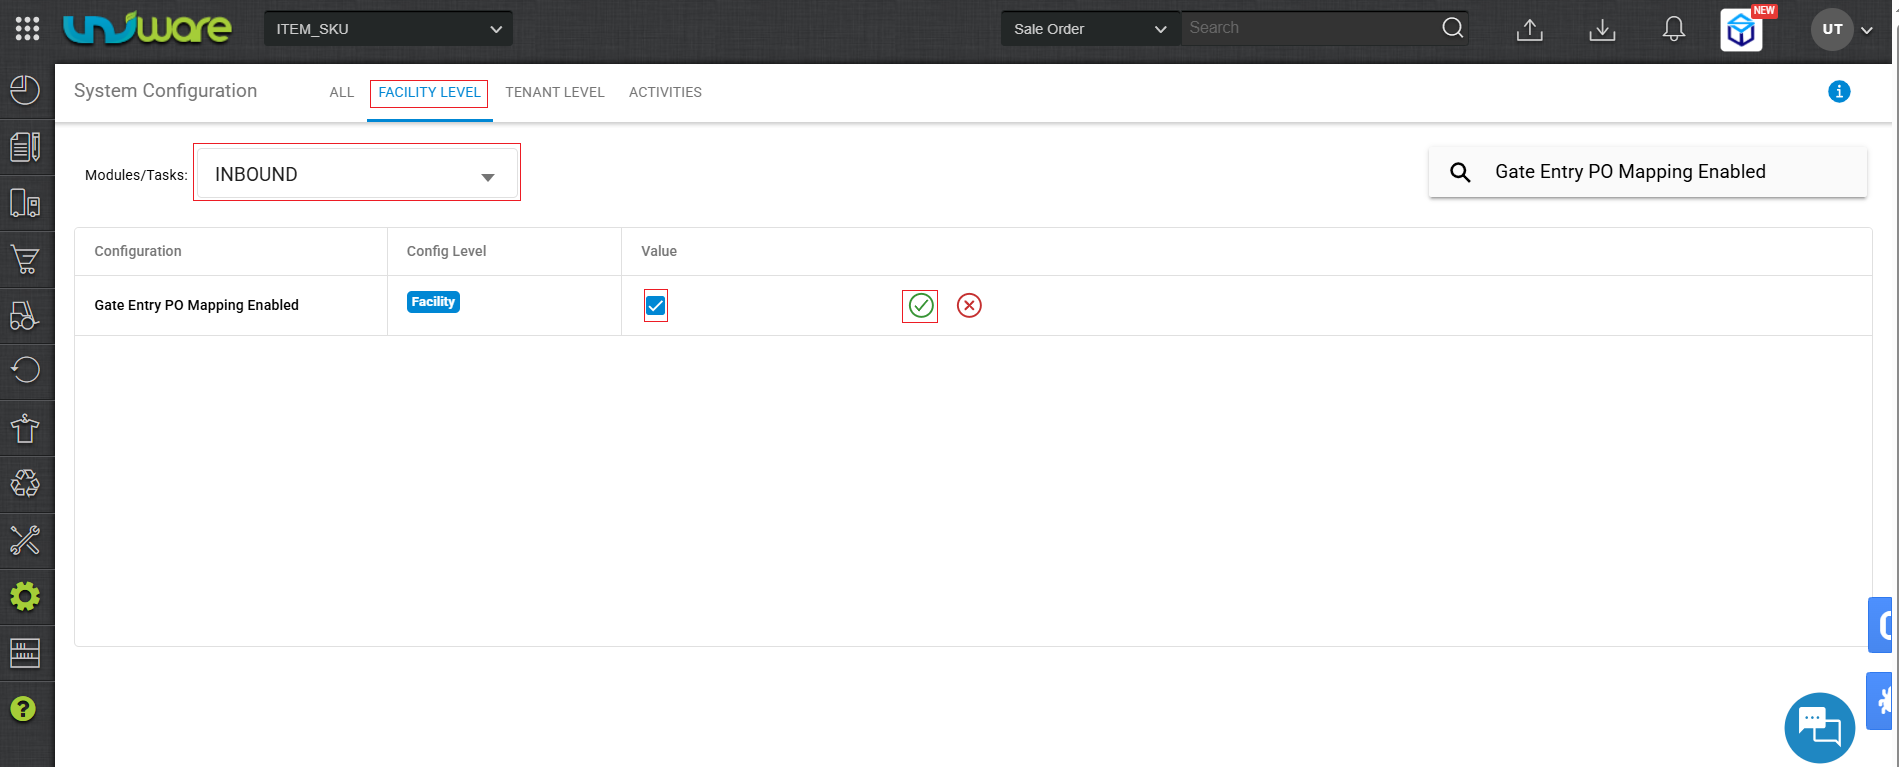
| Note: The Gate Entry PO Mapping Enabled configuration is OFF by default. Existing operations will not be impacted unless this is explicitly enabled for a facility. |
Operational Workflow
Phase 1: Gate Entry Creation
When the “Gate Entry PO Mapping Enabled” configuration is enabled, the Gate Entry process becomes the mandatory first step of the inbound.
Step-1: Hover Inbound tab & Click Gate Entry.
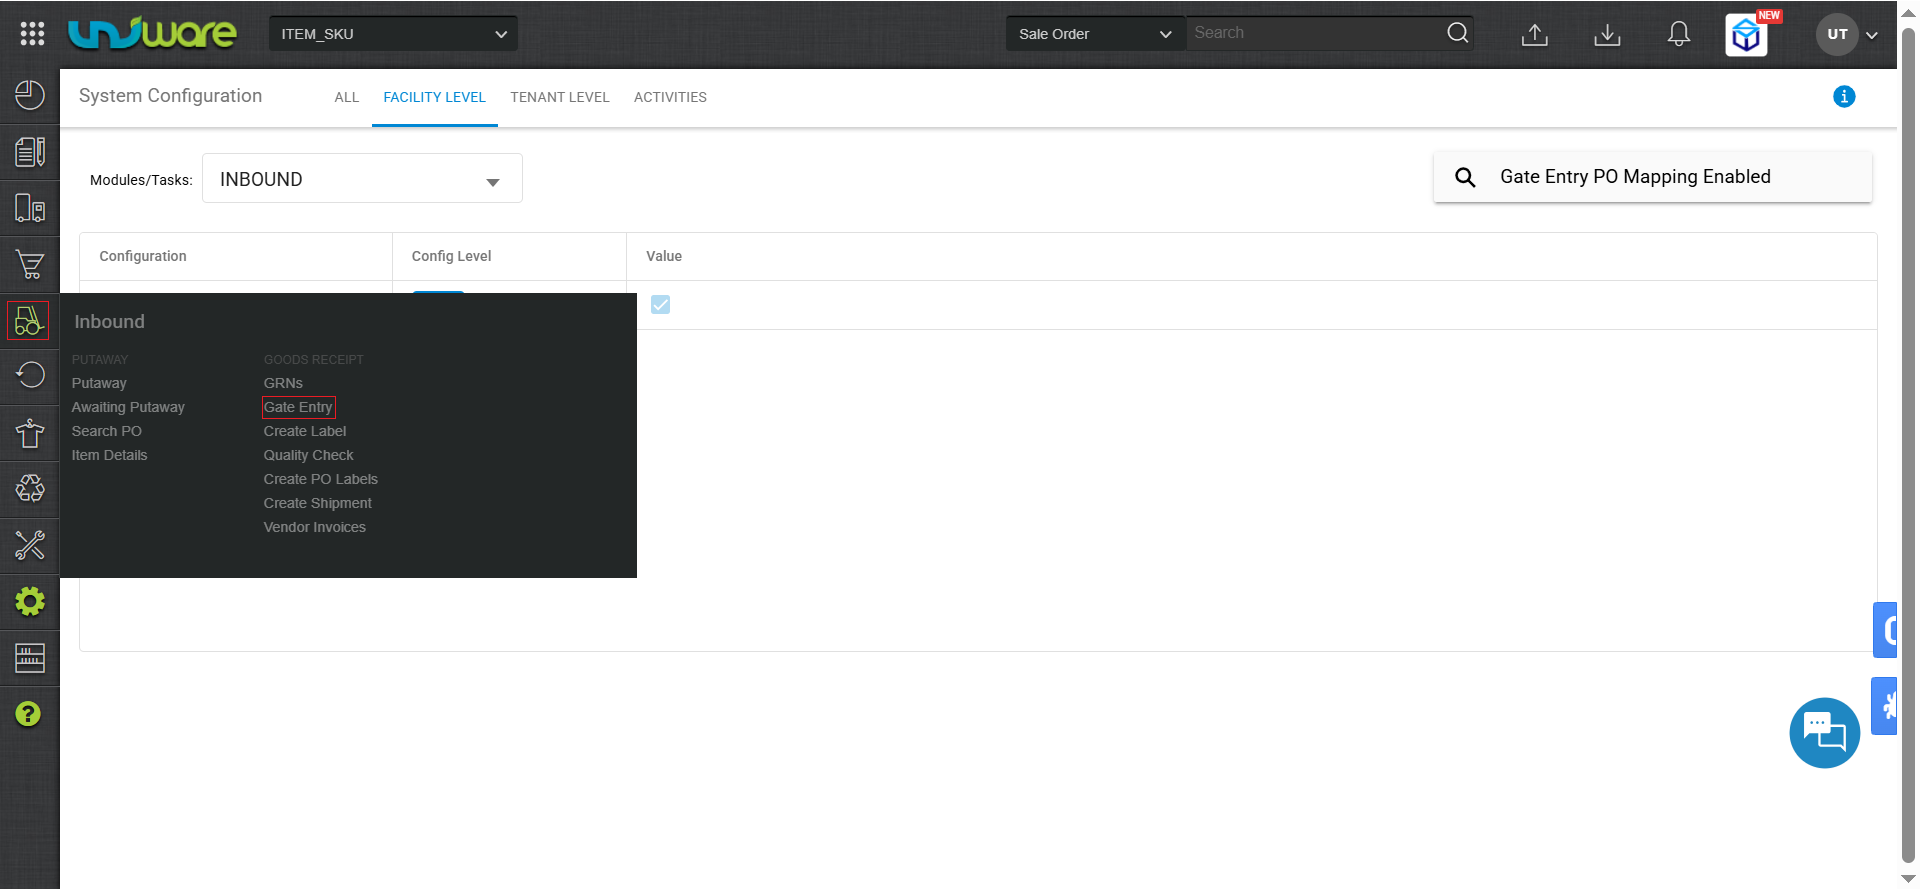
Step-2 : Click CREATE GATE ENTRY.
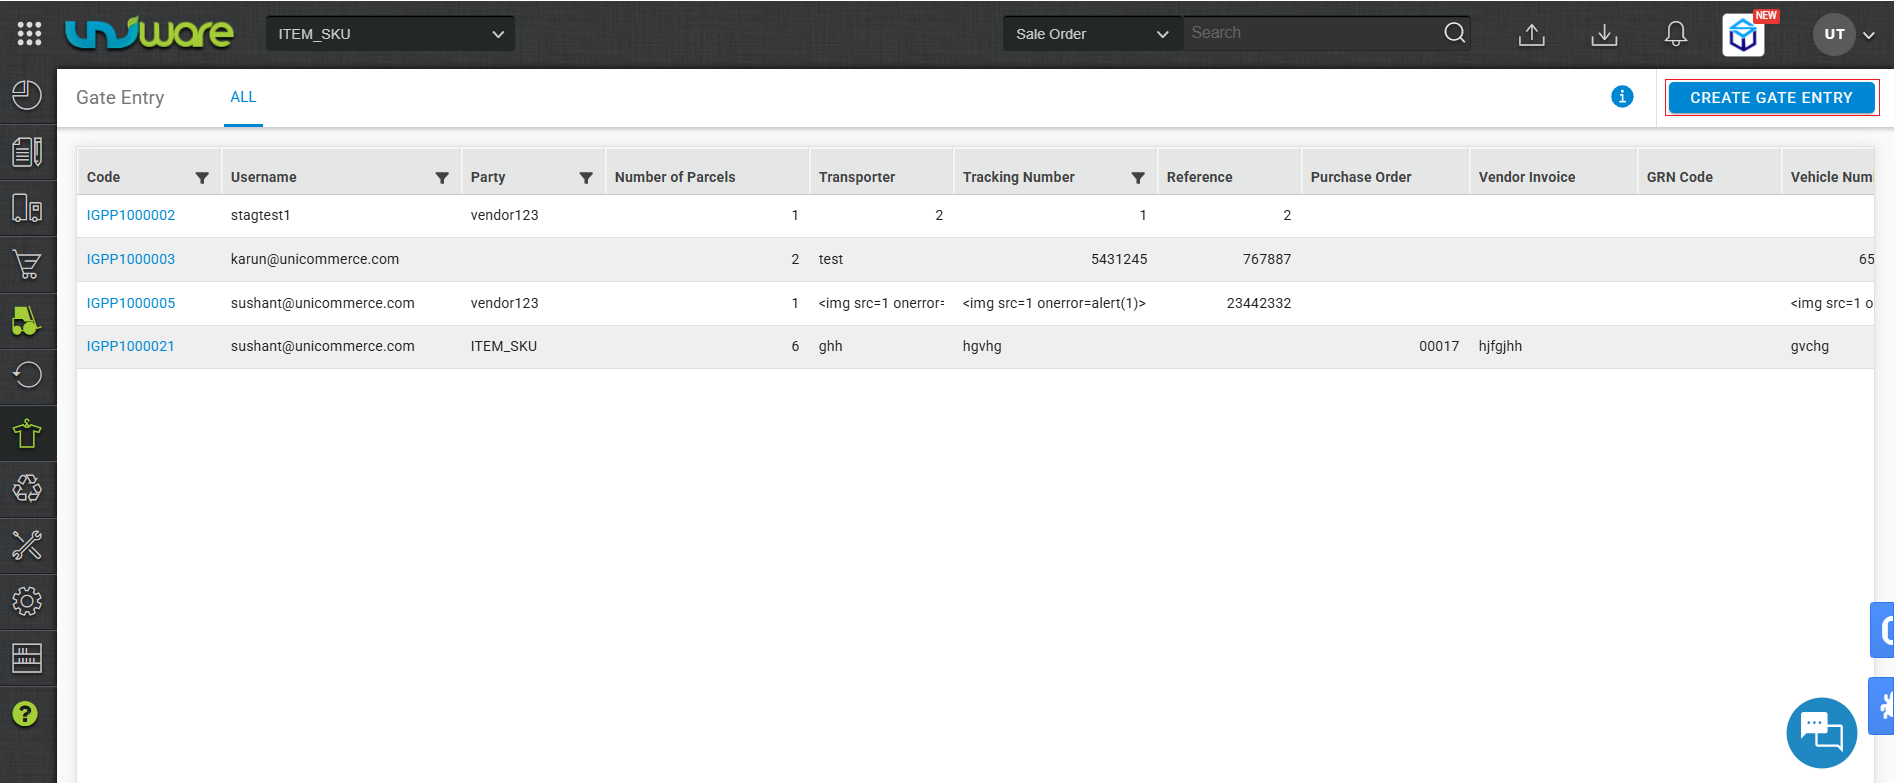
Step-3 : Fill Required Information & Click CREATE GATE ENTRY.
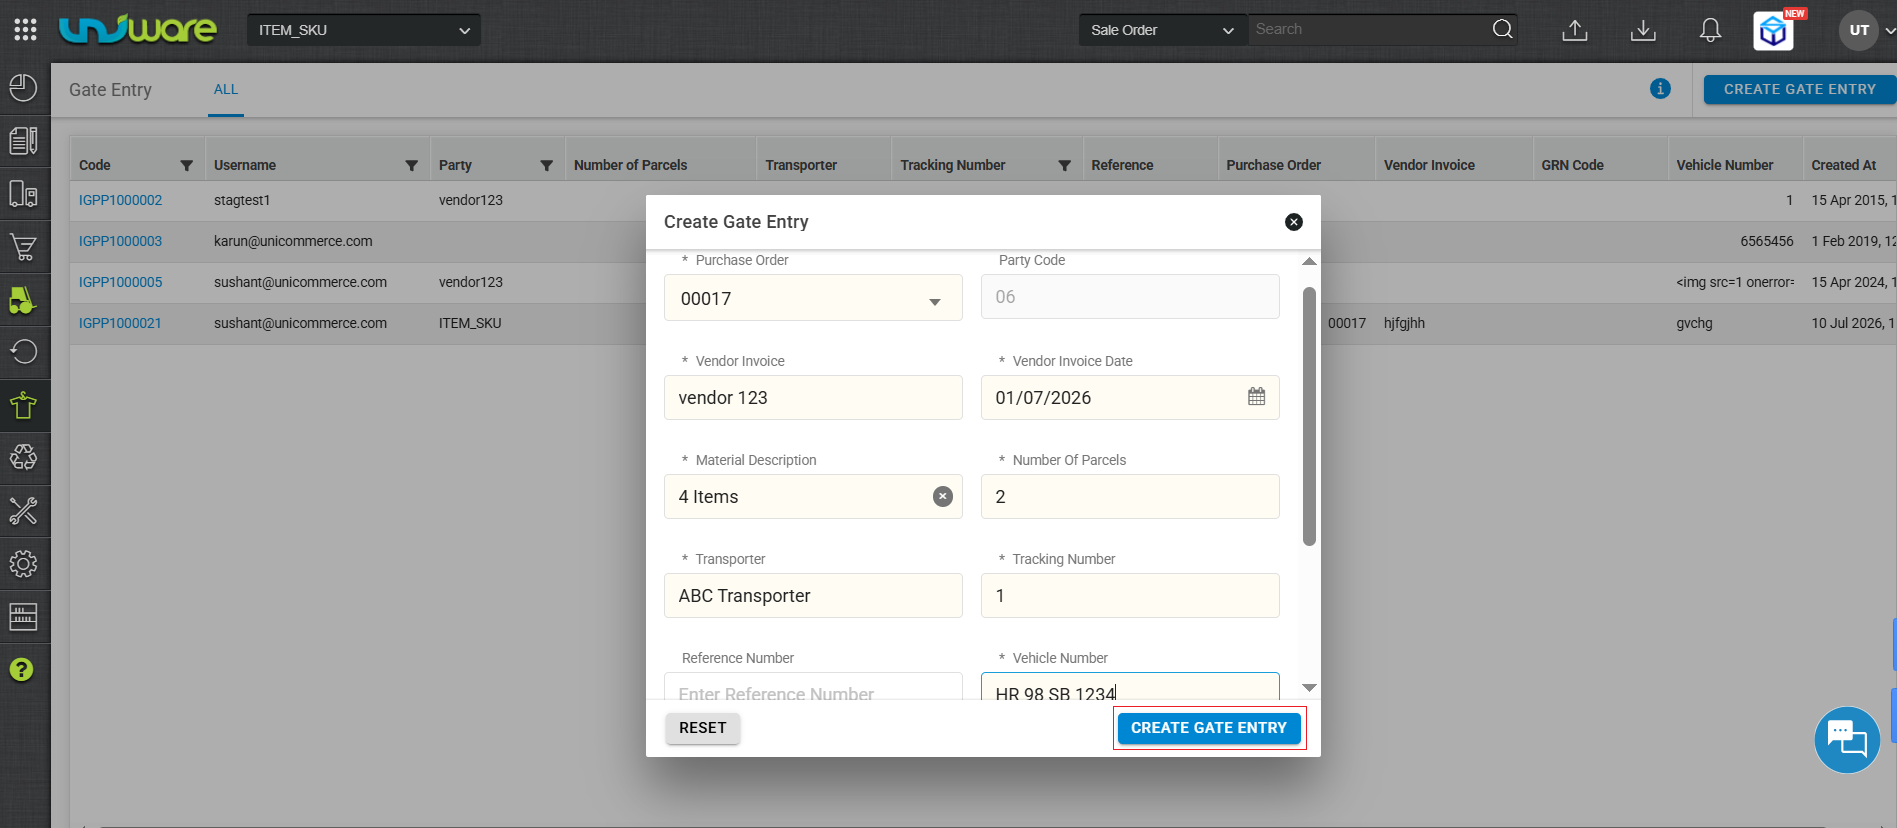
| Field | Description |
| Purchase Order (*) | Enter Created PO Number.
|
| Party Code | Automatically Fill by system. |
| Vendor Invoice (*) | Enter Created Vendor Invoice Number. |
| Vendor Invoice Date (*) | Select Created Vendor Invoice date. |
| Material Description (*) | Describe Material identity. |
| Number of Parcel (*) | Enter Number of Parcel ( Enter in digit only ) |
| Transporter (*) | Name of the Transporter. |
| Tracking Number (*) | Tracking number of the gate entry in uniware. |
| Reference Number | Add a Reference number associate with Gate Entry. |
| Vehicle Number (*) | Enter a Vehicle Number selected for Transporter. |
Phase 2: Creating the GRN
A Goods Received Note (GRN) is used to inward items and record quality checks. Under the new flow, the GRN is directly linked to the Gate Entry.
Step-1 : Hover Inbound Tab Click Search PO.
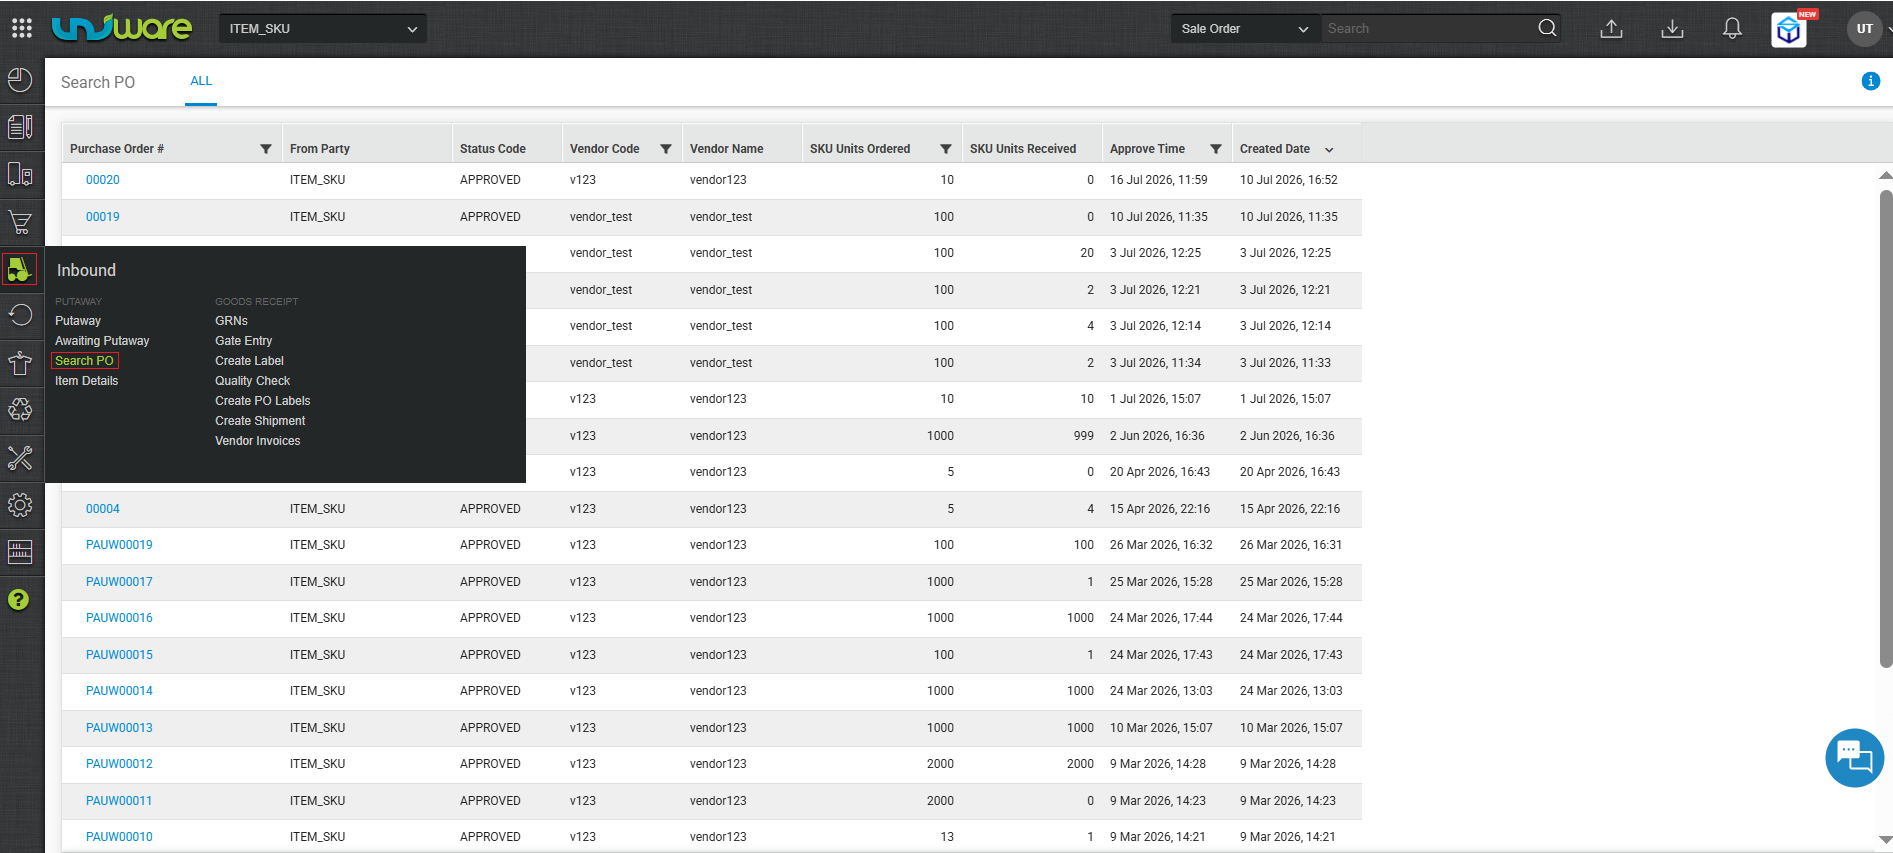
Step-2 : Click PO against want to proceed GRN.
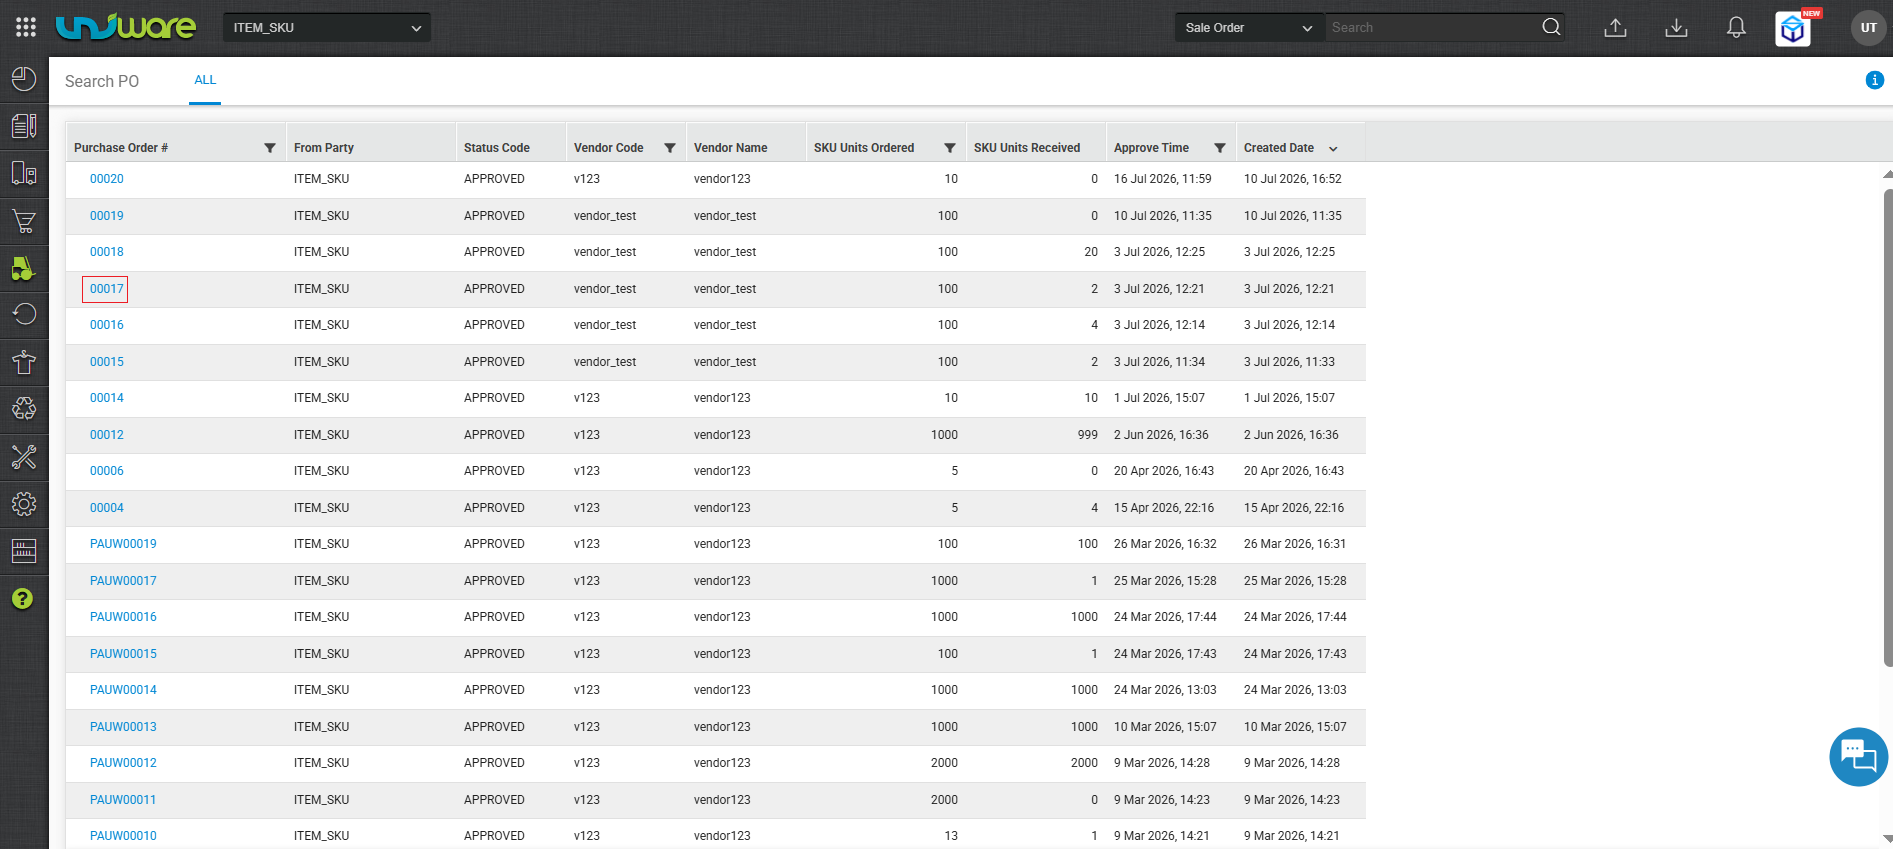
Step-3 : Navigate to GRN Tab & Click “+” icon.
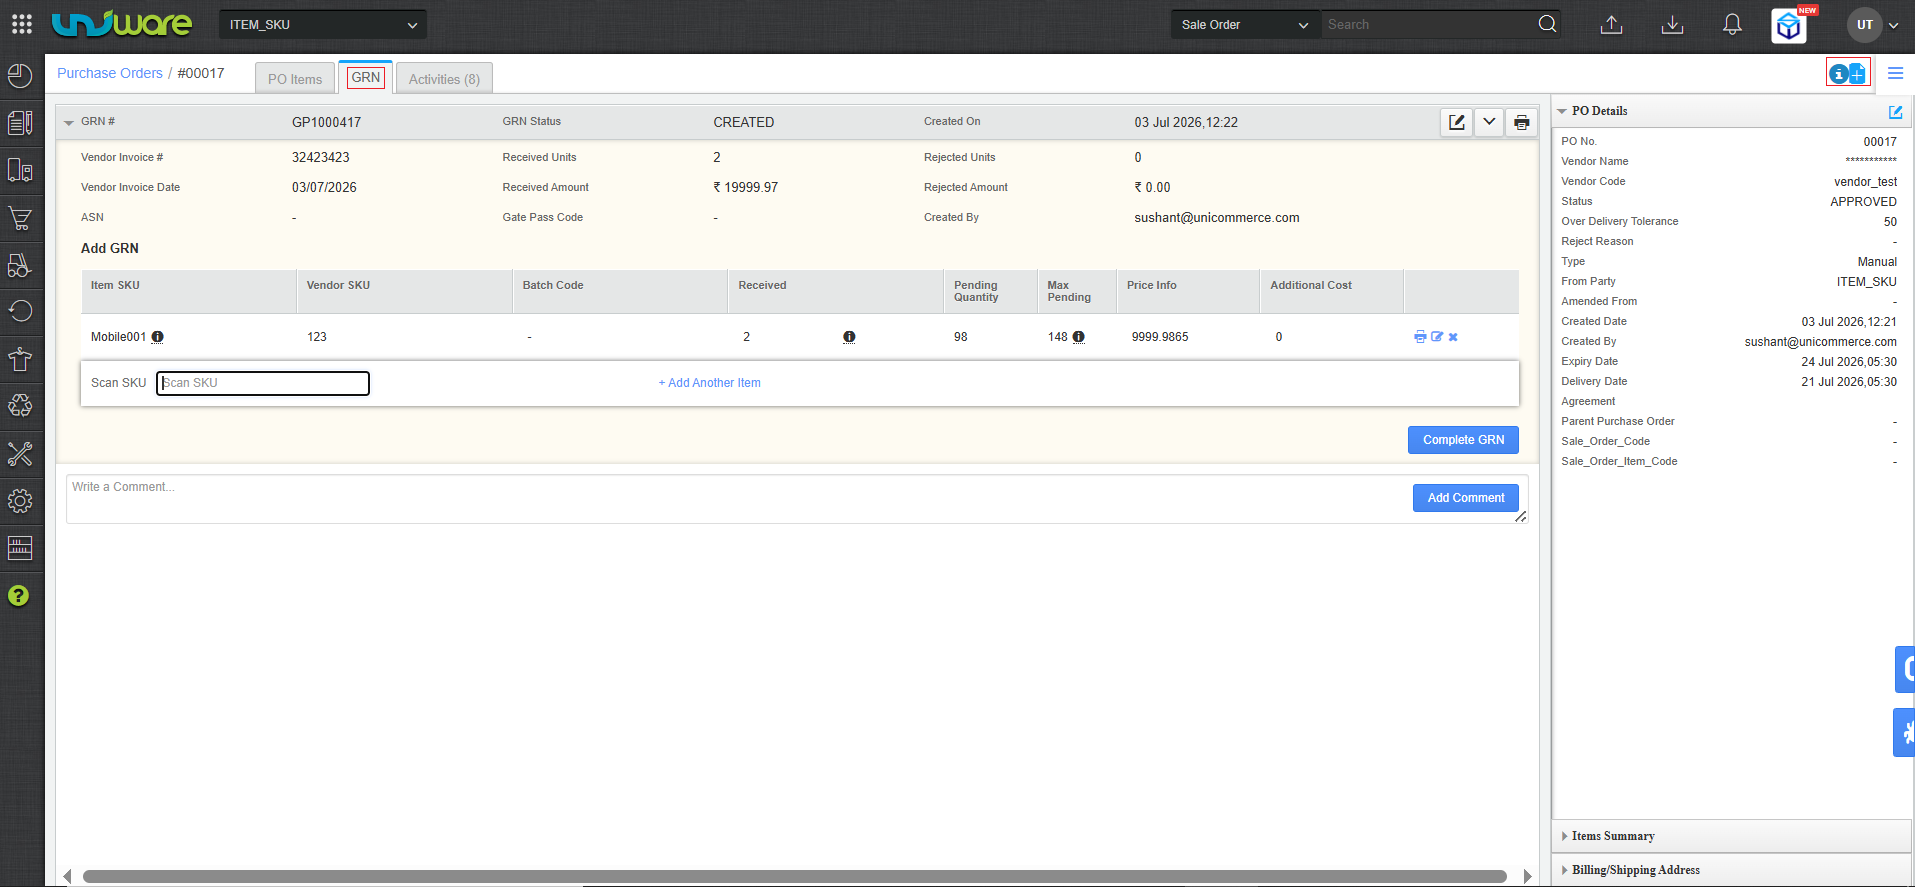
Step-4 : Select Gate Entry & Click Save.
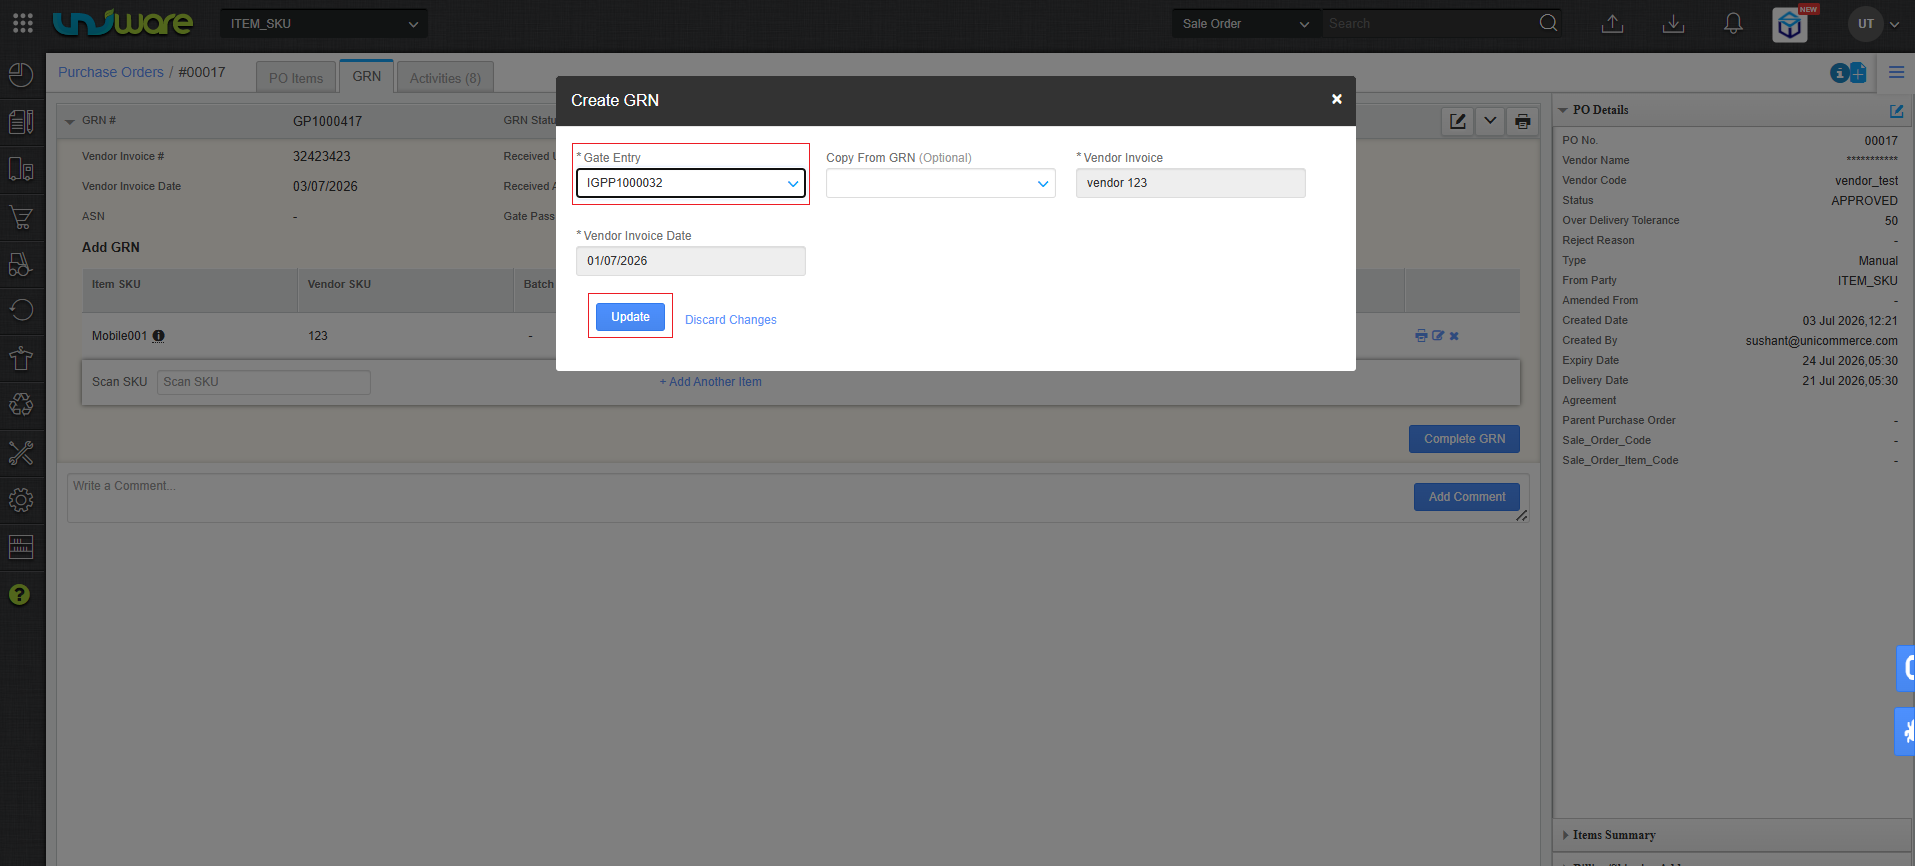
| Field | Description |
| Gate Entry (*) | Select Gate Against PO & GRN. |
| Copy From GRN | |
| Vendor Invoice (*) | Automatically fetch from selected gate Entry. |
| Vendor Invoice date (*) | Automatically fetch from selected gate Entry. |
Step-5 : Add SKU & Click Complete GRN.
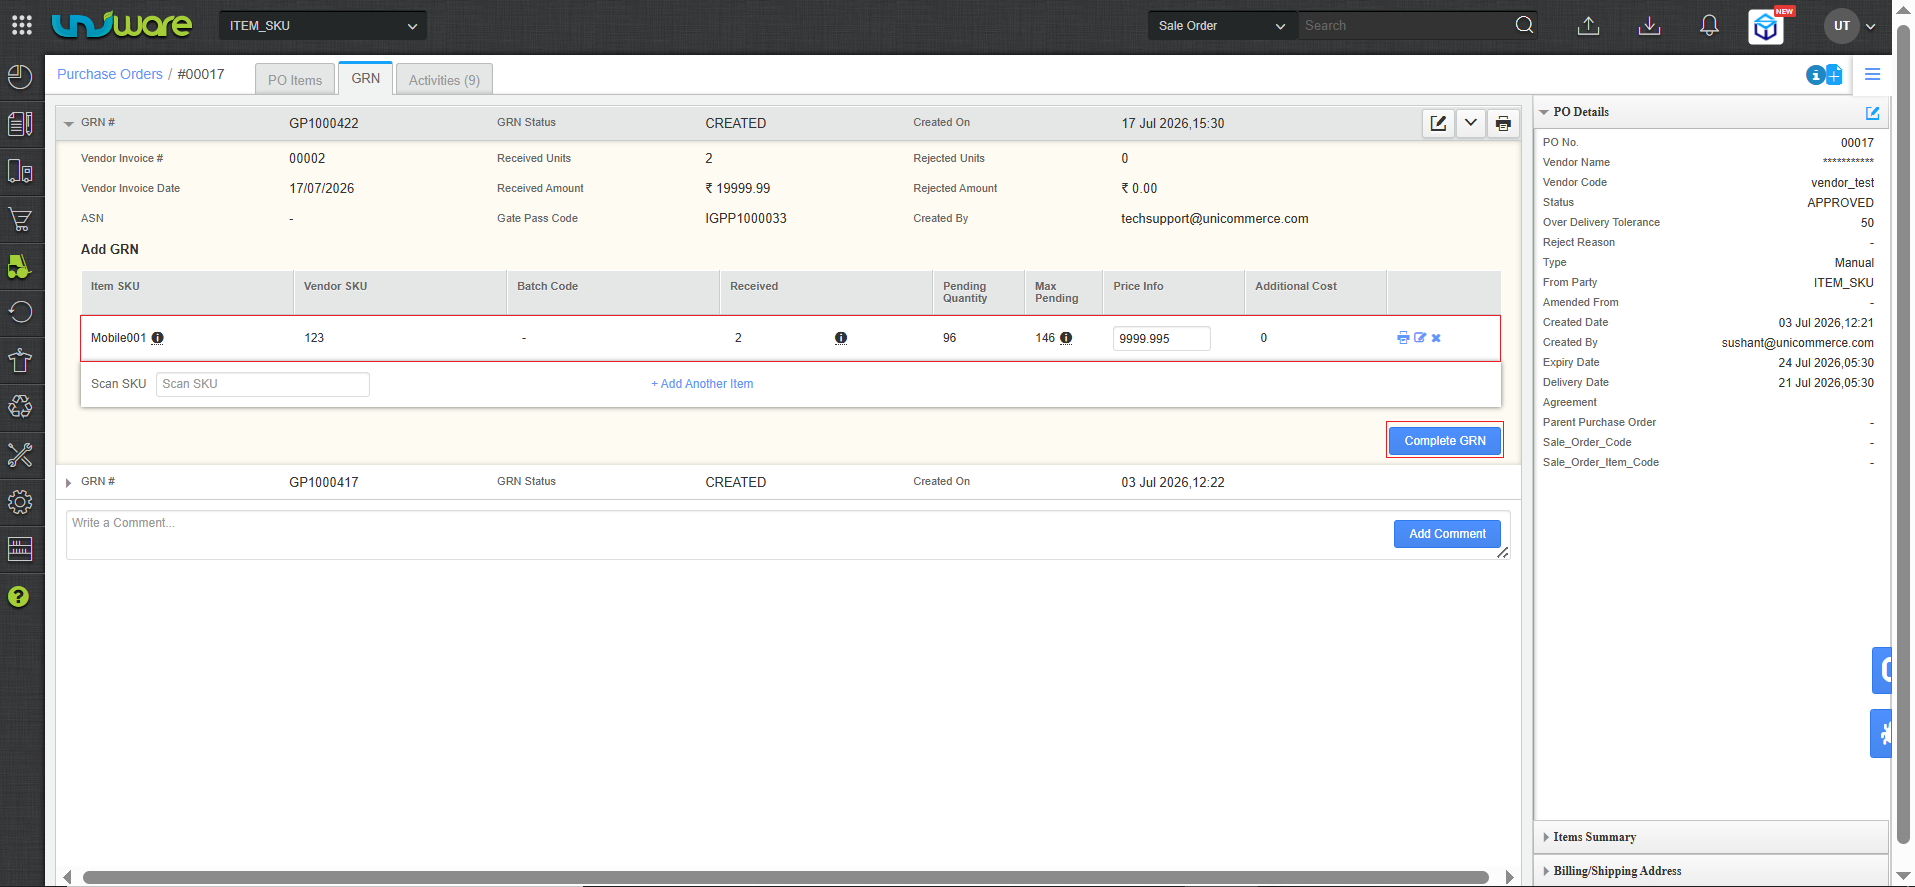
Step-6 : click Mark QC Complete.
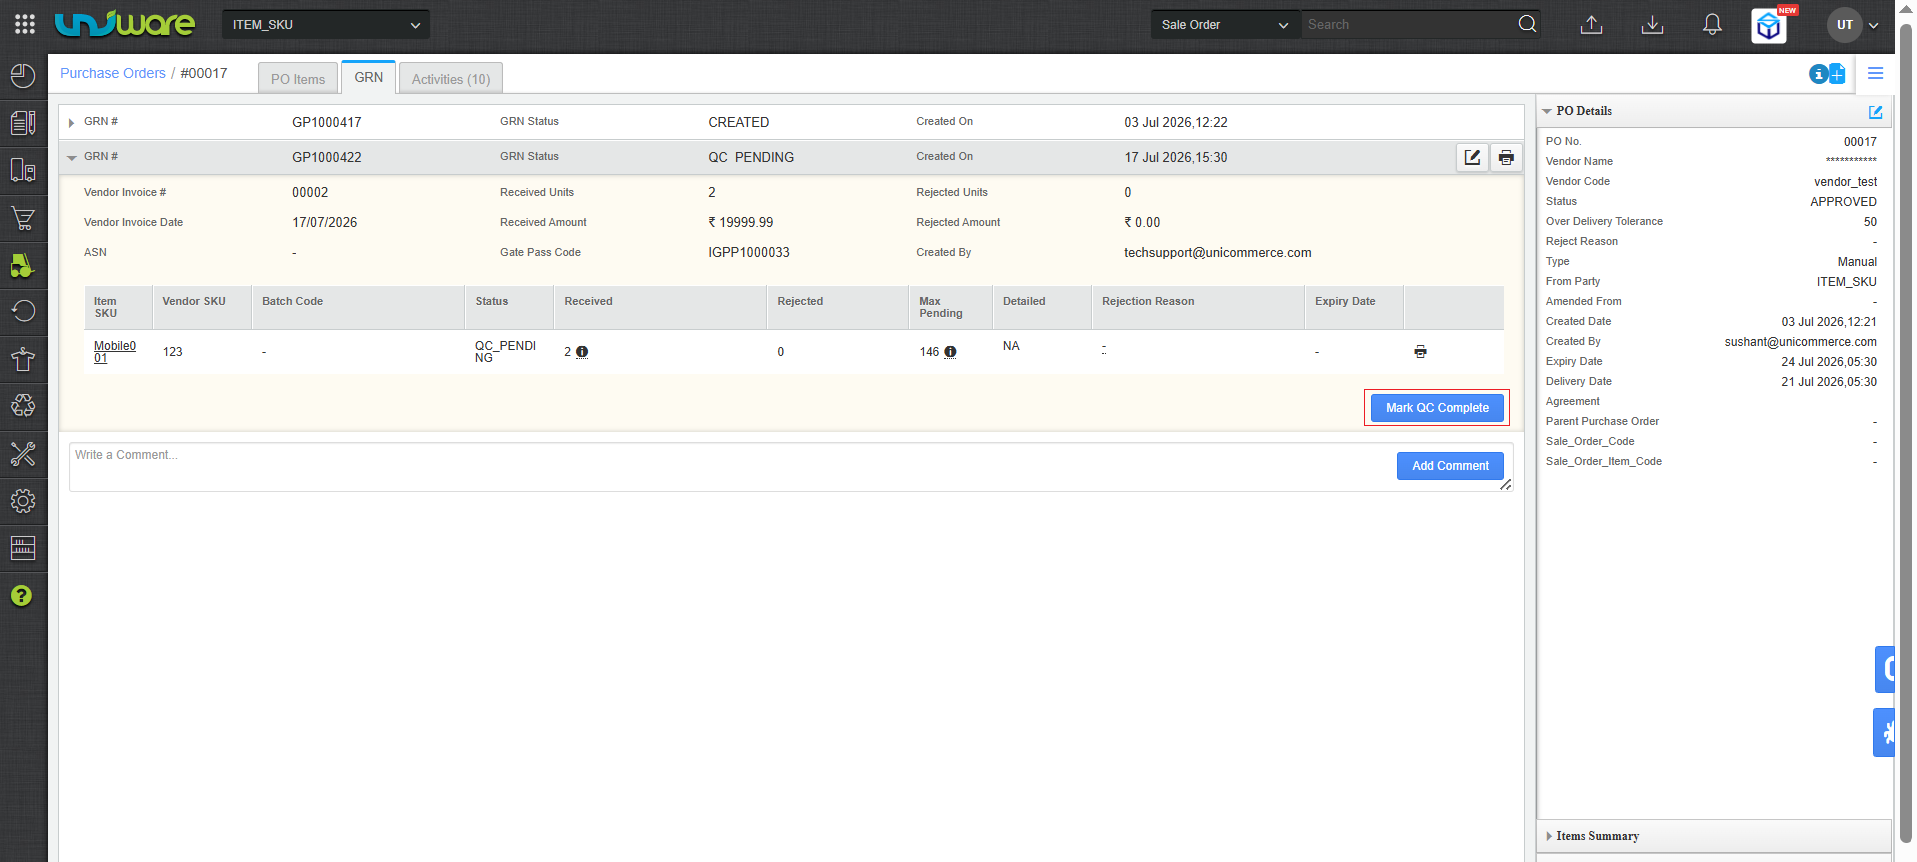
Step-7 : Click Quality check Complete.
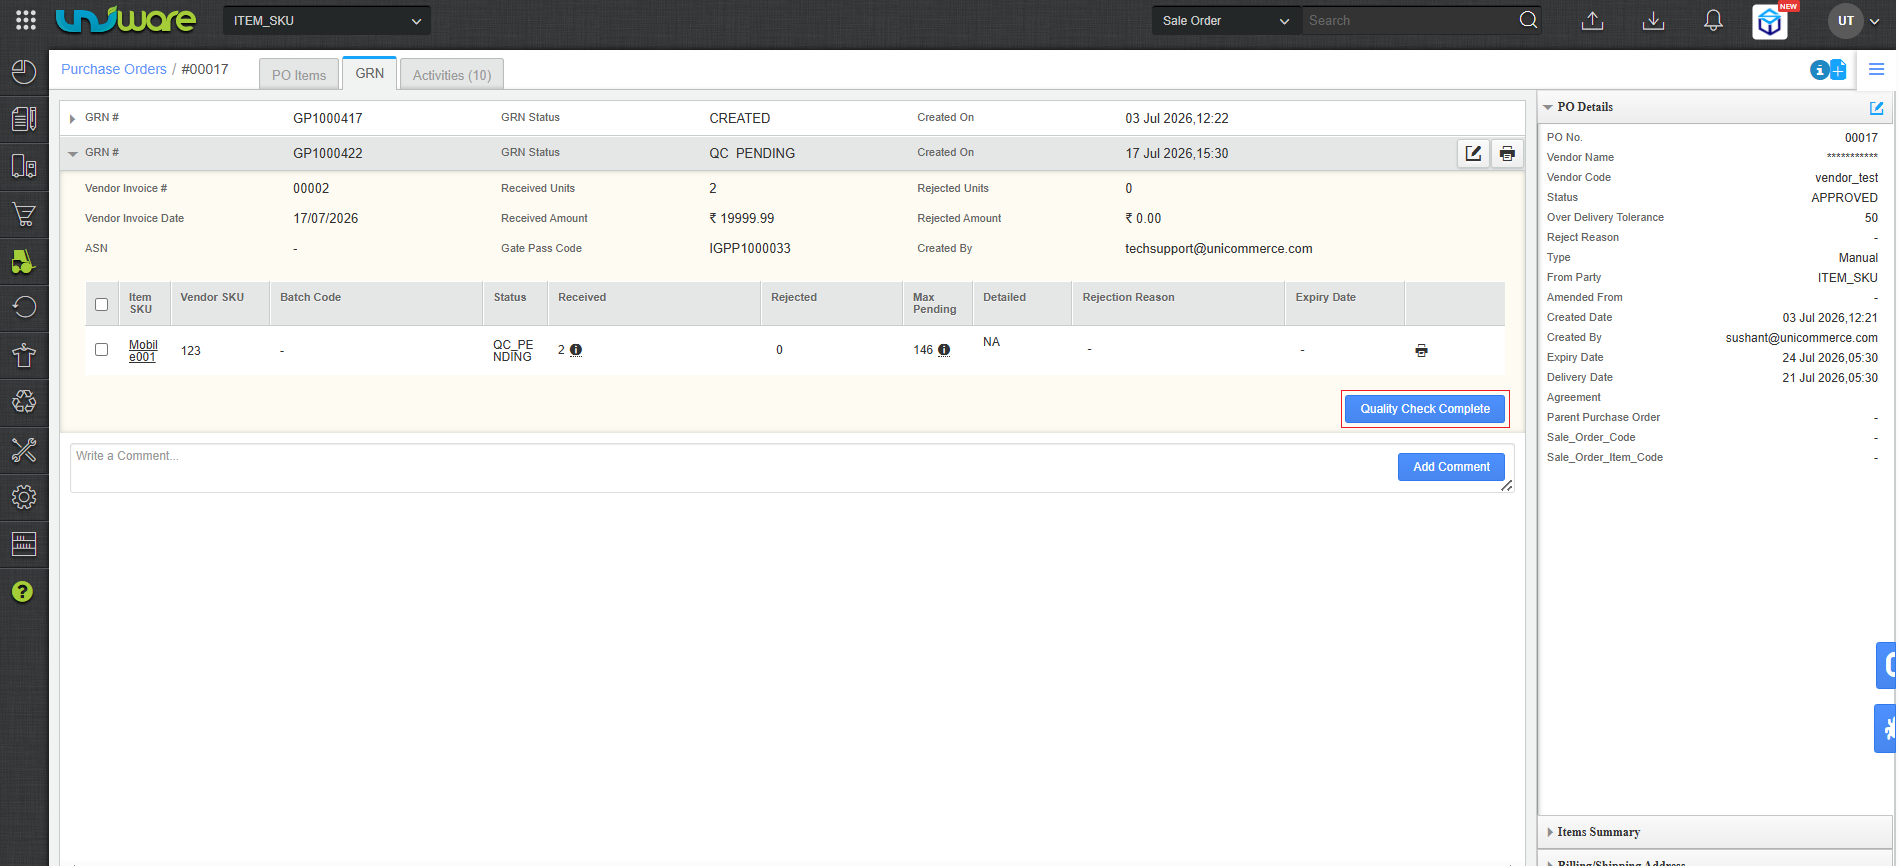
Phase 3: Putaway
Once the GRN is completed, the items must be moved to their storage shelves using the Putaway process.
Step-1 : Hover Inbound & Click Putaway.
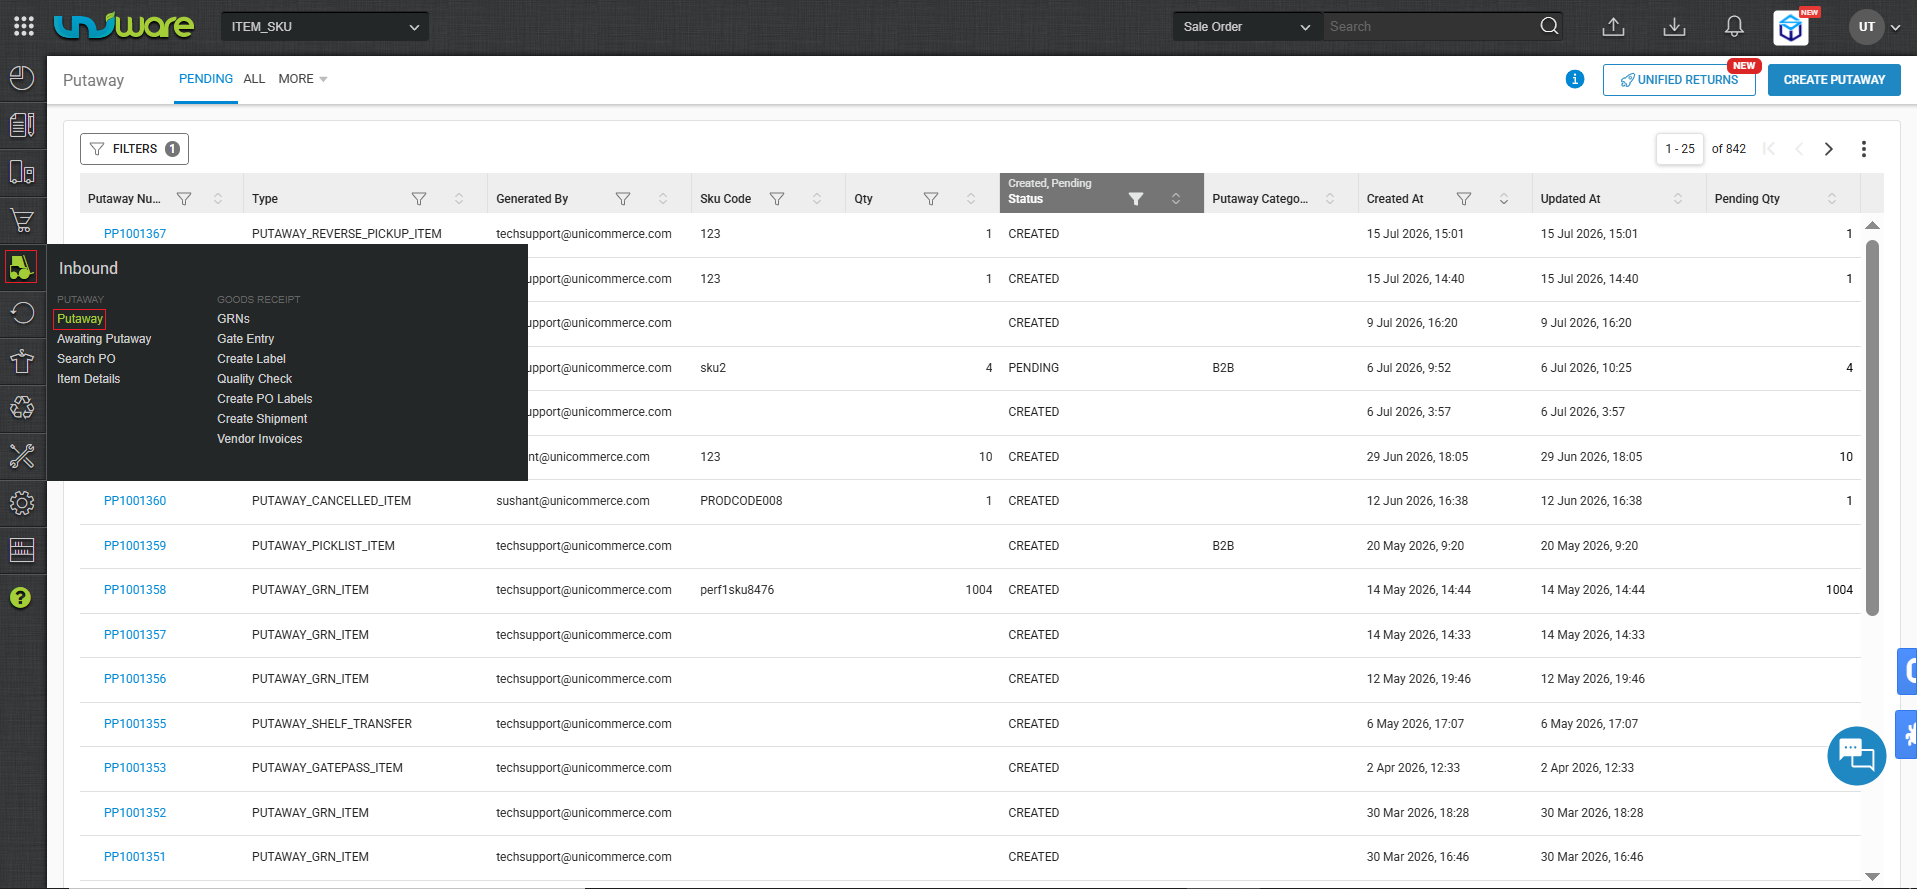
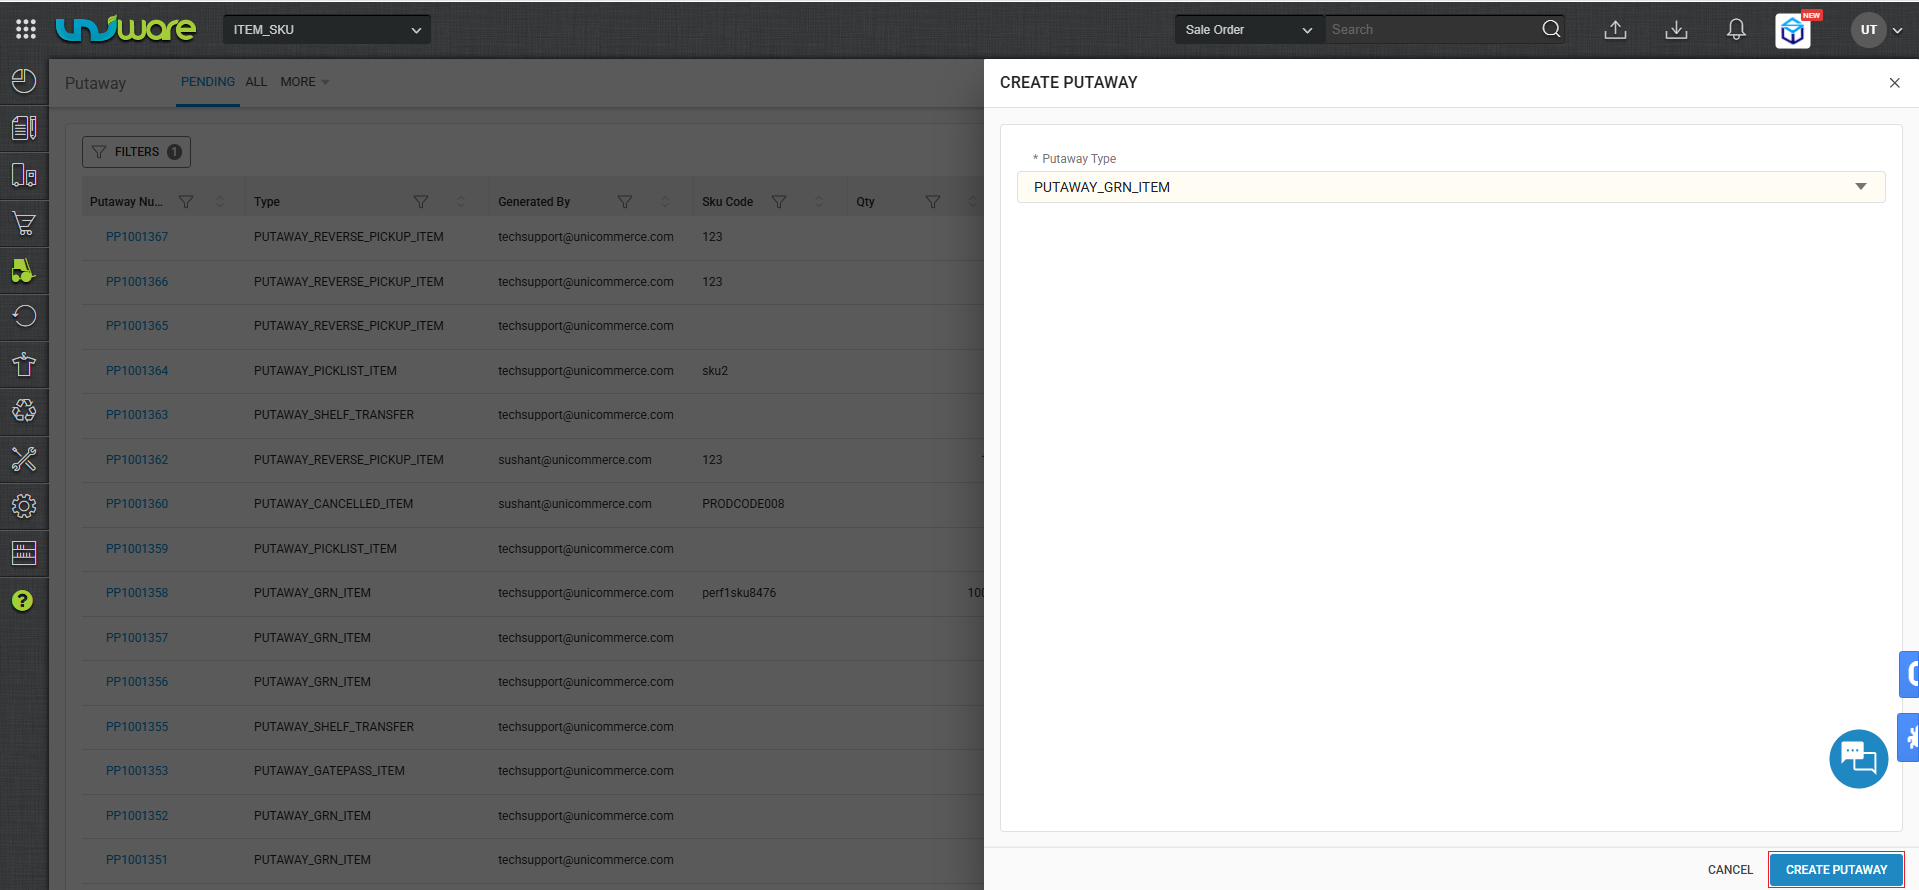
Step-2 : Click CREATE PUTAWAY.
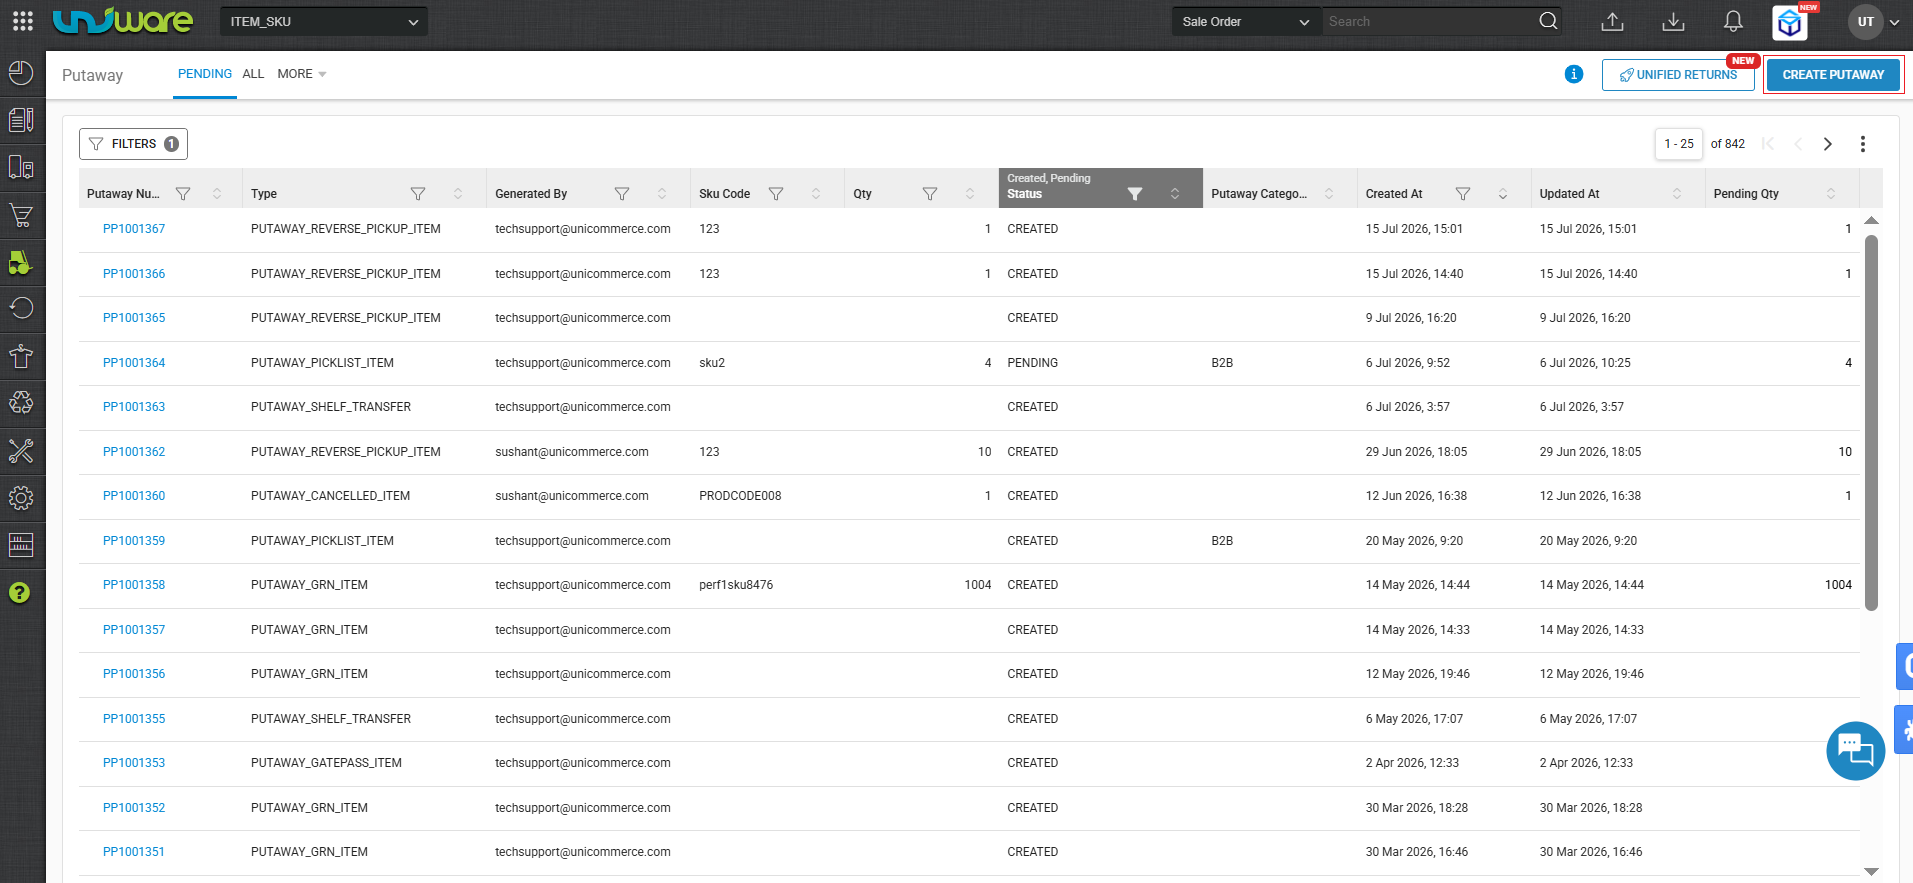
Step-3 : Select the dropdown Putaway GRN Items.
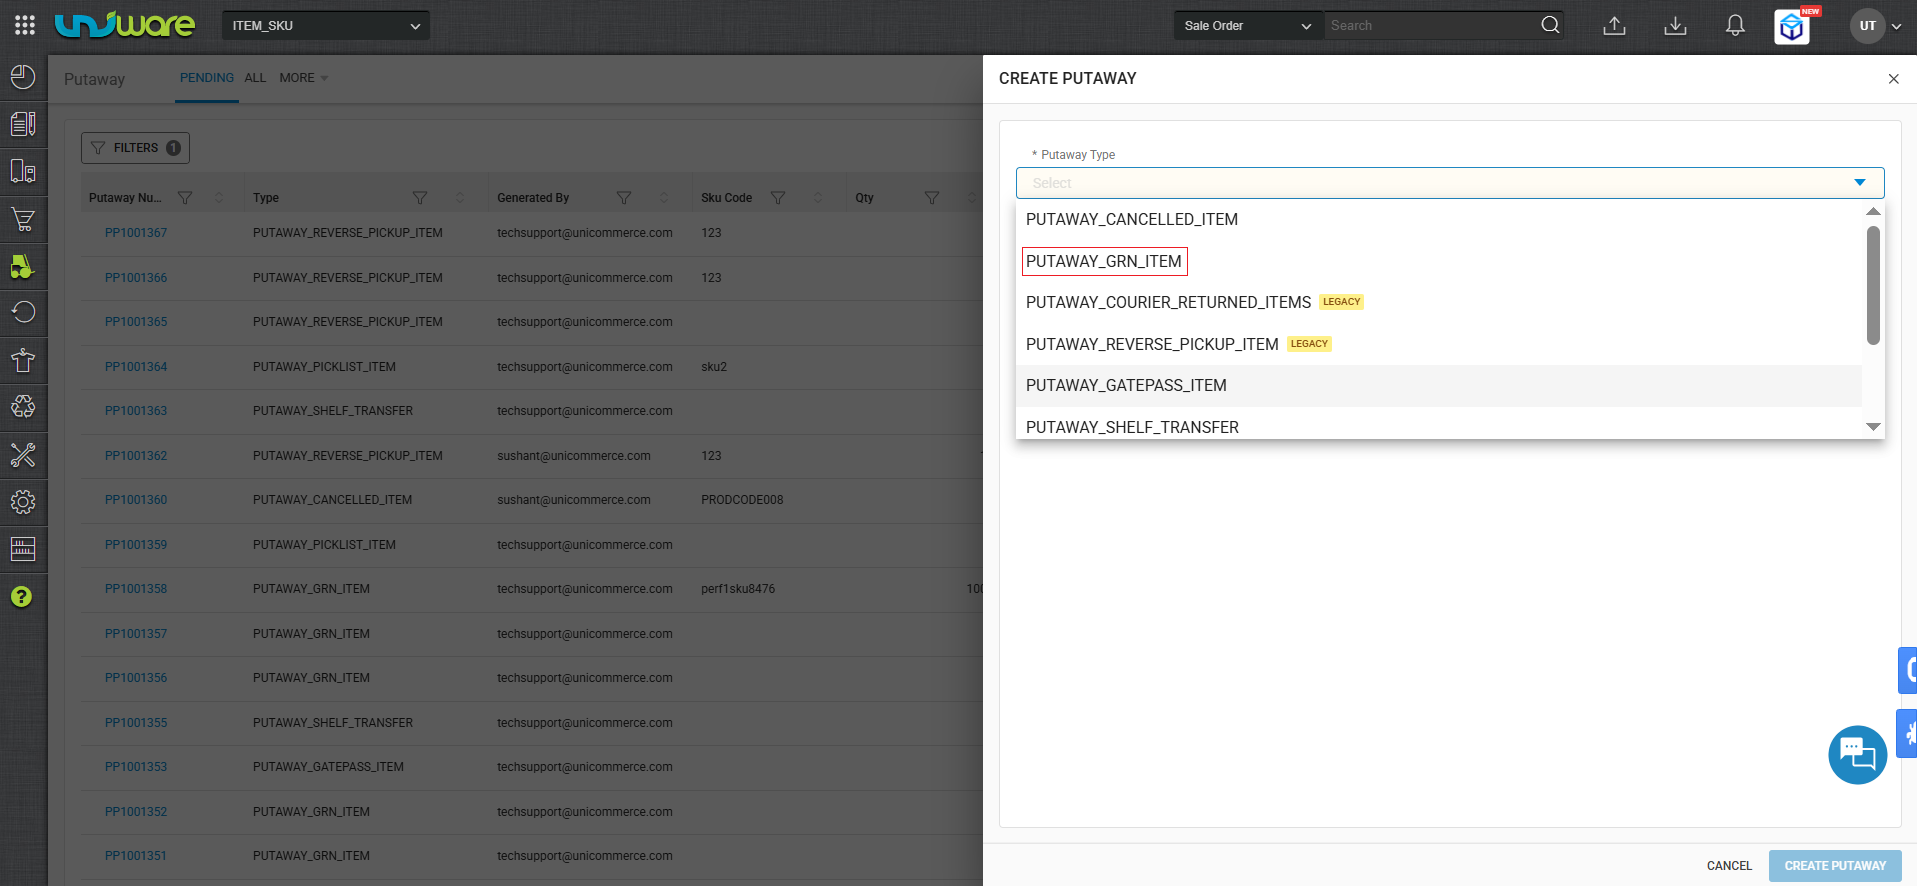
Step-4: Click Create Putaway.
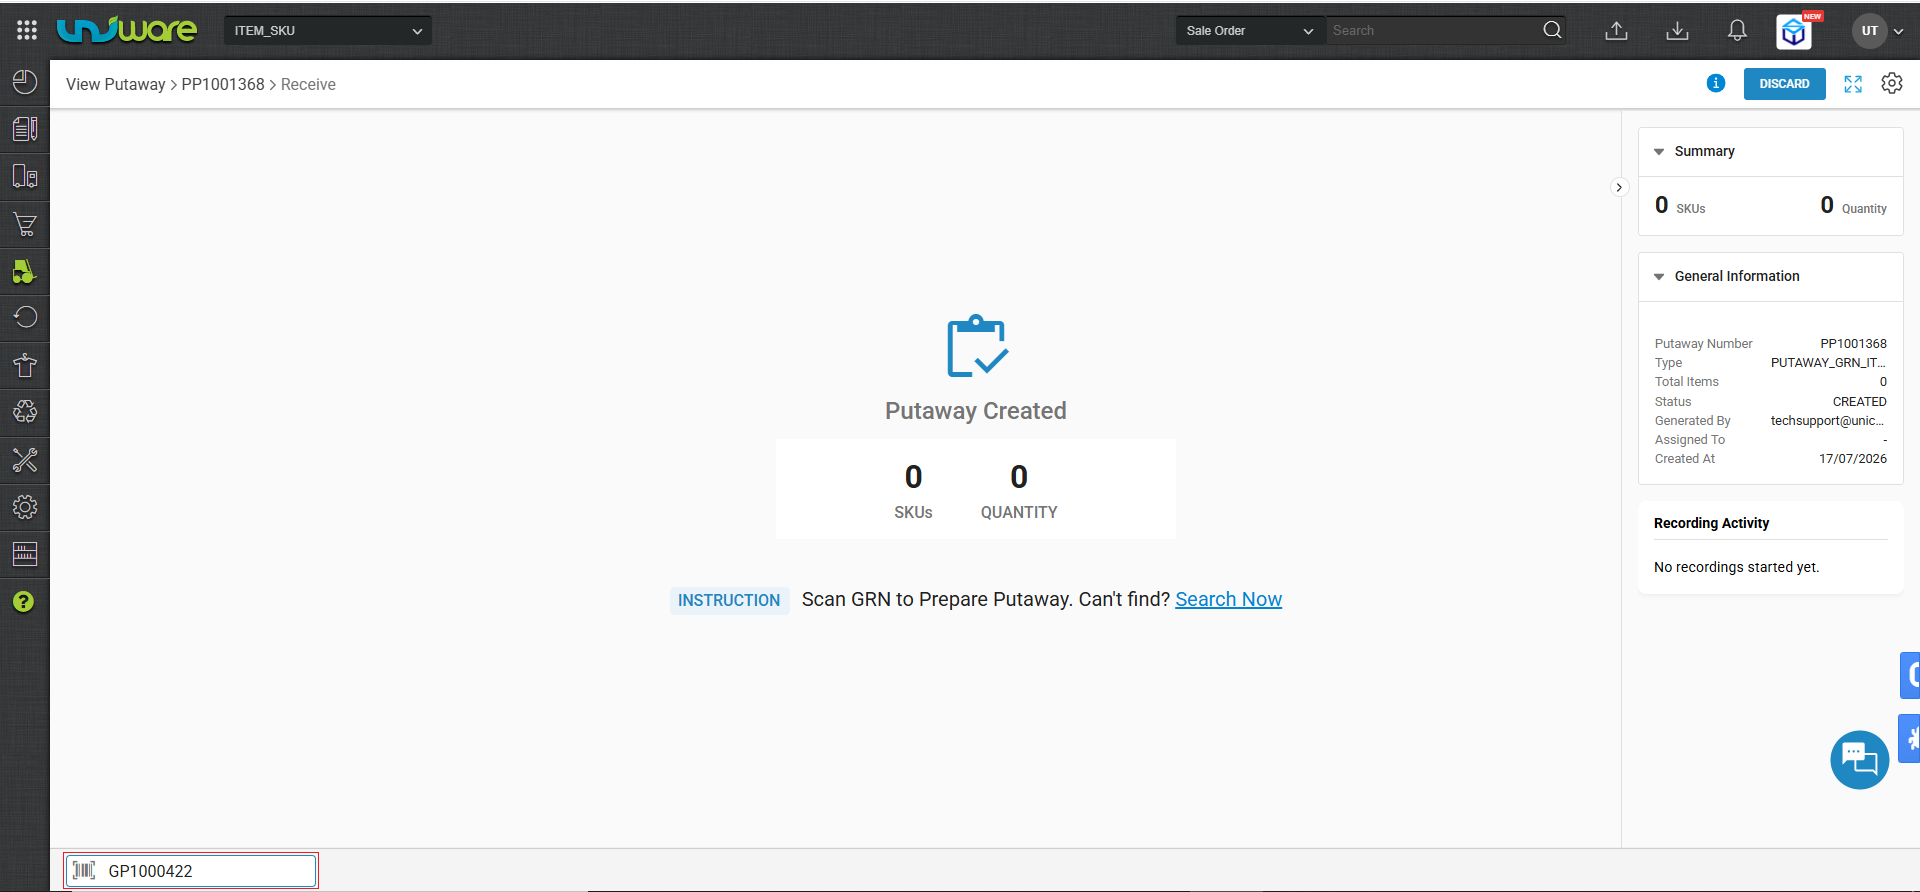
Step-5: Enter GRN No and Hit Enter Button.
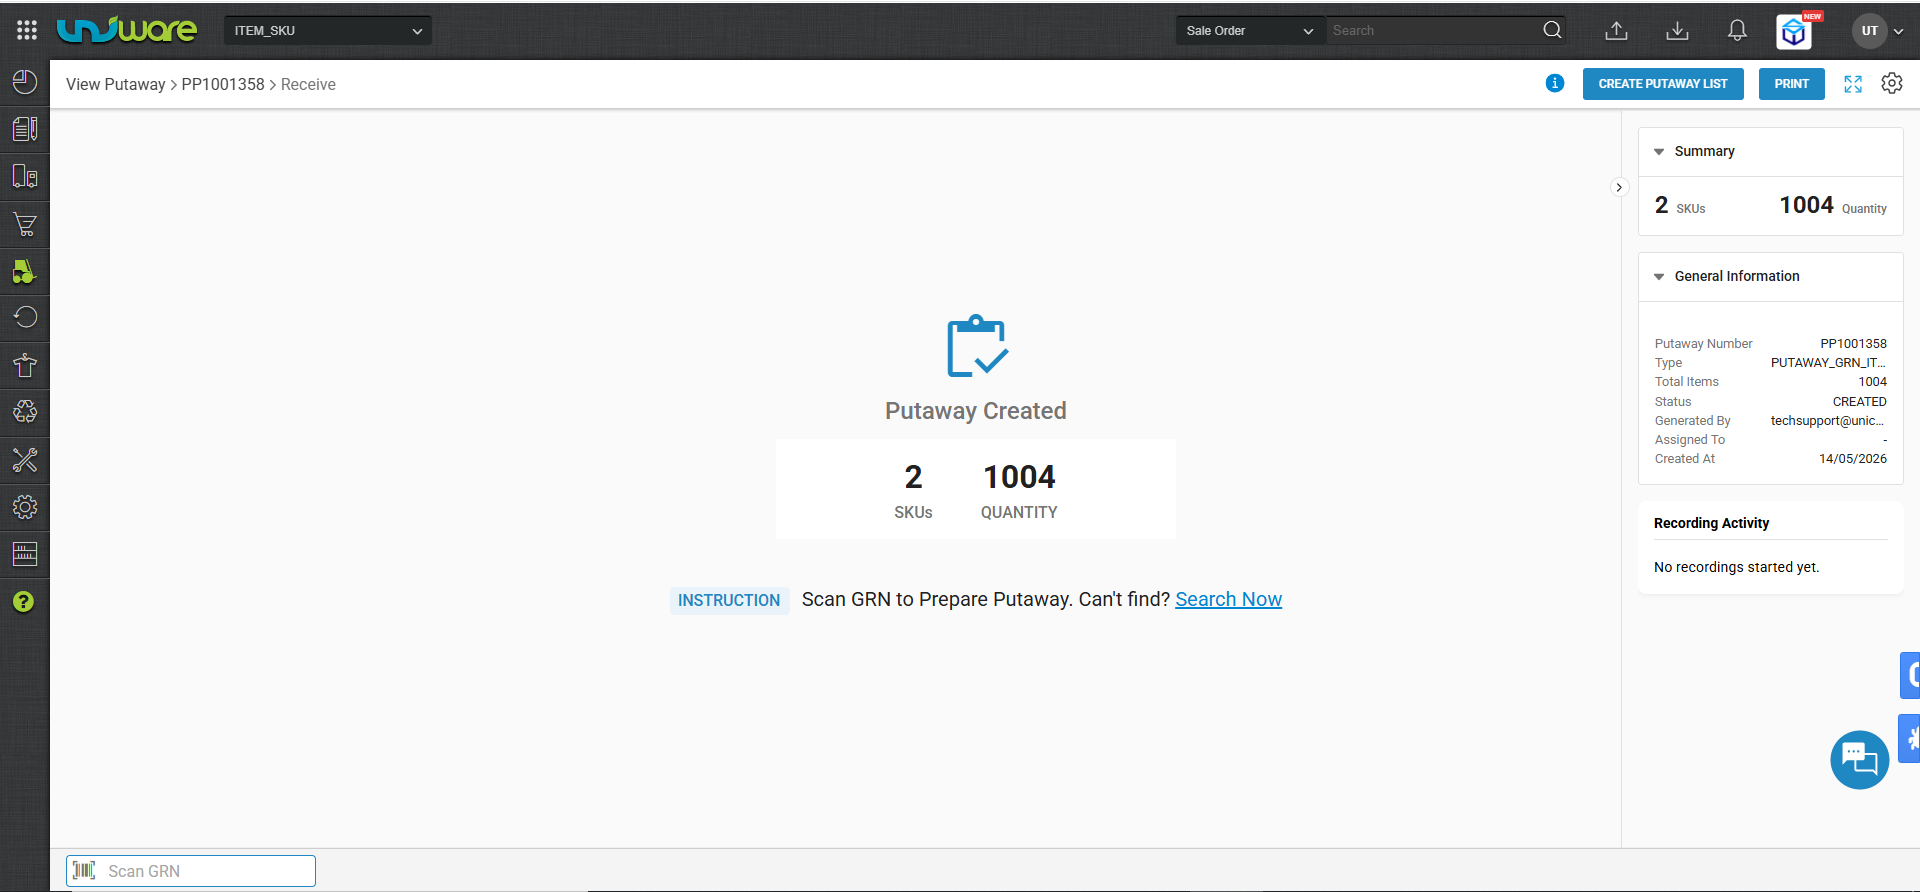
Putaway Configuration (Optional)
You can set the putaway configuration for adding items to Putaway.
Step-1 : Click on Settings Icon.
Step-2: Select Bulk or Each and Click On Save.
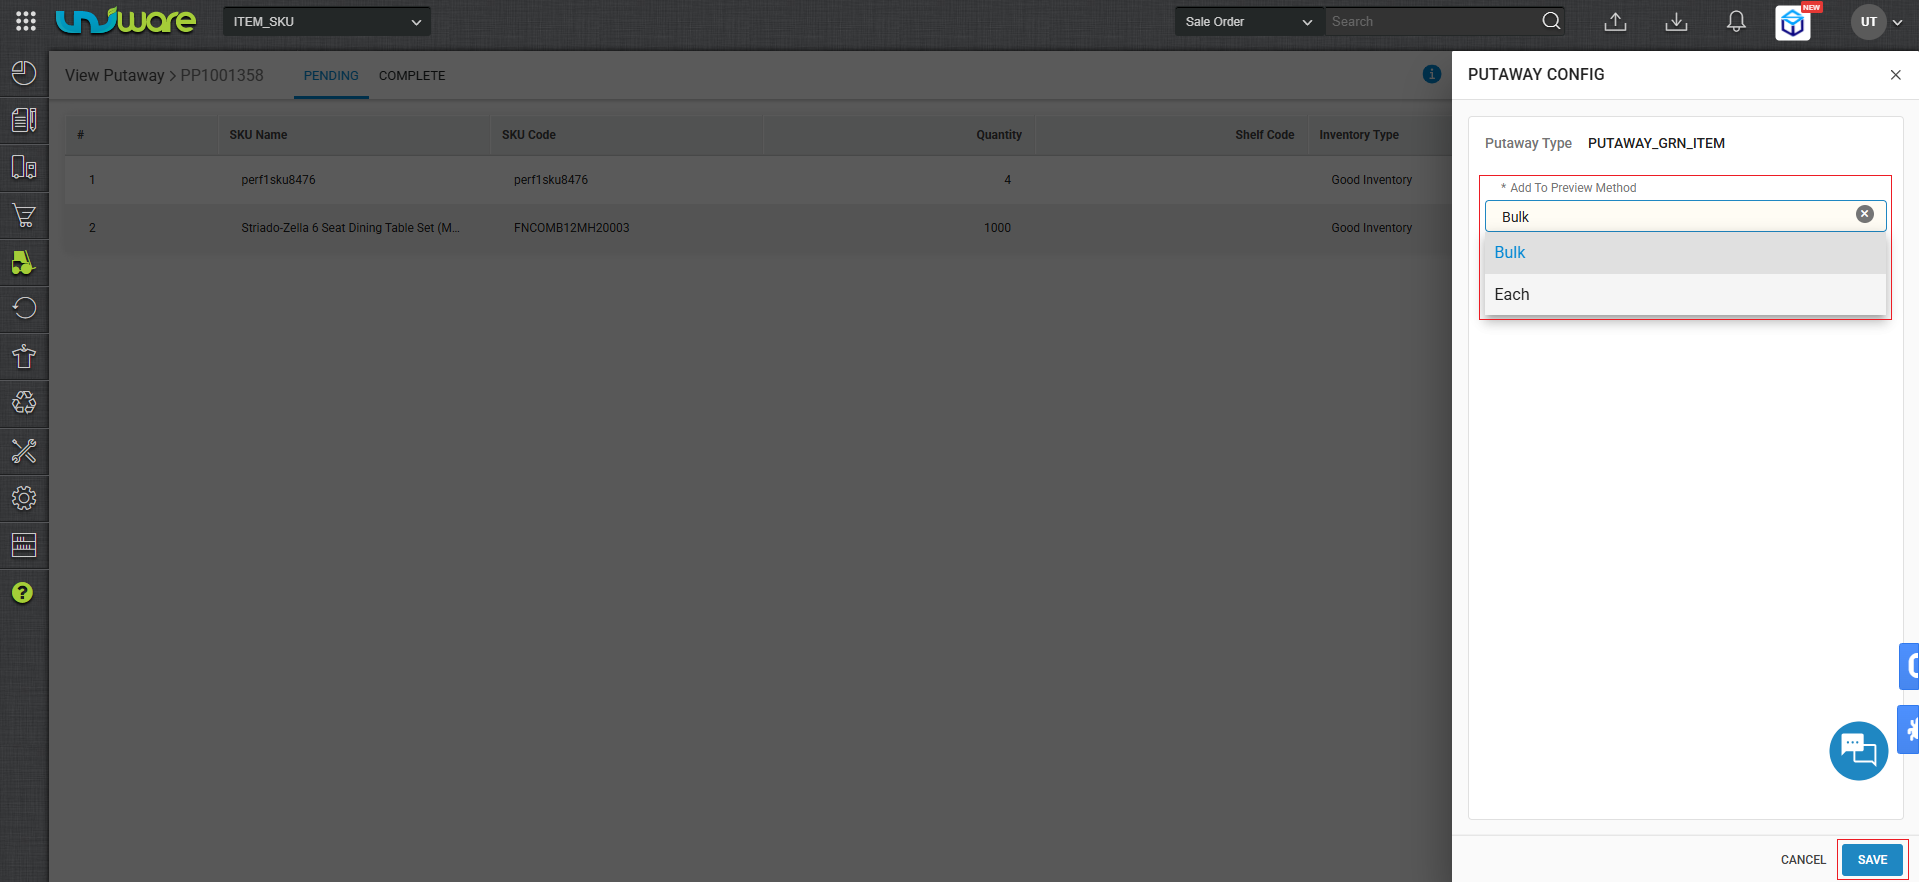
- Bulk: To add items in bulk qty wise.
- Each: To add item with sku scan code with Quality check control On/OFF
Note: You can switch this config at any point of time as per your operation easines.
Step-6 : Select Inventory good or Bad & Enter Quantity.
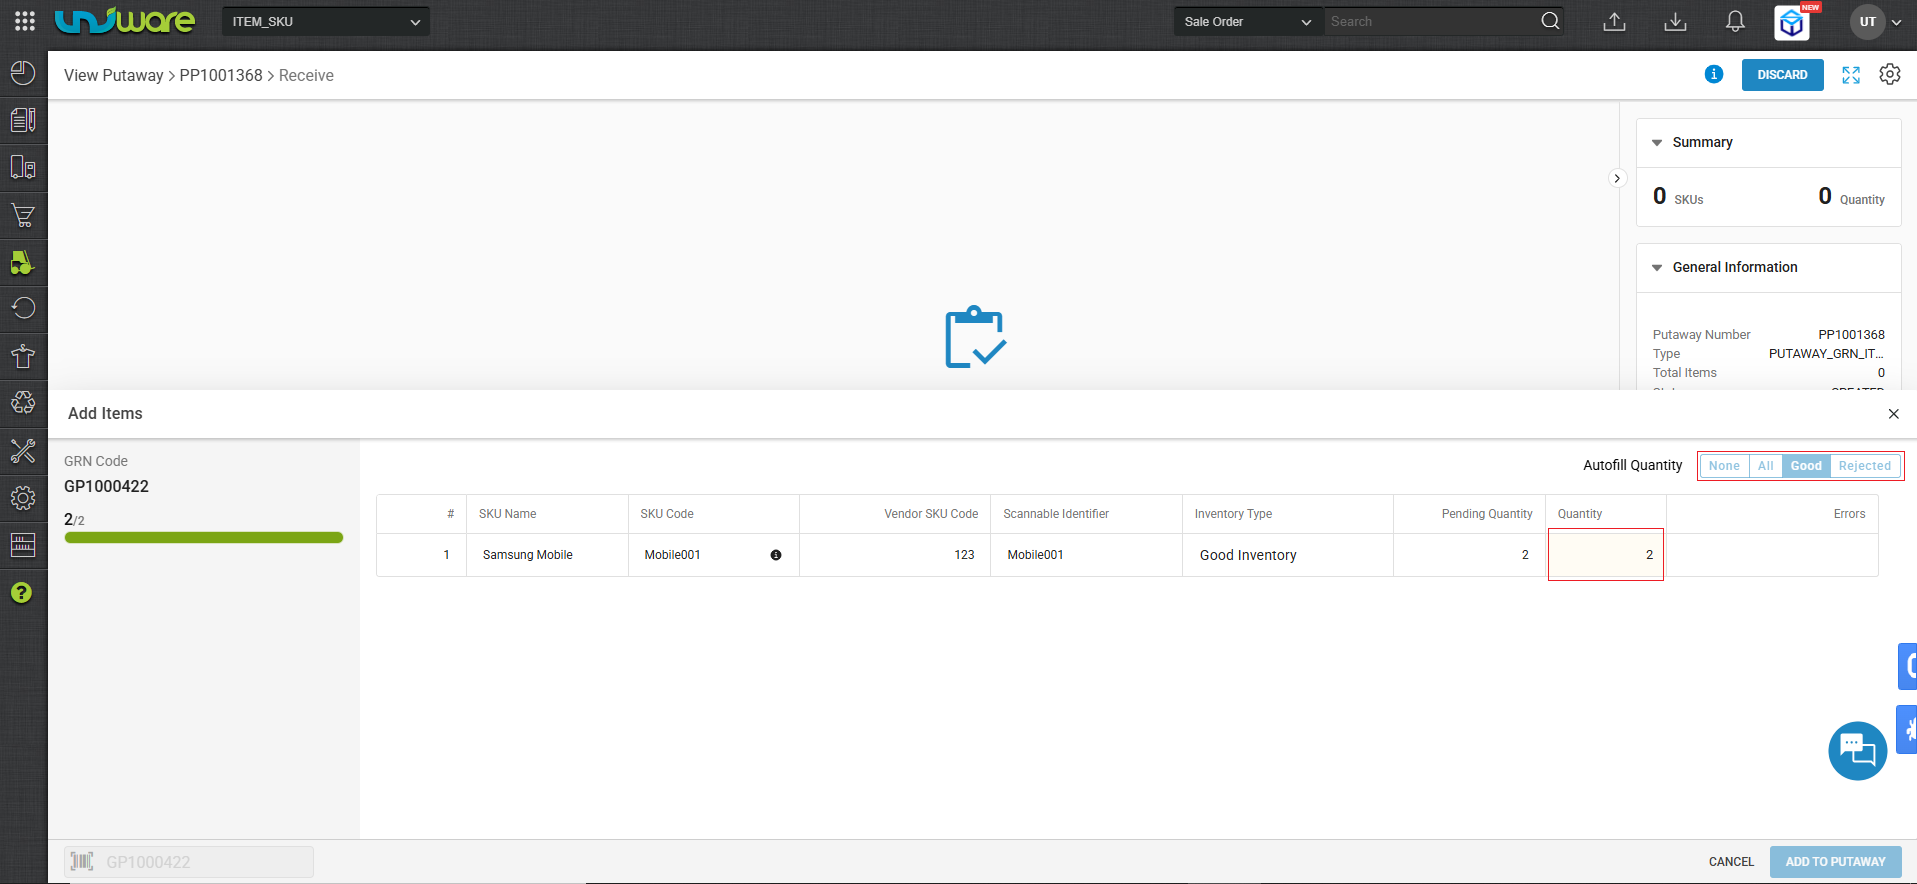
Step-7: Click Add Putaway.
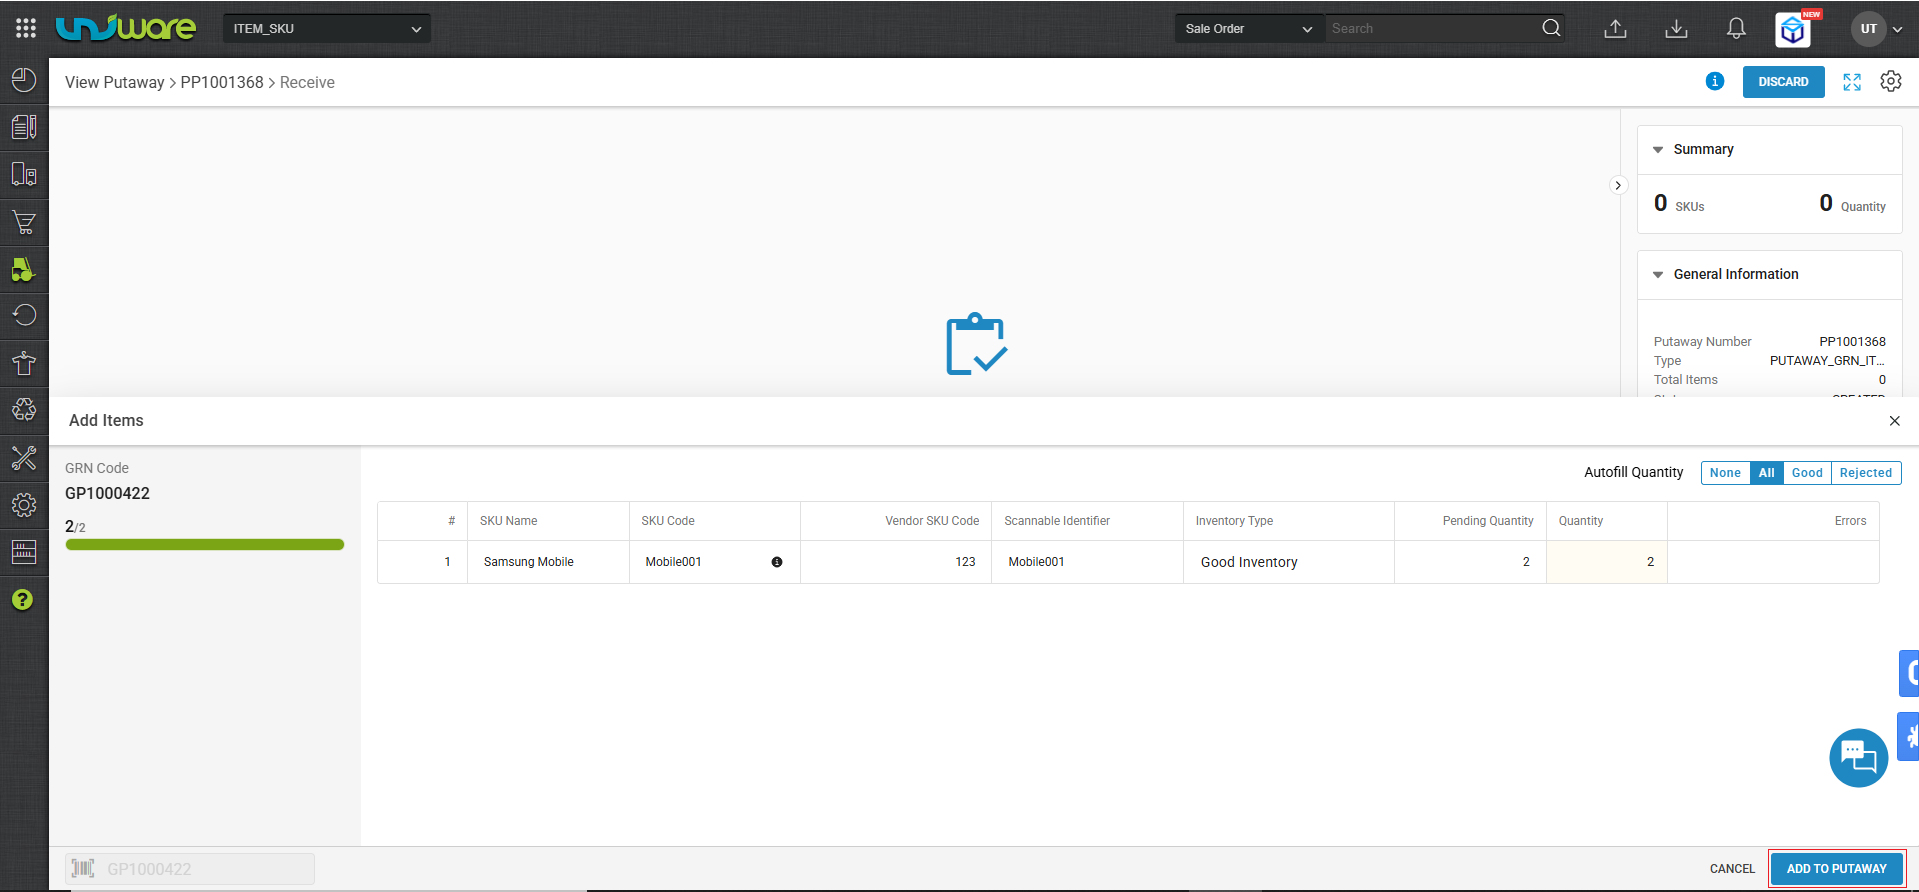
This step are the optional step. If you don’t need to create Putaway List then you can Skip it.
-
Add to List:
- The system displays all SKUs and quantities present in the scanned GRN.
-
Click Add to Putaway. You can repeat this step to add multiple GRNs to a single putaway task.
-
Generate List: Click Create Putaway List.
Step : Click Create Putaway List.
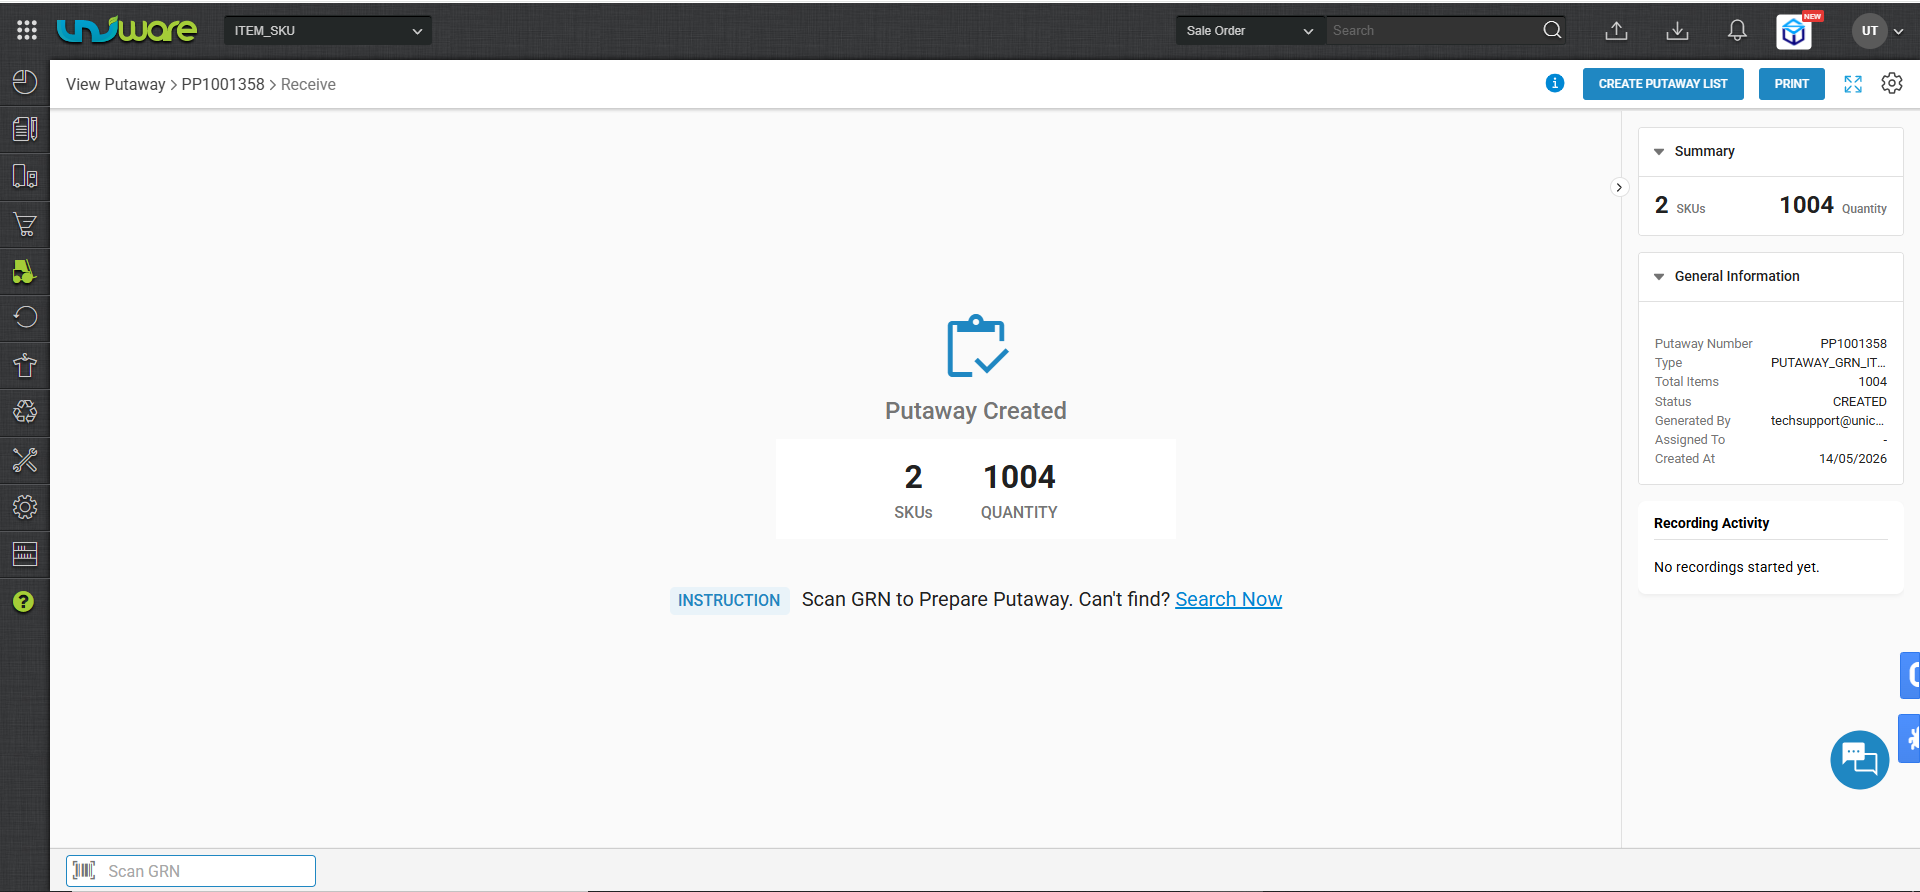
Step-8: Click Update Shelf.
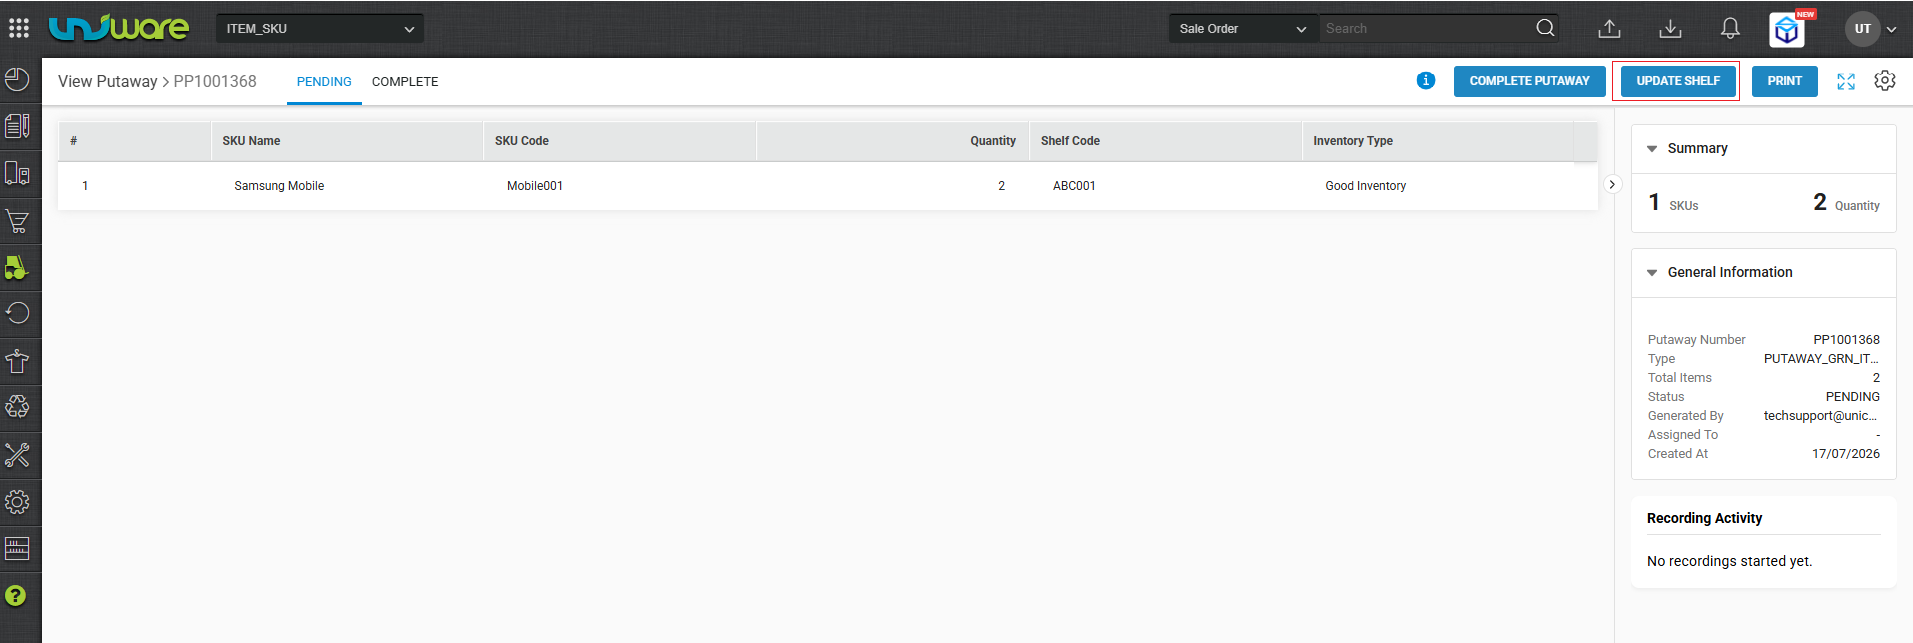
Step-9: Update Shelf and Click Update.
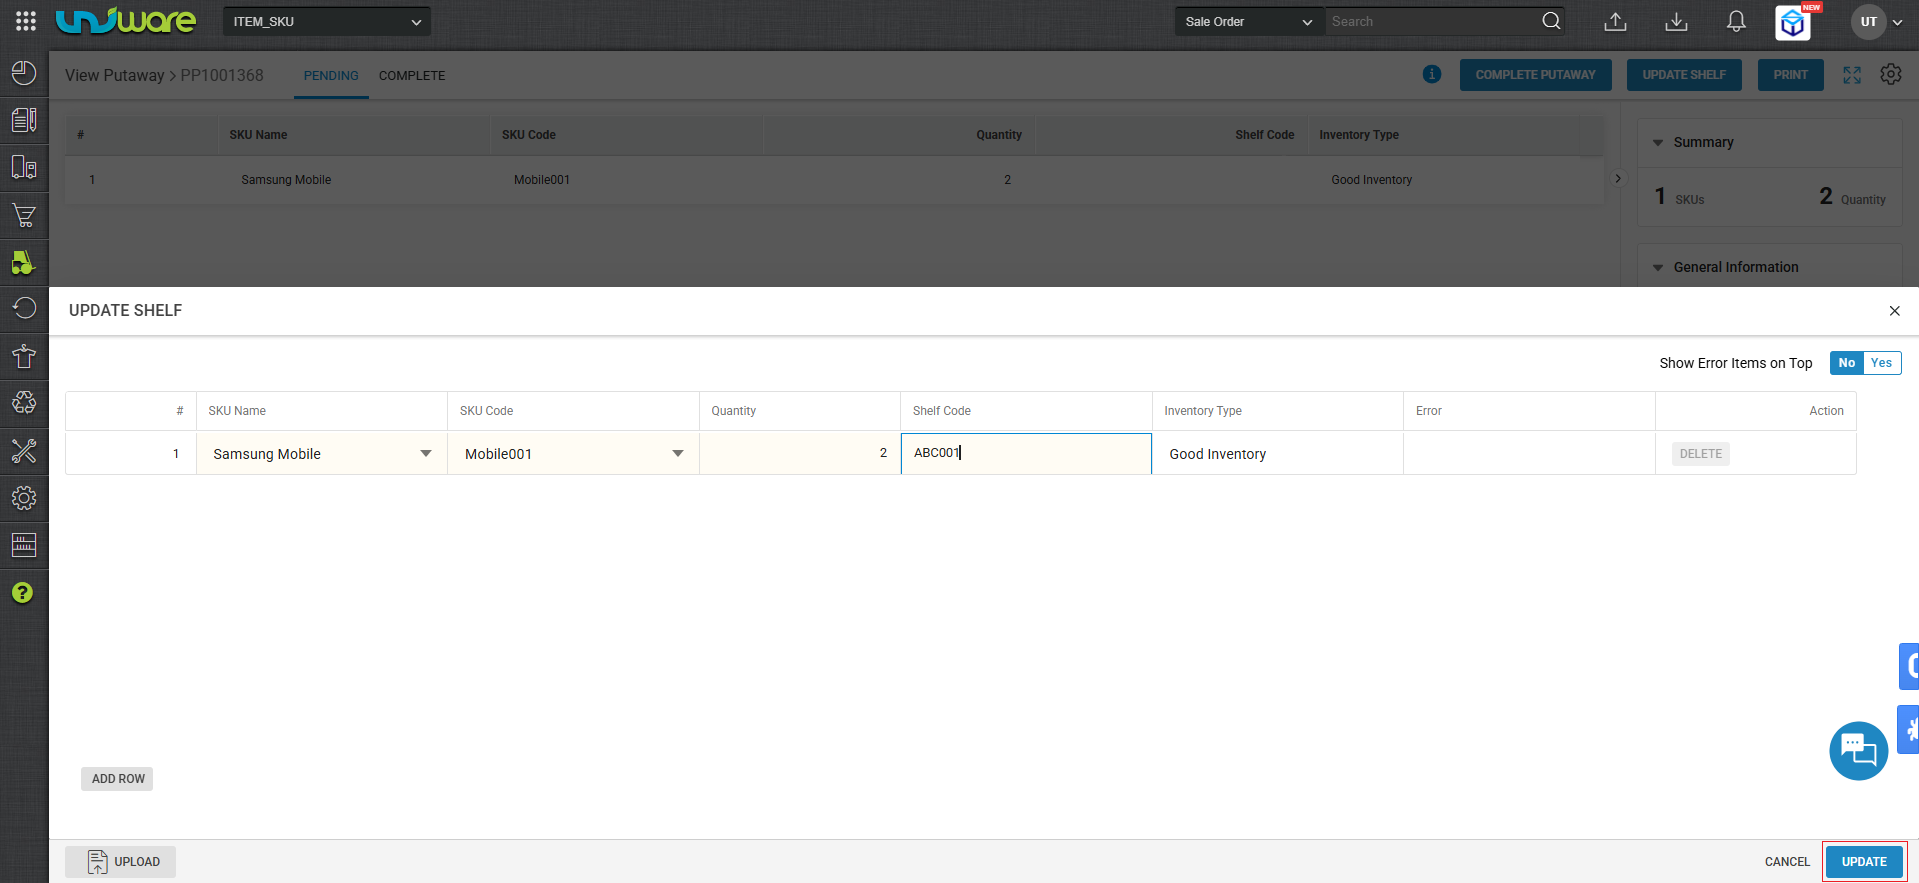
Step-10: Visit View Putaway & Click Complete Putaway.
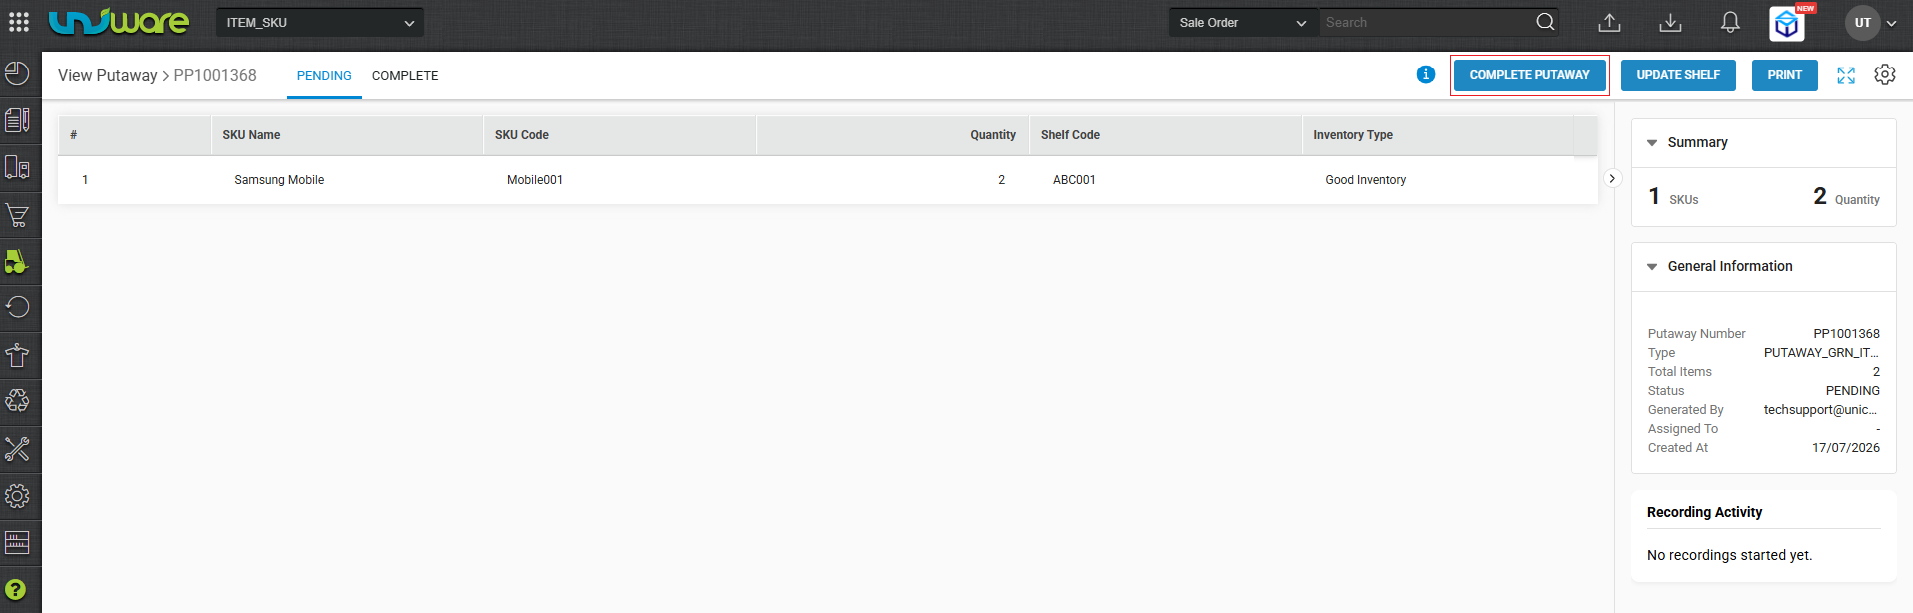
Step-11 : Click on Yes.
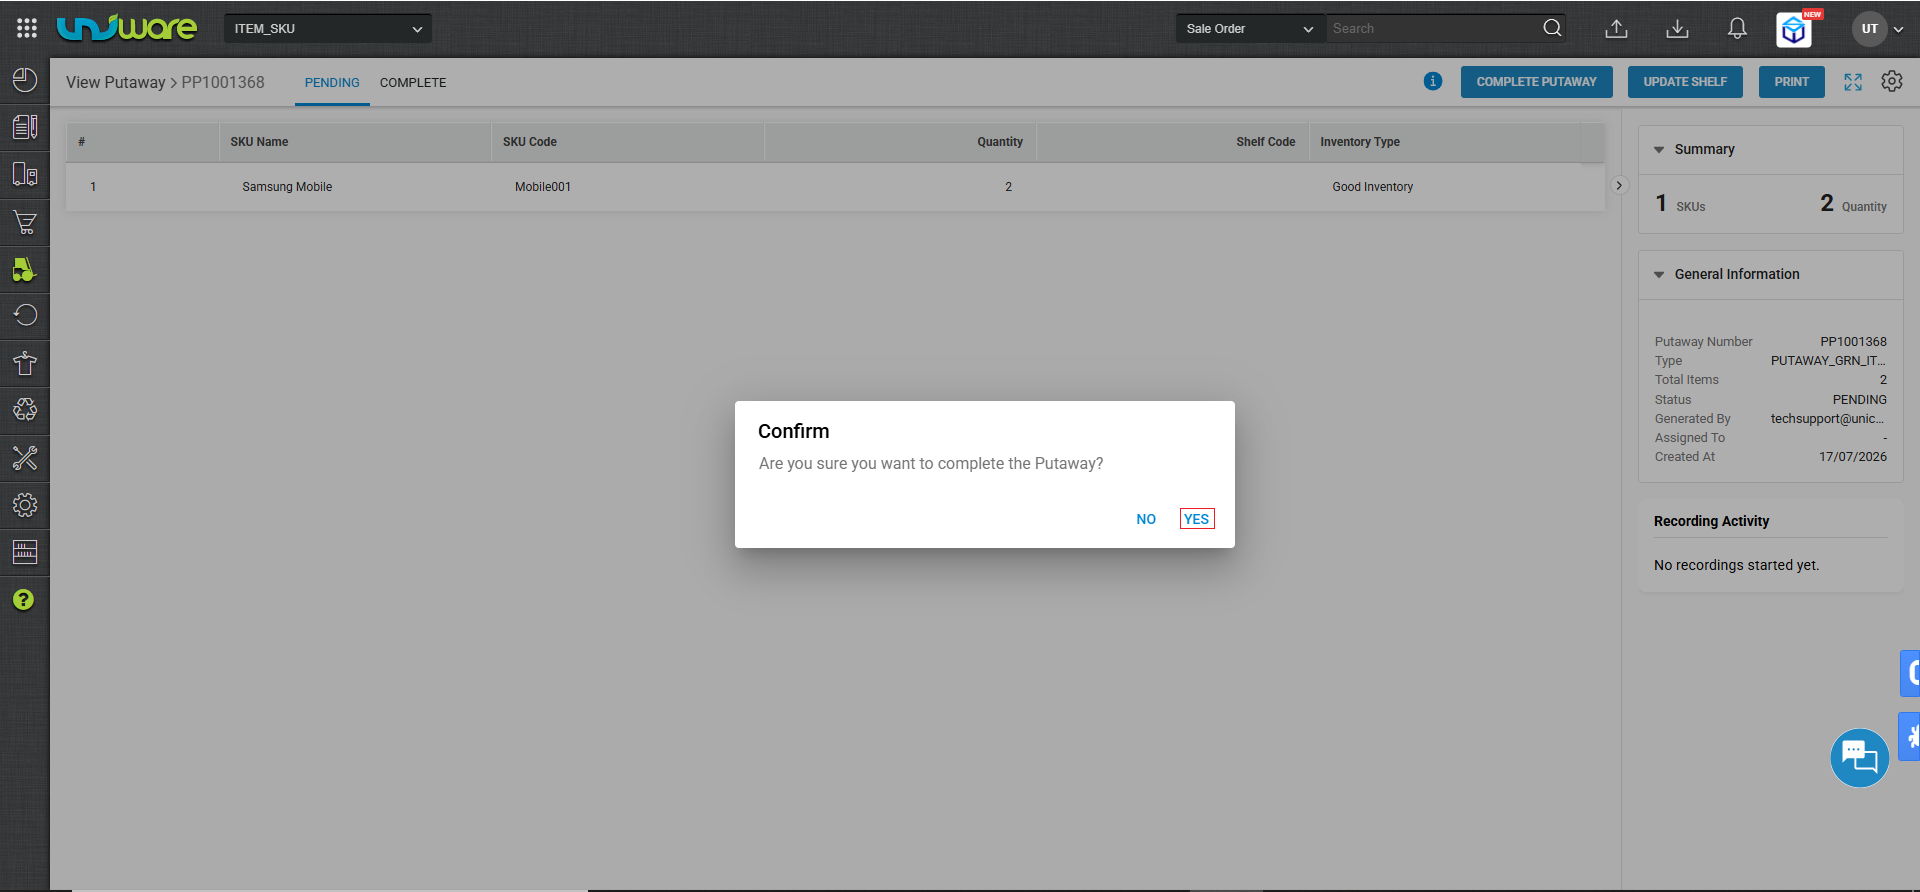
Step-12 : Putaway shows in Complete Tab.
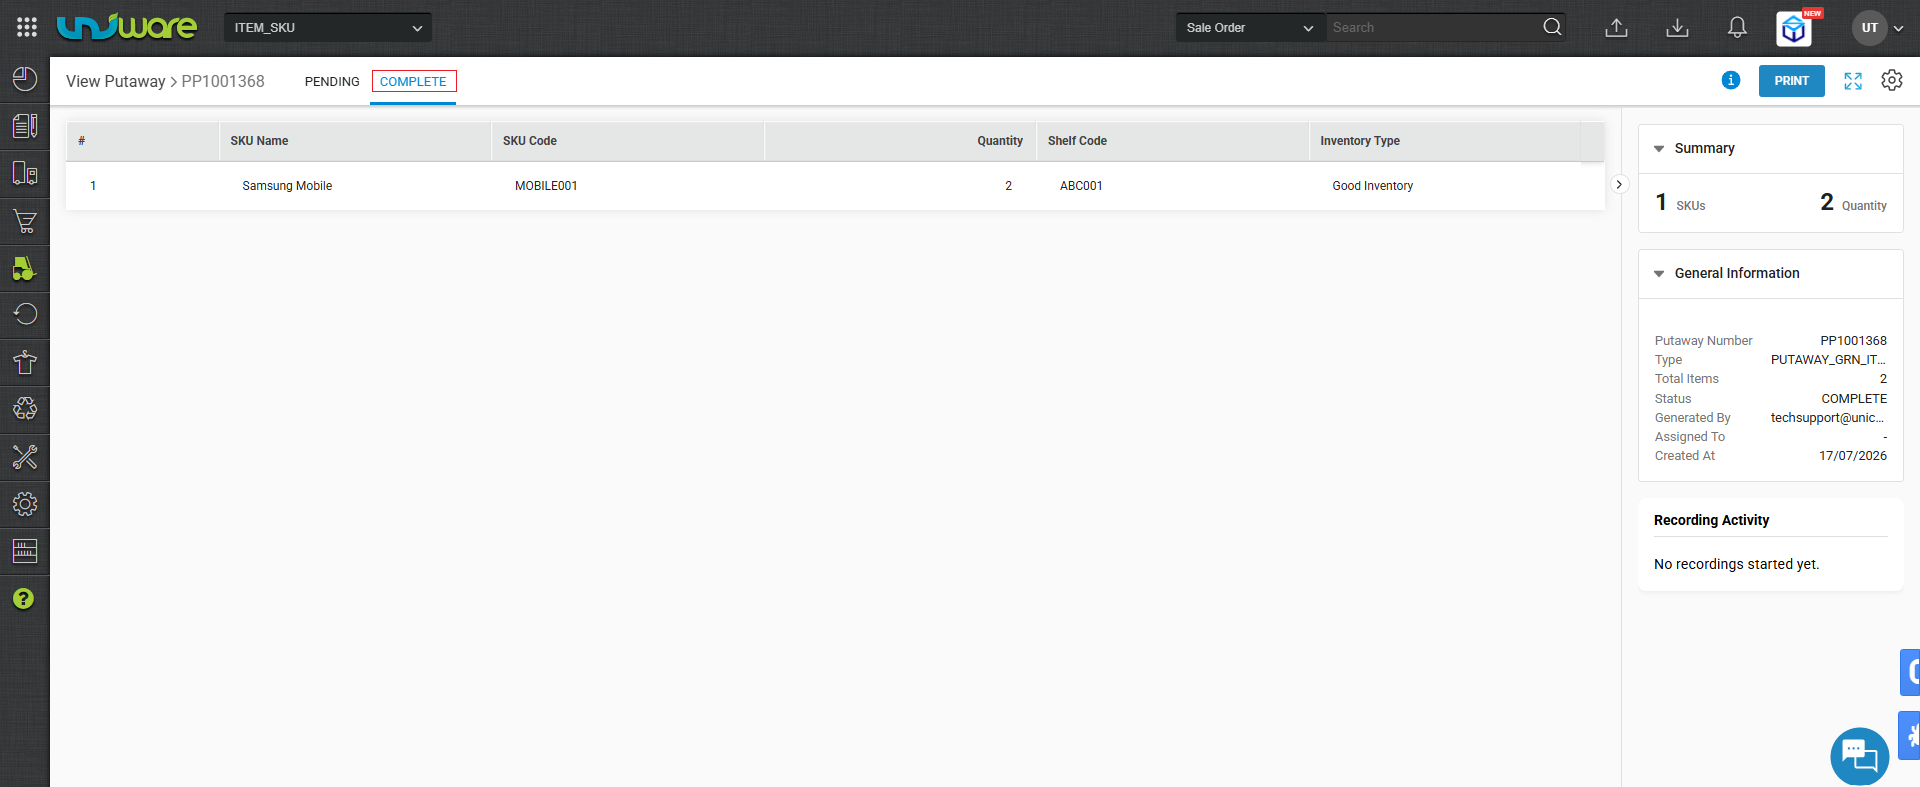
Field Changes
| Field | Screen | Status | Behavior |
| PO Number | Gate Entry | Mandatory | Must be an Approved, non-expired PO. |
| Vendor Invoice Code | Gate Entry | Mandatory | Unique per Gate Entry; flows to GRN. |
| Vendor Invoice Date | Gate Entry | Mandatory | Flows to GRN. |
| Gate Entry Selection | GRN | Mandatory | GRN cannot be created without this link. |
| Invoice Details | GRN | Locked | Pre-filled from Gate Entry; prevents manual re-entry errors. |
Frequently Asked Questions (FAQs)
Q. What happens to my existing GRNs?
Ans. If you turn this feature ON mid-stream, it only affects newly created GRNs. In-progress GRNs will follow the old logic.
Q. Can one PO have multiple Gate Entries?
A. Yes. If a large PO arrives in multiple trucks, you can create a separate Gate Entry for each vehicle/invoice.
Q. What if the PO is expired?
A. The system will not allow a Gate Entry to be created against an expired or unapproved PO. Ensure procurement teams keep PO statuses updated.