
Tata CLiQ is an Indian E-commerce website, selling Apparel, Footwear, Electronics, Watches and Accessories. TATA Cliq Luxury website caters luxury product segment as well across these categories. Customers can order, collect, return and exchange products from any country, either online or from physical partner stores.
Note: If Seller using a single Unicommerce for TATA Cliq, TATA Cliq Luxury and TATA Cliq Indi Luxe, then he has to create separate seller codes in TATA Cliq account for each TATACLiQ model, then add separate channels (with different names) in uniware.
Follow these simple steps to integrate Tata CliQ in Uniware:
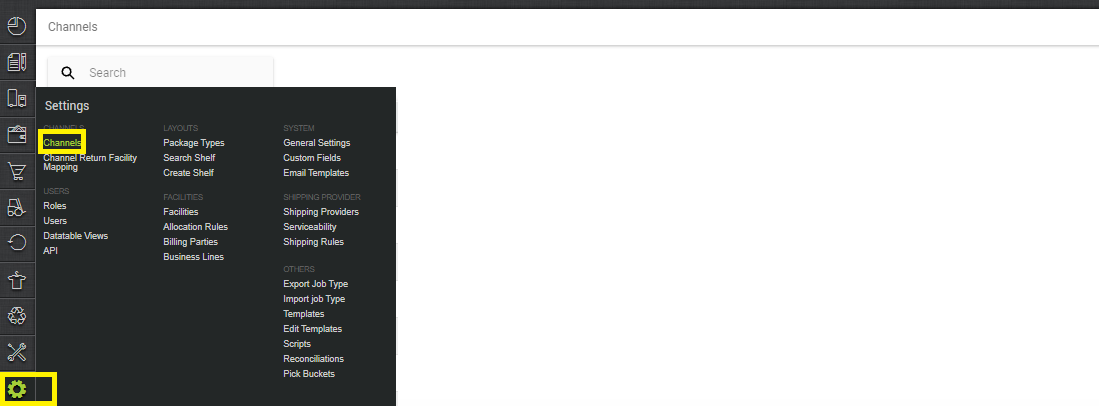
1- In the Uniware menu, select Settings > Channels, then press the button “Add Channel”.
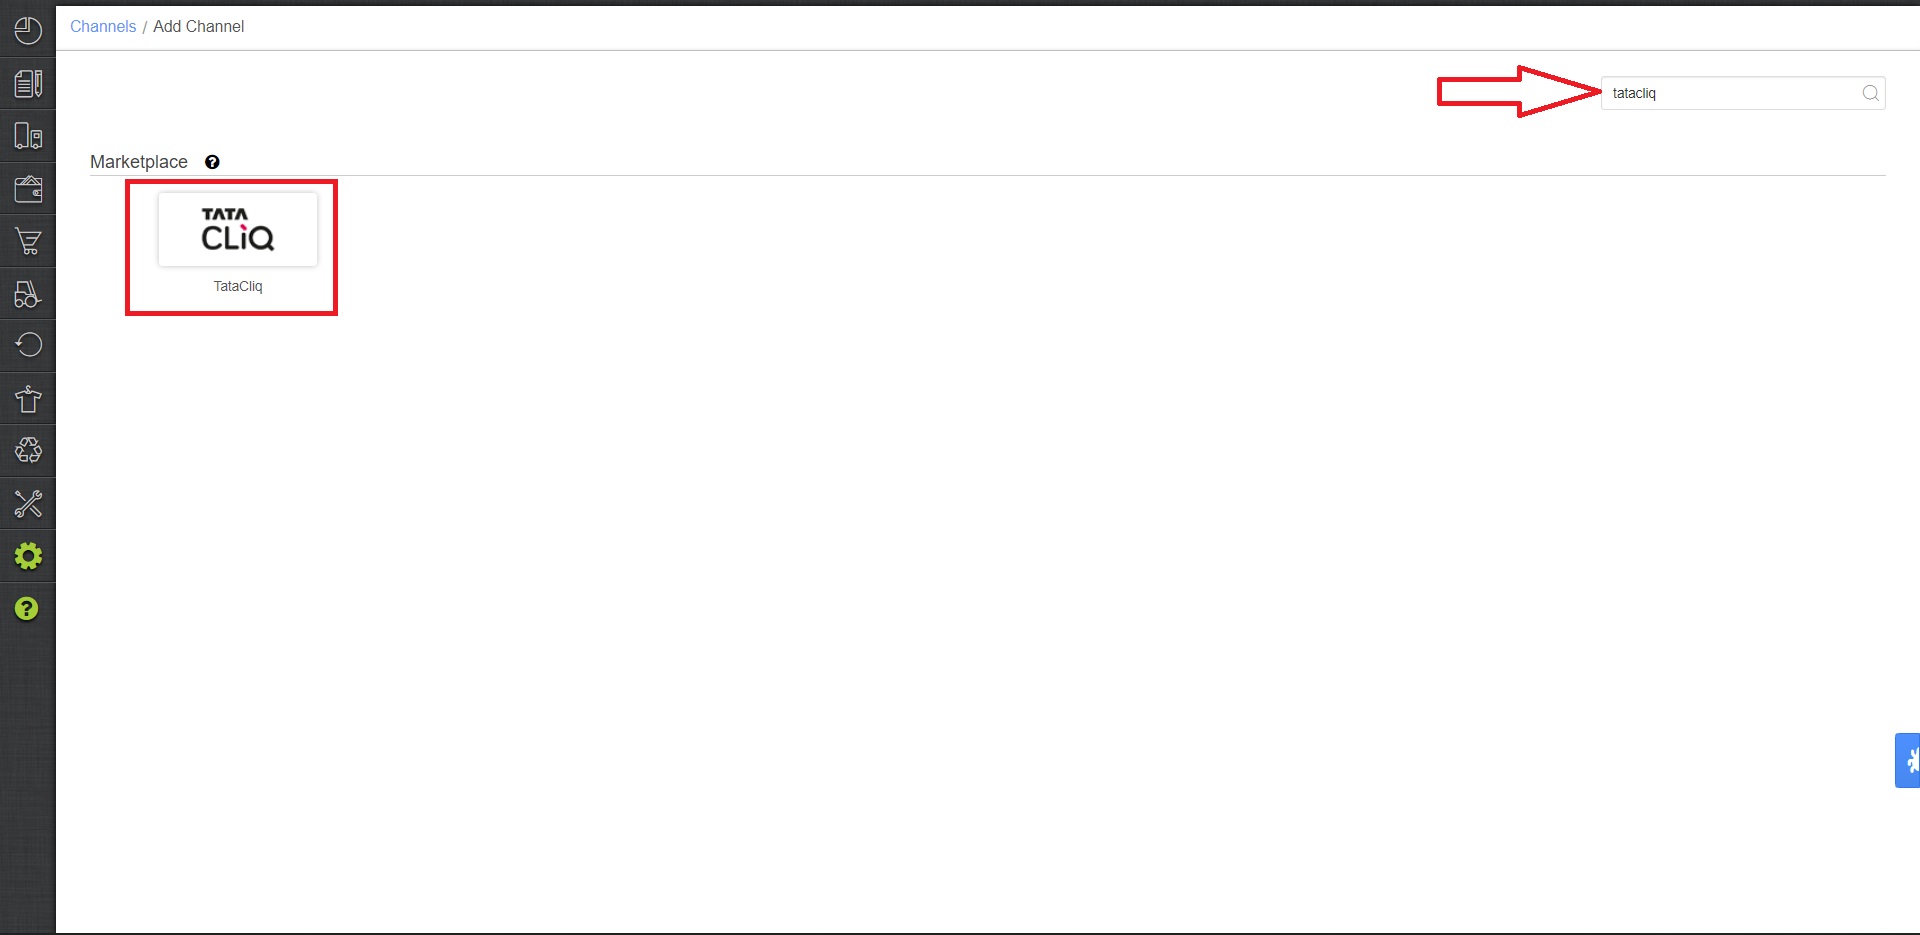
2- Search and Select “Tata CliQ”.
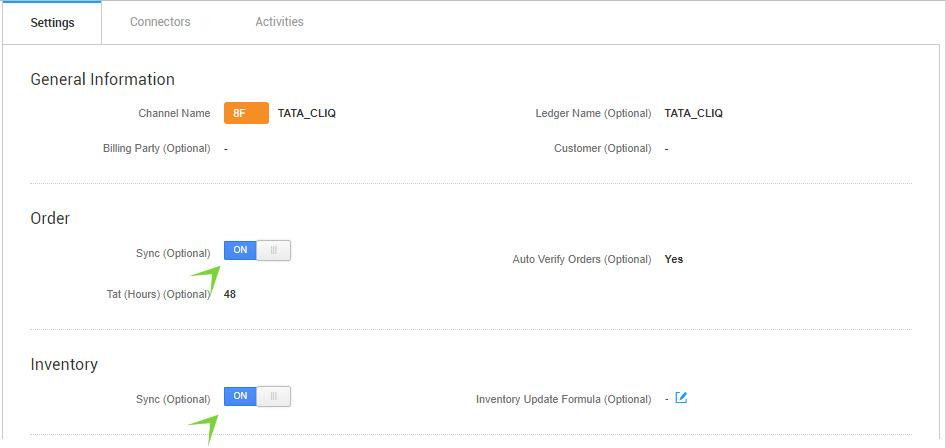
3- Fill in and save the channel details.
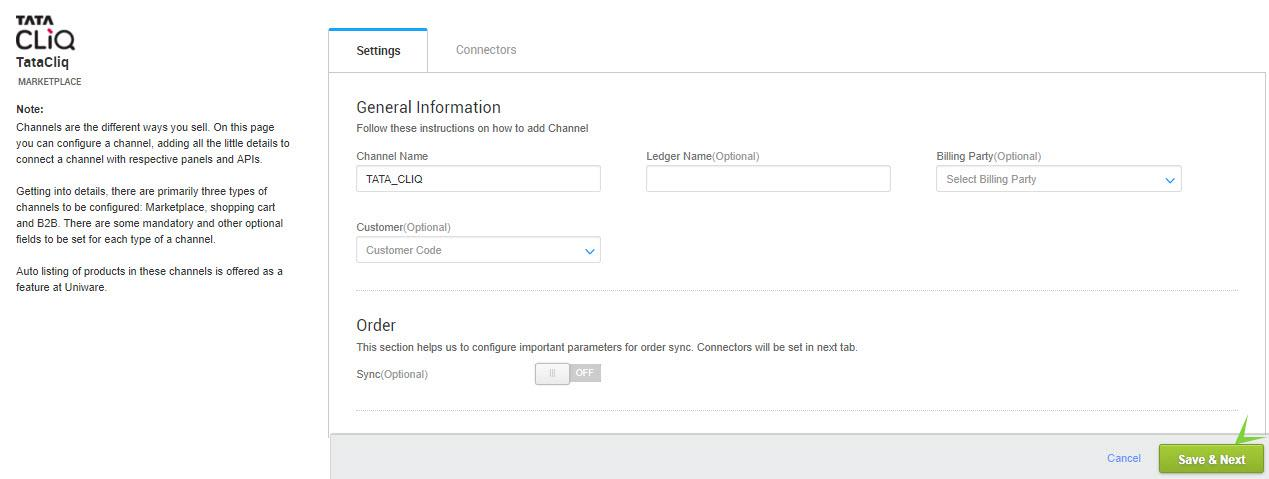
4- As soon as you save the channel details, connectors tab will get opened.
- Seller username and password need to be used to setup new channel for any location and it should be collected from the seller’s respective SPOC (Category Manager) who is authorized to login seller account.
Note: If Seller using a single Unicommerce for TATA Cliq, TATA Cliq Luxury and TATA Cliq Indi Luxe, then he has to create separate seller codes in TATA cliq account for each TATACLiQ model, then add separate channels (with different names) in uniware.
| Parameter | Value/ Description |
| SellerId | Numeric, Provided by TataCliq team. Check below Ref-1 |
| Username | Same as seller’s TataCliq panel login username. |
| Password | Same as seller’s TataCliq panel login password. |
| Tatacliq slave id <> store map | To update by the seller with a json map of facilities. e.g. configuration slave id mapping looks like {"tataCliqSlave":"uniwareWarehouseCode"}
In case of multiple slave ids, you can add multi mapping under this json field with the respective Uniware warehouse code.
For details connect with unicommerce team. |
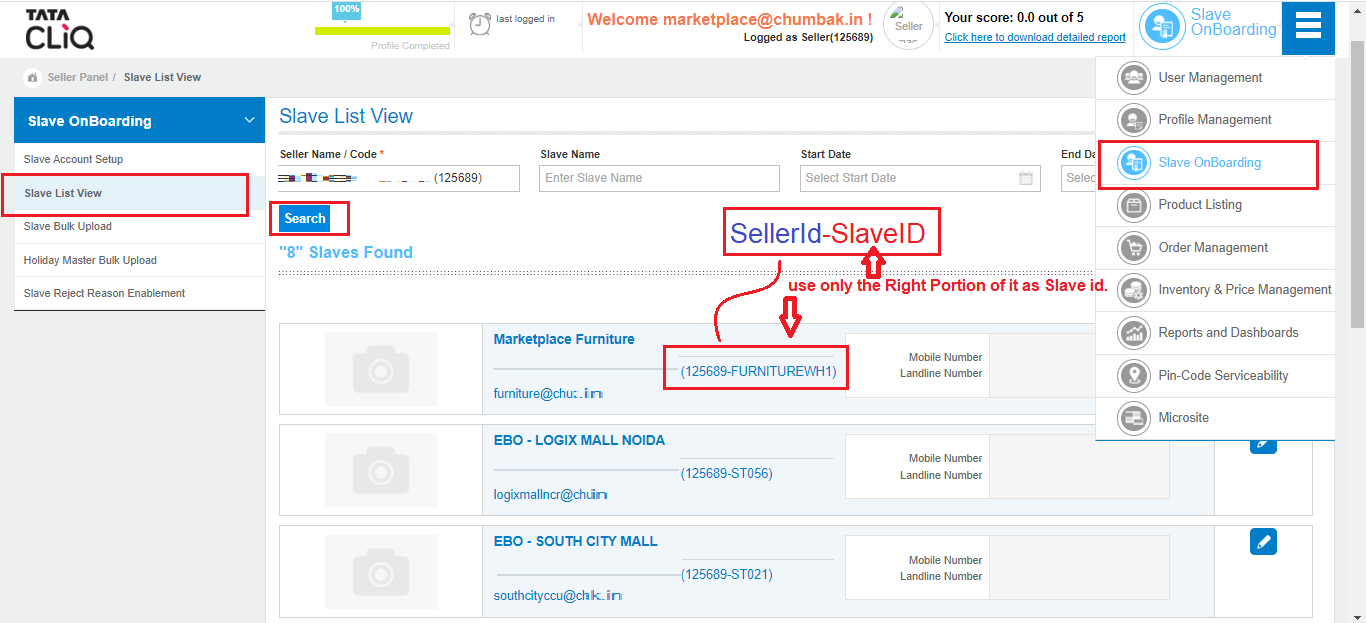
Ref-1: Slave id: To get slave id from Tatacliq
Path: Login to Tata CliQ seller panel (sellerzone.tatacliq.com)> click on Slave Onboarding >Seller List View> press the search button now you will get details as “SellerId-SlaveID”, use only the Right portion of it as Slave id.
Note: There can be multiple slave ids, so make sure to use the correct combination of Slave id with respect to the seller login id.
5- Connect the connectors in Uniware with Tata CLiQ’s email and password.

6- Once connectors are connected, Turn on ORDER and INVENTORY Sync and you can configure all related parameters.
- Turn ON the Order and Inventory sync and Select associated facilities for inventory sync.
- Single Action Invoice Label New: By default ‘OFF’.
-
Merge Invoice Label URL : Only Invoice button will be visible to generate. Generated document – UC invoice with Channel Invoice-Label.
-
Skip Invoice URL : Only label button will be visible to generate Channel Invoice-Label and here UC invoice will be skipped. Generated document : Only Channel Invoice-Label
-
Off : Separate button will be visible to generate Print Invoice and Print label. Generated document – UC invoice and Channel Invoice-Label
-
- GstEInvoicing Enabled From NIC: “NO” because this is B2C order channel.
- Choose Facilities For Inventory Sync: While configuring the store map on the connectors page, It should be ensured that the particular store is selected.
– If we associate more than one facility in this case, System will give error for such case while syncing the inventory.
- Omni Channel Order: Make it ‘No‘ and for Omni channels (for hoppable store orders only), make it ‘Yes‘.

Below are the important points needs to be kept in mind while adding the channel.
-
-
To avoid adding multiple channels in uniware (in case of multiple Slave ids) you can use multi-mapping under json map field with the respective Uniware warehouse code. Then you should add respective UC warehouse codes at channel config Choose Facilities For Inventory Sync
-
There can be multiple slave ids at tatacliq panel, so make sure to use the correct combination of Slave id with respect to the seller login id. From the “SellerId-SlaveID”, use only the Right Portion of it as Slave id.
- Complete order processing and inventory update will remain same as per the standard process.
- Order sync, inventory sync and catalog sync are available.
- Invoices: Invoice Invoices code, Tax details are provided by channel.
- Label(Label with Invoice) and Manifest file will be fetched from channel.
- Shipping is handled by channel.
- Status sync will work for Cancelled/Return Status.
-
Seller cancellation from Uniware is allowed in this Integration, Cancelled status will get updated on the channel.
-