
Overview
The UniCapture VMS allows warehouse users to record video sessions of the packing and return processes.
The recorded video establishes clear proof of Packing/Product condition and help resolve claims quickly.
Purpose
Use the UniCapture
-
Proof of Packing: Provide proof of packing for logistics and insurance claims.
-
Customer Dispute: Resolve customer disputes quickly with visual evidence.
-
Return Handle Transparency: Verify the physical condition of returned items.
-
Audit Evidence: Maintain clear audit trails for all shipped packages.
Applicability & Prerequisites
Applicability
-
Requirement: This feature is available to users with SMB ( Small & Medium Businesses) & D2C.
Prerequisites
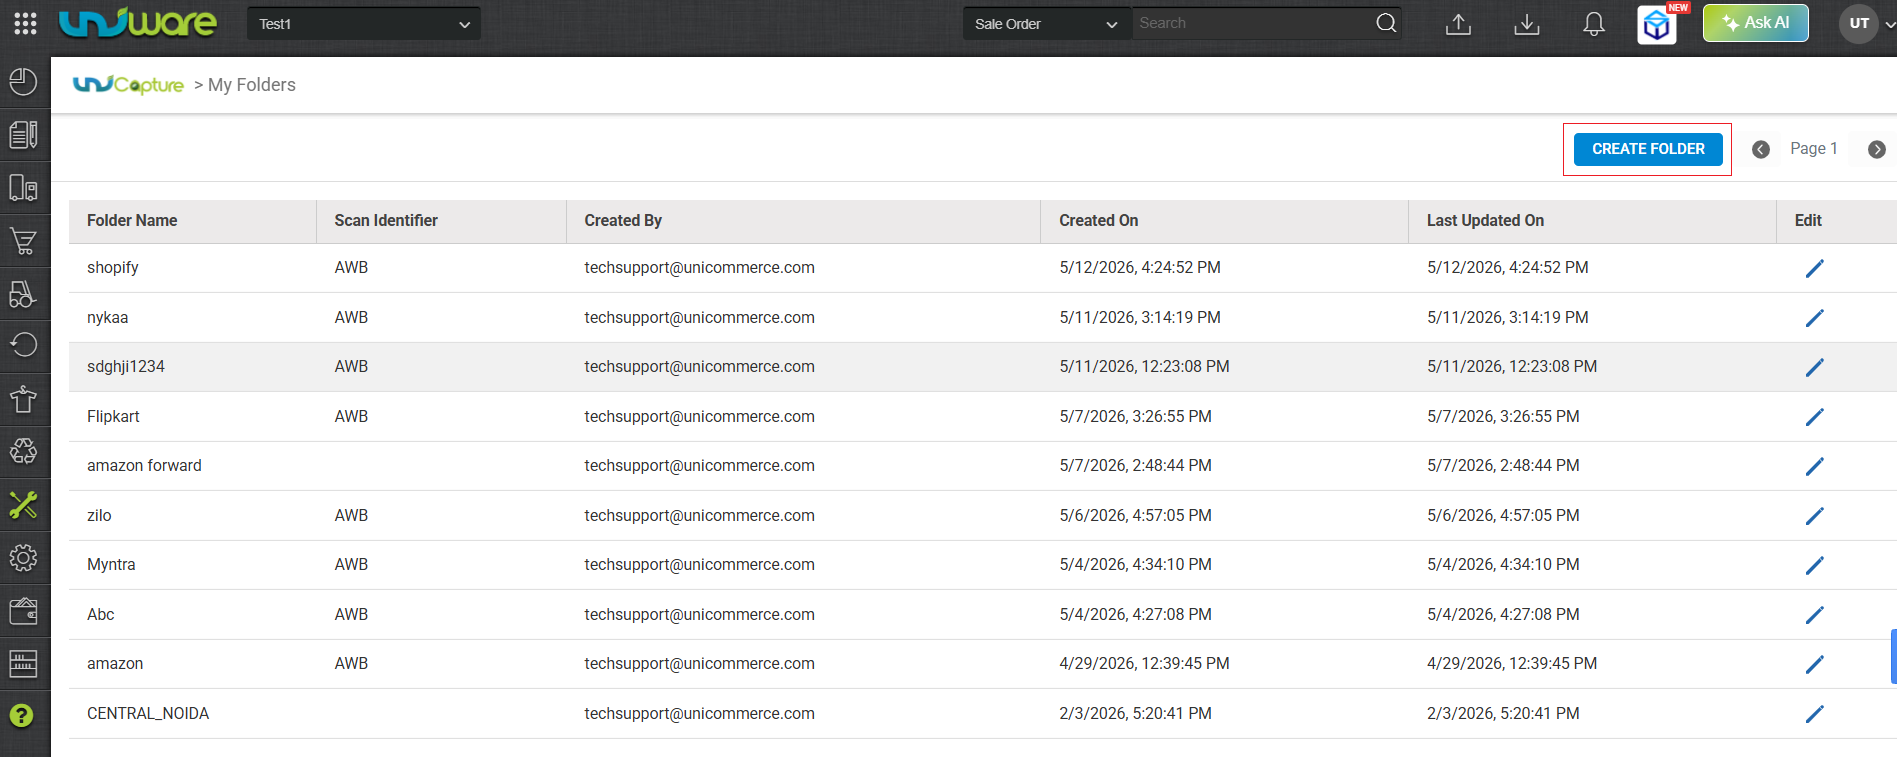
System Configuration: You must configure folders in the My Folders section of the Uniware application before you start recording.
How to create a Folder in the My Folder Section
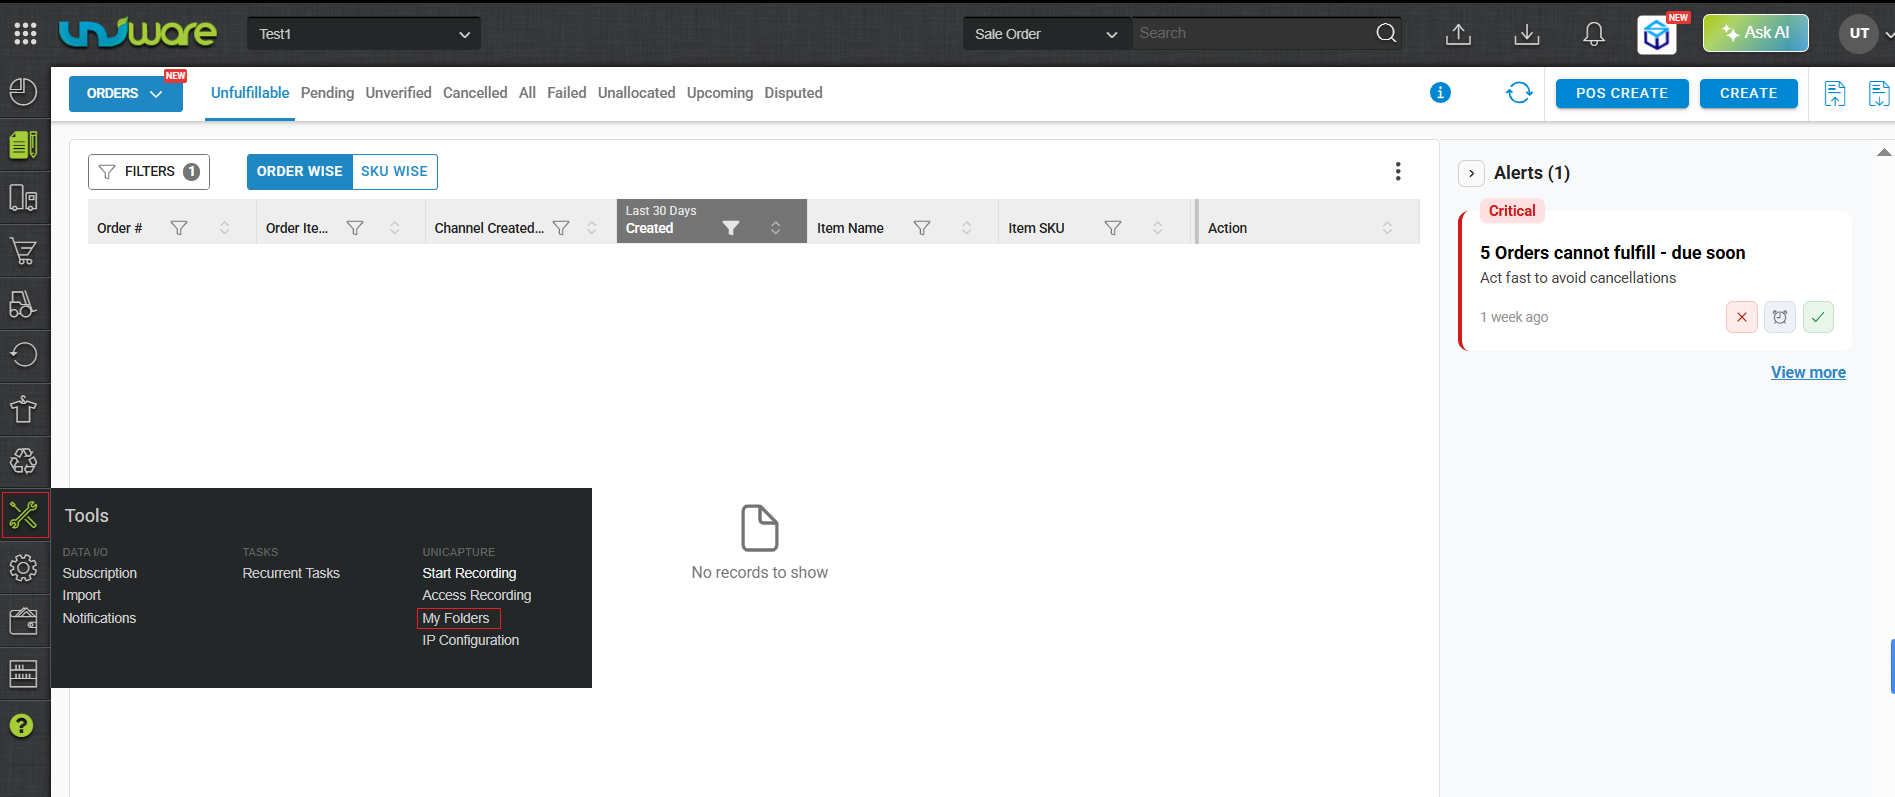
Step-1: Visit Uniware Menu, Hover Tools & Click My Folders
Step-2: Click the CREATE FOLDER button.
Step-3: Name the folder, select the identifier, and click SAVE
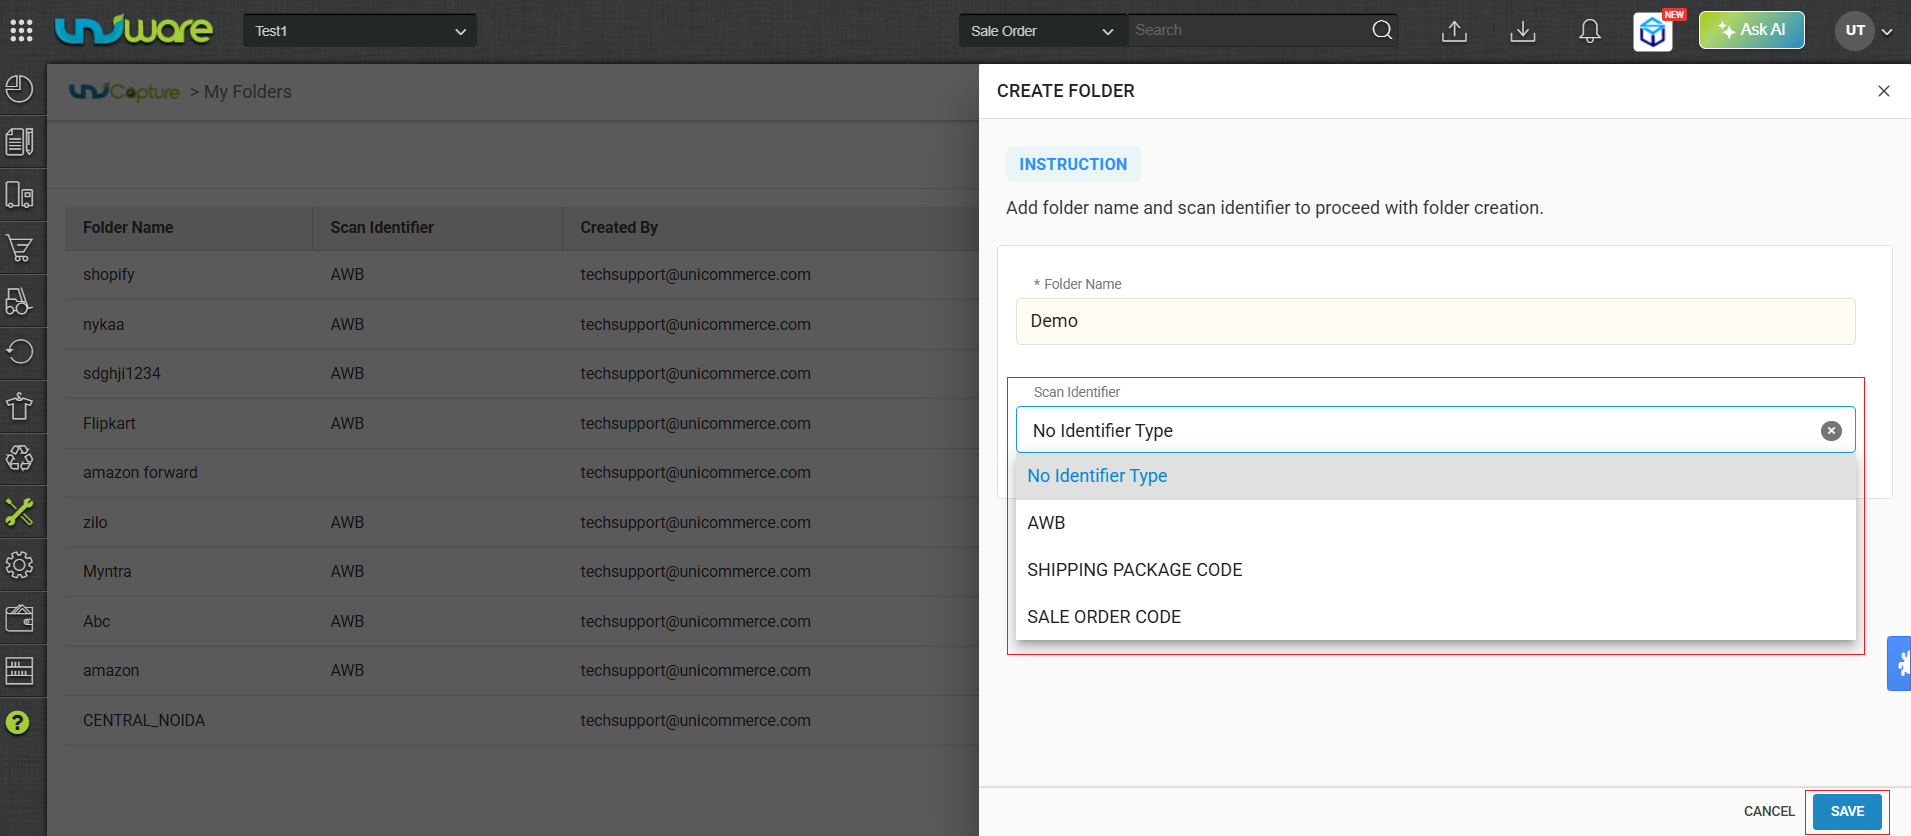
| Note: Identifier Selection is not Mandatory here. By default, it is set to ” No Identifier “. |
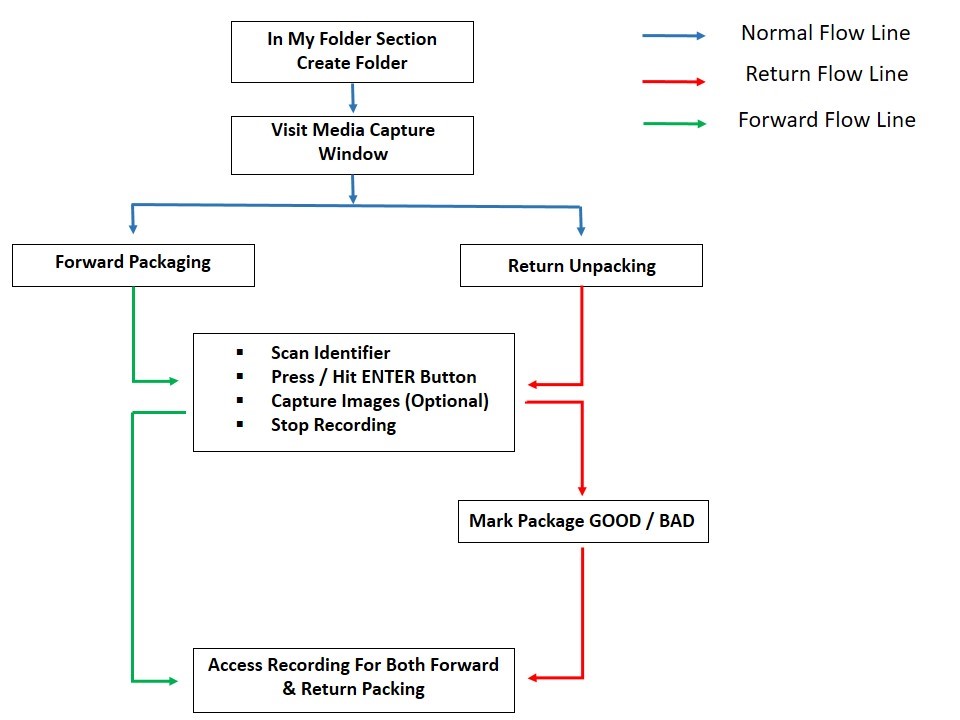
How It Works
Access Media Capture Window
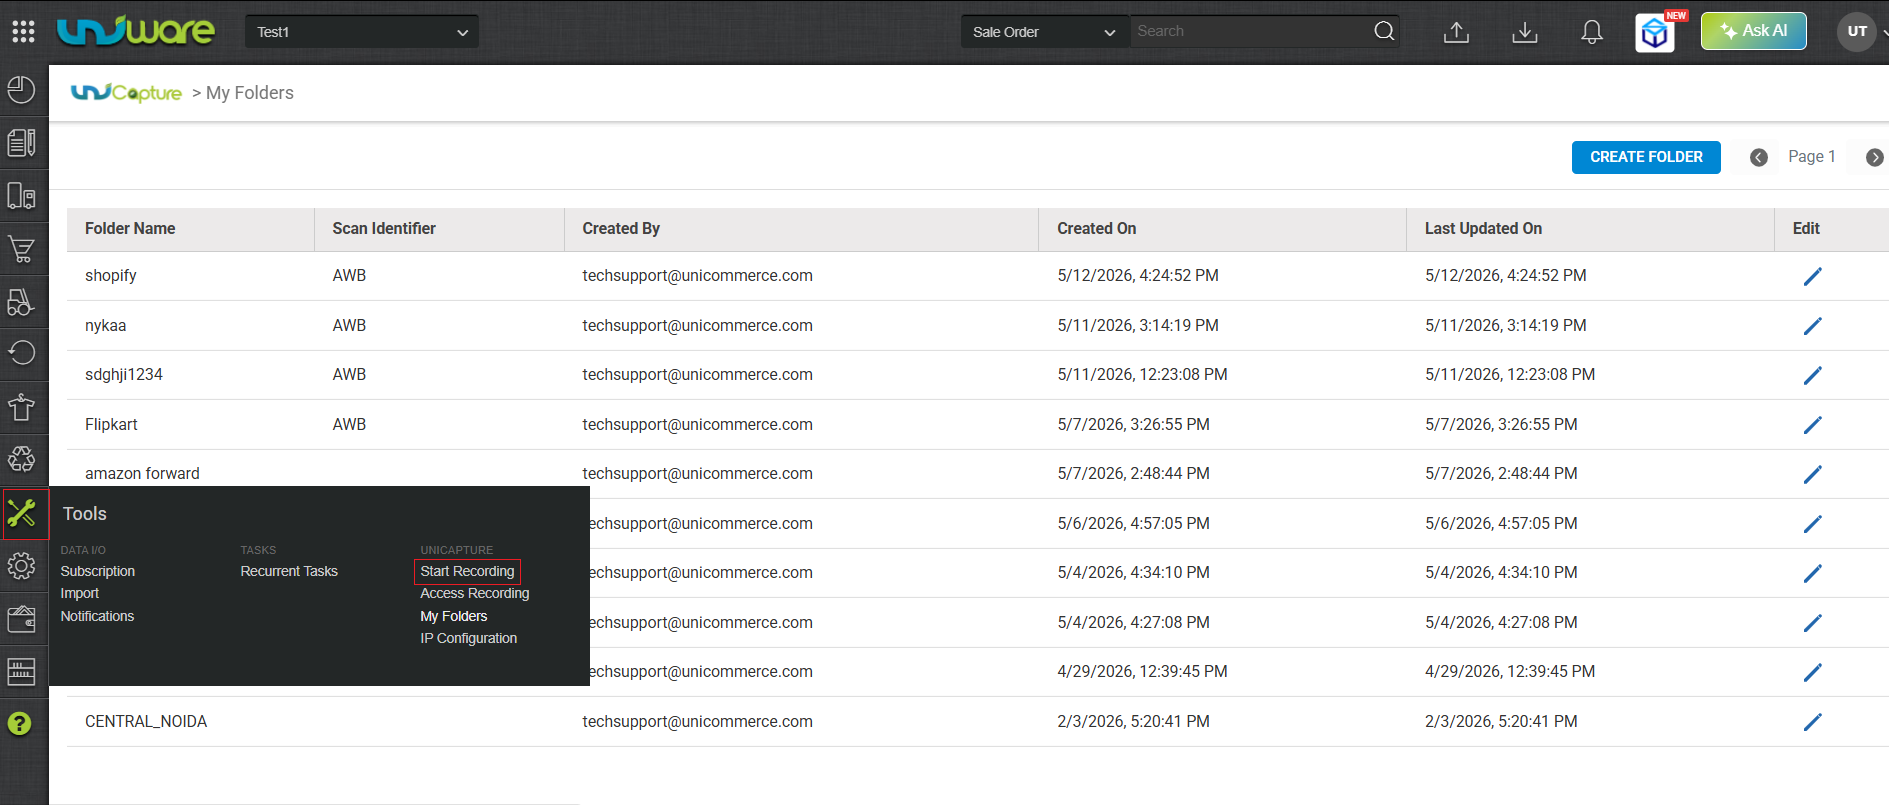
Step-1: Visit Uniware Menu, Hover Tools & Click Start Recording
Step-2: Stay on Media Capture Window
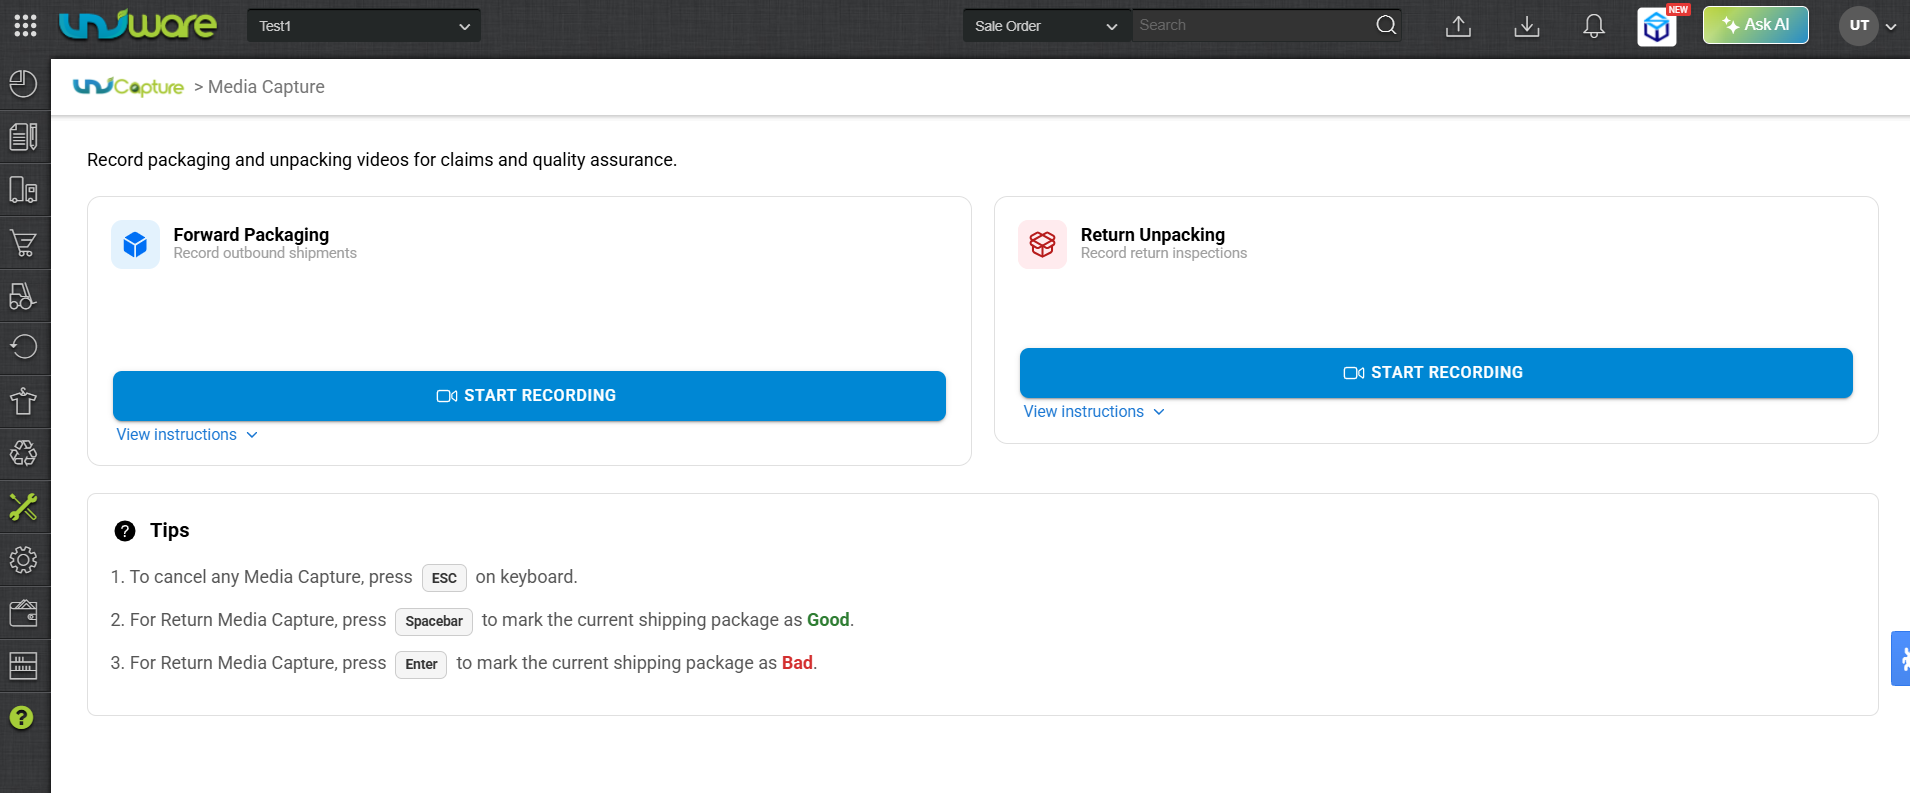
Process-1: Recording Forward Packaging
Step-1: In the Forward Packaging Section, Click START RECORDING

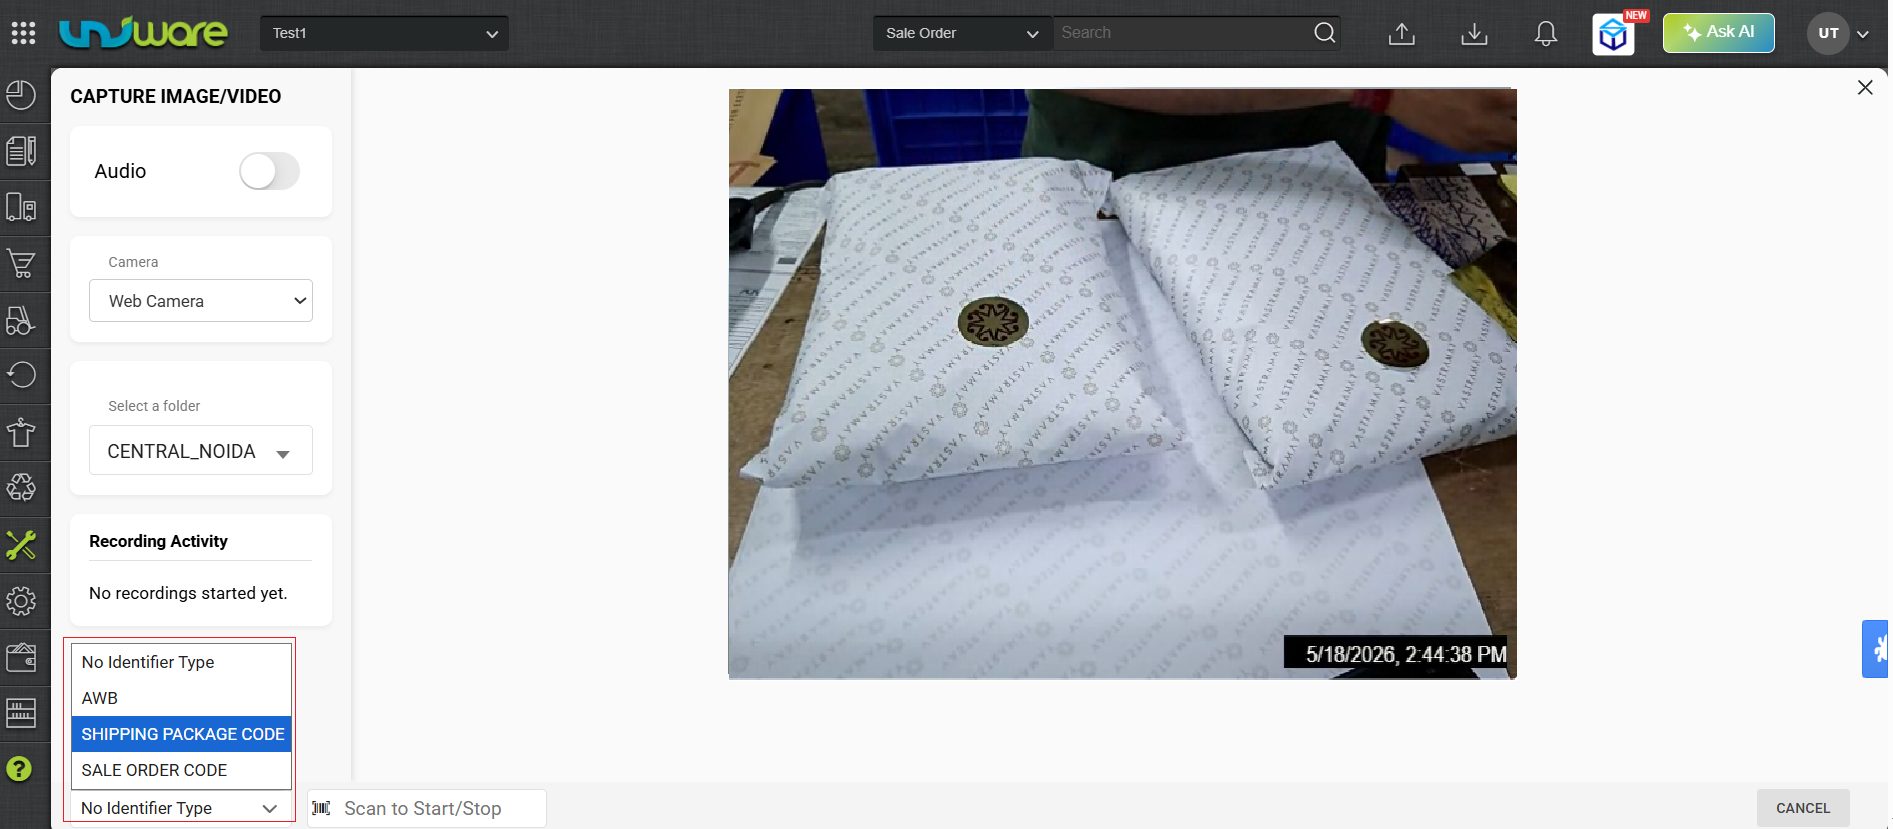
Step-2: Select Required Data & Identifier, Provide the Identifier Number in the Scan Box, & Hit the Enter Button to Start Recording.
1. Choose the Scan Identifier Type: Select your preferred identifier from the dropdown.
- No Identifier
- AWB
- Shipping Package Code
- Sale Order Code

2. Start Recording: Scan or type your chosen Identifier and hit the Enter Button. The recording starts automatically as soon as the system validates the scan.
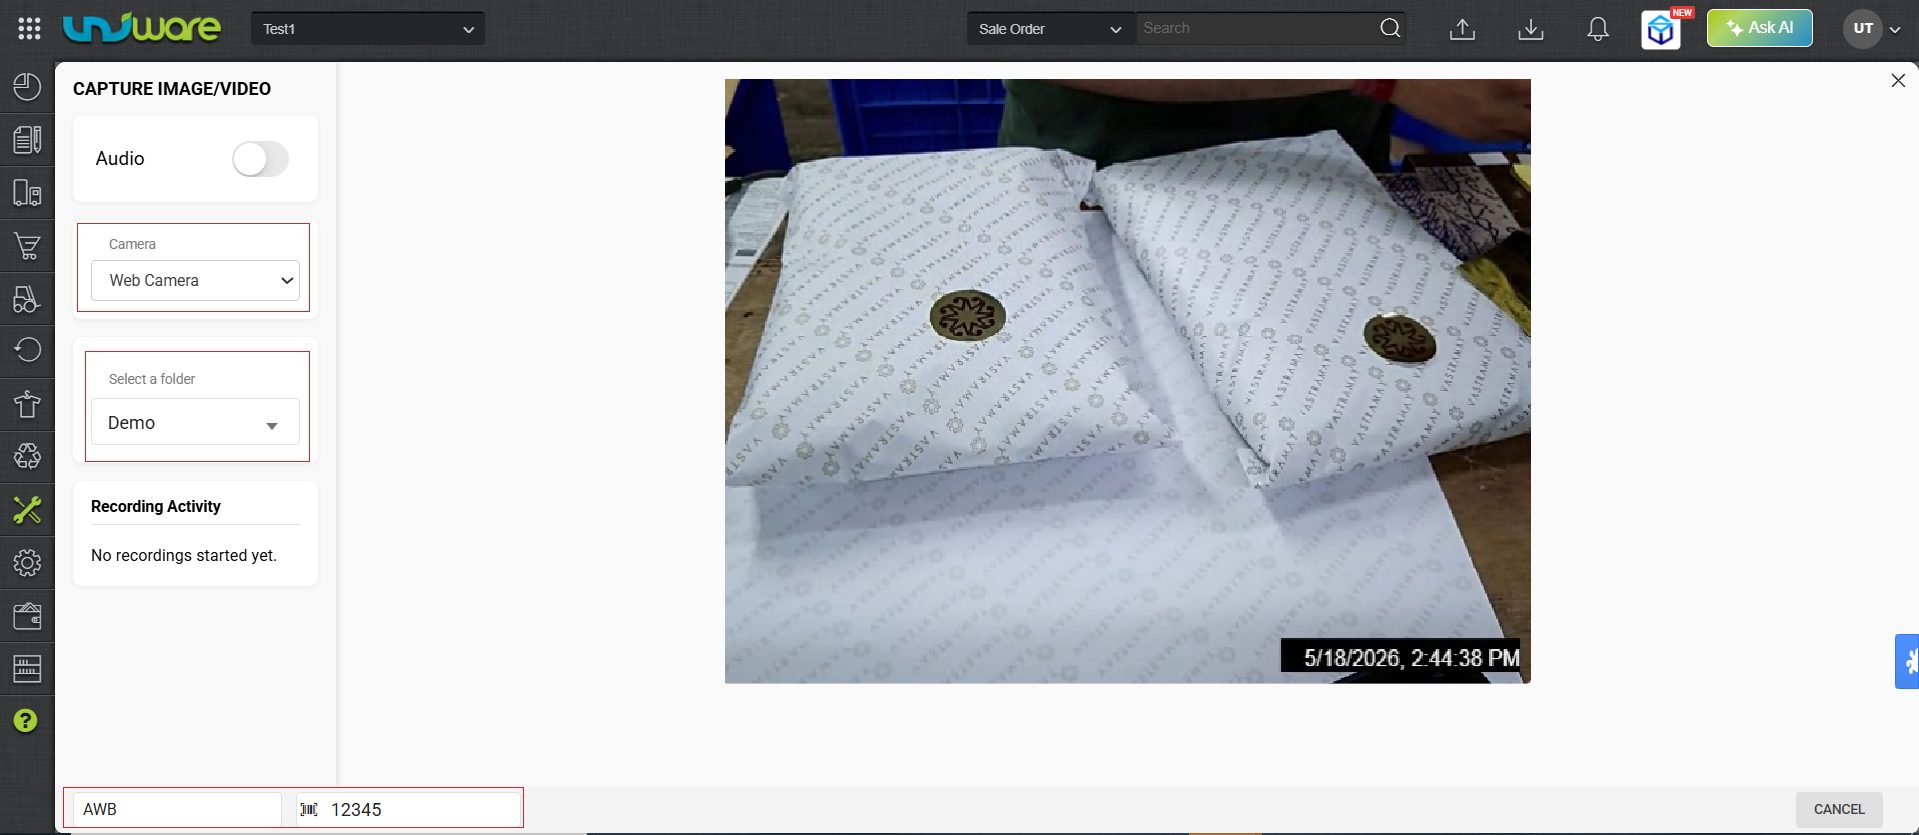
| Note: Toggle the audio switch to Enable if you want to record sound. By default, it is Disabled. |
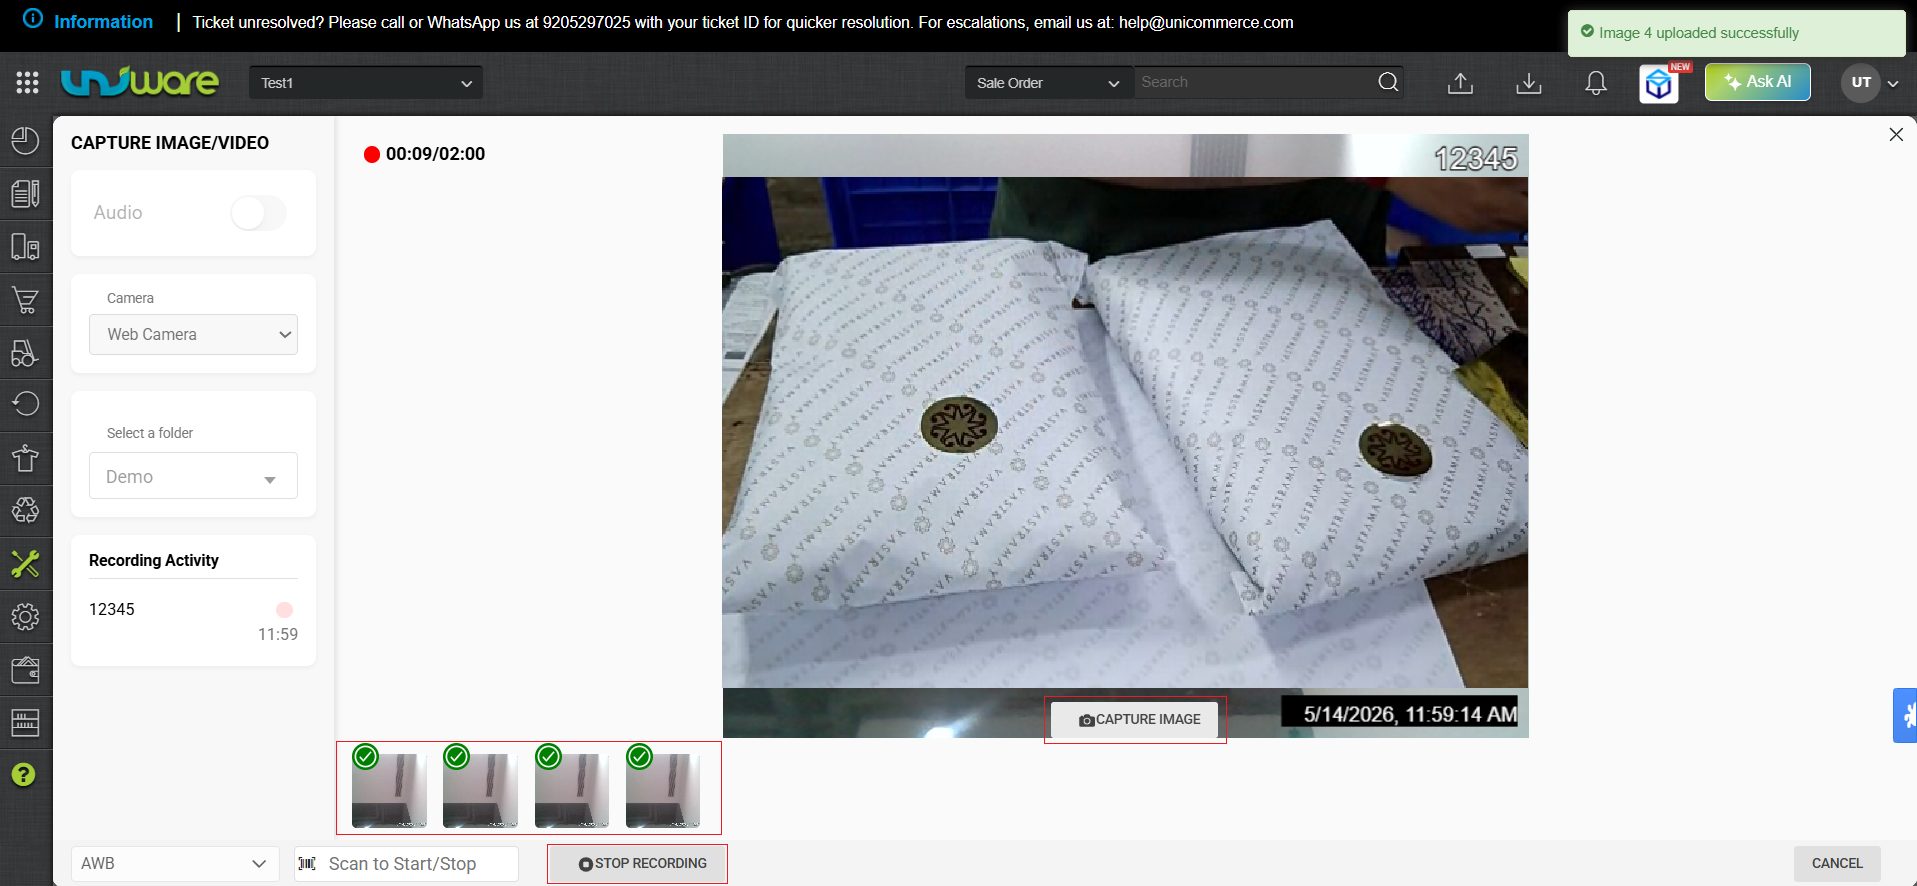
3. Capture Images (Optional): While recording, click Capture Image or press the Spacebar to capture photos.
4. Stop / Complete Recording :
To stop the recording, click the STOP RECORDING Button.
The system automatically saves the video and any captured photos when the 2-minute limit ends, either you can start the new recording to stop and start new recording.
Process-2: Recording Return Shipments (Inwarding)
Before starting recording, visit back to Media Capture Window Page.
Step-1: In the Return Unpacking Section, Click START RECORDING
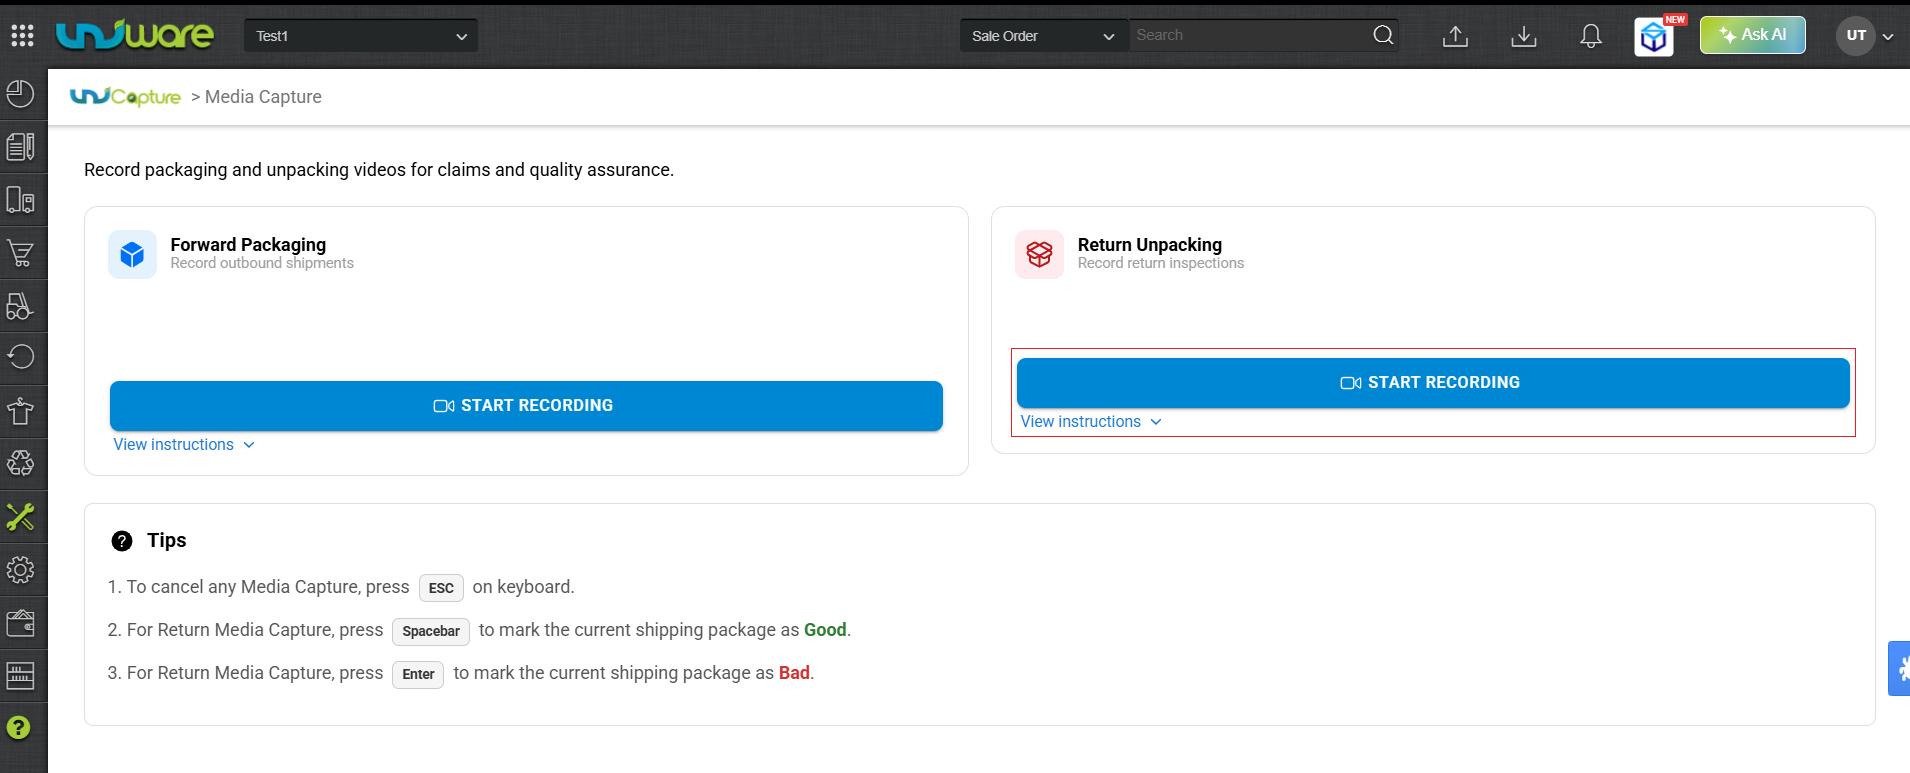
Step-2: Select Required Data & Identifier, Provide the Identifier Number in the Scan Box, & Hit the Enter Button to Start Recording.
1. Choose the Scan Identifier Type: Select your preferred identifier at the bottom of the modal, or keep the default selection.
- No Identifier
- AWB
- Shipping Package Code
- Sale Order Code
2. Start Recording: Scan or type your chosen Identifier and hit the Enter Button. The recording starts automatically as soon as the system validates the scan.

| Note: Toggle the audio switch to Enable if you want to record sound. By default, it is disabled. |
3. Capture Images (Optional): While recording, click Capture Image or press the Spacebar to capture photos.
4. Stop / Complete Recording :
To stop the recording, click the STOP RECORDING Button.
The system automatically saves the video and any captured photos when the 2-minute limit ends, either you can start the new recording to stop and start new recording.

Step-3: Mark the Return Condition of the Package.
- Press the Spacebar or click on Good to mark the package as Good.
- Press Enter or Click on Bad to mark the package as BAD or click on Bad.
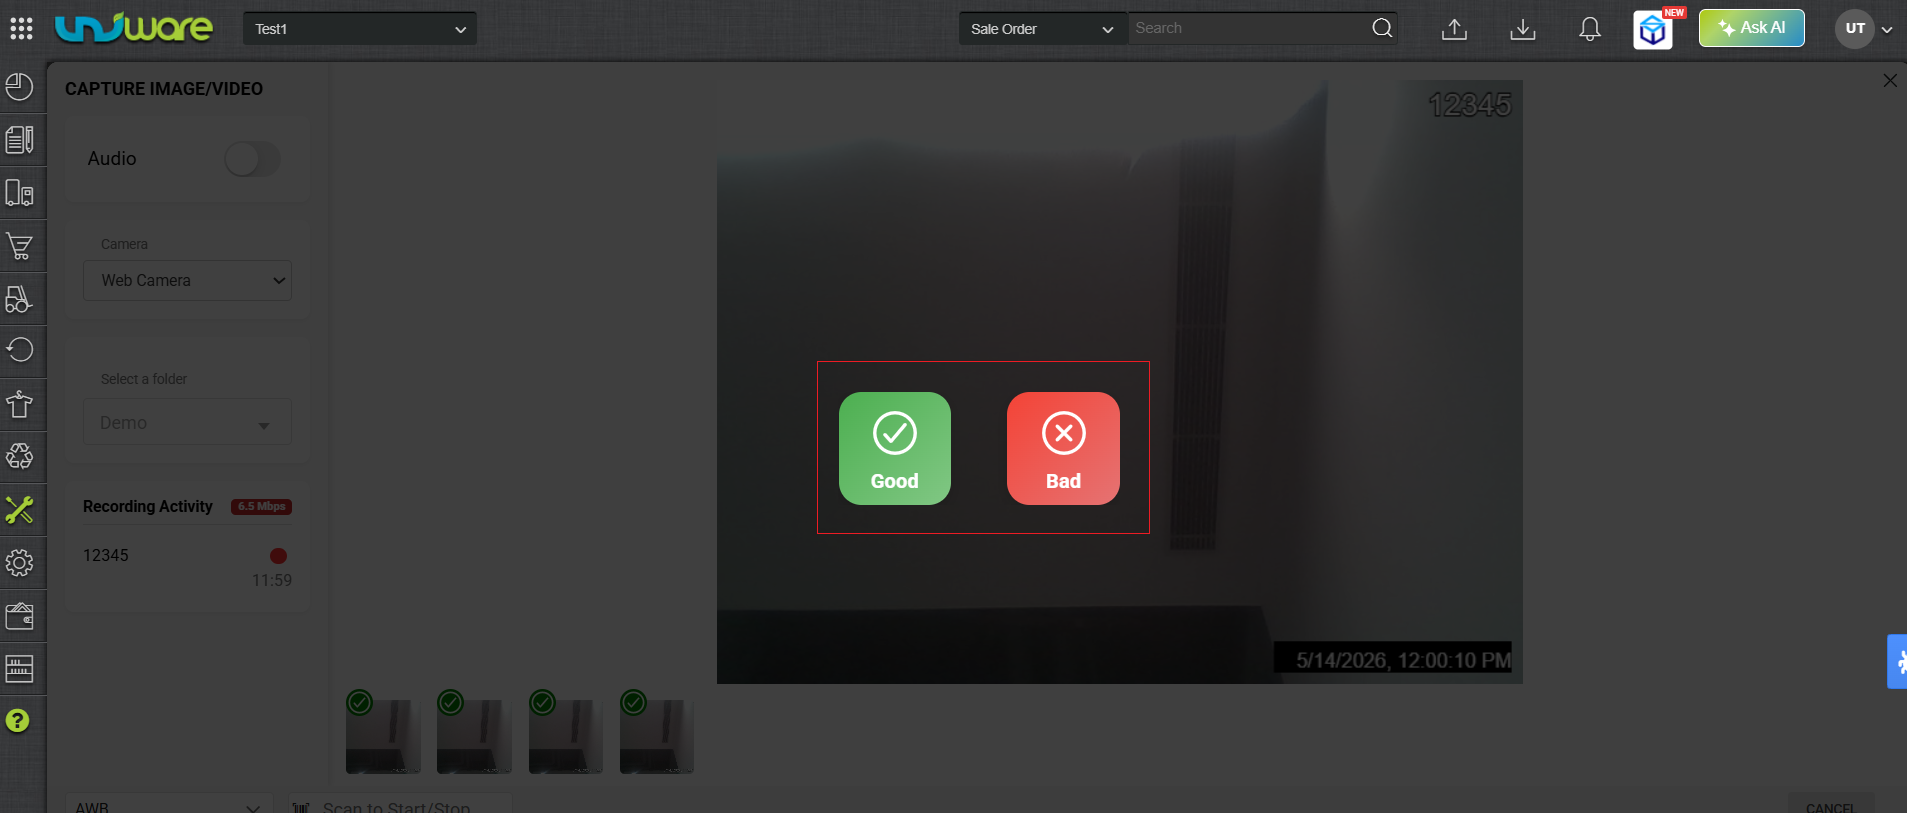 Fig: Mark Good / Bad Return Package.
Canceling a Recording
You can cancel an active recording session at any time:
- Press the ESC key on your keyboard.
- The system discards the current session and does not save any media files.
Keyboard Shortcuts
Use these quick keyboard actions to speed up your warehouse workflow:
| Action | Keyboard Key |
| Capture Image | Spacebar |
| Mark Return as GOOD | Spacebar |
| Mark Return as BAD | Enter |
| Cancel/Discard Session | ESC |
Access Recording
To Access Video Recording and Capture Images for both Forward Packaging & Return Unpacking.
Step-1: Visit Uniware Menu, Hover Tools & Click Access Recording.
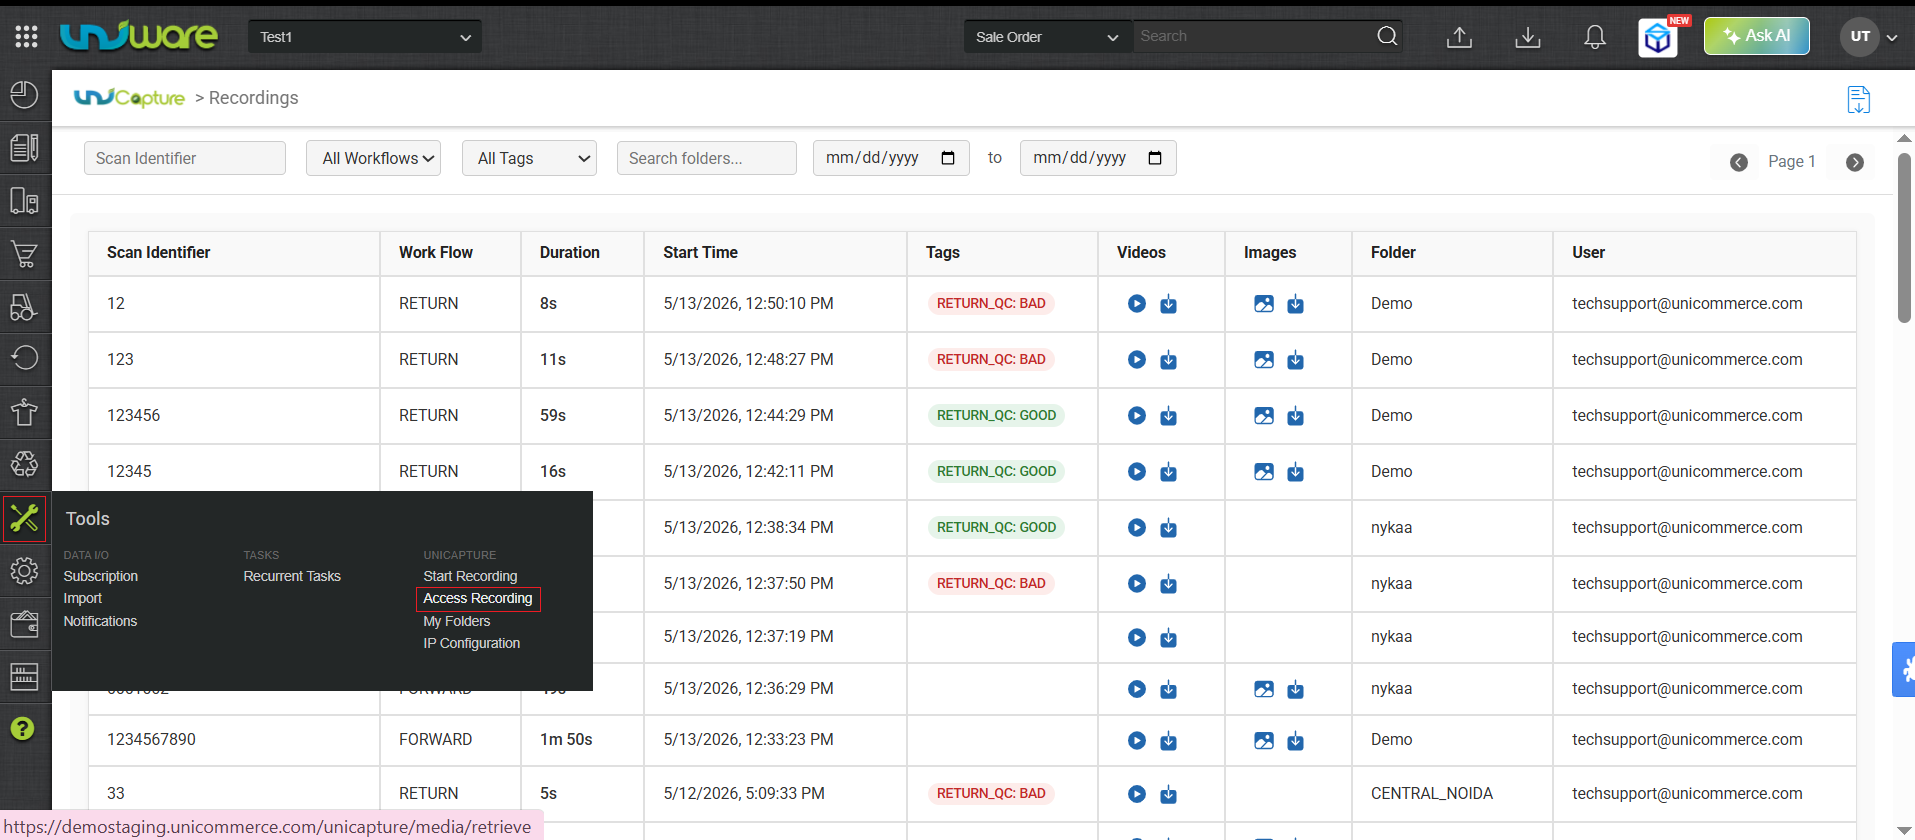
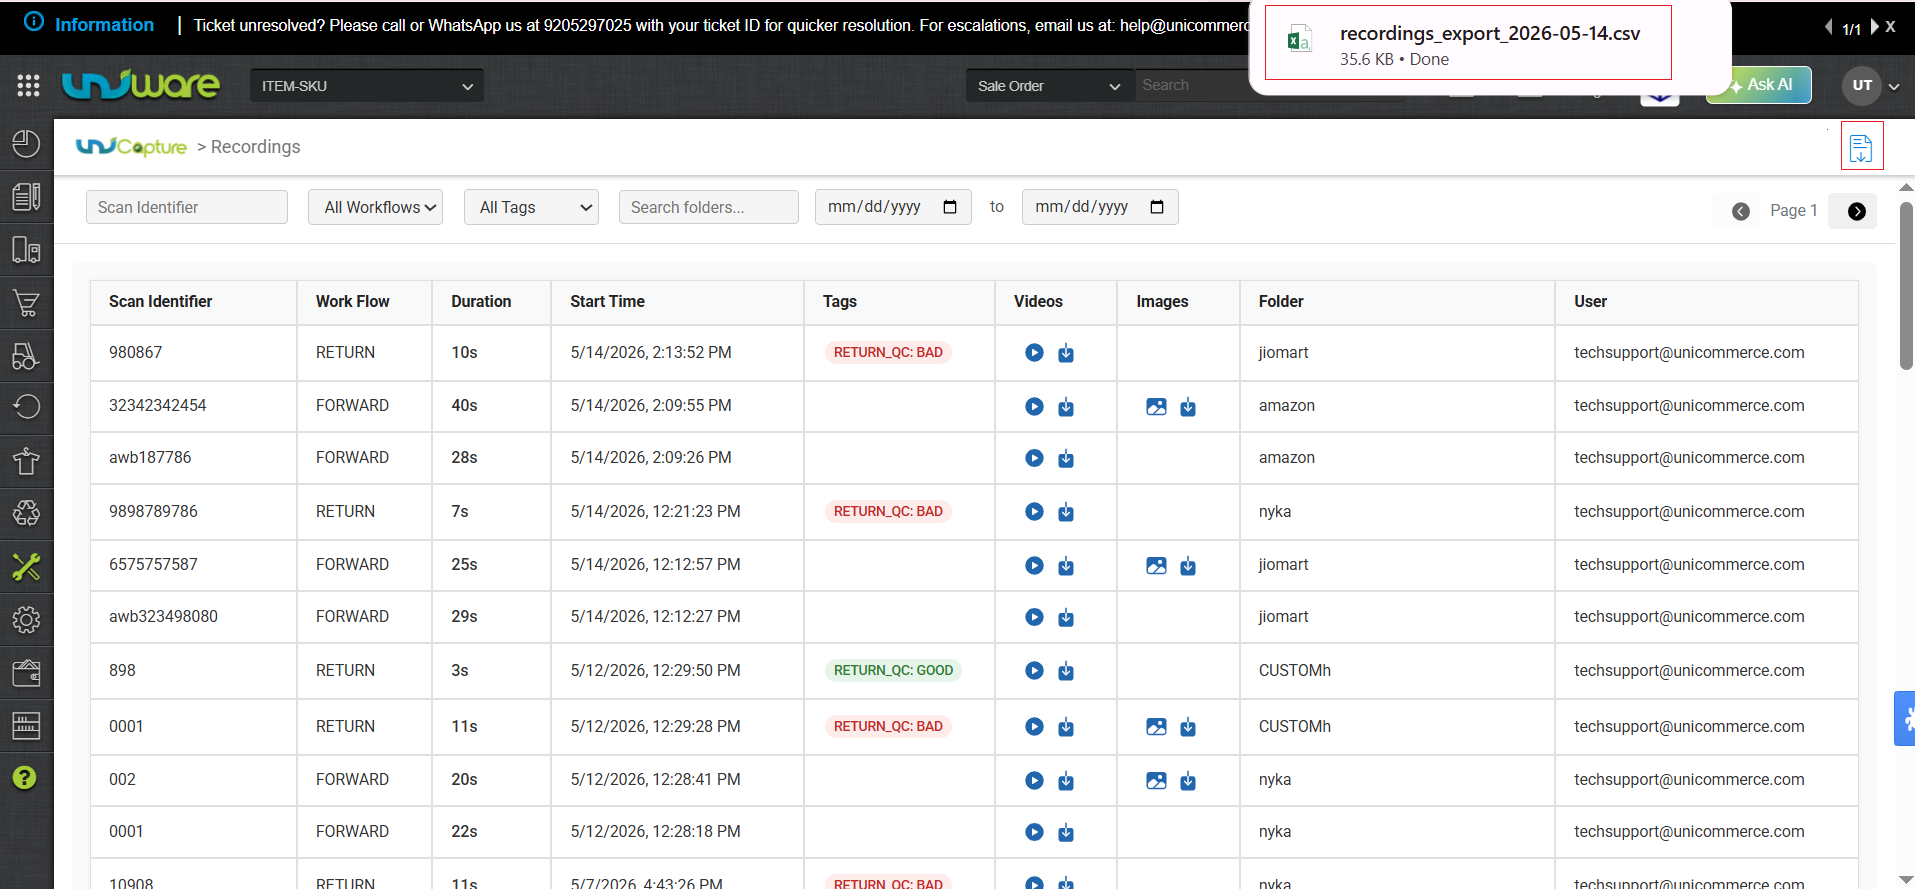
Step-2: Click Import CSV & Visit the Excel Sheet that Contains Records of Video & Images.
| Note: If a high-quality video fails to upload due to poor network connectivity, the system will automatically resume the upload once sufficient bandwidth is available. There is no need to record or restart the upload process manually. |
Quick-Recap
Quickly Revised steps to Operate UniCapture VMS Feature.
Frequently Asked Questions (FAQs)
Q: Can I record videos longer than 2 minutes?
A: Yes. The system has a strict safety limit of 2 minutes per session. The recording stops automatically after 2 minutes.
If you have to take special permission to increase the recording session limit from managers, then you will be able to record more than 2 min.
Q: Where does the system save my captured images?
A: The system automatically attaches all captured images to the created folder for easy retrieval.
Q: Can I record without scanning an AWB, Shipping Package Code & Sale Order Code?
A: Yes. Select the “No Identifier” option before starting your recording.
Q: What happens if I accidentally press the ESC key during a recording?
A: The system immediately closes the session, discards the video, and deletes all temporary data.