
You will find a newly designed add new Channel page where the configuration settings are separated from the connectors’ configuration in the two tabs.
By this way, you can add any channel which is available in uniware channel list.
The access path:
1. Settings ->Channels, click the button “Add channel”

2. Search and choose any channel that you want to add.
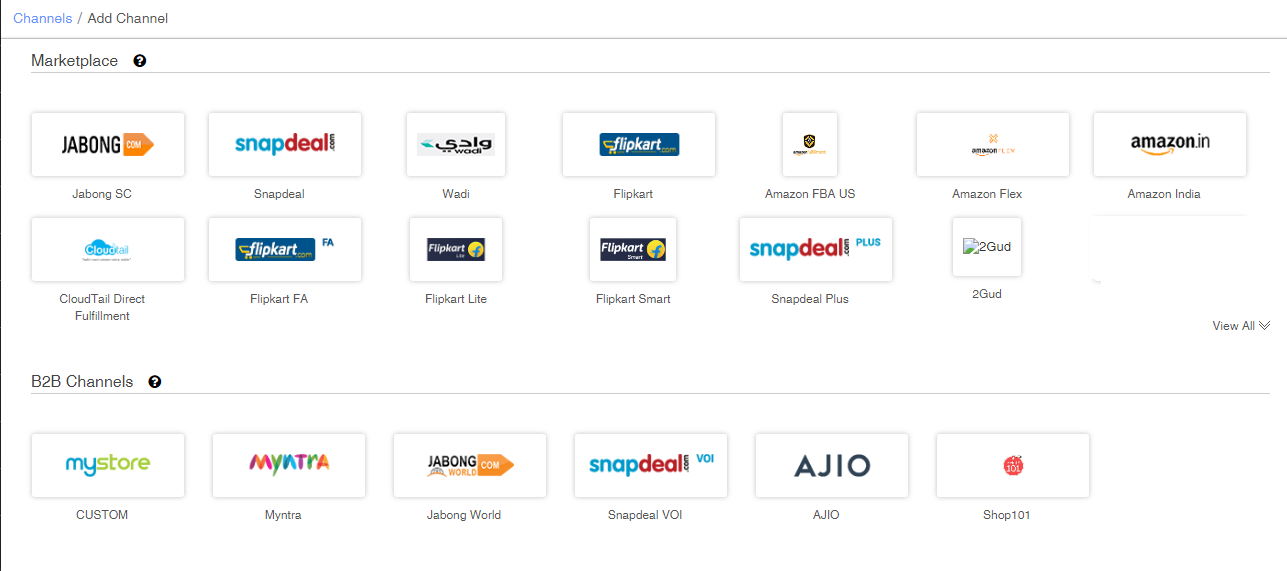
3. Select any Marketplace or B2B or a Shopping Cart. Click the relevant channel logo to configure the channel like Flipkart, Snapdeal, Myntra or Limeroad etc.

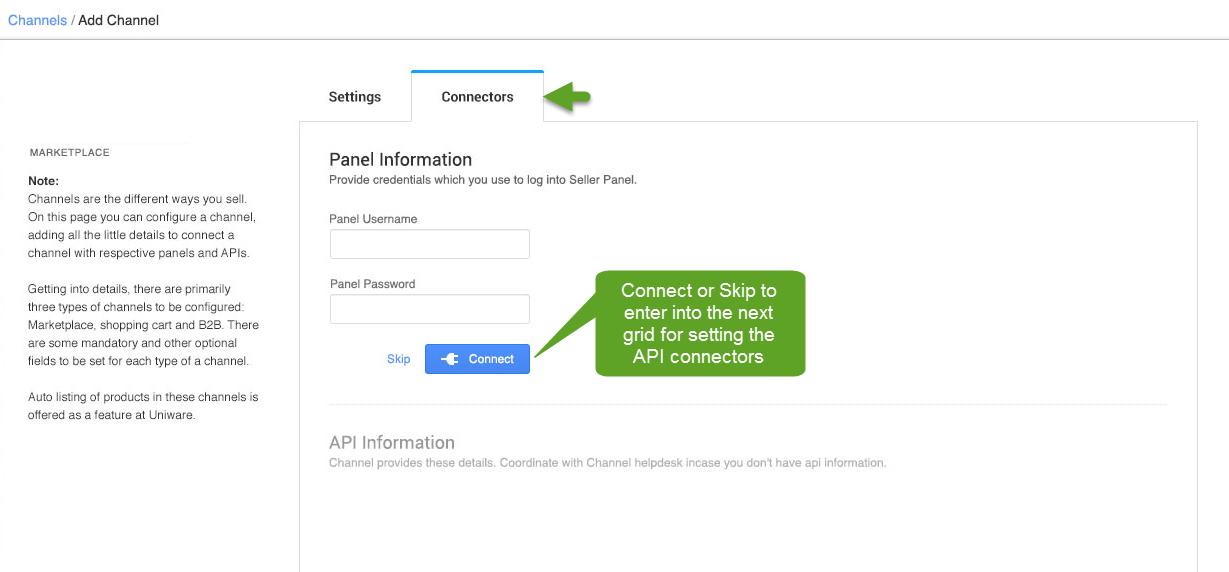
3. Once the required values are entered on this page, and you click “Save & Next” you will jump to the next tab for the Connectors setting.
4. Even this page has a clear demarcation of Panel logins and API settings. Please refer to the images below:
5. As soon as the channel is configured successfully, you can see the Channel Summary.
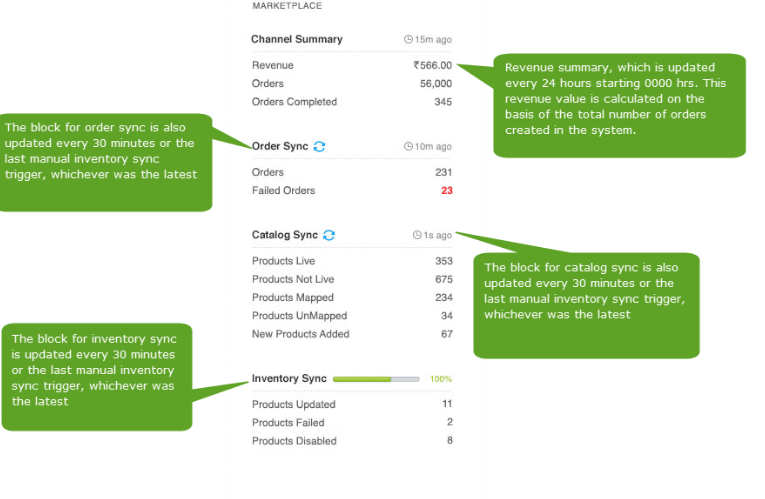
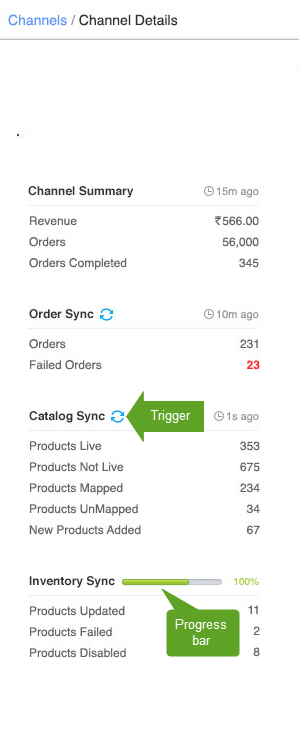
6. You can trigger the respective sync processes from this page itself.
7. The other channel-specific settings can be checked on respective channel integration articles.
e.g. Channels
Note:
- There is no provision to delete the added channel in Uniware.
- The added channel can only be disabled and enabled again as per operation need.
- The channel name can not be updated in UC later on. However, sellers can add the same channel with a slightly different name.
- As per UC, only a maximum of 100 channels (enabled and disabled) can be there in their account.
Channel’s general settings are mentioned below:
http://support.unicommerce.com/index.php/knowledge-base/channel-setting-parameters-general-information/