
A picklist is created in the system for the selected orders; on the picklist being received, the shipment is marked as picked. The picklist is marked as closed as soon as all the orders in it are invoiced once items are scanned.
From the functional point of view, when the picklists are in either of the states: CREATED or RECEIVED, they are pending picklists, since the order items are not completely received at the invoicing station.
Picklist Status
- A picklist is created in the system for the selected orders and the status of the picklist becomes Created.
- On the picklist being received, the shipment is marked as picked and the picklist is marked as Receiving.
- As soon as all the orders in it are invoiced it status become Closed.
Process Flow:
For order processing with SKU traceability system, follow a few simple steps:
Create and Receive Picklist:
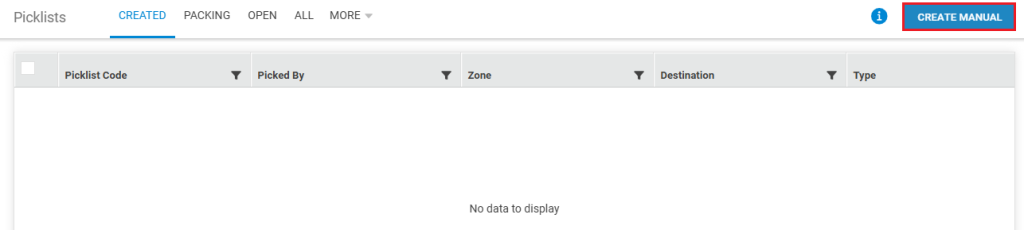
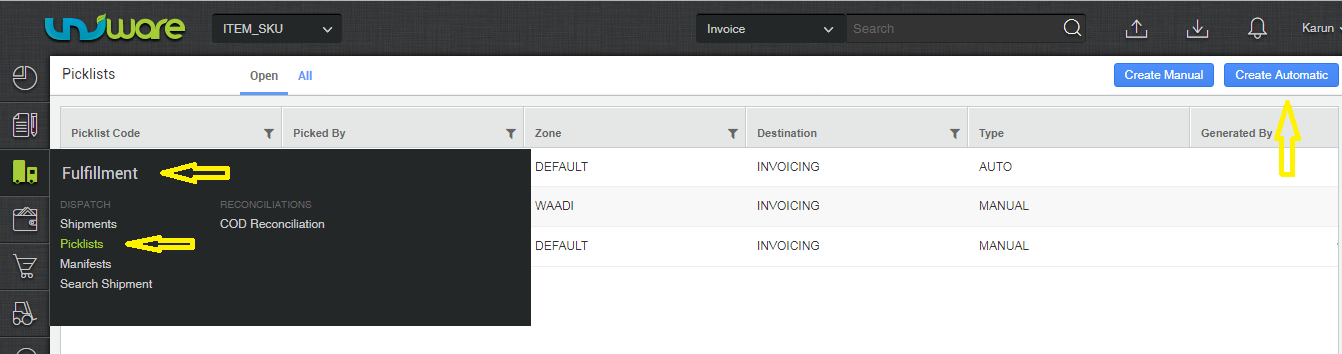
P1- On the path Fulfillment > Picklists, select “Create Manual” on the top-right side of the screen.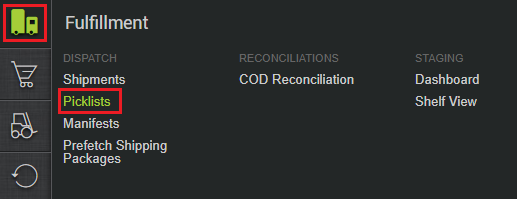
Note: In Enterprise version, you can also create Channel wise auto picklist.
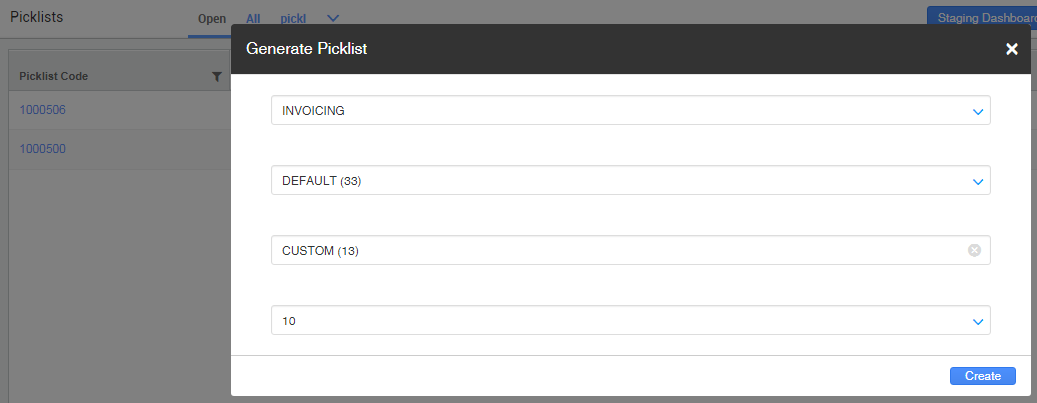
Rest process is similar as per below default functions.
P2- Select the Orders and click on “Create Picklist“. This creates the picklist successfully. You can print the picklist or receive it at the invoicing station. Both the actions can be done on this page.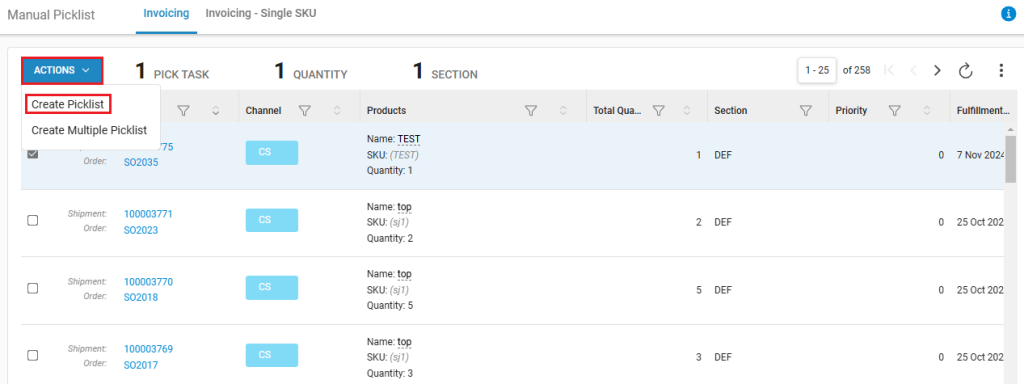
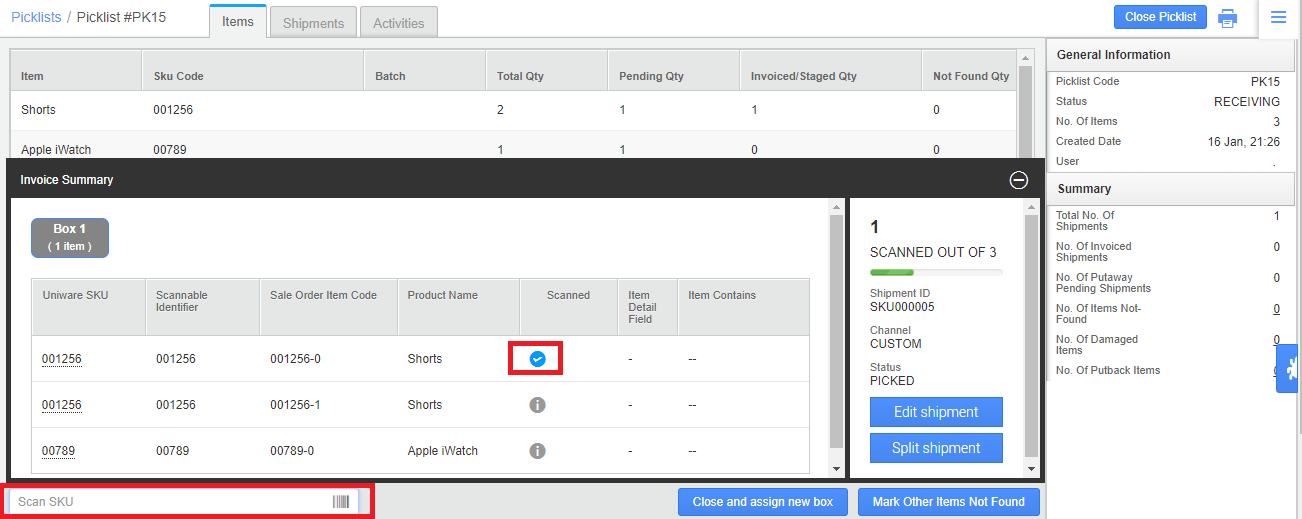
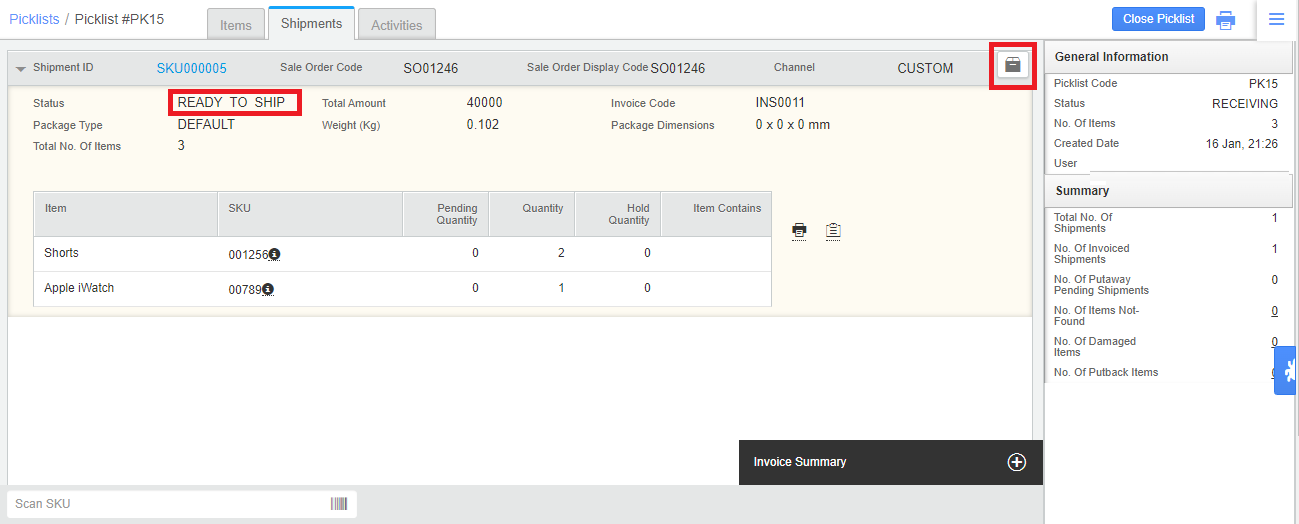
P3- Now user picks the items from the warehouse and bring them to at invoice station. Here he hit “Receive Picklist” button to start scanning items. Once the picklist has been marked as receiving , invoices can be generated.
Please remember:
- For SKU level traceability (i.e., SKU barcoding), you have to scan the items while receiving the picklist for conducting these actions and it is available only in Professional & Enterprise version only.
- In SKU traceability facility, to improve order accuracy, the sellers can mandate generating picklist and scanning SKU at invoicing dock for packing an order. Use system configuration (Facility level)- “Mandate scanning for SKU traceability”, For more details connect with uniware team Click here.
- In addition to scanning Uniware SKU code and Scan Identifier, users can also scan Seller SKU codes during order processing.
- If you need image base QC for items then Enable Image-based Outbound QC on channel setting page. Click here
P4. User hits close box button or assigned the new box for remaining items. If channel parameter “Boxing With Packslip Enabled” enabled for channel.
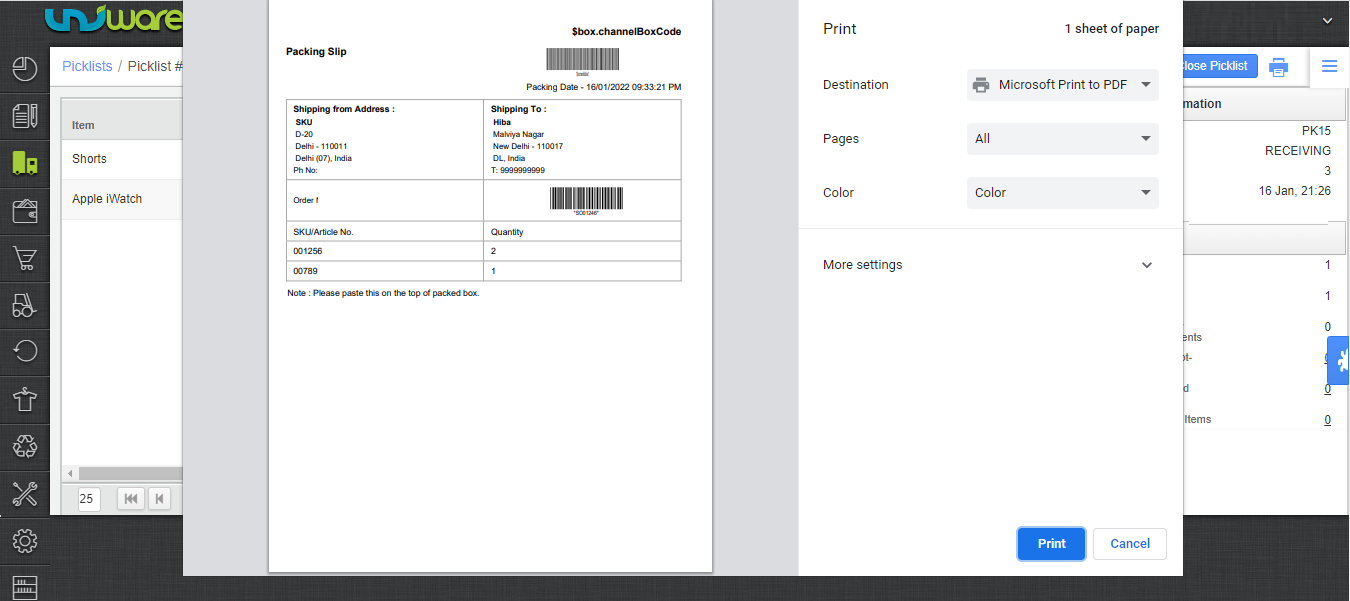
P5. A pop-up will show up in which a specific package type needs to be selected (Package type with scannable flag set as true), & submit button on same. Then once all items are scanned in shipment invoiced get generated.
P6- After the invoices are generated, Labels can also be generated from within the picklist.
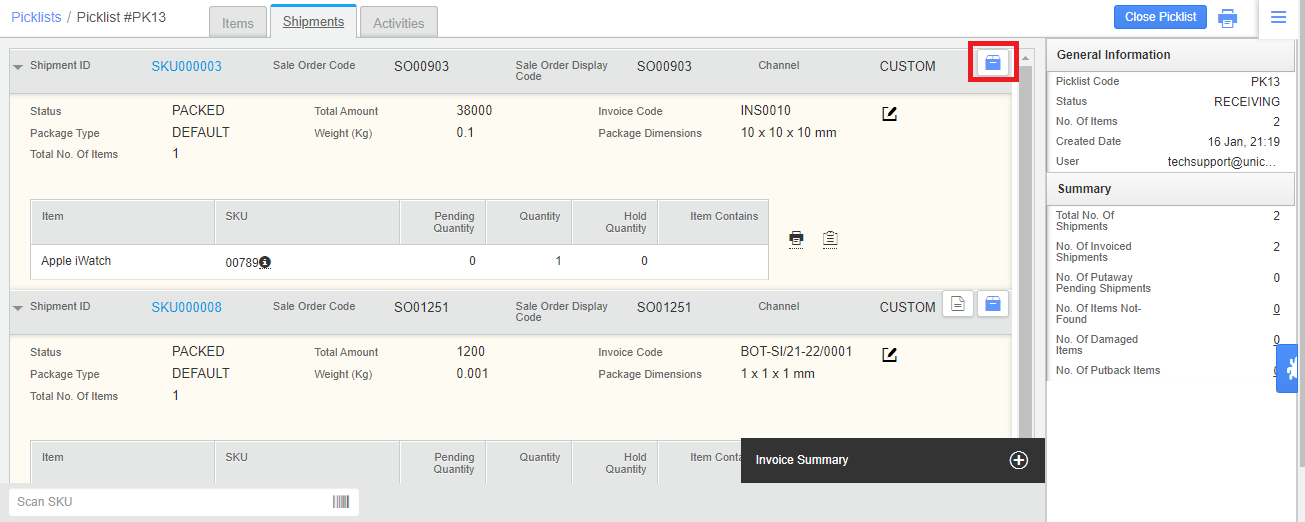
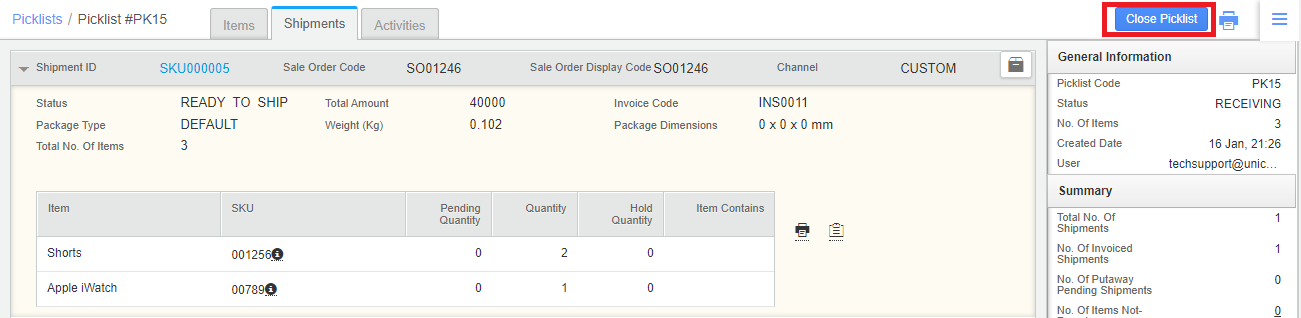
P7- Once invoices and labels are generated for all the orders, picklist can be marked as closed manually or it will auto closed after some time as per set system task of five minutes.
From the functional point of view, when the picklists are in either of the states: CREATED or RECEIVED, they are pending picklists, since the order items are not completely received at the invoicing station.
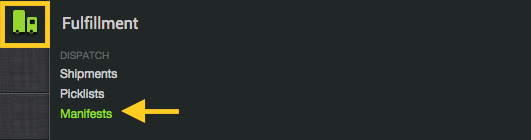
Creating Shipping Manifest
After successful generation of labels user can go for shipment dispatched. For that he can start the manifest process a mentioned below:
M1. On the path Fulfillment > Manifests, Press the button “Create Manifest”
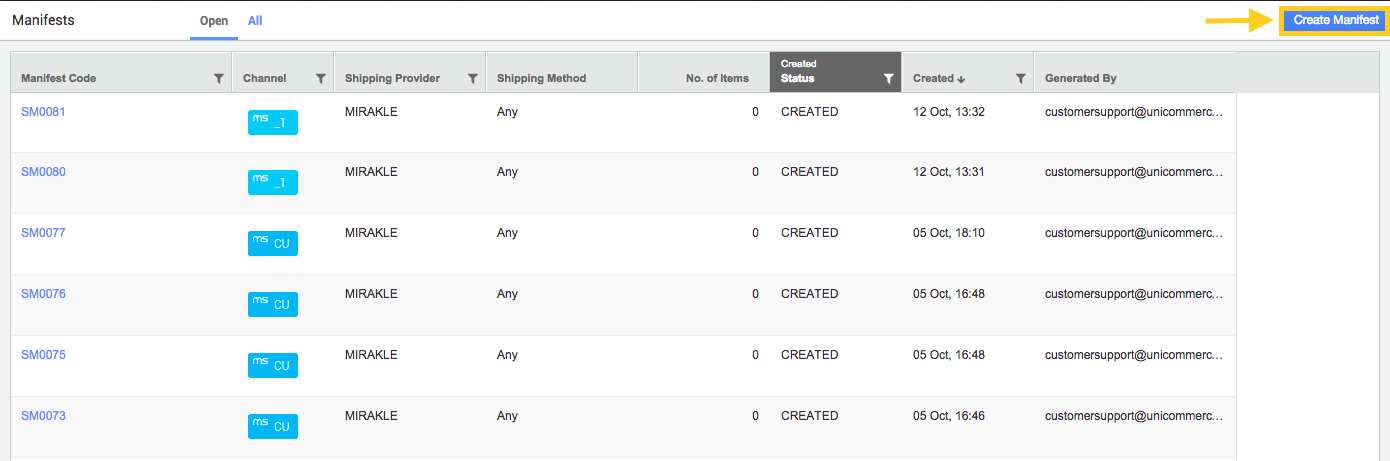
M2. Select the Channel (from which the orders have originated), Shipping Provider,
Shipping Method (COD or Prepaid or Any). You can select pick up dates and add comments (which are optional) to create the manifest.
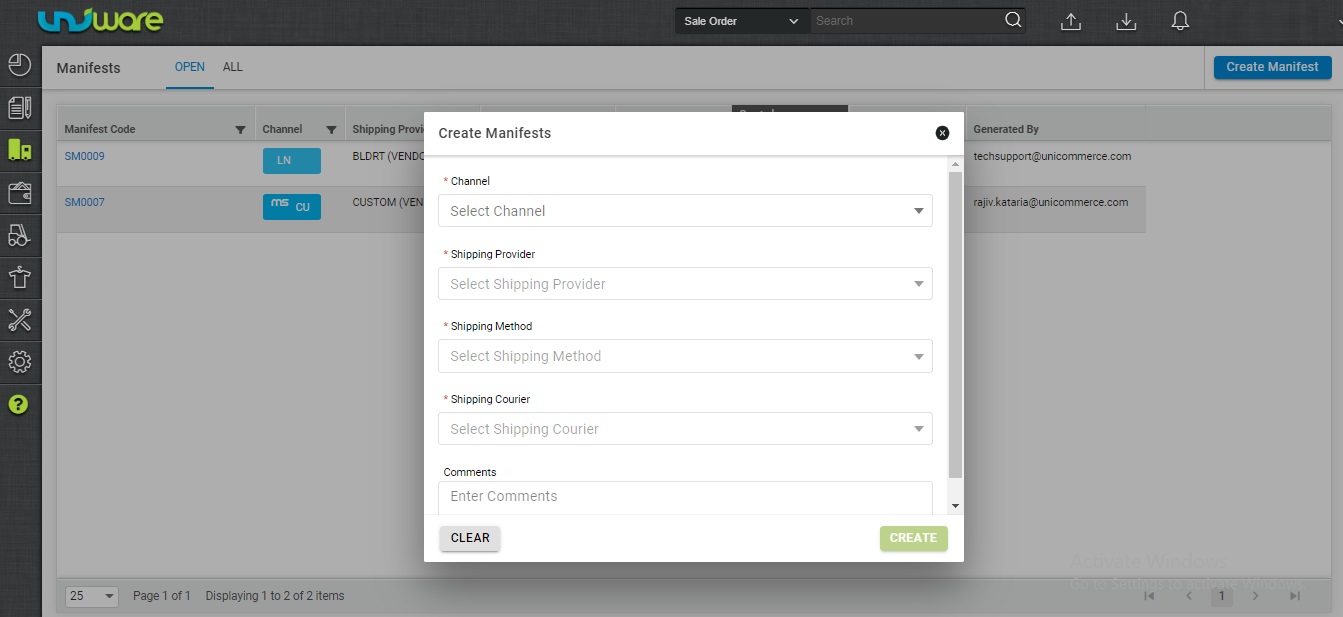
Note: Always remember that at a manifest can be created for a single channel/market place at a time. Here, only those shipping providers will appear in the drop-down list for which packets with the status “Ready to Ship” are present in the system or package is assigned a shipping provider (in case of manual seller shipping).
Note: In case of Aggregator Shipping, Seller can use, shipping courier wise segregation on manifest creation.
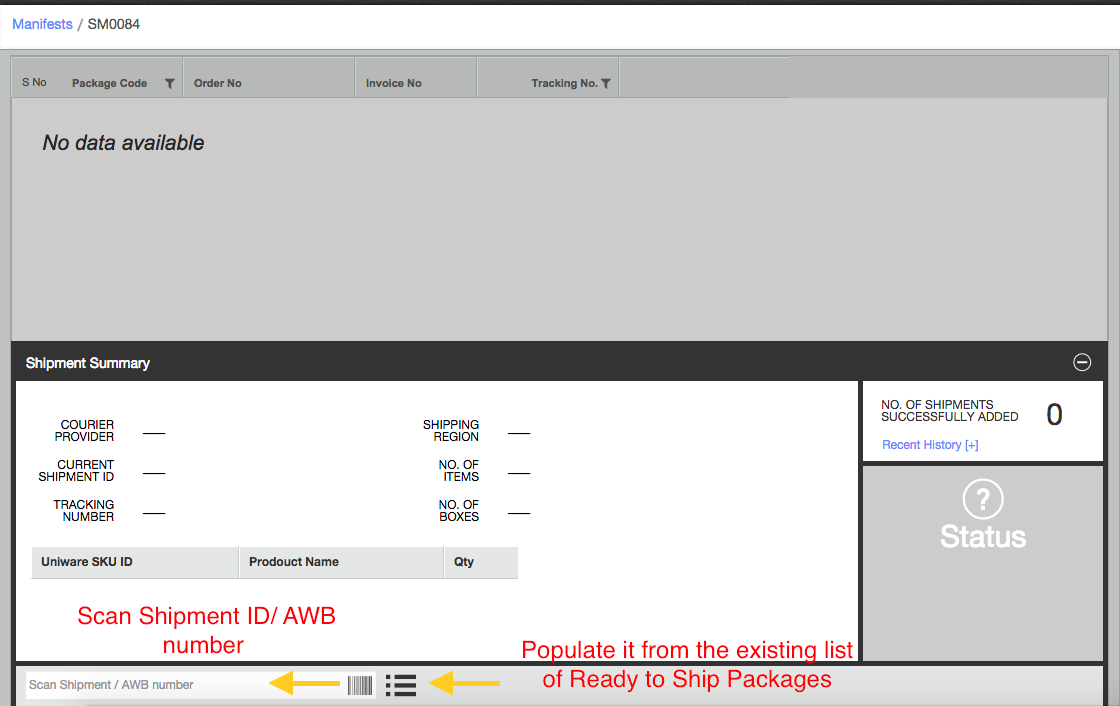
M3. In the subsequent sheet add the shipments to the created manifest. This can be done in two ways, either by scanning the Shipment ID/AWB number or by populating it from the list of existing Ready to Ship packages for the selected Courier provider and Channel.
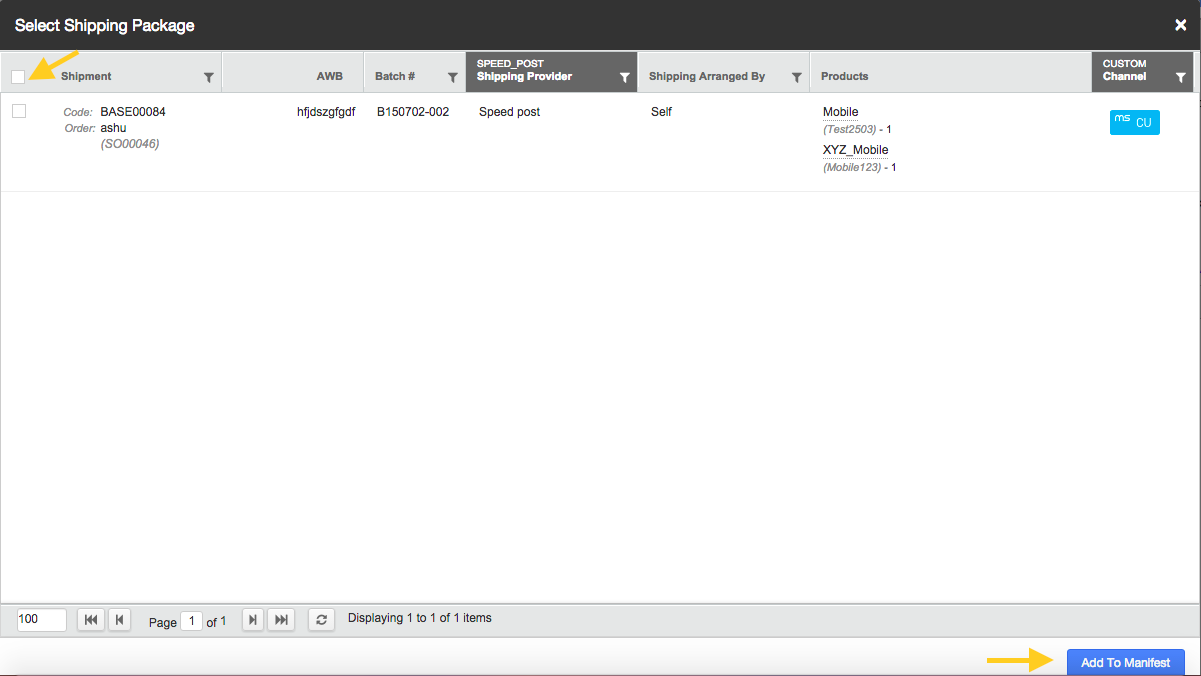
M4. The shipments can be added into the manifest from existing list of “Ready to Ship” packages in these simple steps:
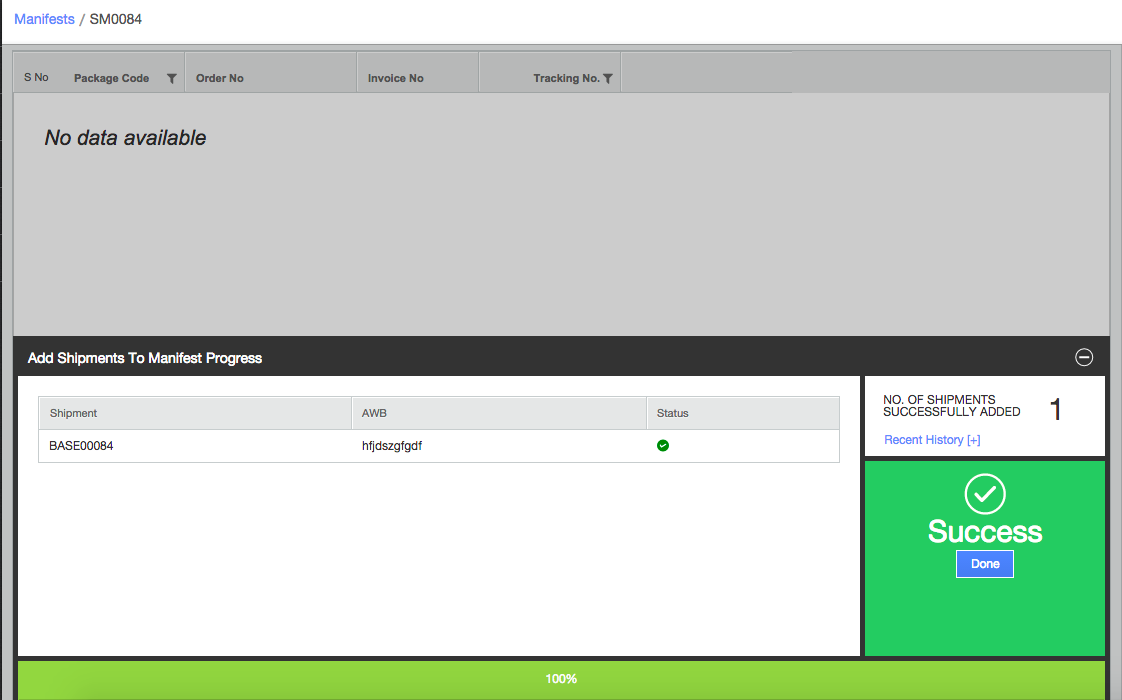
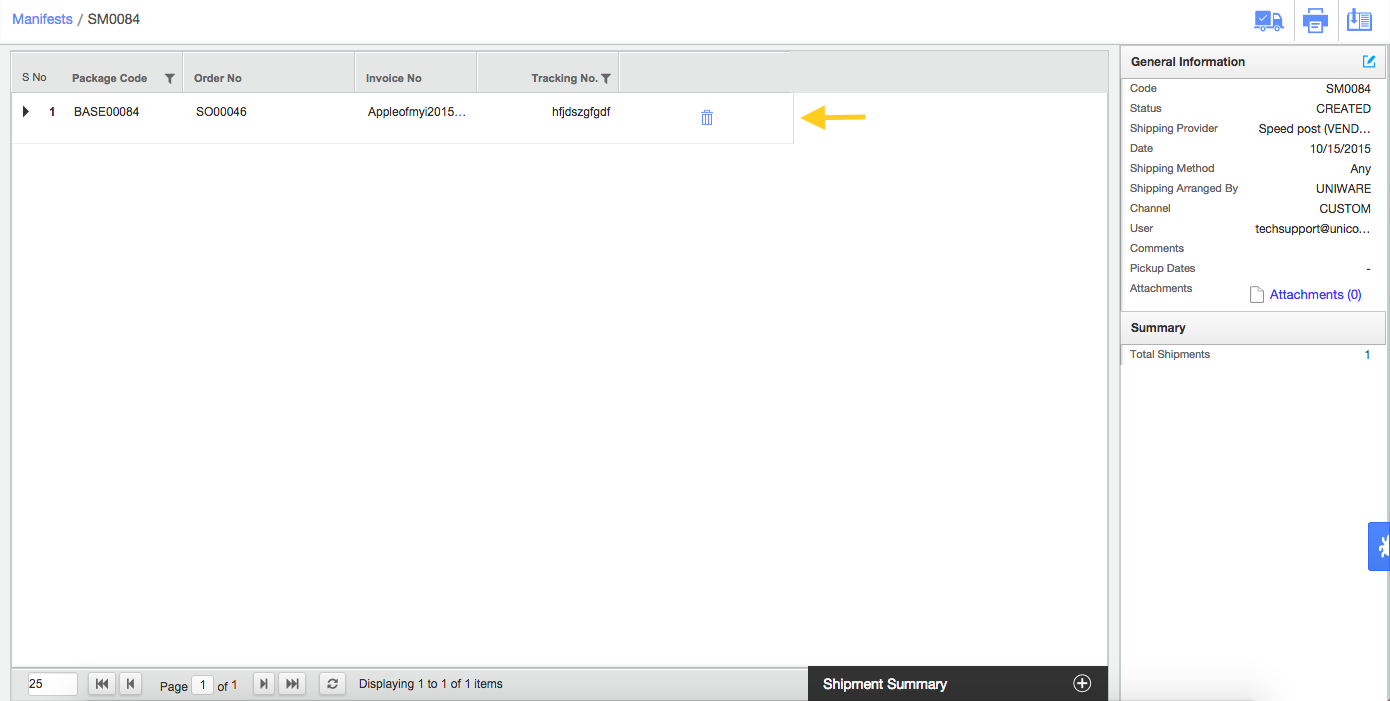
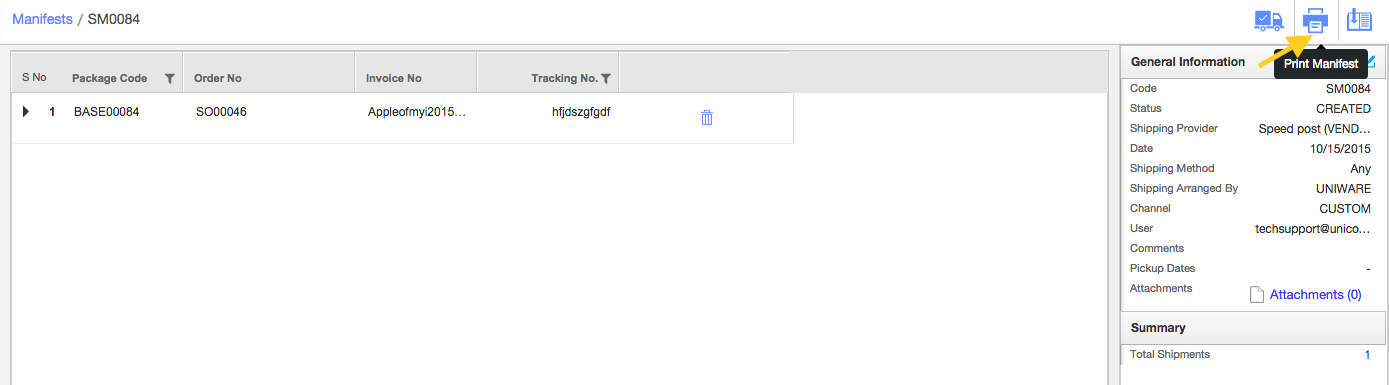
M5. Now you have to print and close the manifest. This can be accomplished by clicking these icons on the top right side of the page:
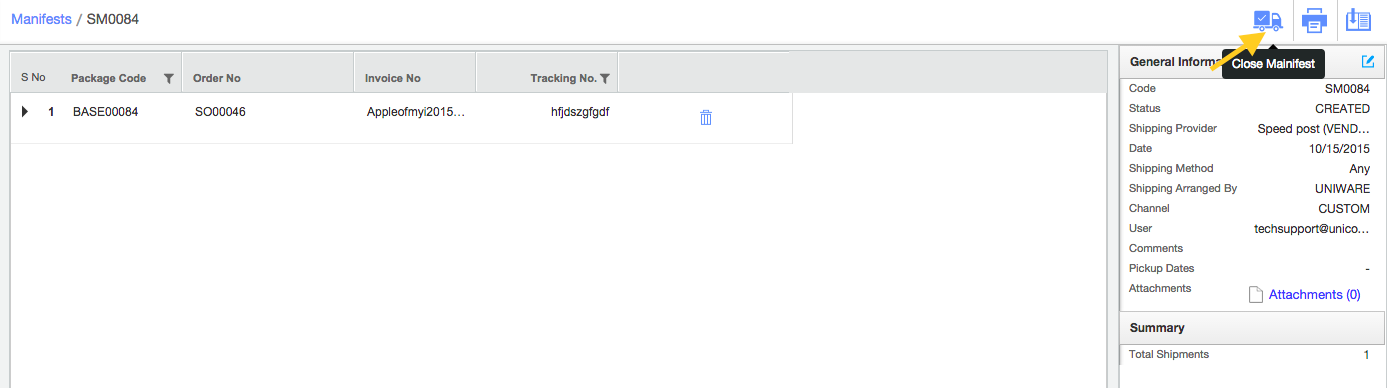
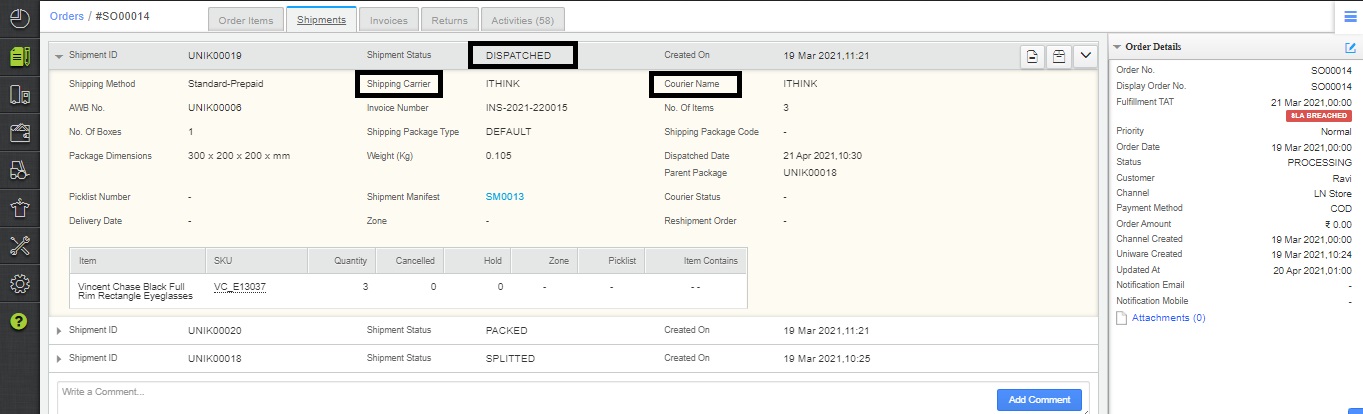
M6. After closing the manifest, this shipment is marked “DISPATCHED” in the system.
Notes
1) For Damaged/Putback item:
The user needs to create the new putaway as Putaway picklist item where he can now mark Good/Bad Inventory and assign the shelf accordingly.
2) In case of package type as fixed and having multiple order item:
If user Not Found/ Damaged any shipment item before invoicing then all other picklist items belong to that shipment will be marked as PUTBACK automatically. Read more about it. Click here.
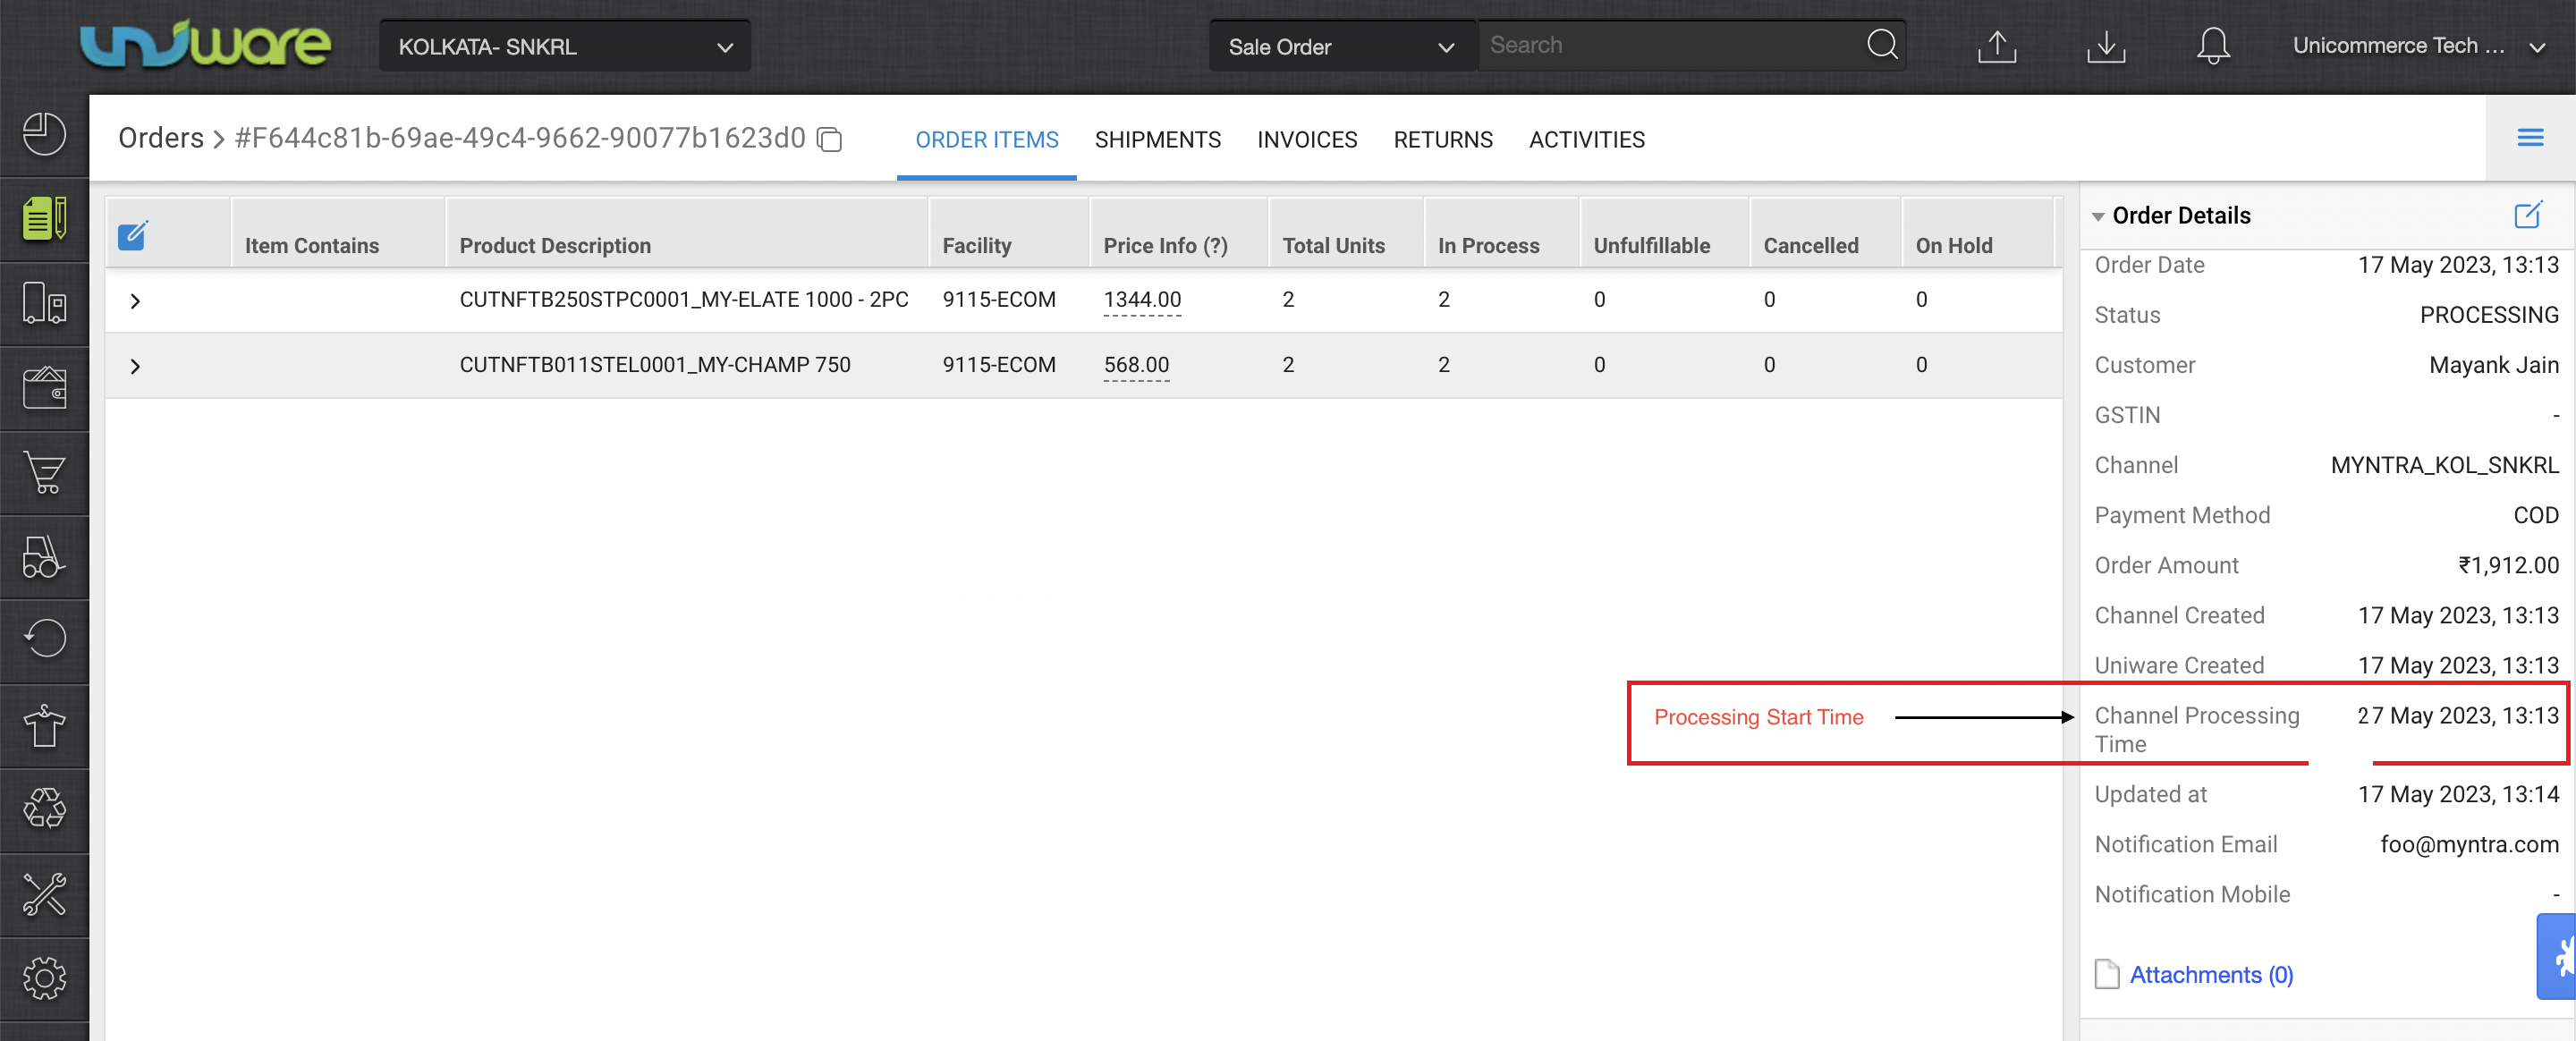
Note:
Channel Processing Time:- For selective channels ‘ orders there can be “Channel Processing Time” will be there with a future date and until this time is achieved or lesser then current time no picklist can be created.
For such orders check box option to select for picking will not visible.
.