
A: Invoice template can be set in a few simple steps:
1- Follow the path Settings > Templates.
2- You have to select one the template designs as TYPE GST and check its preview.
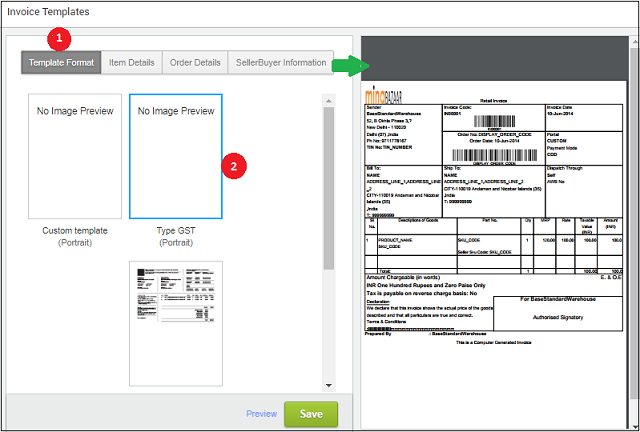
3- You can customise the fields to be added in the selected invoice template. For this, you have to explore next tabs. But before going anywhere press the
button.
4- For setting item-related details, in the tab “Item details” select the fields you want to be displayed in the invoice, like item’s brand, product name, size and MRP etc.

5- Check the selected fields are reflected in the preview on the right side of the screen. Press the “preview” button to update the selected fields in the invoice preview.
6- To set order related details like invoice barcode or channel name and shipping charges etc, select the respective fields from the “Order Details” tab.

7- For the “Seller-buyer Information” explore the next tab and select the desirable fields.

8- Check all the customizations in the preview of the invoice template as visible on the right side of the screen.
9- Don’t forget to
the changes.Your invoice template is set!
Please Note:
- All Uniware Print and Export templates are seller/Tenant level entities.
- UC does not allow customization in UC template i.e. Picklist,Label,Manifest and many more print for Standard or Professional plans.
- Customizations can be allowed in the Enterprise plan (if feasible) in UC template with Paid Effort estimates.
- For any change in Uniware print template’s set values will change for all channels uniware templates.