
The Facility Dissociation Reasons report is used to get the data of all the dissociated facilities and the reason for disassociation with all related information . You can view all details up to maximum 92 days.
Uses:
Specially for Omni Channel order processing, numerous orders received from various carts or marketplaces are fulfilled through stores to minimize overall Estimated Time of Arrival (ETA) and enhance customer satisfaction. Stores also possess the capability to accept or reject orders based on inventory availability, and can disassociate from any channel due to various reasons such as malfunctioning Point of Sale (POS) systems, internet connectivity issues, or lack of manpower.
Earlier, the reasons for store disassociation were not visible, and there was no estimation available for when a store would resume operations on the channel. As a result, there was inadequate visibility regarding the duration of store disassociation from a channel and when it was expected to reconnect.
Applicability
Version: Standard, Professional and Enterprise
Traceability: None, SKU, ITEM
Procedure
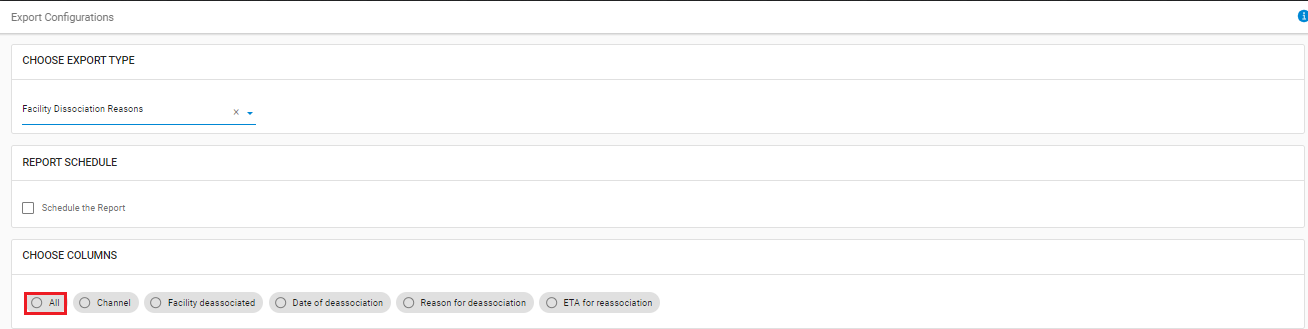
Export Type Selection
Navigate to the following path:
UI Navigation: Dashboard > Other Reports>{Select the report named: “Facility Dissociation Reasons”}
Report Columns Selection
Select the columns headers as per the need, here we use “ALL” (checkbox) that will select all column headers and give full reports. For selected columns, you can choose one by one.
Select and control the data in report file as per the selected report. The description is provided below:

The description is provided below:
|
Field Name (M: Mandatory) |
Description/Notes |
|---|---|
|
Channel |
Dropdown, to extract the data basis on channel name. |
|
Facility |
Dropdown, to extract the data basis on facility. |
|
Action Date (M) |
DD/MM/YYYY, to extract the data basis on action date in Uniware. |
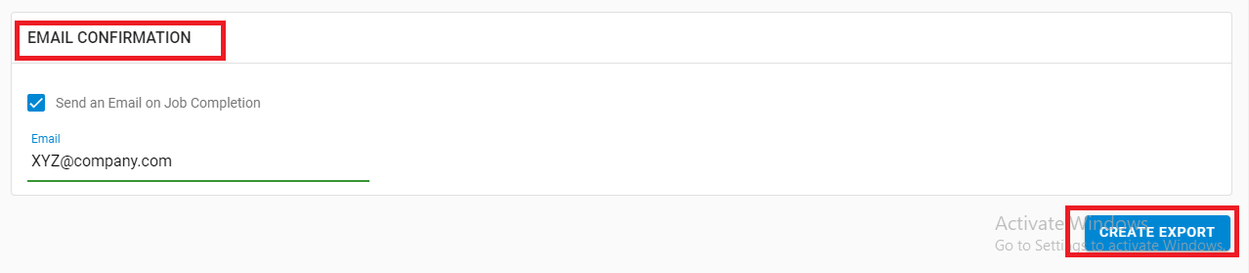
Email Confirmation
Select this field to send the report file to any selected user mail id (from added User in system). Click on “Create Export” to generate the selected report.
Result & Errors
If report is generated successfully, system gives a message. In case of incorrect selection, the export will not generate and show error. In such case, update the checkboxes and values in the appropriate fields and re-export the file.
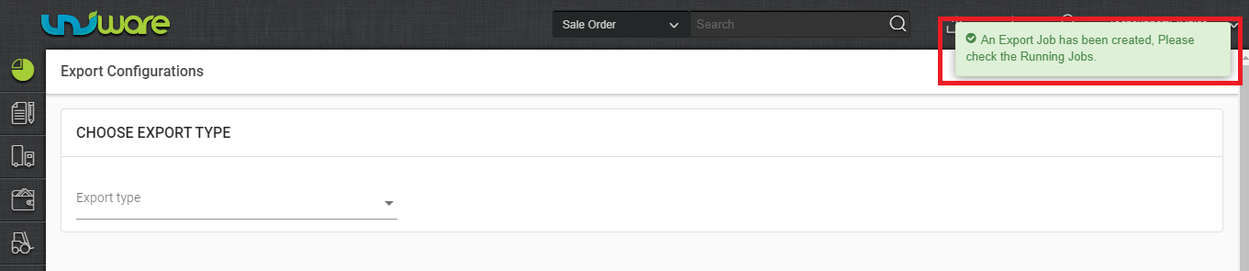
Click on the “View Export” icon, to check the Export status.

In case of incorrect data, in the export file, update the checkboxes and value in the appropriate fields and re-export the file.