Let us now go through the procedure to create a return manifest.
You can also handle the unidentified shipping packages (if any), while creating the return manifest.
Applicability
Version: Standard, Professional and Enterprise
Traceability: None, SKU, ITEM
Procedure
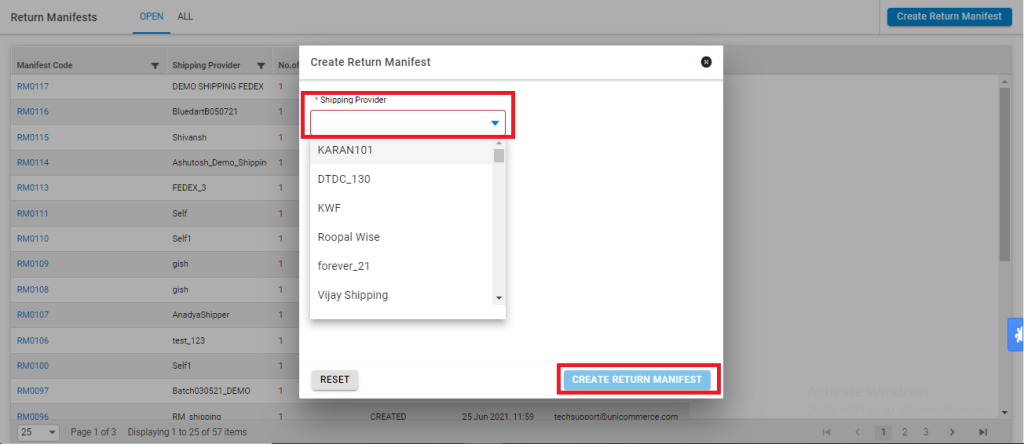
1. Follow the path Returns > Manifests
2. Click the button “Create Return Manifest” on the top right corner of the screen.

3. Enter the field details as per the description provided below:

|
Field Name (M: Mandatory) |
Description |
|---|---|
|
Shipping Provider (M) |
Select the shipping provider as service handler to whom the shipments will be handed over, from the dropdown. For channel shipped packages, choose the shipper as “Channel Shipping” |
4. Click on the ‘Create’ button.
Adding Shipment to Manifest
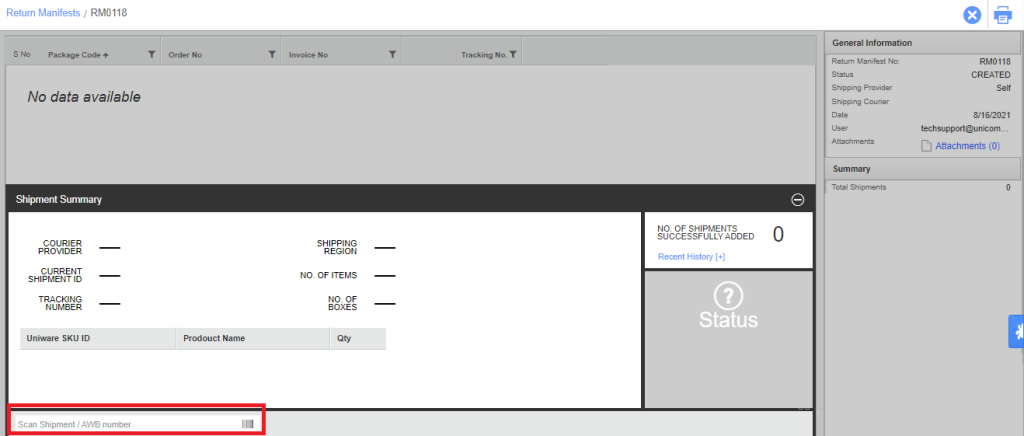
After creating a Return manifest, next step is to add shipments in that manifest that are ready to receive. This can be done in three ways:
-
Scan the Tracking Number
-
Scan the Shipment Code
-
Scan the Reverse Pickup Code
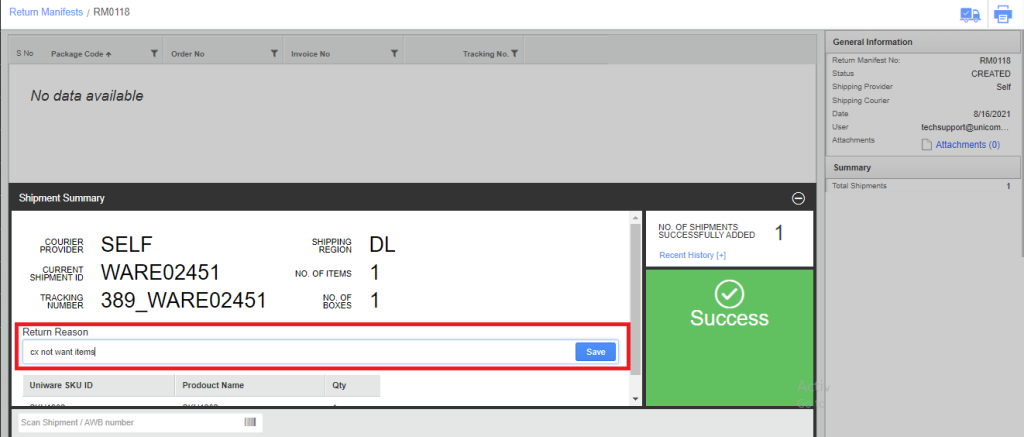
In shipment summary section, enter or scan the barcode of the Shipment id/AWB No/Reverse Pickup Code.


Every successful entry will add the package to the manifest. Repeated the same way to add more packages that are ready.
For Unidentified Packages:
After creating a return manifest, if the package is unidentified (CIR or RTO), on scanning the Shipment id/AWB No/Reverse Pickup Code, you will get the below screen with the message UNIDENTIFIED.

Click here to understand how you can handle these unidentified packages.
After loading the packages to the manifest user can close the manifest.
