
Hopping refers to a feature which enables store staff to accept or reject any or all of the items of an order. Once rejected, the item will hop on to another store.
As a part of our Omnichannel offerings, Uniware allows hopping an order from one store to another store manually/automatically.
Note: The feature is only available for Enterprise version with Omni Channel hopping feature.
Hopping will enable a brand to fulfil multiple objectives:
1- Decrease Bottom Line of operating cost
2- Improve Customer Experience by increasing fulfilment rate & SLA
Based on Routing rules hoping can define on item level and order level. Manually triggered hopping and Automatic hopping based on certain SLA triggers.
Process Overview
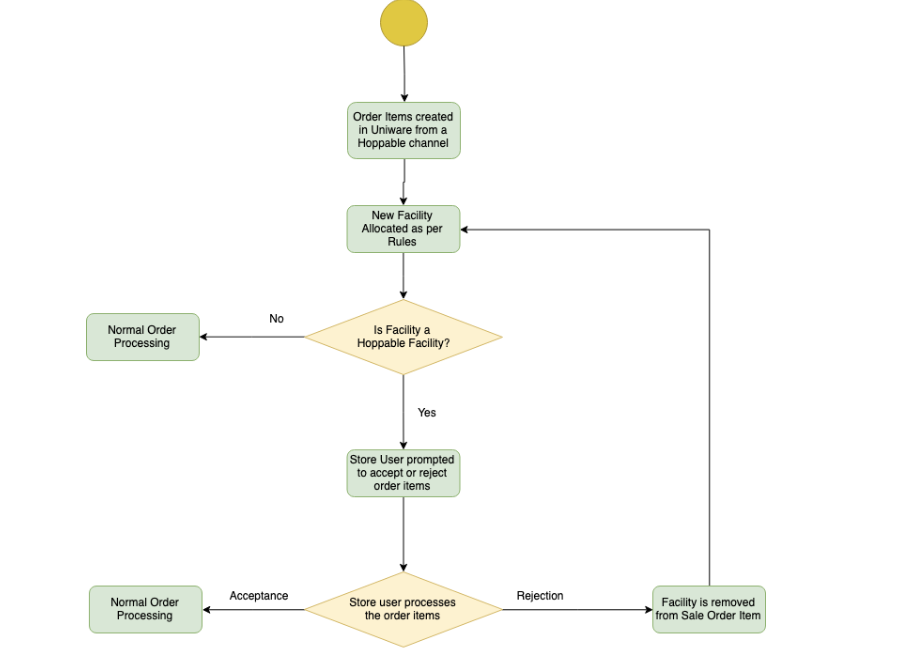
Follow these simple steps to Hop Order in Uniware:
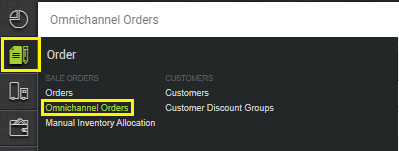
1- Hop order can be checked in Order > Omnichannel Orders
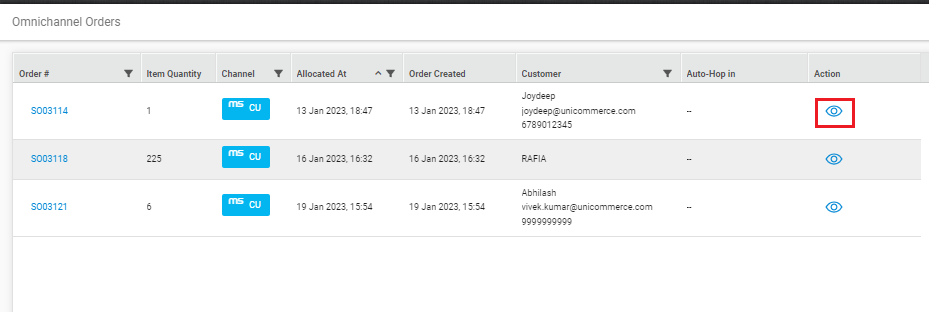
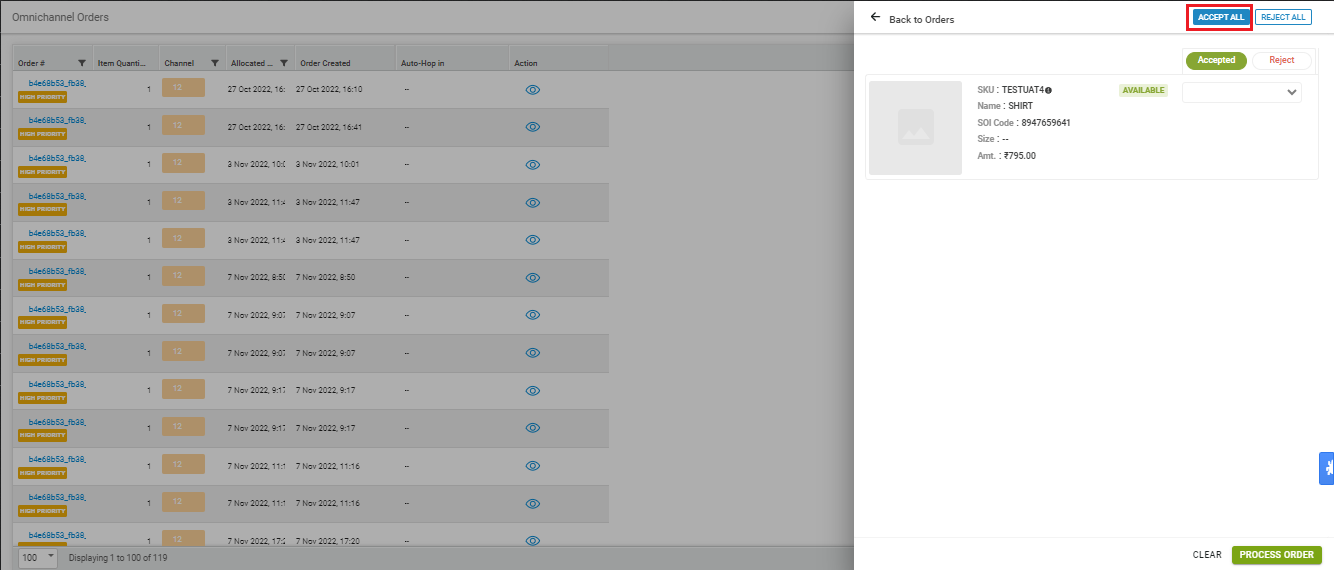
2- By clicking on the Eye Icon, you can take action on the orders which are set to hop
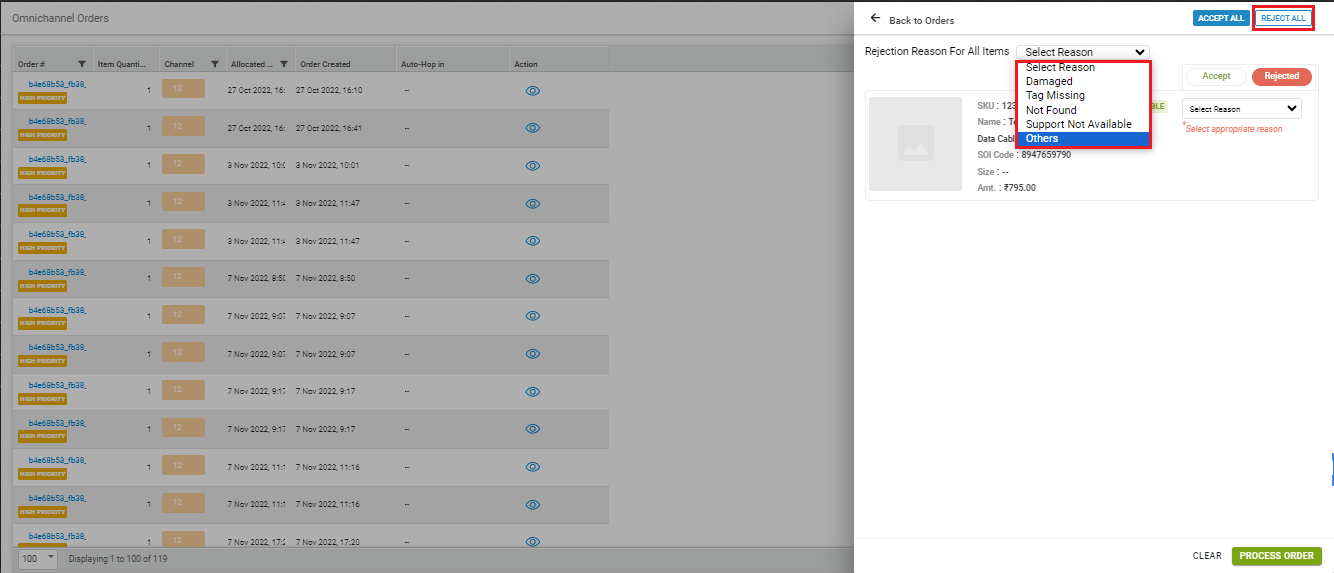
3- Order Rejection:
i. Reject All:- Now, you can Reject All the order items at a time by just clicking on the Reject All button. You need to provide a reason against all the order items.
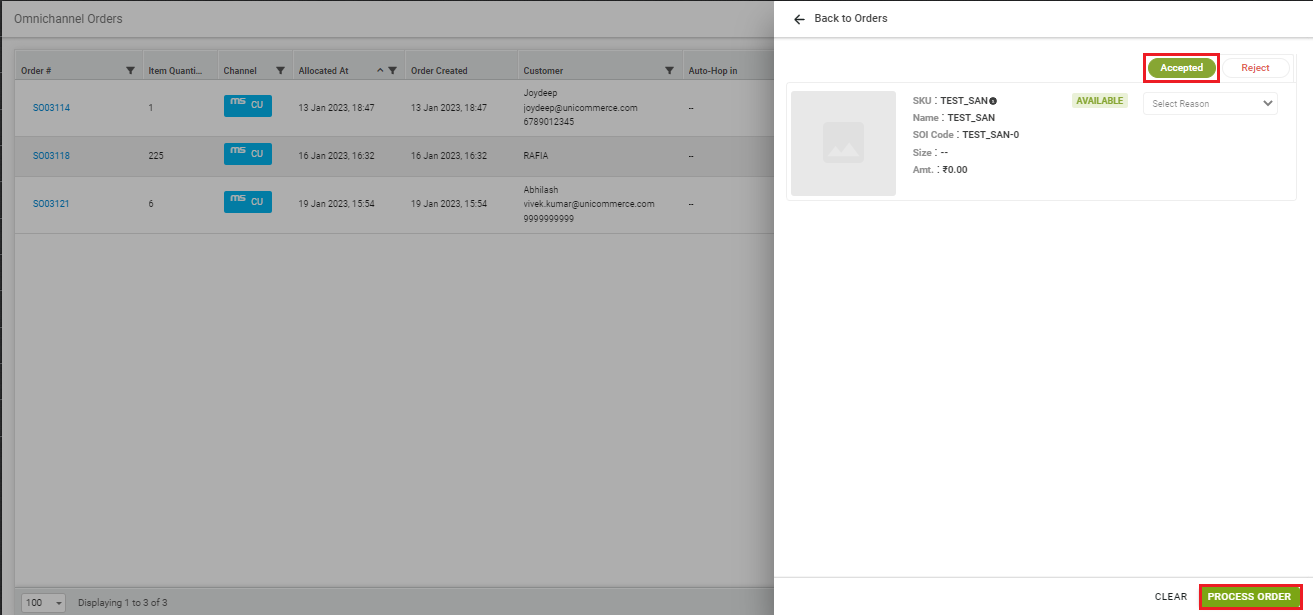
ii. Reject:- From the Reject option, you can reject only the particular order item against which you are clicking on the Reject button. You need to provide a reason against the particular order item.

Note:-
- Sellers can use a set of rejection reasons (pre-configured) from the dropdown including the option to enter any custom reason by selecting the Reason as ‘Other‘.
- Once you reject the order item, the item will hop in to the another/warehouse.
| Rejection Reason | Description |
| Not Available | Inventory Mismatch between POS & Unicommerce. |
| Damaged | Size Mismatch, Color Faded, Other scenarios. |
| Tag Missing | Barcode Torn, Barcode Missing. |
| Not Found | Inventory Available in POS but not found physically. |
| Support not Available | No manpower, No packaging material, courier issues etc. |
| Others | Enter any custom reason. |
4- Order Acceptance:
i. Accept All:- Now, you can Accept All the order items at a time by just clicking on the Accept All button.
Once user accept the orders, inventory allocation task will create the shipment for those orders in respective facility based on routing roles to process further as sale orders.
ii. Accept:- Now, you can Accept All the order items at a time by just clicking on the Accept button.
5- Post Hopping Actions
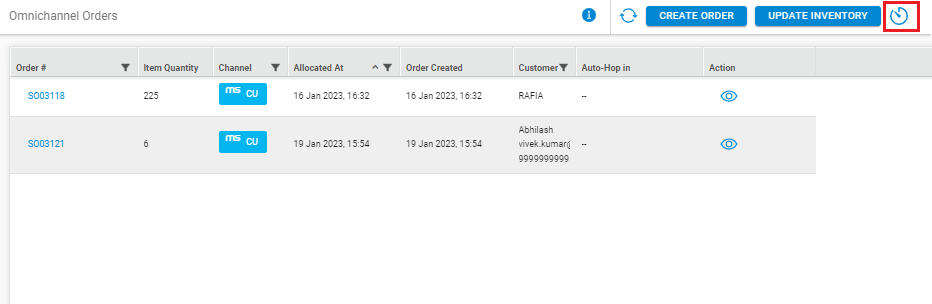
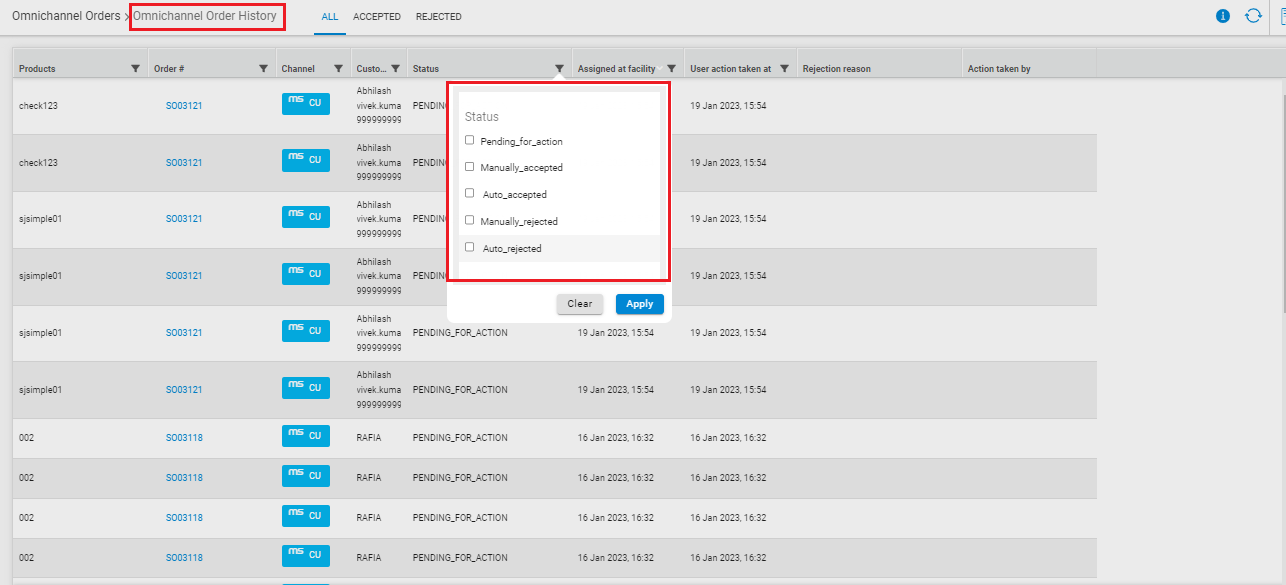
5.a- Hopping History:
User can check the history by any particular order by clicking on the Clock icon from the top right of the screen.
5.b- Order Processing:
After accepting the order, order will move shipment tab from where user can normally process the order as per their define warehouse flow.
Processing in Bulk: Order Processing through Uniware with None Traceability
Processing by Picklist: Order Processing through Picklist with SKU Traceability
Below are the important points that need to be kept in mind hopping orders:
- Configuration:
- Channel Level Config: “Omnichannel Orders” must be enabled
- Channel Level Config: “Max hours for auto hopping” 72 or 144…1000, a value in countable hours for smooth operation.
- Facility Level Config: “Enable Hopping” must be enabled in General Setting (To enable this feature, connect with UC Support Team/KAM)
- Omni sellers will not be able to cancel orders once accepted in Uniware.
- Package type should be flexible in case seller need to accept/reject a particular sale order item from multiple availability
- Uniware allows hopping an order from one store to another store manually/automatically.
- Myntra PPMP and Tata CLiQ Omni hopping will be managed by Channels only.
- Accepted orders will move to shipment from where we can normally process them.
- Rejected orders will hop into the another store/warehouse.
Hopping Depth:- The sellers can control the number stores rejecting the order before being routed to the default facility.
- If total hop count is less than hopping depth then next hop would be allowed and if total hop count is equal to hopping depth then next hop would be automatically done to the default facility stored at channel level under the field “Default Facility Code“.
Configuration: Channel Level Config: “Default Facility Code (Optional)”.
- By default, the value of this config would be ‘Null’.
Configuration: Tenant Level Config: “Hopping Depth” in General Setting.
- By default, the value of this config would be ‘0’.
- To enable this feature, connect with UC Support Team/KAM to mark this config as ‘True‘.
Note:-
- The system will hopping of Sale Order Item on basis of Channel Level configuration.
- If hopping depth is breached then the default facility will be assigned to SOI which will picked from Channel.