Below mentioned are the Three Key Steps required to be followed to complete the One Click Prime Tally Integration:
A. Configure TDL/TCP file in Tally
B. Configure Import module
C. Download information in Tally from Unicommerce
Note: To know how to replace the existing Tally TCP with a new TCP file, click here.
Before moving ahead to the Integration part make sure that ledger names and tax classes* are created in Tally which are used to recognize the data format being imported from Unicommerce:
ledger names and tax classes*– If you are using Uniware exports to import data in tally then you need not make any changes in ledger names and tax classes else please connect with Unicommerce Support and they’ll guide you to make necessary changes in Tally.
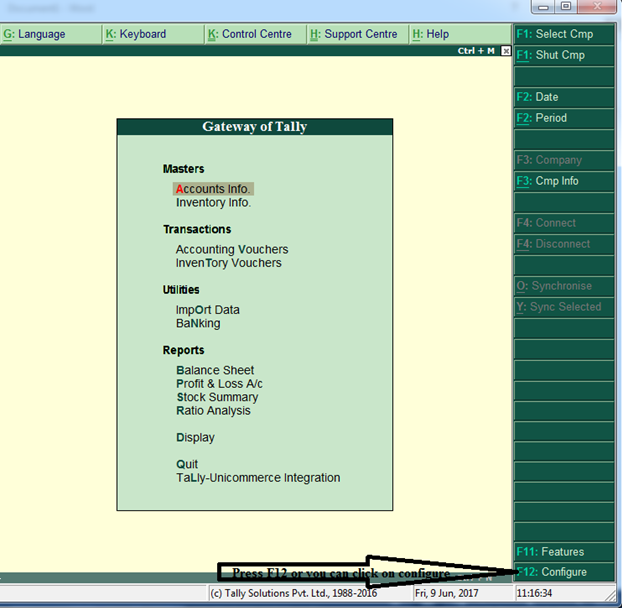
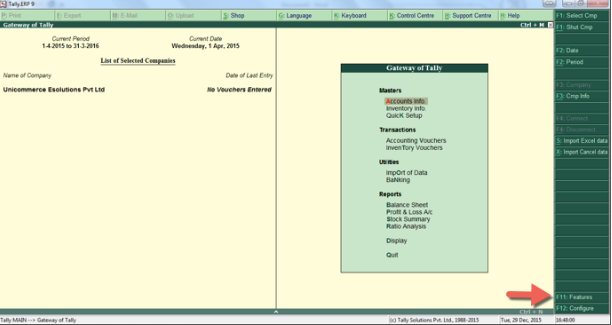
A.1- Go to Gateway of Tally and press F12 (or click on Configure in tally):
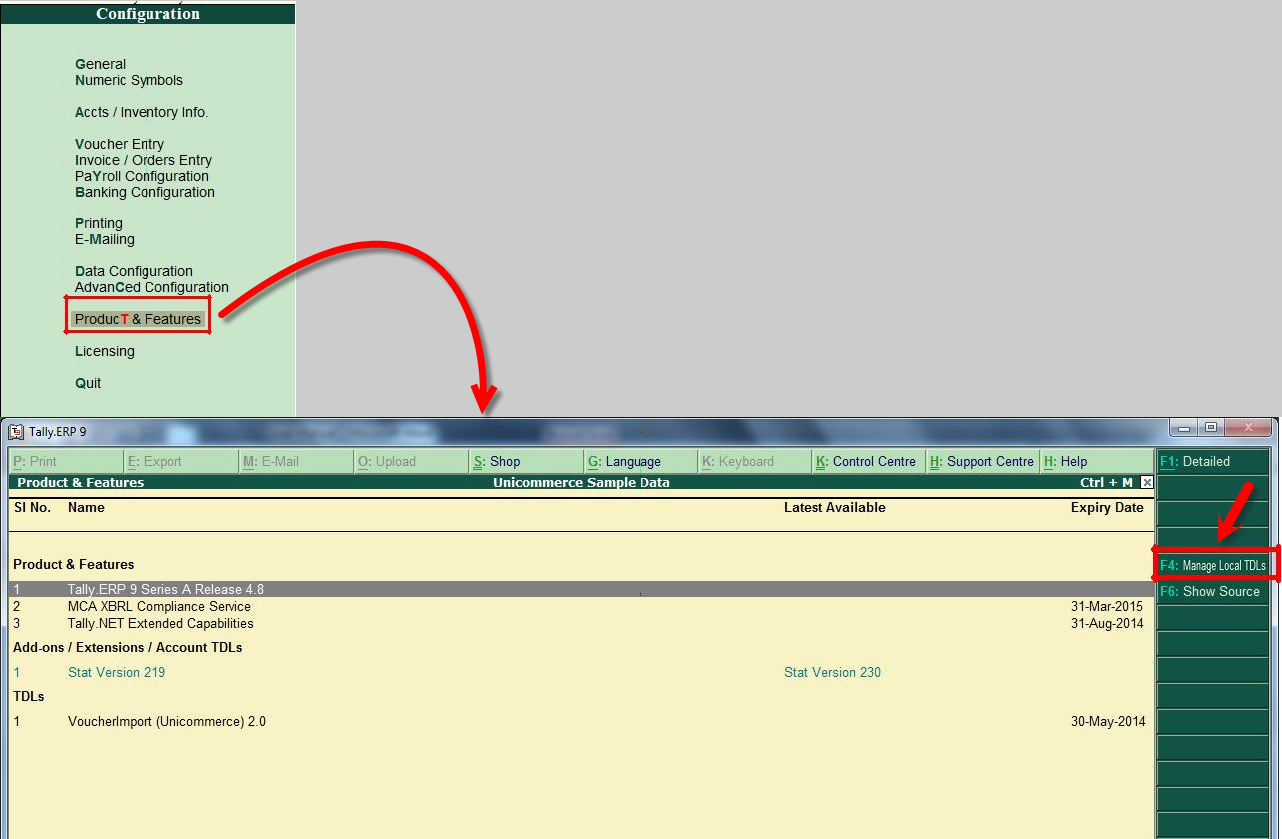
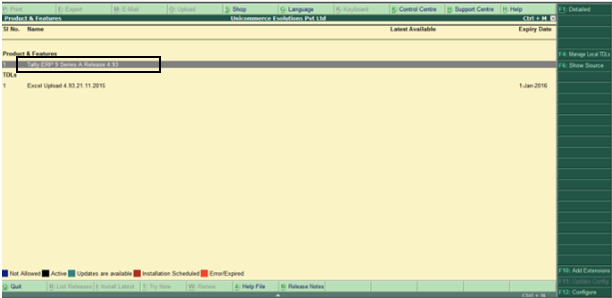
A.2- Select Product & Features or press “T”. Then press F4 (Or click “Manage local TDLs”):
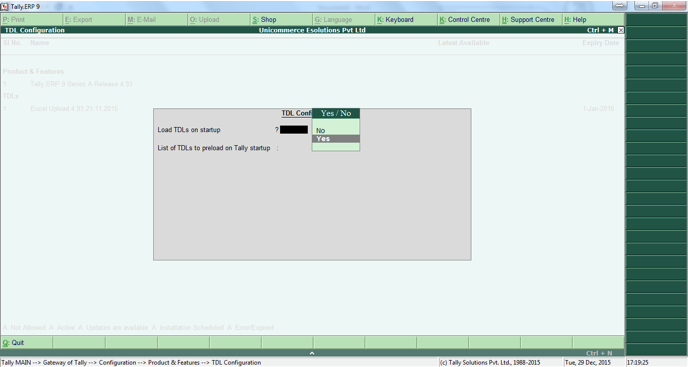
A.3- To enable the TDL select YES:
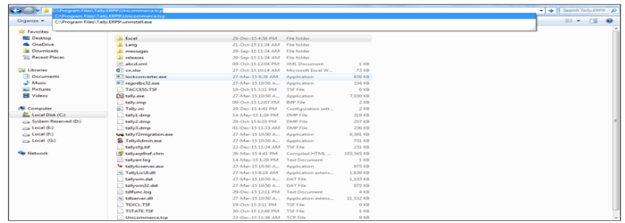
A.4- Copy the path of TCP file. (the TCP file is provided by Unicommerce):

A.5- Please note: By accepting the changes, TDL name will become active and TDL name will reflect in black which shows that TDL is successfully installed:
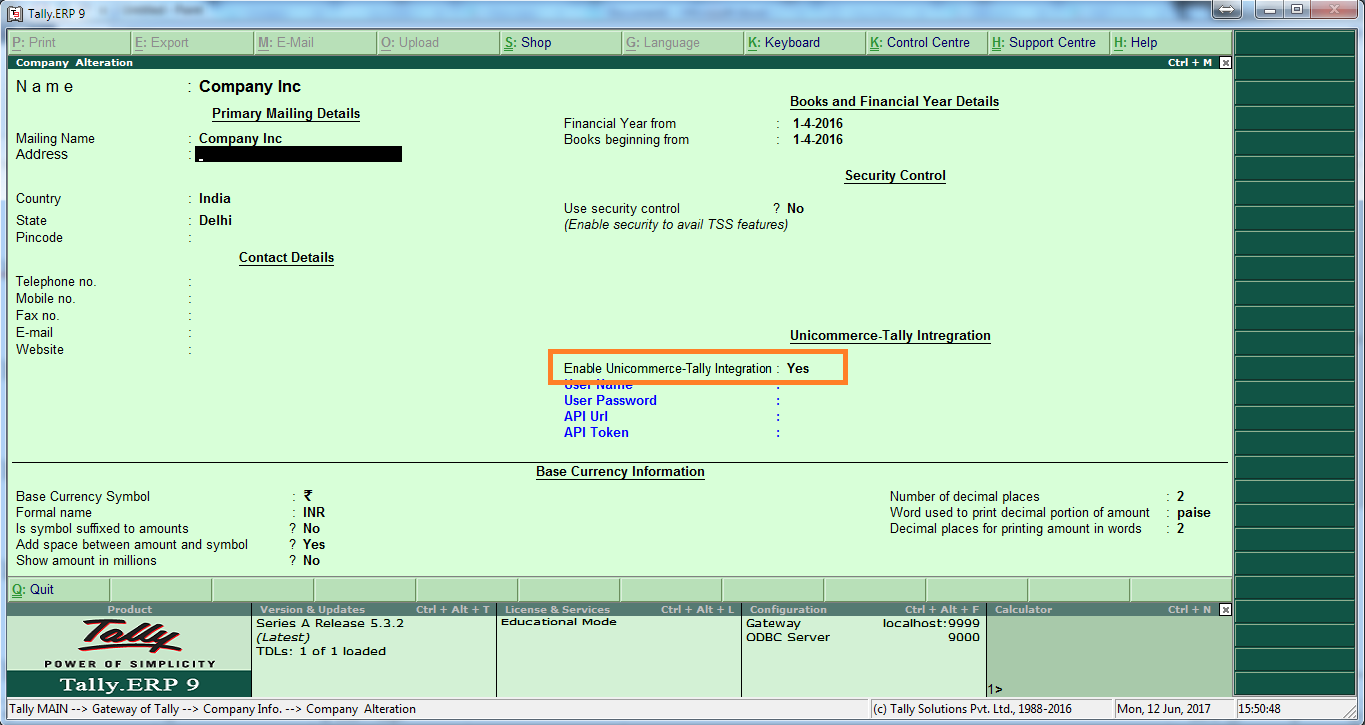
A.6- Now press ALT+F3 and alter your current company to change the setting “Enable Unicommerce-Tally Integration”. Make it YES and save the changes.
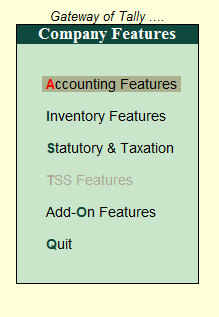
B. To Configure the Import Module in Tally:
b. Accounting with Inventory
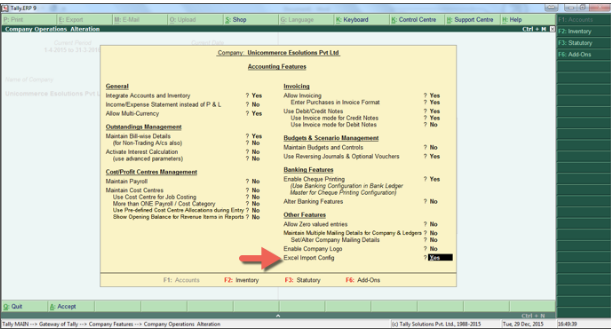
B.4- There are two fields:
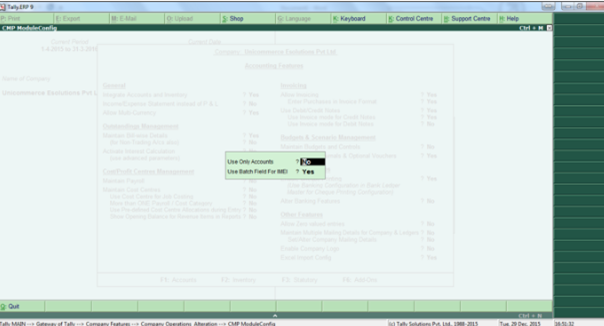
a) Use only accounts (YES for accounting only and NO for accounting with inventory)
b) Use Batch Field for IMEI (Mark YES to get IMEI number in the description field of items)
B.5- Choose the fields, press enter and save it.
C) Automatic downloading of records from Unicommerce to Tally:
C.1 After configuration, you get the option as shown below for Tally-Unicommerce Integration:
C.2- Click on Download from Unicommerce:
C.3- Select your export type from here like Sales, cancel and returns.
C.4- Select your sheet.
C.5- Select the date range (dd-mm-yyyy).
C.6- Select the voucher type (As per your tally voucher).
C.7- Select the Bank (Use in case of receipt) (Else you can leave it blank).
C.8- After selecting your file it downloads successfully, then press OK, after which your file starts to import in tally.
After Import process is complete, you will be able to see your returns, cancellation, payment etc. (depending on the import type selected) in Tally.
Attachments:
Recommended for you:
1. E-commerce NDR Management System
2. E-commerce Marketplace Payment Reconciliation
