Other features also include:
-
Bulk item creation with HSN code
- Management of Purchase entries in Tally from Uniware
- Seller can updates their sales in tally without inventory as well.
- We also handle the TCS amount in tally, for that we need to create the TCS ledger in tally, after that value can be updated in tally.
- Batch details in Tally
For this, you need to create all the ledger name in tally according to GST format (as per client’s tax classification).

Steps to Integrate Tally:
Pre-requisites:
a. Create a company in Tally with the name of Unicommerce to import all the data. As soon as the TCP is updated, the Import for Unicommerce is created.
b. Create SKU alias sheet for inventory management perspective in Tally and save in the folder path, which will be used in the configuration steps later.
c. Product mapping is done to associate – item name- tally name, item alias – uniware SKU codes as uniware only handle simple sku not bundle or combo sku in tally.
Below mentioned are the Four Key Steps required to be followed to complete the one-click tally Integration:
A. Configure TDL/TCP file in Tally
B. Configure Import module
C. Export data from Unicommerce
D. Import downloaded data into Tally
Note: To know how to replace the existing Tally TCP with a new TCP file, click here.
Let us now begin with these steps:
A) TDL configuration in Tally.ERP9-
Perform the following steps in the given order:
-
Go to the Gateway of Tally and Press F12 (To Configure).
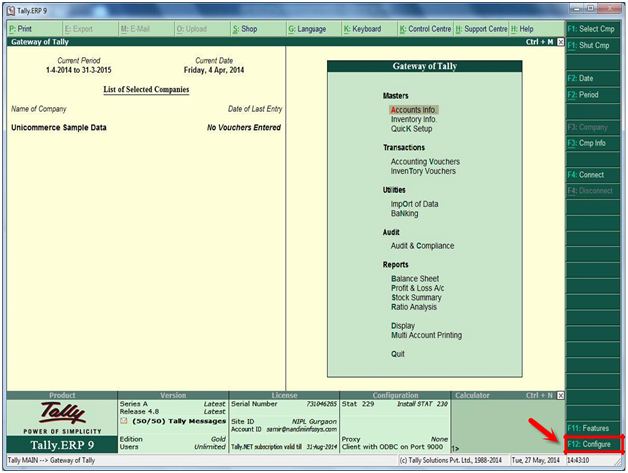
-
Select Product & Features or, press “T”. Then press F4 (Or click “Manage local TDLs”).
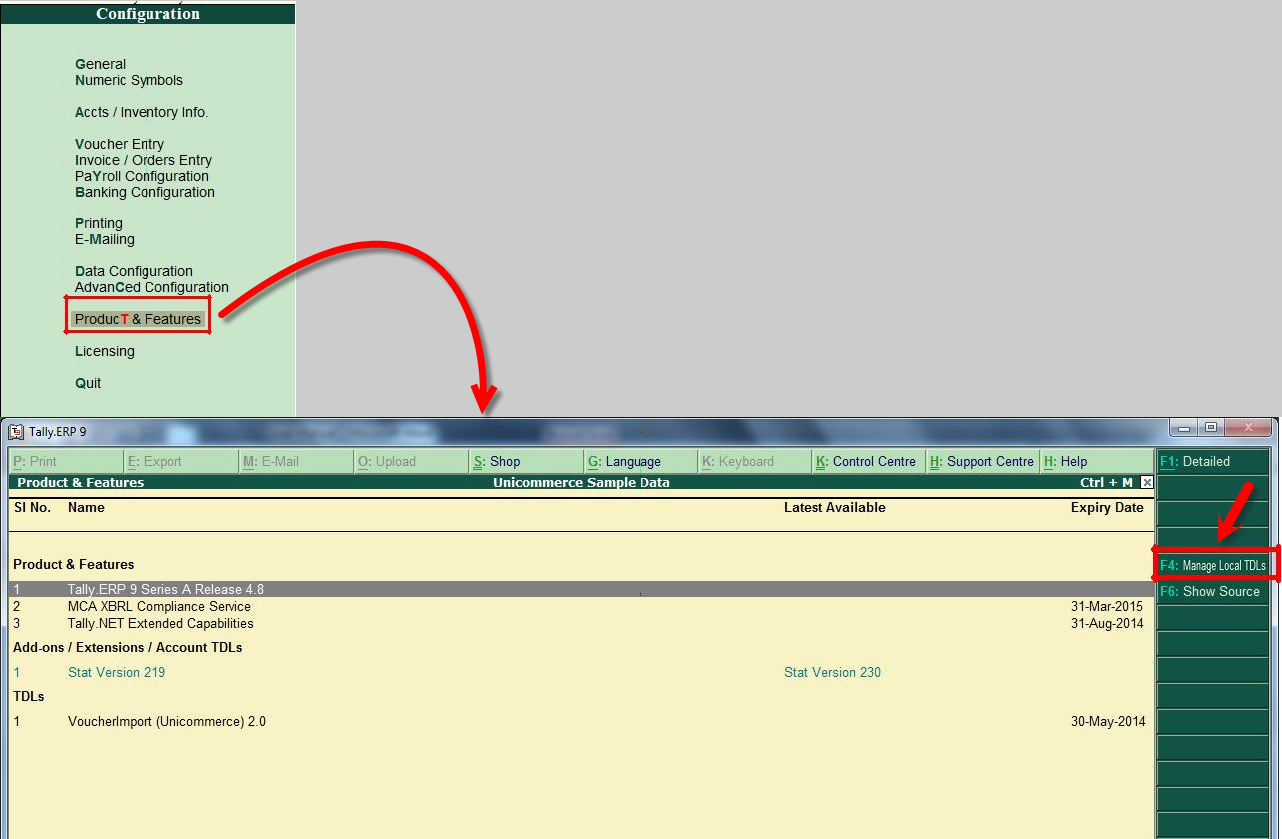
-
To enable the TDL select YES.
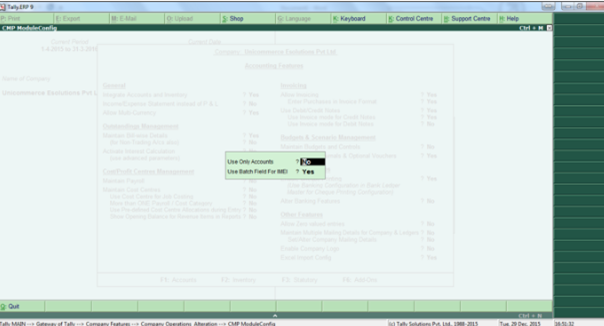
-
Copy the path of TCP file. (The TCP file is provided by Unicommerce, scroll down to find the attachment).
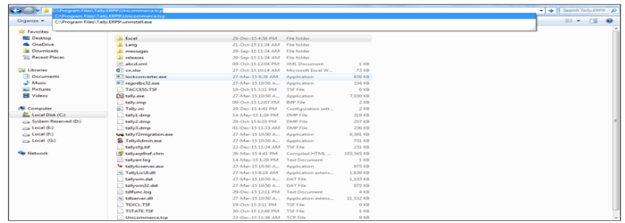
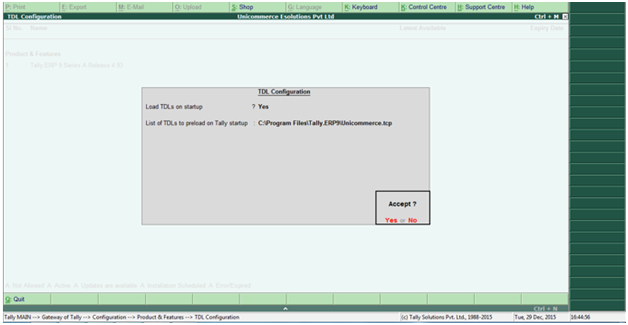
-
Please note that by accepting the changes TDL name will become active and TDL name will reflect in black which shows that TDL is successfully installed:
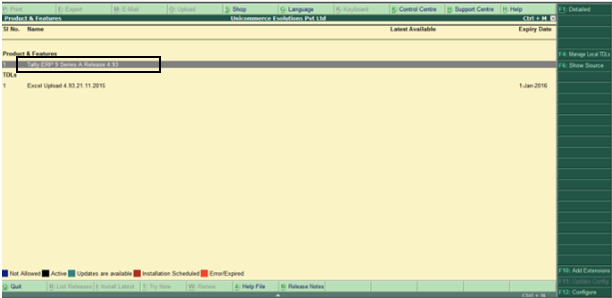
-
After successful uploading of TDL, You can check the Unicom_Menu after the Quit Option.
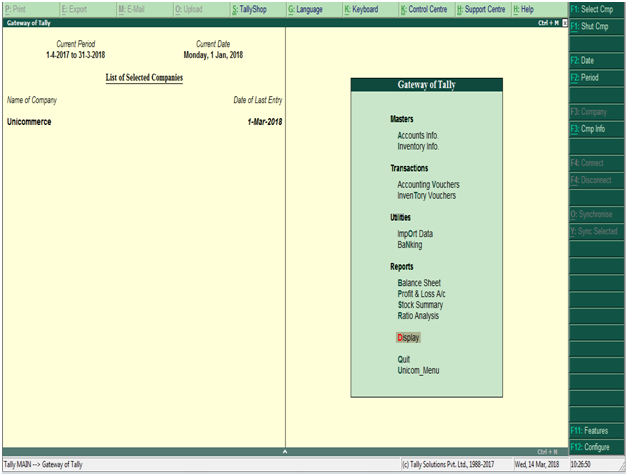
B) Configure the Import-Module:
There are two types of importing features we provide:
a. Accounting
b. Accounting with inventory
-
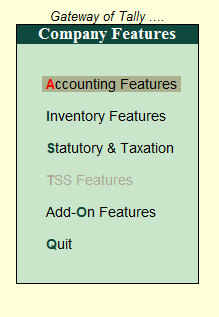
To enable the Excel import module, Go to the gateway of Tally and press F11 (to select Features)
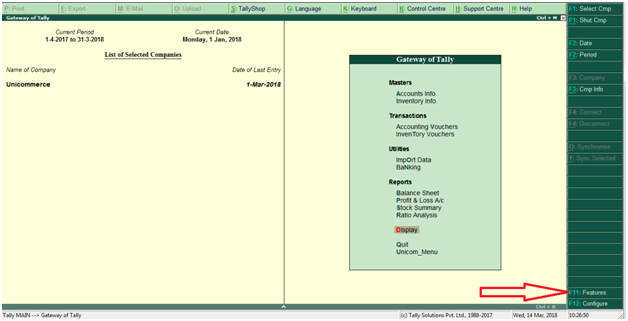
-
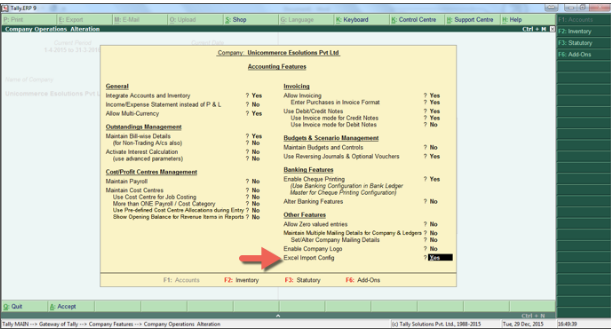
Next step, select the “Accounting Features” or just press “A”.
-
In the next menu, refer to the “Other features” and type “YES” in “Excel Import Module”.
-
There are two fields:
a. Use only accounts (YES for accounting only and NO for accounting with inventory)
b. Use Batch Field for IMEI (Mark YES if you need IMEI number in the description field of items)

C) Generation of Excel from Unicommerce and import in Tally for more detail Click here
Attachments
Recommended for you:
