
A Purchase Order (PO) is a buyer generated document specifying the number of products, their quantities and agreed prices the seller will provide to the buyer.
A GRN (Goods Received Note) is a record used to confirm all goods have been received and often compared to a purchase order payment is issued.
The Purchase Orders can be managed on a single page. From adding PO items to sending it for approval, creating and completing its GRN, initiating and completing the Quality check of the constituent PO items! This process has been improved to reduce your iterations between different menu heads.
Let us see the entire process
1. On the UI, go to the Purchase tab > Purchase Orders >Click on the Create PO button to create a PO manually.

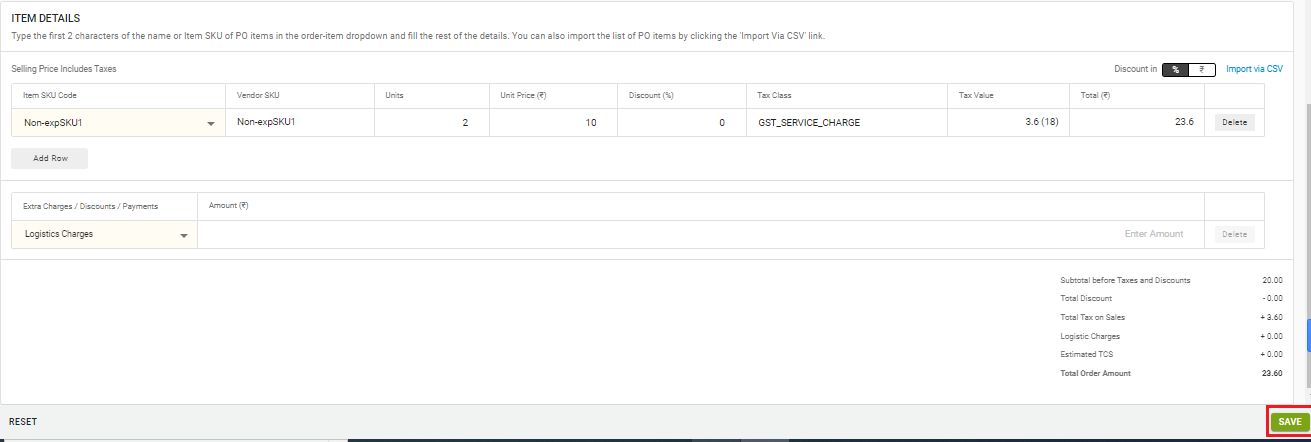
2. Once you click on the Create PO button, the create Purchase Order window will open in which you need to add basic details, vendor details and Item details.
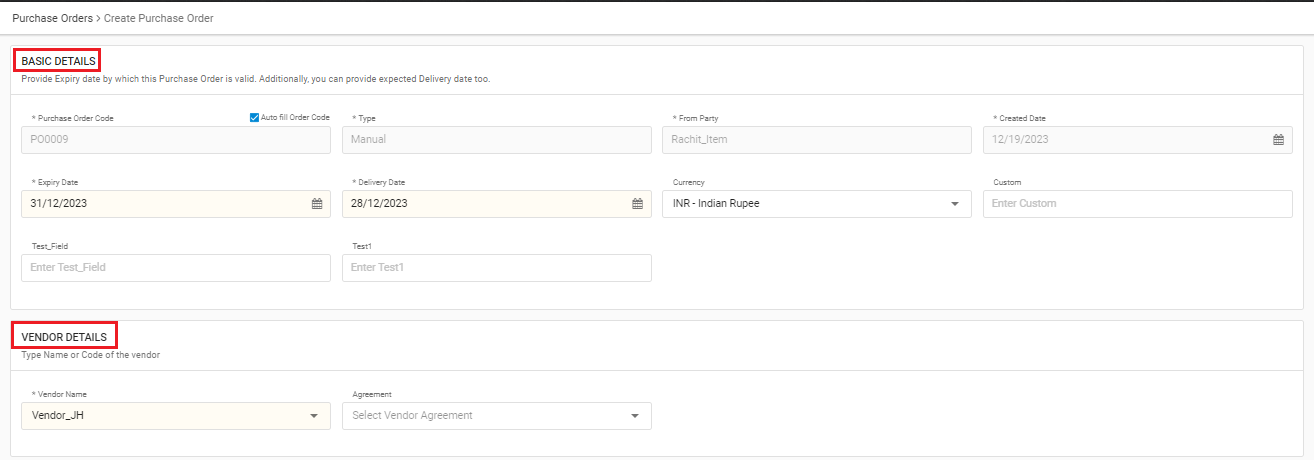
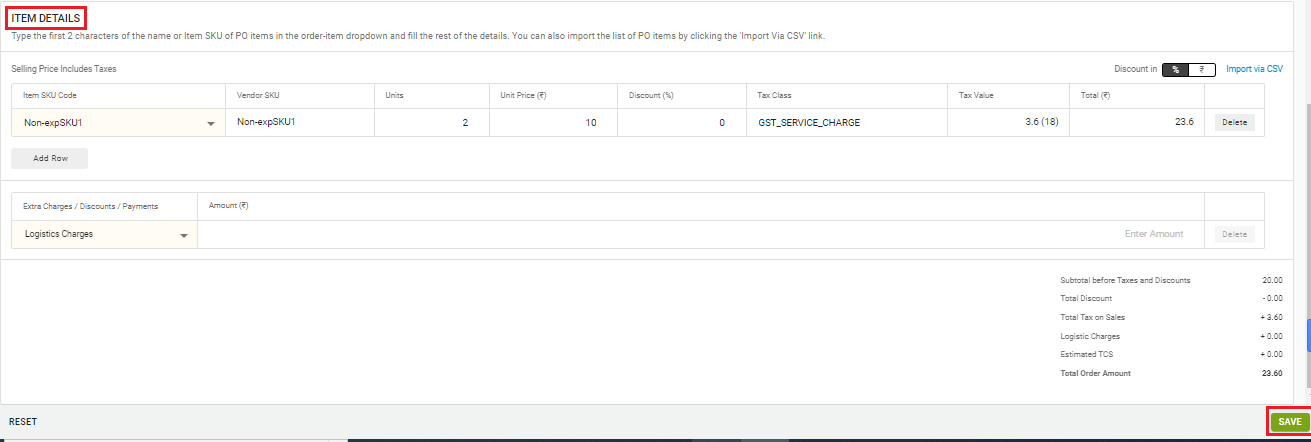
Note:- Add the item details along the prices, discounts and tax applicable. You can also add extra charges/discounts applicable on the PO.
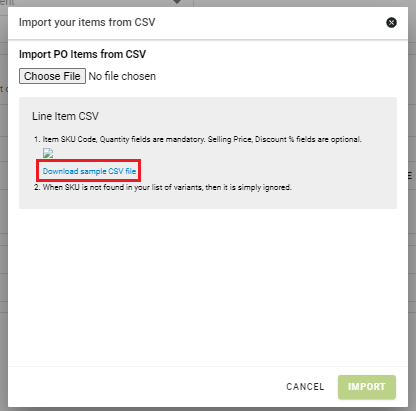
3. If you want to do bulk import orders, kindly refer the below statement.

4. To do bulk import orders before, all you need to do is download the sample template.
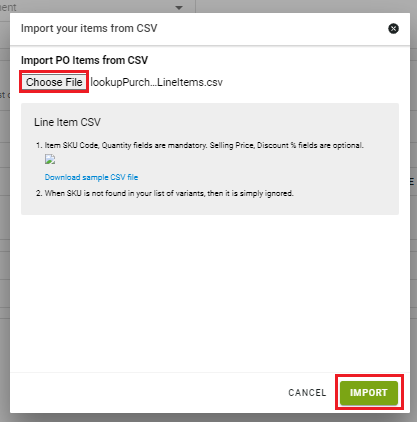
5. Once you download the CSV file, fill out the required values and upload the file by the given path and click on the Import button.
6. Once all the required details have been filled, you can click on the Save button to create Purchase Order.
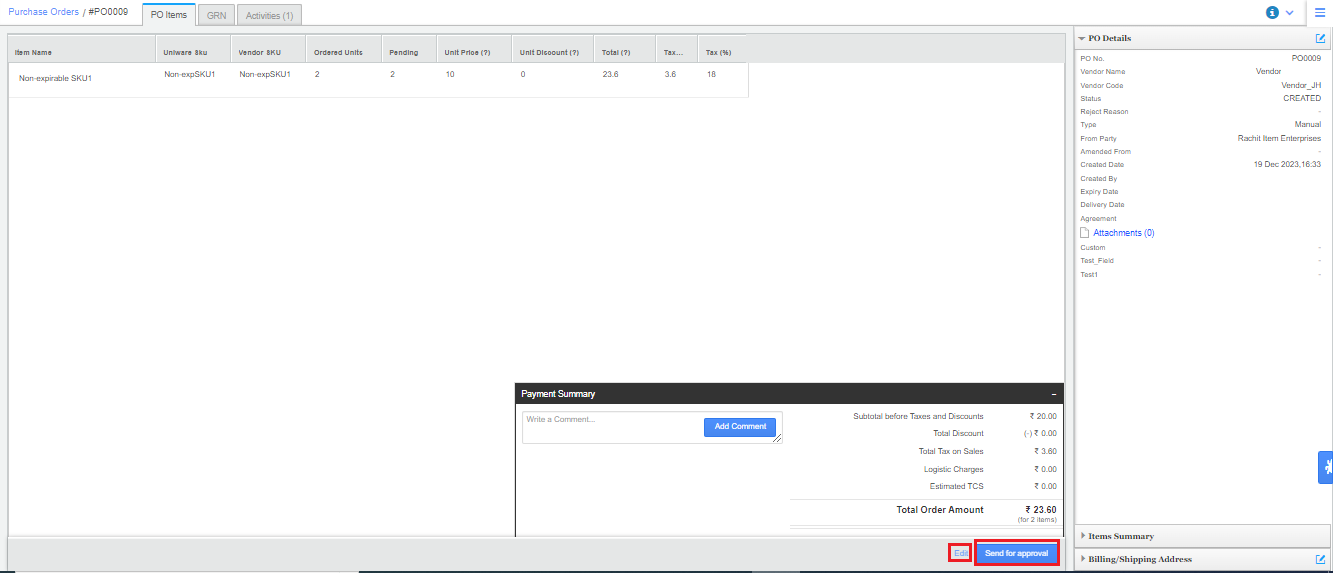
7. On the PO details page, you can see the order items and details contained in a PO. If required, you can edit the details and save it or else you can directly send the PO for an approval.
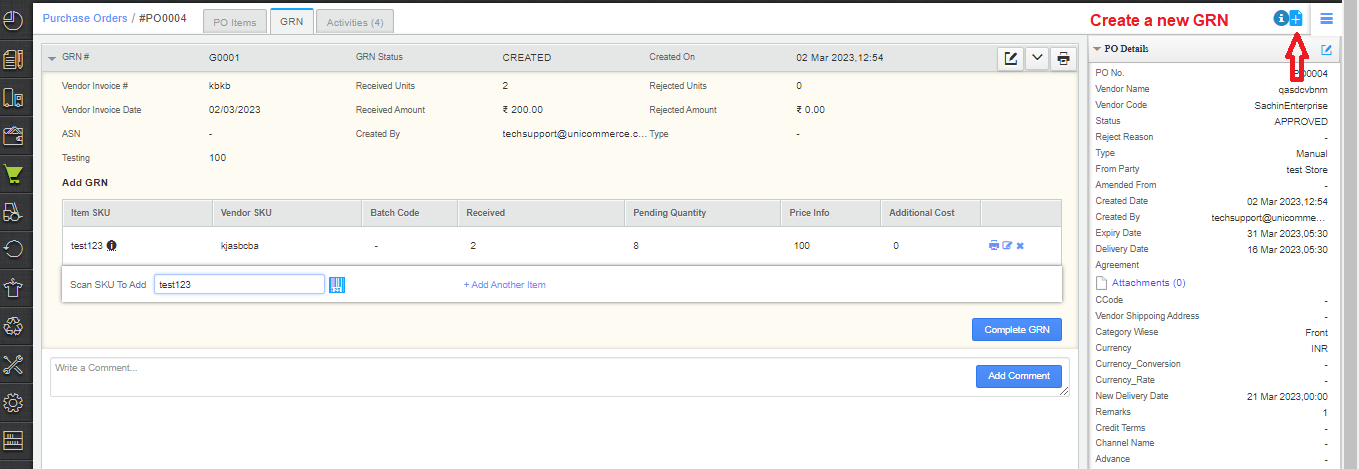
8. In the next tab for GRN, you can create and complete a GRN for the goods received for a PO raised.
Here user can scan the SKU and then put the received qty manually against each different good received.
for ITEM Traceability, Configs:
Barcoding before QC – True,
Barcoding Pregenerated – True/False
Barcoding before GRN – False
Note: If your purchase patterns and list of vendors are repetitive, you can create GRN in bulk using CSV import (Go to Tools> Imports> Auto GRN items).

Please use this import only when you are sure about GRN quantities along with its inventory type because any incorrect line item may end in abrupt inventory behaviour.
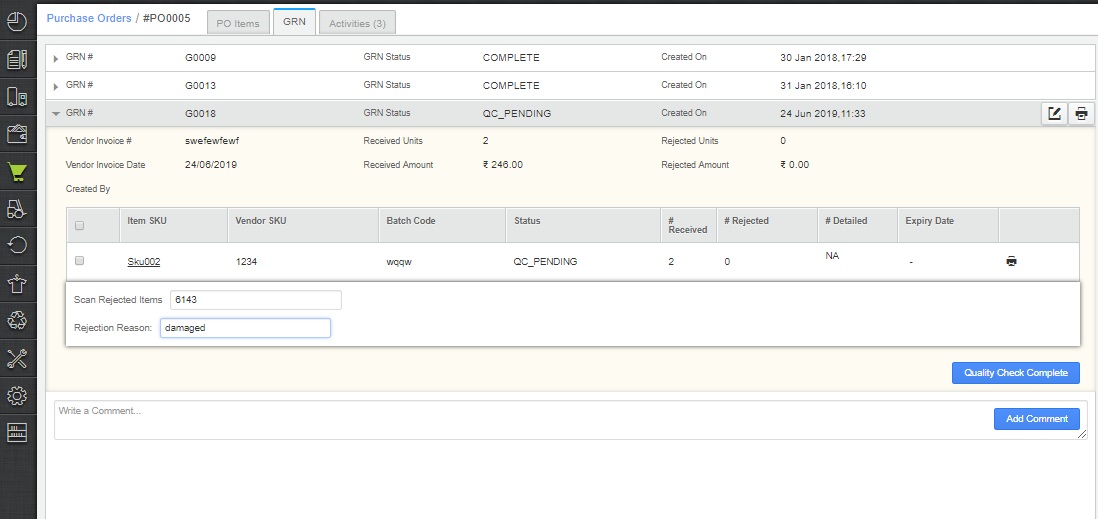
9. As soon as you complete the GRN, you can do a Quality check of the received products on the same page.
Let’s see how?


Note: If your system traceability set on Item level in Enterprise version then it asks to capture item-wise Rejection Reason on GRN. Once you rejected some QTY in QC then it will ask rejection reason specific to item barcode.
Note: The system will send an email to the respective vendors after GRN is complete to notify about received goods in order to give them full visibility.
Recommended for you: